
6 Installing OS (optional)
The device comes with a pre-installed operating system by default. If the operating system becomes damaged during use, or if you need to replace the operating system, you must re-download the system image and flash it. The following sections describe the specific procedures for downloading the image and flashing the eMMC/SSD/SD card.
6.1 Downloading OS File
Our company provides 2 images for users to download. The download paths are listed in the table below:
| OS | Download Path |
|---|---|
| Raspberry Pi OS (Desktop) 64-bit-trixie (Debian 13), with Hailo software pre-installed, with security chip library pre-installed | 2026-06-18_IPC3400_hailo_raspios_trixie_arm64 |
| Raspberry Pi OS (Desktop) 64-bit-trixie (Debian 13), with security chip library pre-installed | 2026-06-18_IPC3400_raspios_trixie_arm64 |
6.2 Flashing to eMMC/SSD
TIP
The procedure for flashing to an SSD is identical to the procedure for flashing to eMMC.
If the purchased ED-IPC3400 includes eMMC or an SSD, it supports booting the system from eMMC or the SSD. Refer to the instructions below for flashing. It is recommended to use the official Raspberry Pi flashing tools. The download paths are as follows:
- Raspberry Pi Imager: https://downloads.raspberrypi.org/imager/imager_latest.exe
- SD Card Formatter: https://www.sdcardformatter.com/download/
- Rpiboot: https://github.com/raspberrypi/usbboot/raw/master/win32/rpiboot_setup.exe
Preparation:
- The downloading and installation of the official tools to the computer have been completed.
- A Type-C USB to Type-A USB cable (USB flashing cable) is prepared.
- The image file to be flashed has been obtained.
Steps:
The procedure is described using a Windows system as an example.
- Locate the Type-C USB interface position on the side of the device, as indicated in the image below.

- Connect the power cable and the USB flashing cable (Type-C USB to Type-A USB).
- Connect the USB flashing cable: Connect one end to the Type-C USB interface on the device and the other end to a USB port on the PC.
- Connect the power cable: Connect one end to the DC Jack terminal on the device and the other end to an external power source.
Disconnect the power from the ED-IPC3400, then reconnect the power.
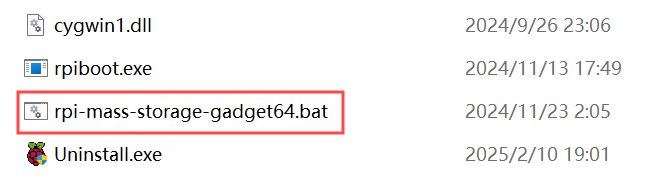
Open the installed
rpi-mass-storage-gadget64.battool (as shown in the red box below) to automatically assign a drive letter.
TIP
The rpi-mass-storage-gadget64.bat tool is located in the Rpiboot installation directory.
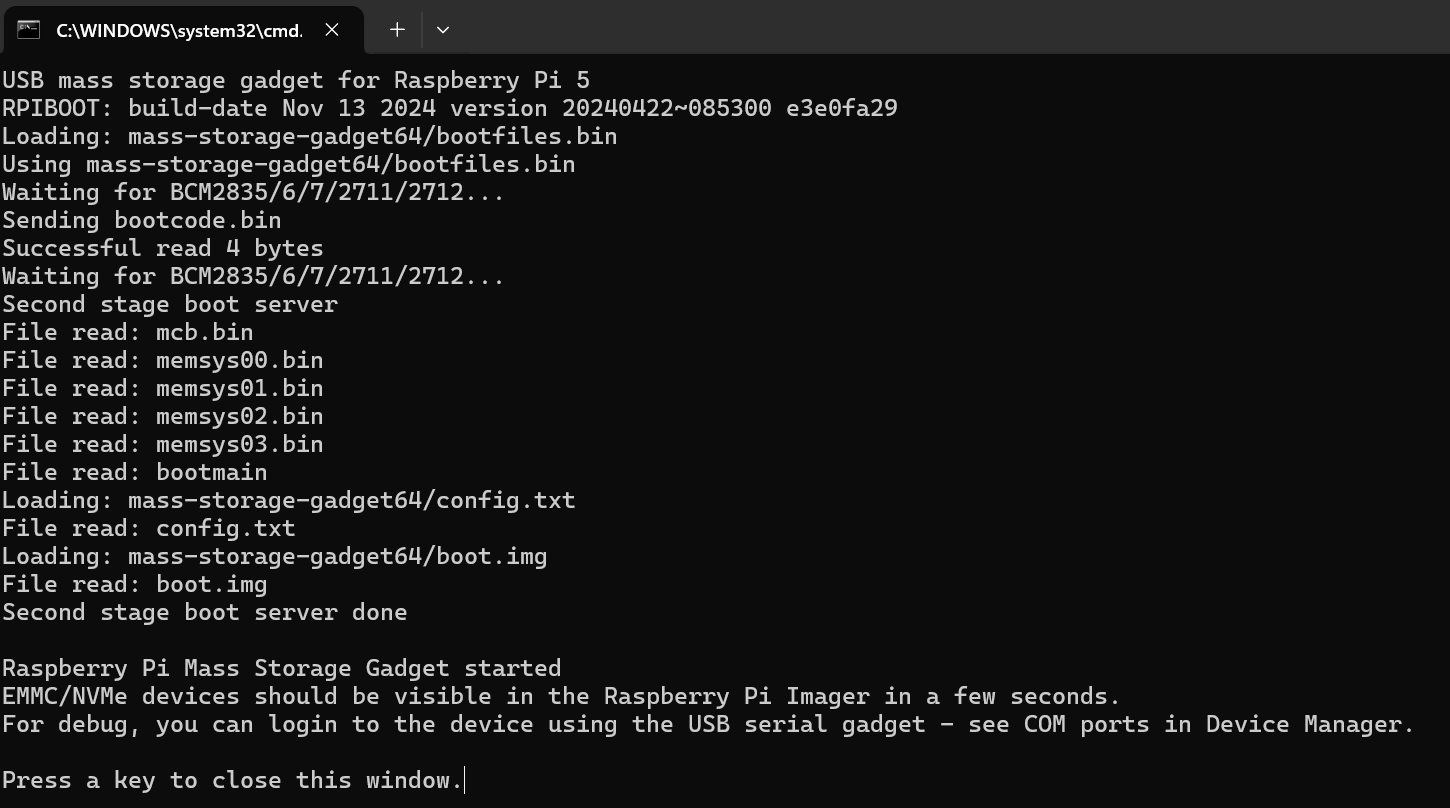
Once the drive letter is assigned, a notification will pop up in the lower-right corner of your screen.
Open
SD Card Formatter, select the drive letter to be formatted, and click "Format" in the lower right corner to format.
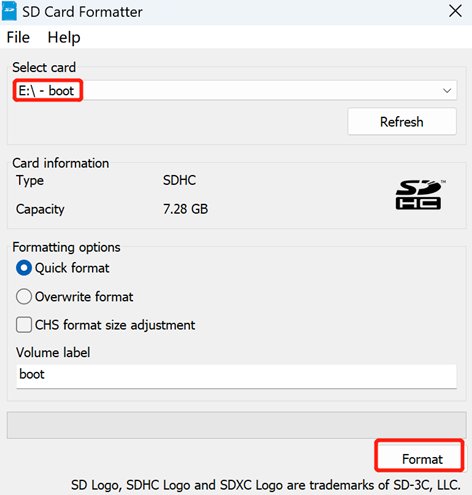
In the pop-up prompt box, select "Yes".
When the formatting is completed, click "OK" in the prompt box.
Close
SD Card Formatter.Open
Raspberry Pi Imager, select "CHOOSE OS" and select "Use Custom " in the pop-up pane.
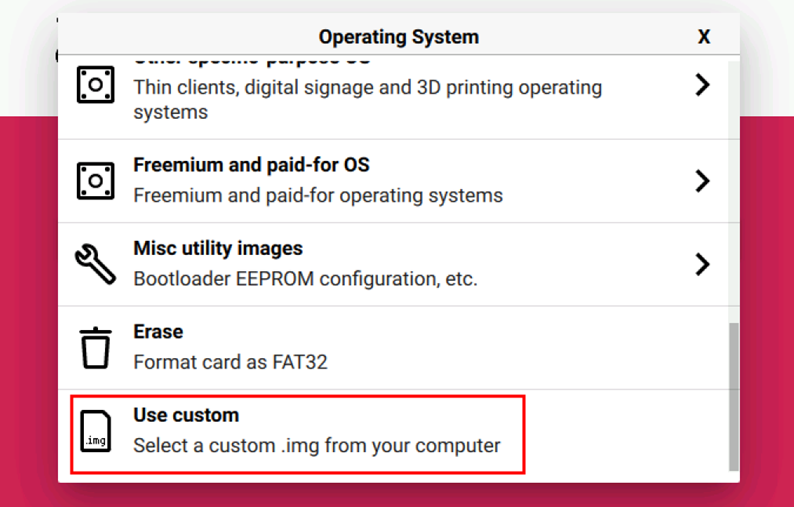
According to the prompt, select the OS file under the user-defined path and return to the main page.
Click "CHOOSE STORAGE", select the default device in the "Storage" interface, and return to the main page.
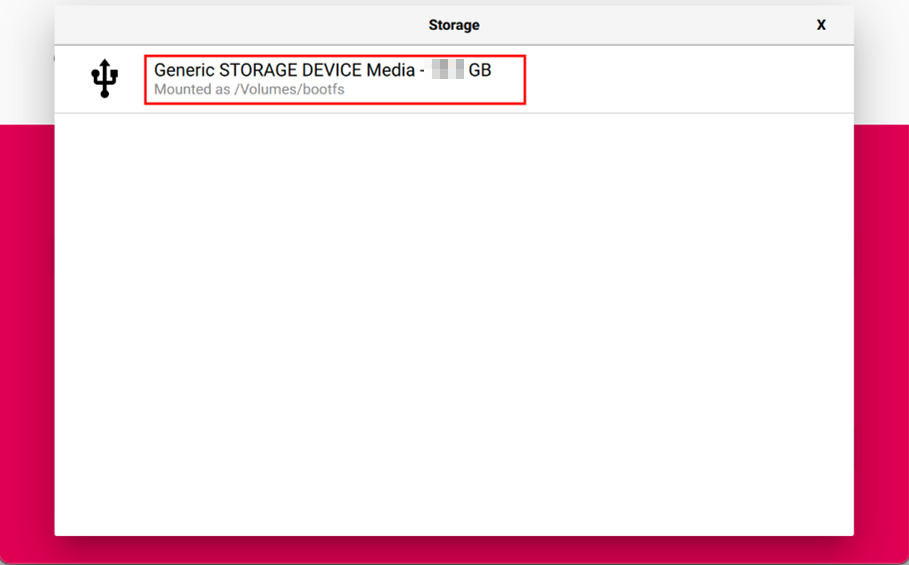
- Click “NEXT”, select "NO " in the pop-up “Use OS customization?” pane.
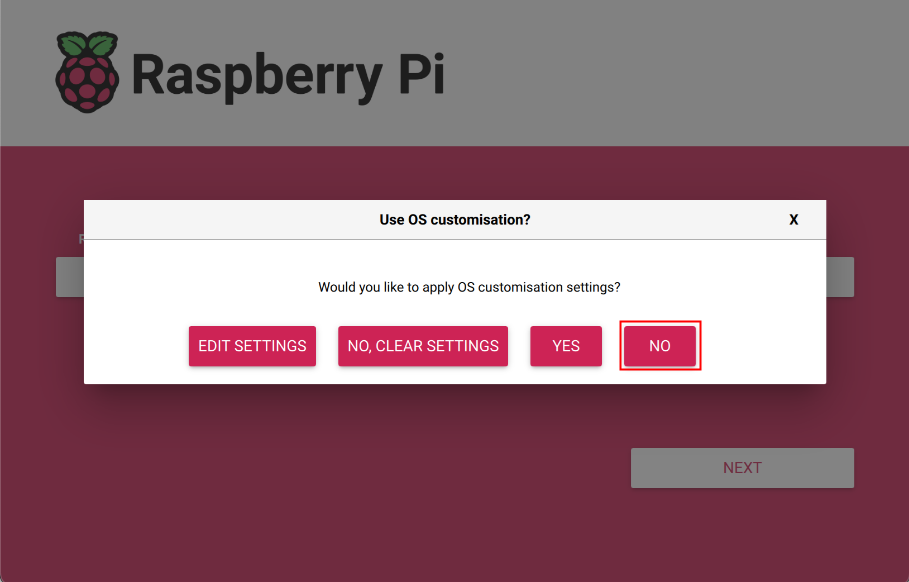
- Select “YES” in the pop-up “Warning” pane to start writing the image.
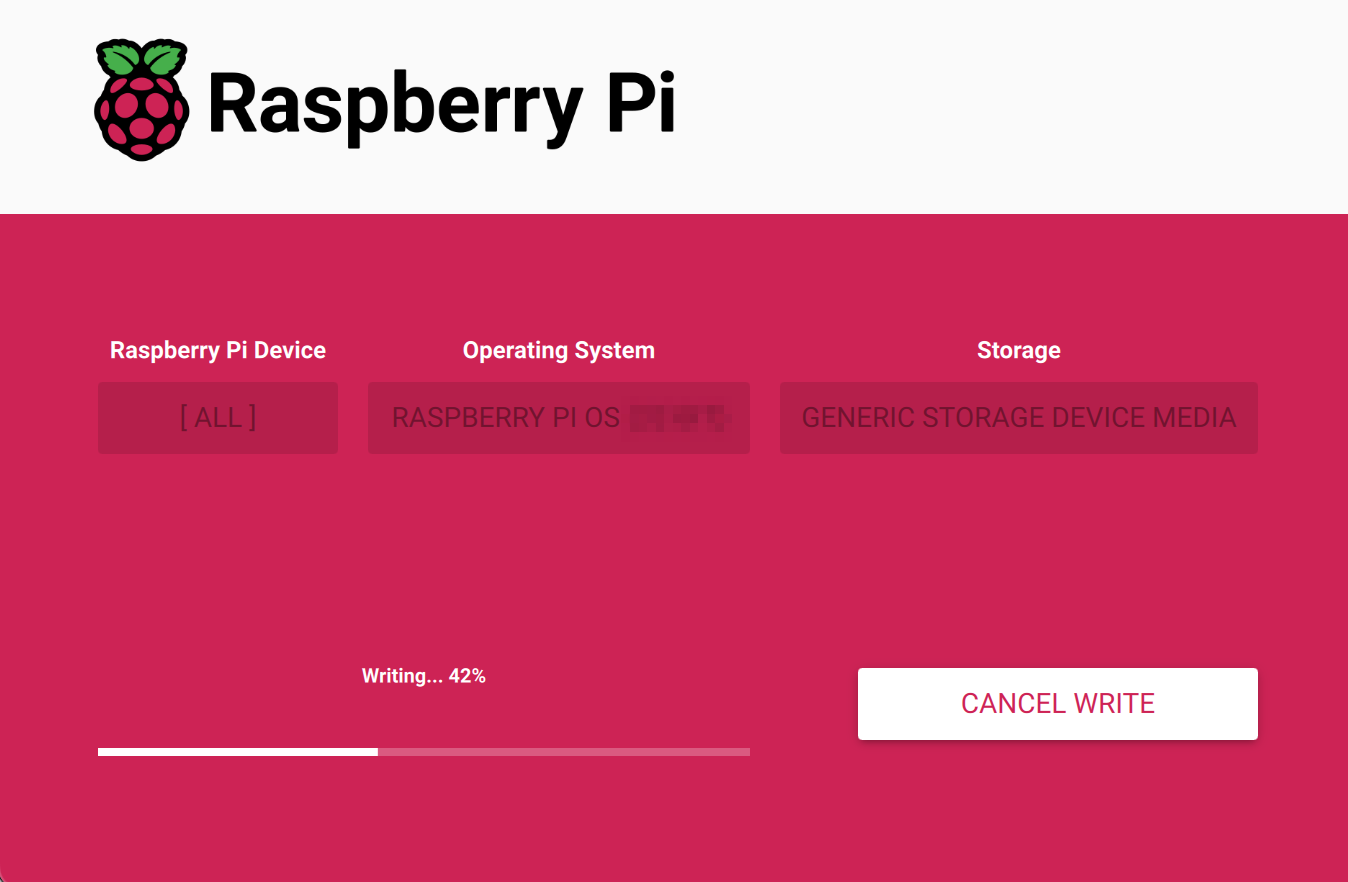
- After the OS writing is completed, the file will be verified.
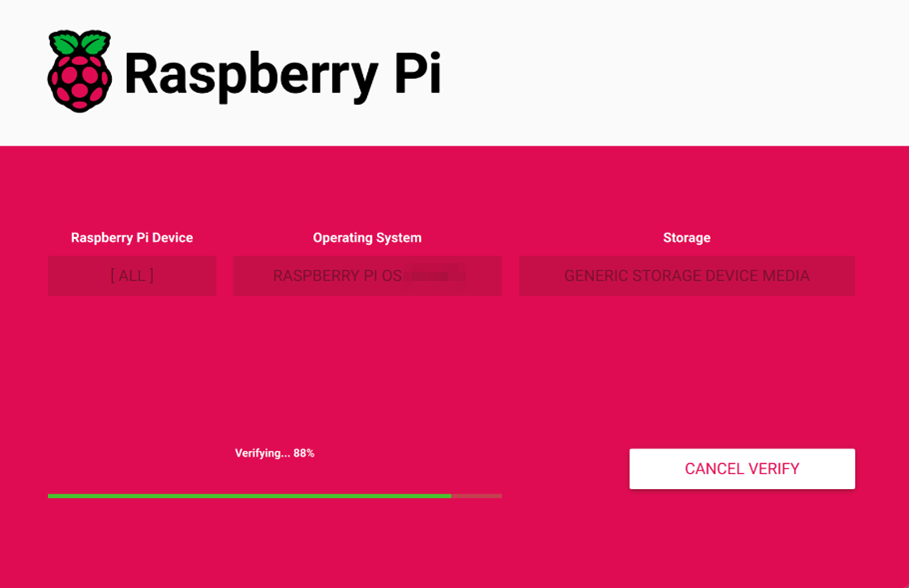
After the verification is completed, click “CONTINUE” in the pop-up “Write Successful” box.
Close
Raspberry Pi Imager, remove USB cable and power on the device again.
6.3 Flashing to SD Card
If the purchased ED-IPC3400 does not include eMMC but only includes an SD card, it supports booting the system from the SD card. Refer to the instructions below for flashing.
It is recommended to use the Raspberry Pi official tools. The download paths are as follows:
- Raspberry Pi Imager: https://downloads.raspberrypi.org/imager/imager_latest.exe
- SD Card Formatter: https://www.sdcardformatter.com/download/
Preparation:
- The flashing tools have been downloaded and installed on a Windows PC.
- The image file to be flashed has been obtained.
- An SD card reader is prepared.
- The device has been disconnected from its power source.
Steps:
The steps are described using Windows system as an example.
- Use a Phillips-head screwdriver to counterclockwise remove the 3 screws on the DIN rail bracket (indicated by arrows in the image below), then detach the default DIN rail bracket.

- Locate the Micro SD card position, as indicated in the image below.

Push the Micro SD card inward into the slot to eject it, then remove the Micro SD card.
Open
SD Card Formatter, select the drive letter to be formatted, and click "Format" in the lower right corner to format.
In the pop-up dialog box, click "Yes".
When the formatting is completed, click "OK" in the prompt box.
Close
SD Card Formatter.Open
Raspberry Pi Imager, select "CHOOSE OS" and select "Use Custom" in the pop-up pane.
According to the prompt, select the OS file under the user-defined path and return to the main page.
Click "CHOOSE STORAGE", select the default device in the "Storage" interface, and return to the main page.
- Click “NEXT”, select "NO" in the pop-up “Use OS customization?” pane.
- Select “YES” in the pop-up “Warning” pane to start writing the image.
- After the OS writing is completed, the file will be verified.
After the verification is completed, click “CONTINUE” in the pop-up “Write Successful” box.
Close
Raspberry Pi Imager, and remove the card reader along with the Micro SD card from USB port of PC.Insert the Micro SD card into the ED-IPC3400, then power on the ED-IPC3400.