3 Booting The Device and log in to OpenClaw
This chapter describes the specific steps for connecting cables, starting the device and logging in to OpenClaw.
3.1 Connecting Cables
Describes the methods for connecting cables.
Preparation:
- Accessories such as a functional display, mouse, keyboard, and power supply adapter are ready.
- A functional network is available.
- Functional HDMI and Ethernet cables are ready.
Schematic diagram of connecting cables:
For pin definitions of each interface and specific connection methods, please refer to 1.6 Interface.

3.2 Booting The System For The First Time
After the ED-CLAWBOX device is connected to the power supply, the system will begin to start.
- The indicator on the ON/OFF button lights up and remains steadily lit in blue.
- After the system starts normally, the Raspberry Pi logo will appear in the top-left corner of the screen.
TIP
Default Username: pi; Default Password: raspberry.
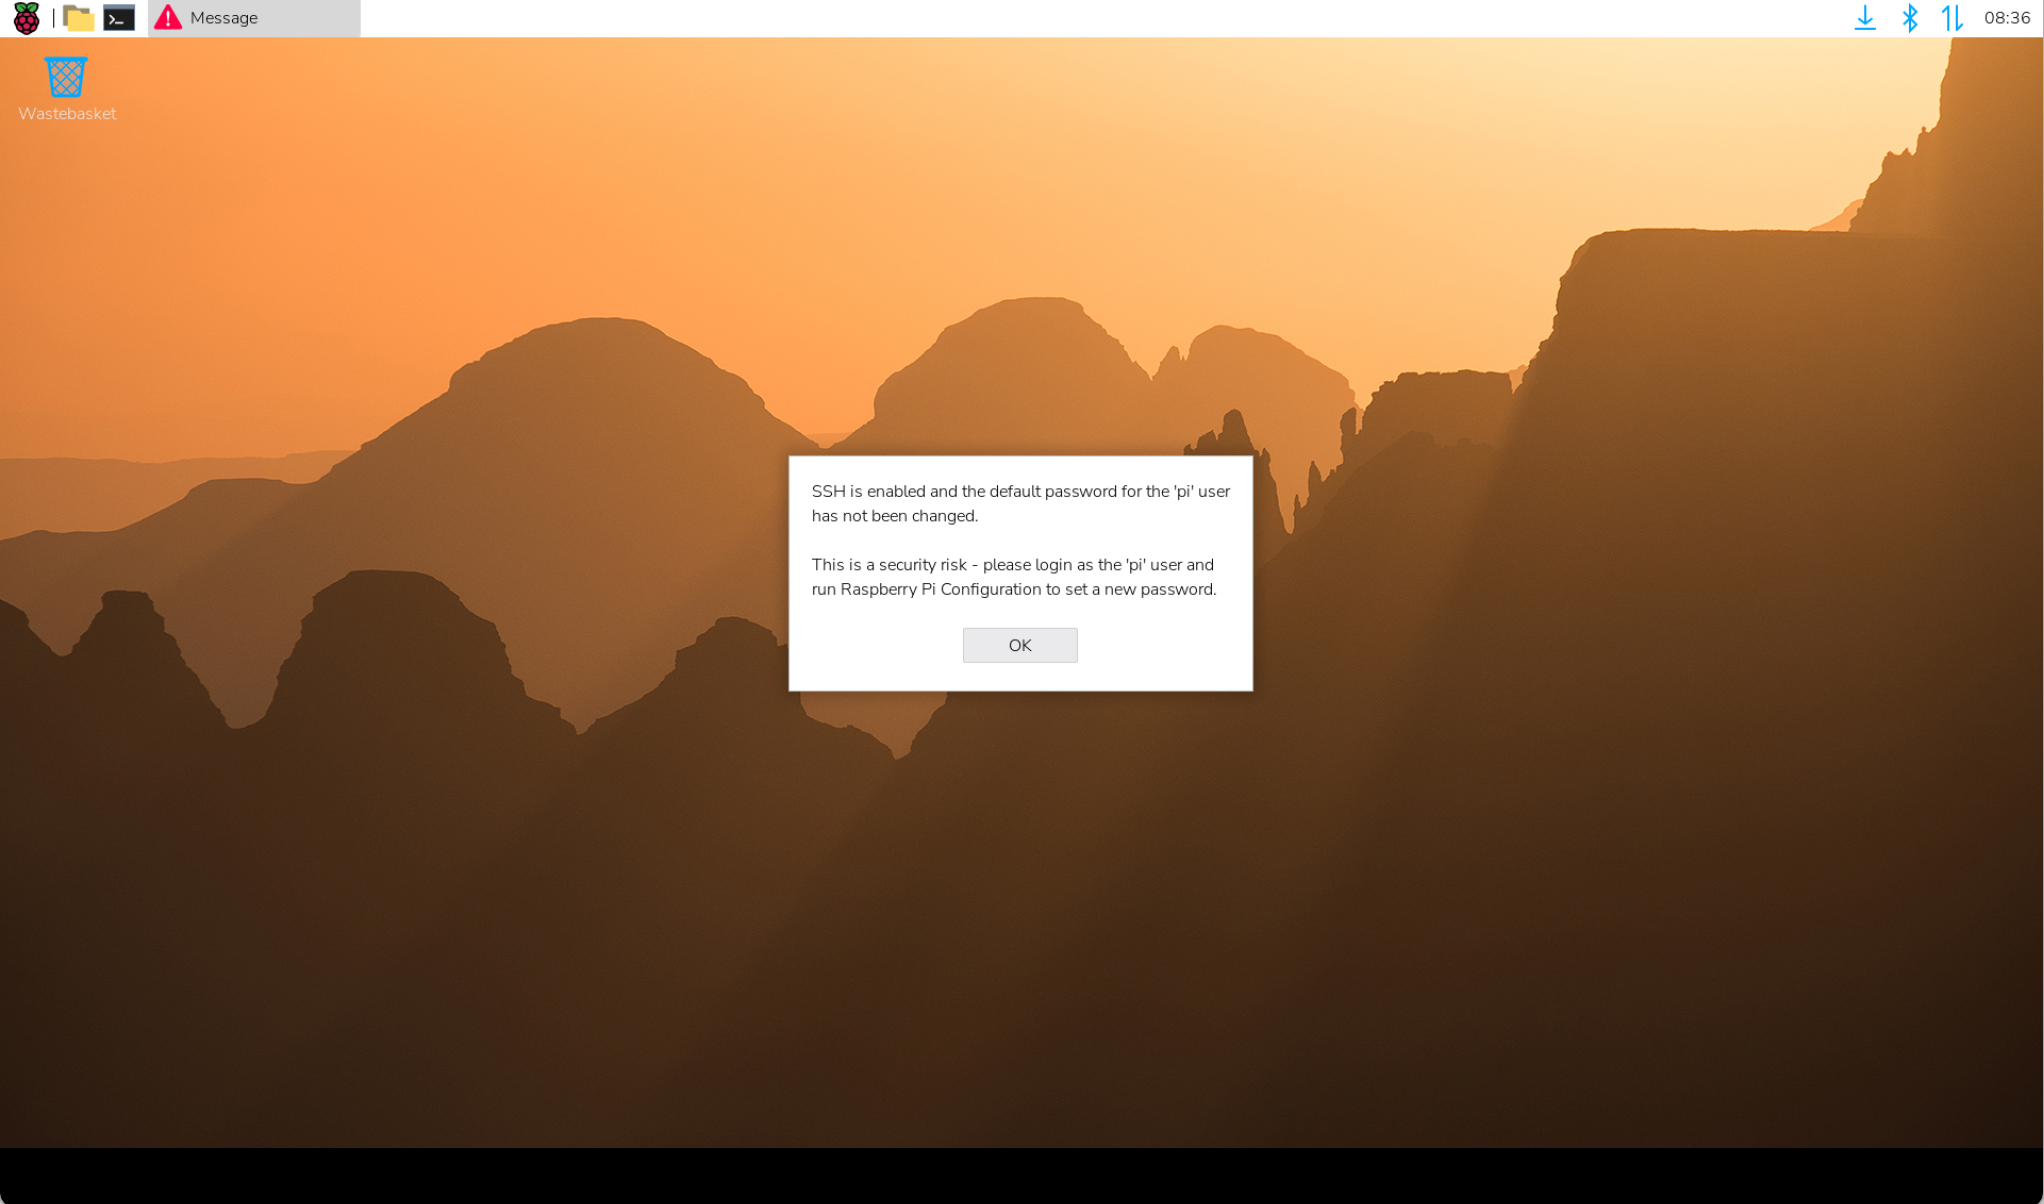
The ED-CLAWBOX device comes with the Desktop edition of the system pre-installed. After startup, it directly boots into the desktop, as shown in the figure below.
3.3 Log In to OpenClaw and Connect to The MiniMax Model
The ED-CLAWBOX has OpenClaw deployed by default. Users can connect to various large language models (LLMs) as needed. The following is a step-by-step guide using the MiniMax model as an example.
TIP
OpenClaw supports connecting to various LLMs. Only the MiniMax model is introduced here as an example.
Preparation:
The ED-CLAWBOX has started normally and is connected to the network via Ethernet or Wi‑Fi.
A Windows PC is available.
Both the Windows PC and the ED-CLAWBOX are connected to the same router, placing their IP addresses on the same subnet.
The API Key for the MiniMax model is obtained.
On the Windows PC's browser, enter the URL: https://platform.minimax.io to access the MiniMax official website.
Apply for an API key as needed.
Steps:
- Hover over the icon at the top-right corner of the desktop to check the device IP address (e.g., 192.168.X.X).

TIP
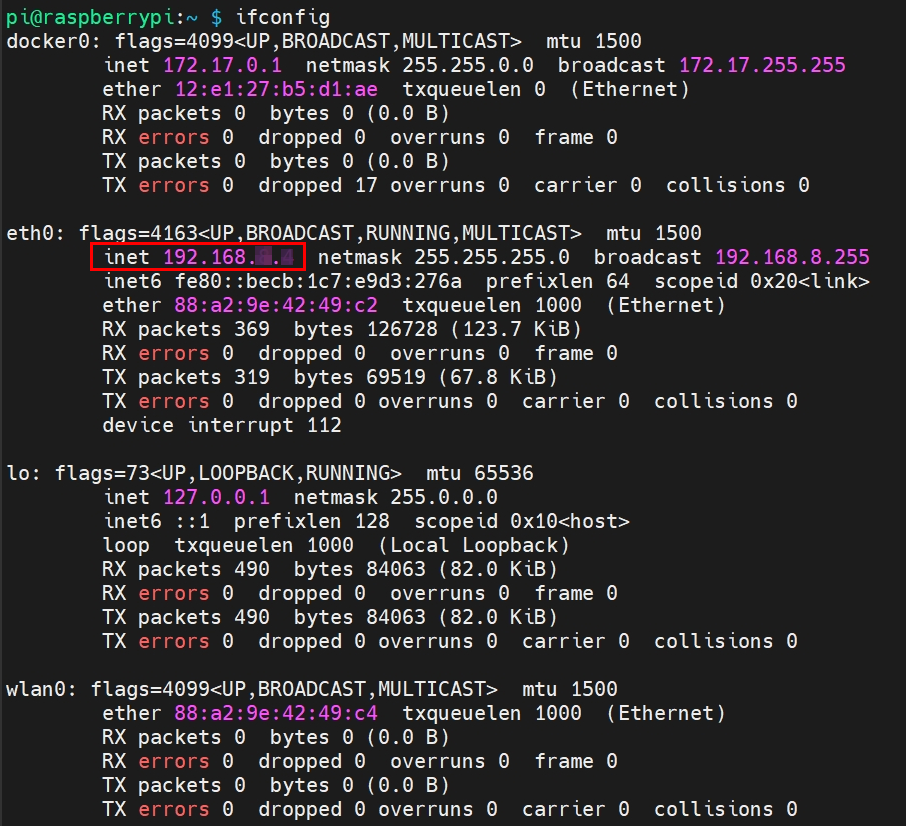
This device supports CLI-based IP address queries:
Open the command terminal on the ED-CLAWBOX device and execute the following command to query the device's IP address (e.g., 192.168.X.X).
ifconfig
- In the Windows PC's browser, enter the URL: http://192.168.X.X:8090, then press
Enterto access the JishuShell login interface.
TIP
http://192.168.X.X is the ED-CLAWBOX device IP address obtained in Step 1.
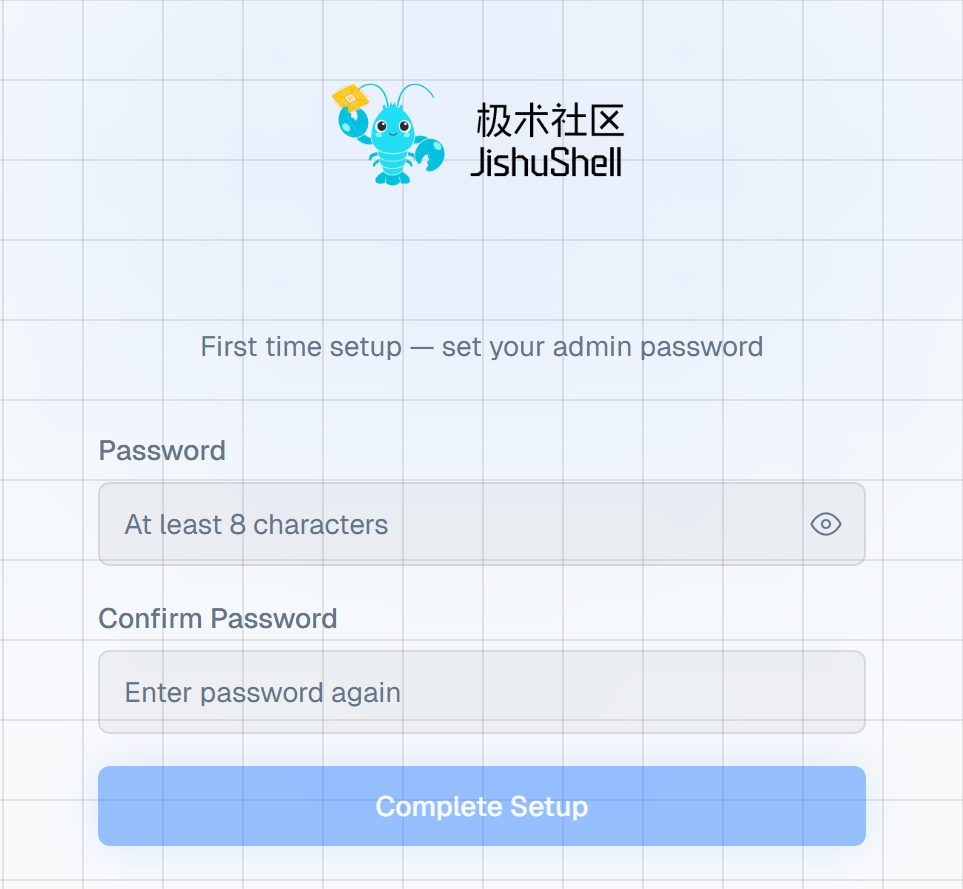
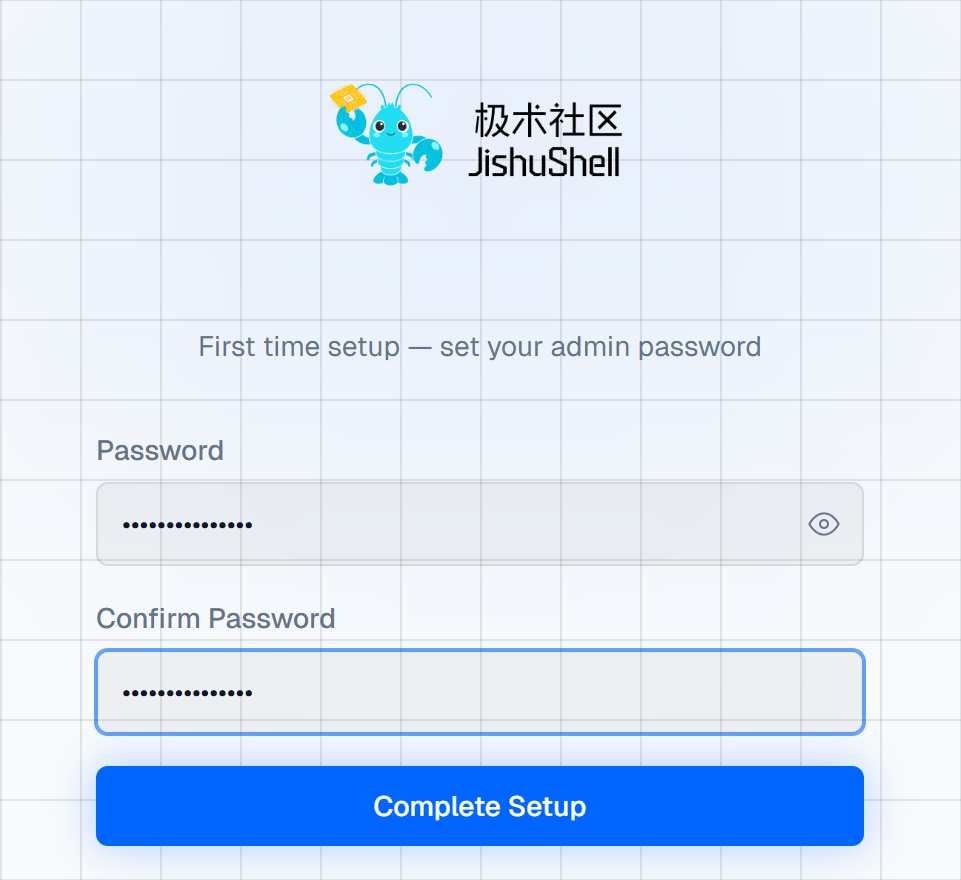
- Set a password as prompted, then click "Complete Setup".
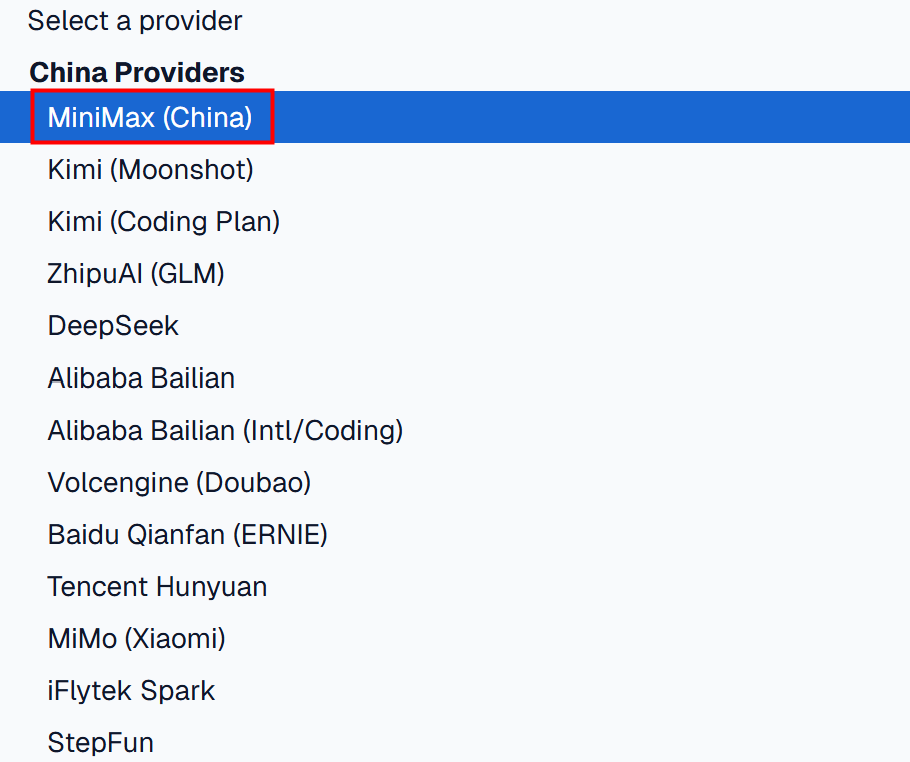
- In the "Select a provider" field, select "MiniMax(China)".
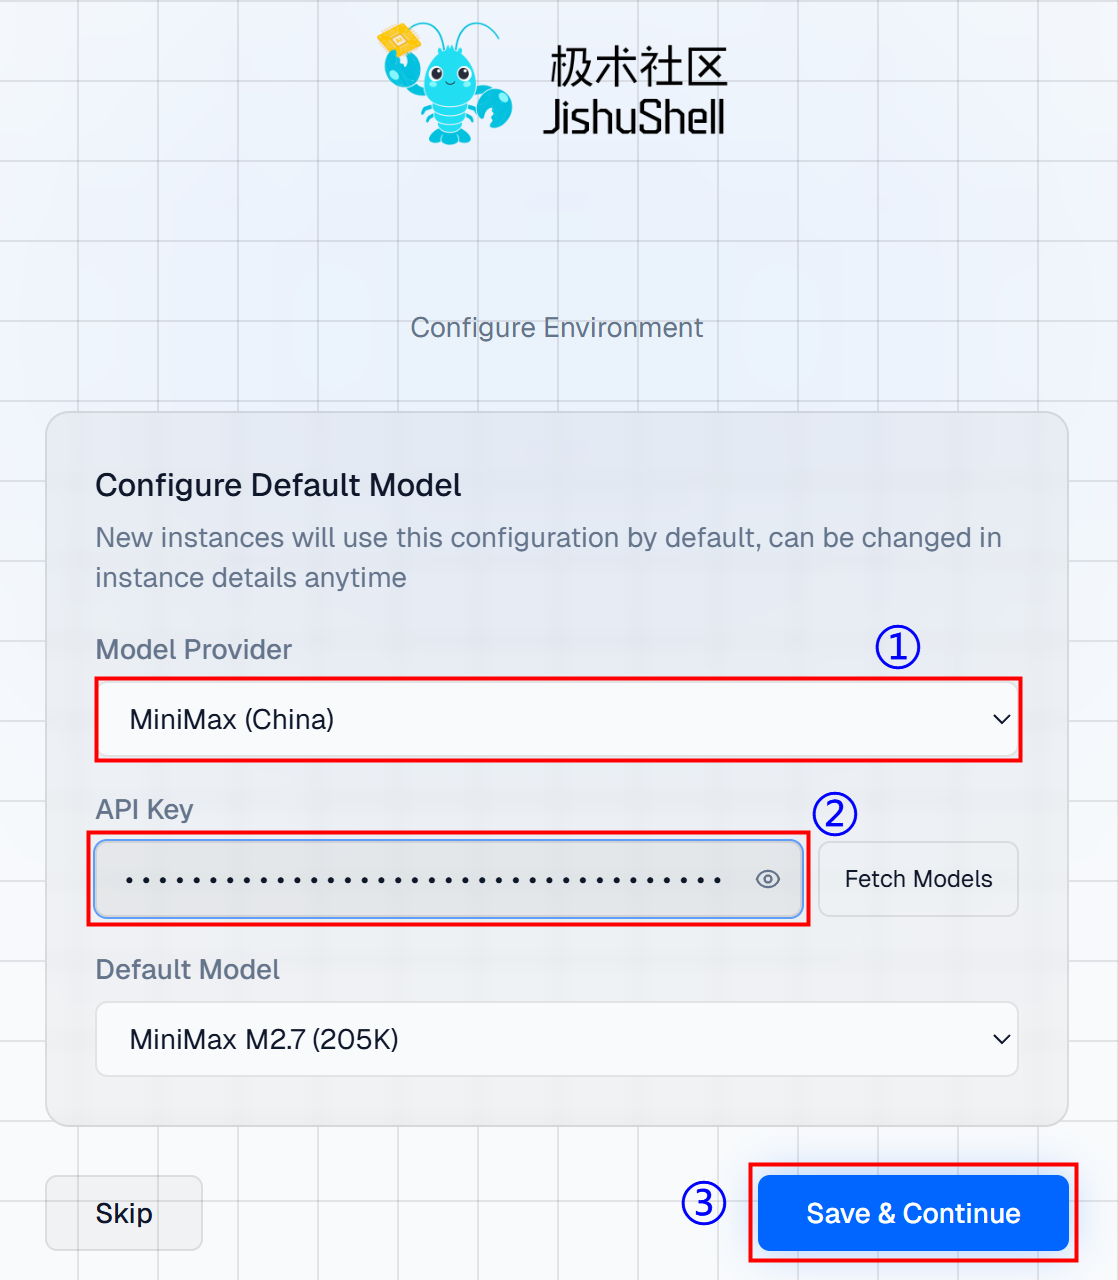
- In the "API Key" field, enter the obtained MiniMax model API Key, then click "Save & Continue".
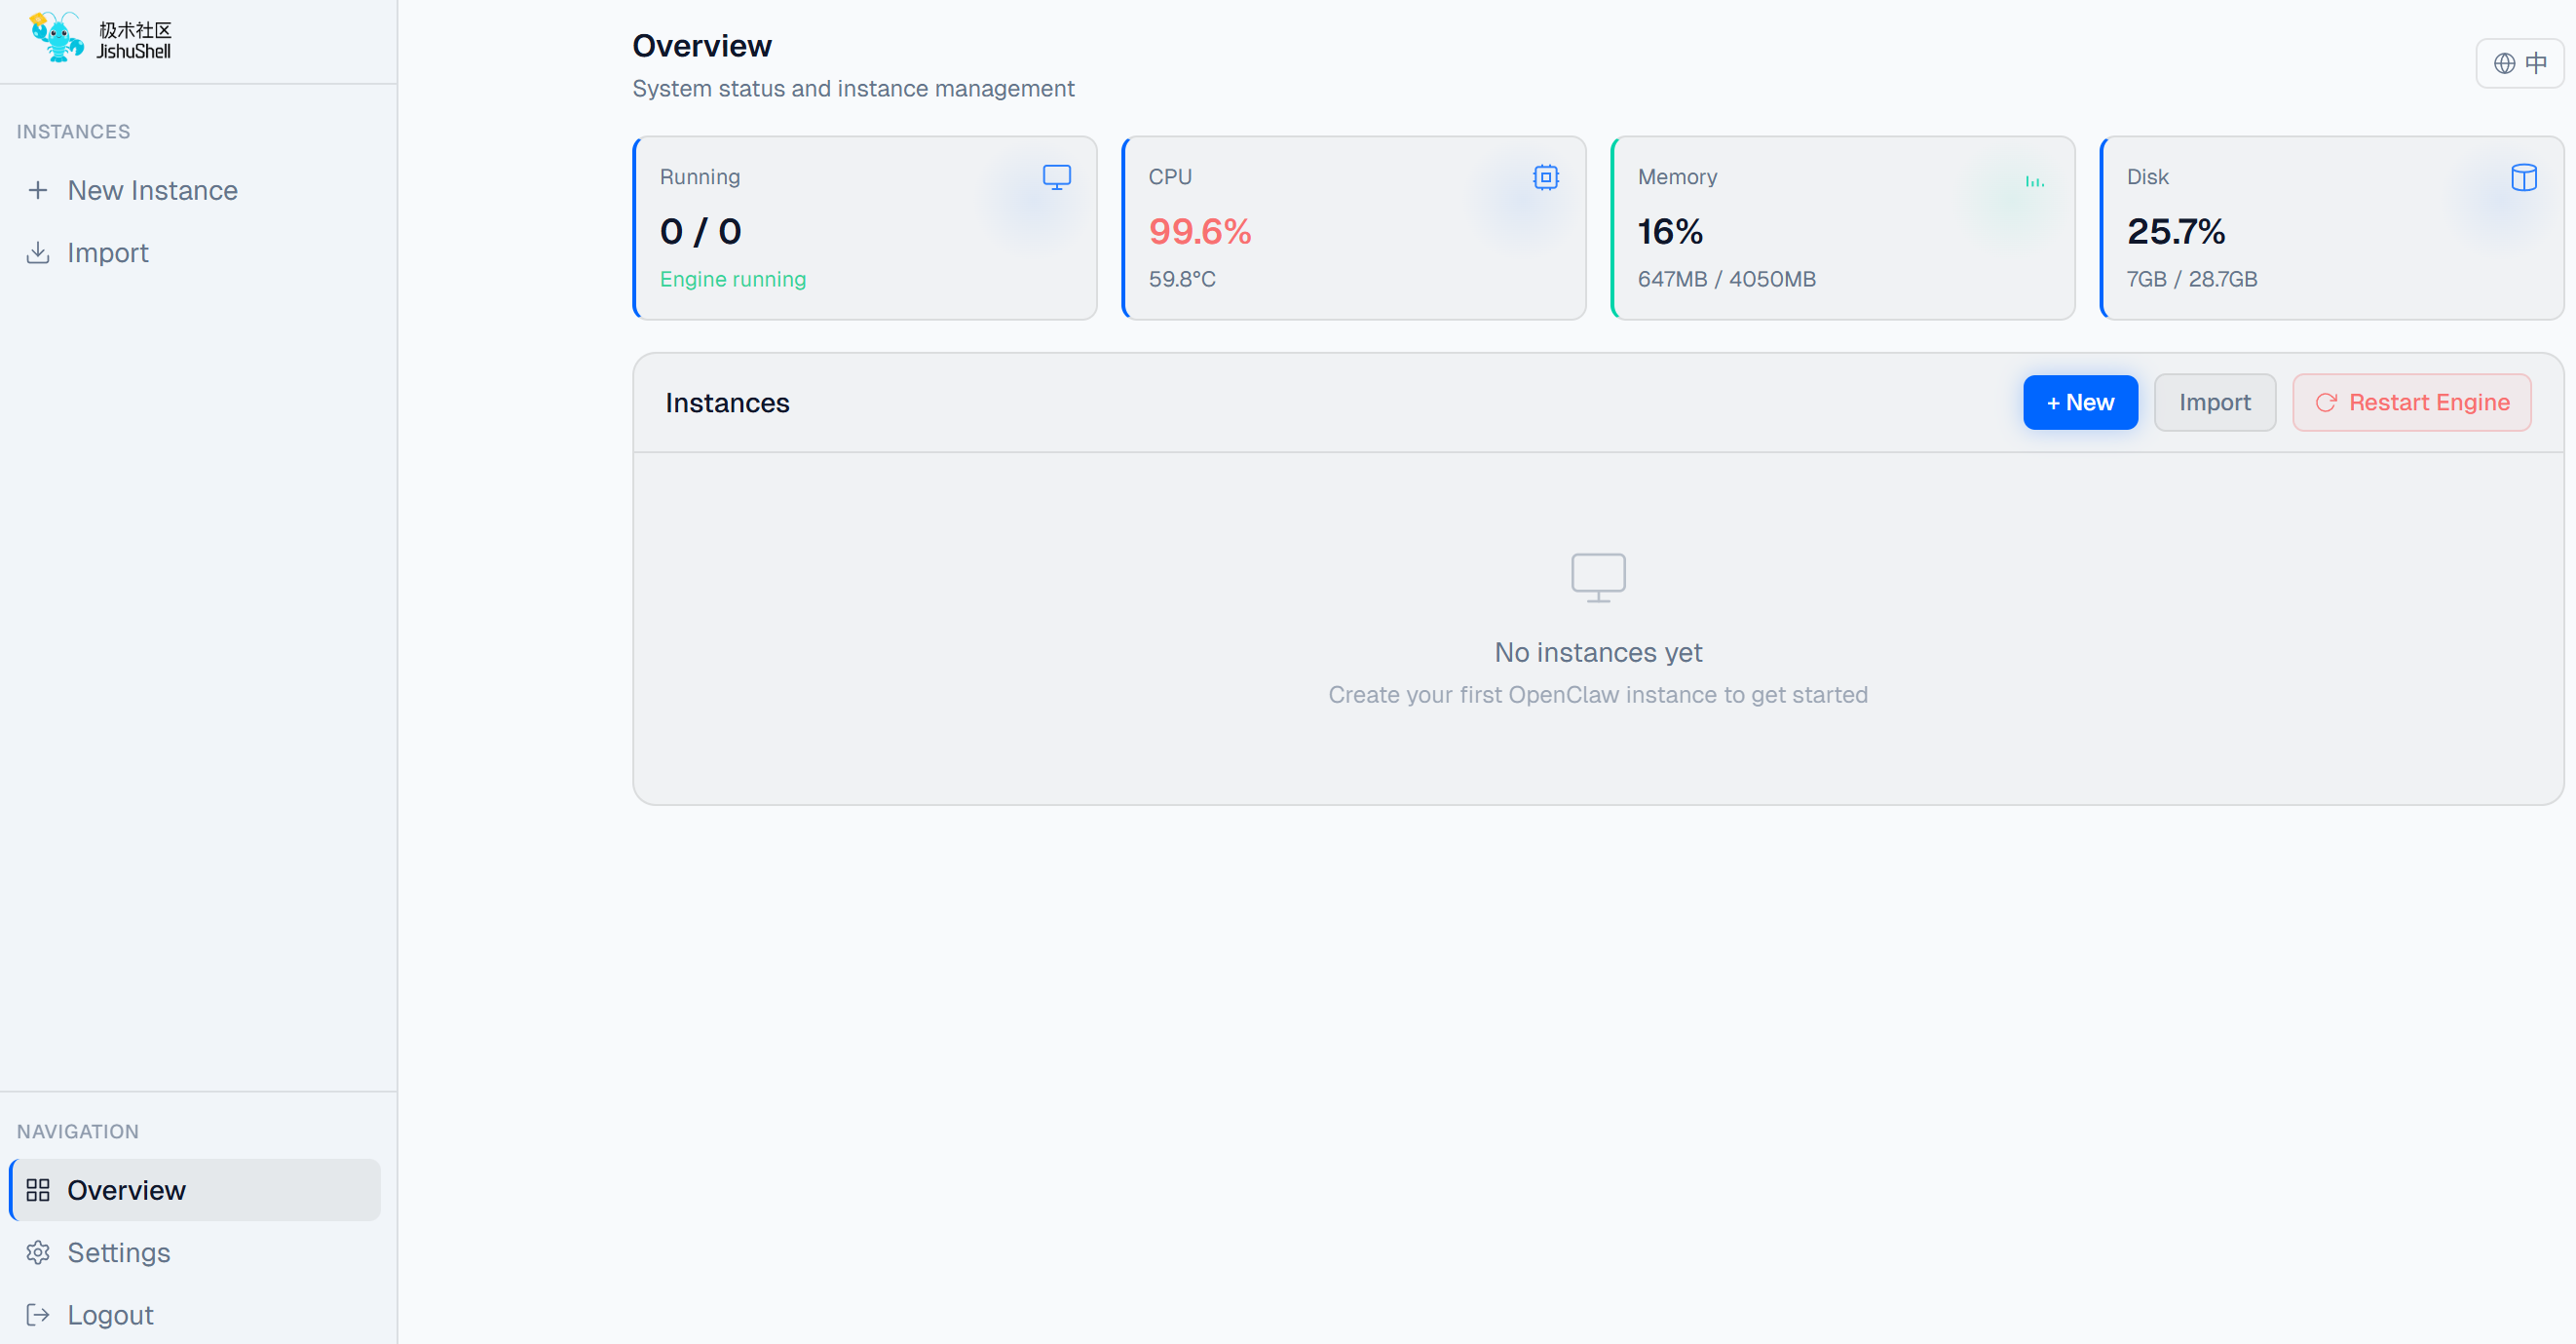
- After configuration is complete, click "Enter Panel" to access the JishuShell configuration interface.
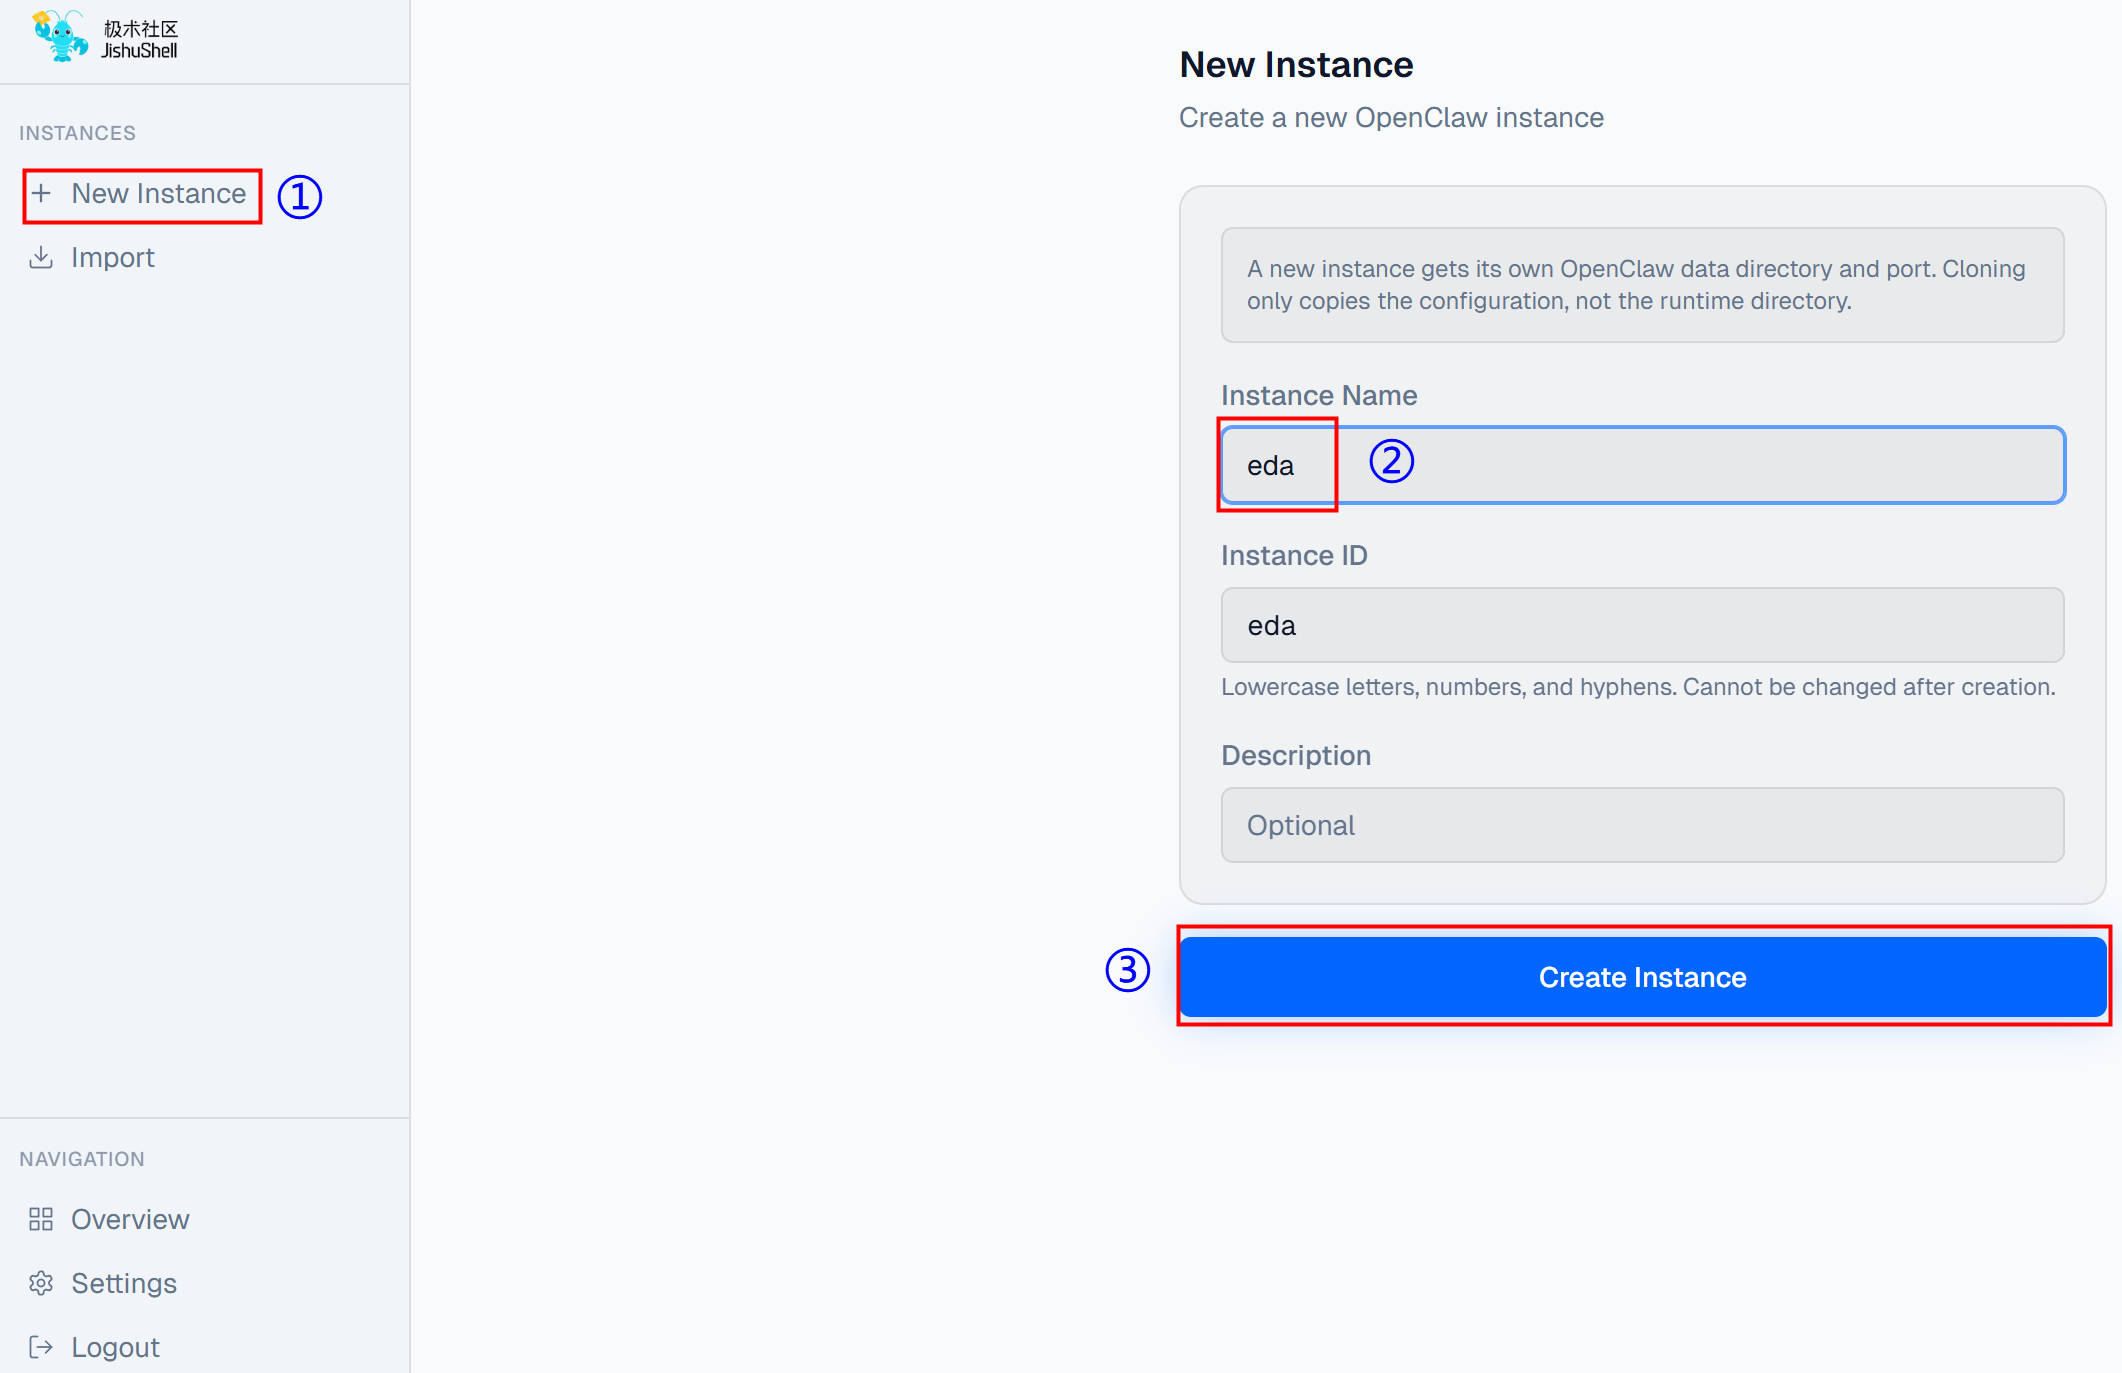
- Click "New Instance", enter an Instance Name, and finally click "Create Instance".
- After the instance is successfully created, it will start automatically. The following figure shows the chat interface after the instance starts.
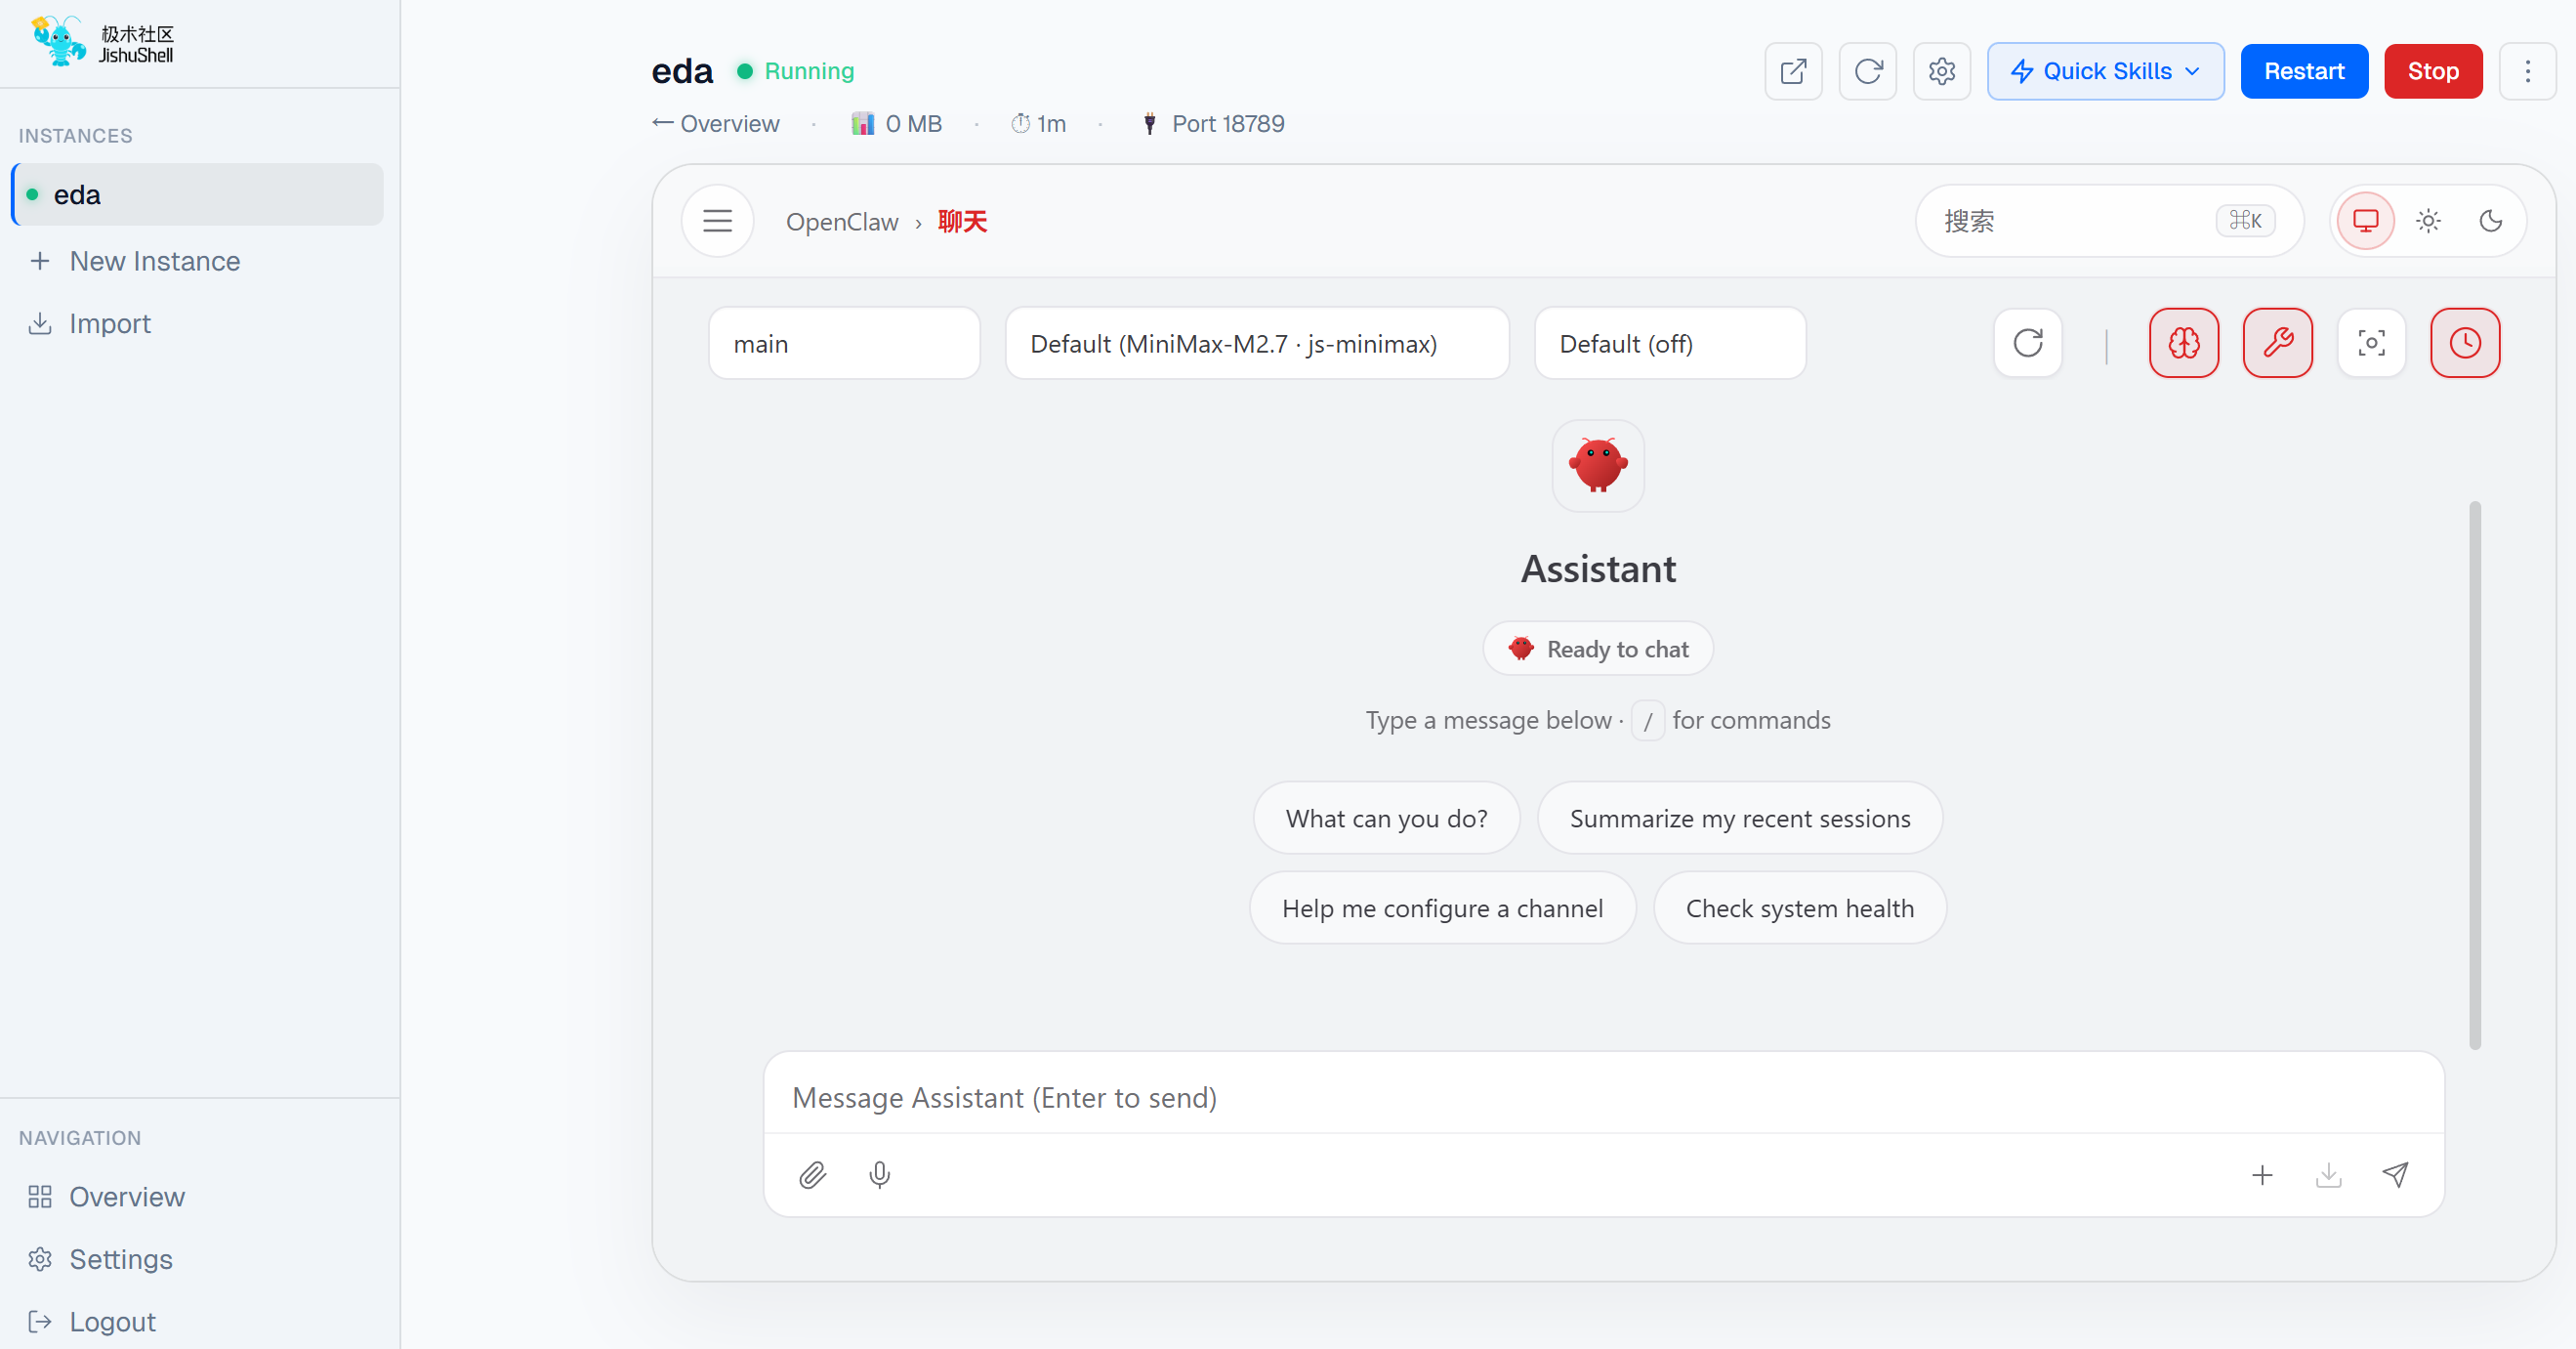
Chat in the dialog box as needed.
If you need to add a new model, switch models, or connect to other chat software during use, refer to the following instructions.
Adding a Model and Switching Models (using the DeepSeek model as an example).
Log in to the DeepSeek official website (https://platform.deepseek.com/usage) and obtain an API key.
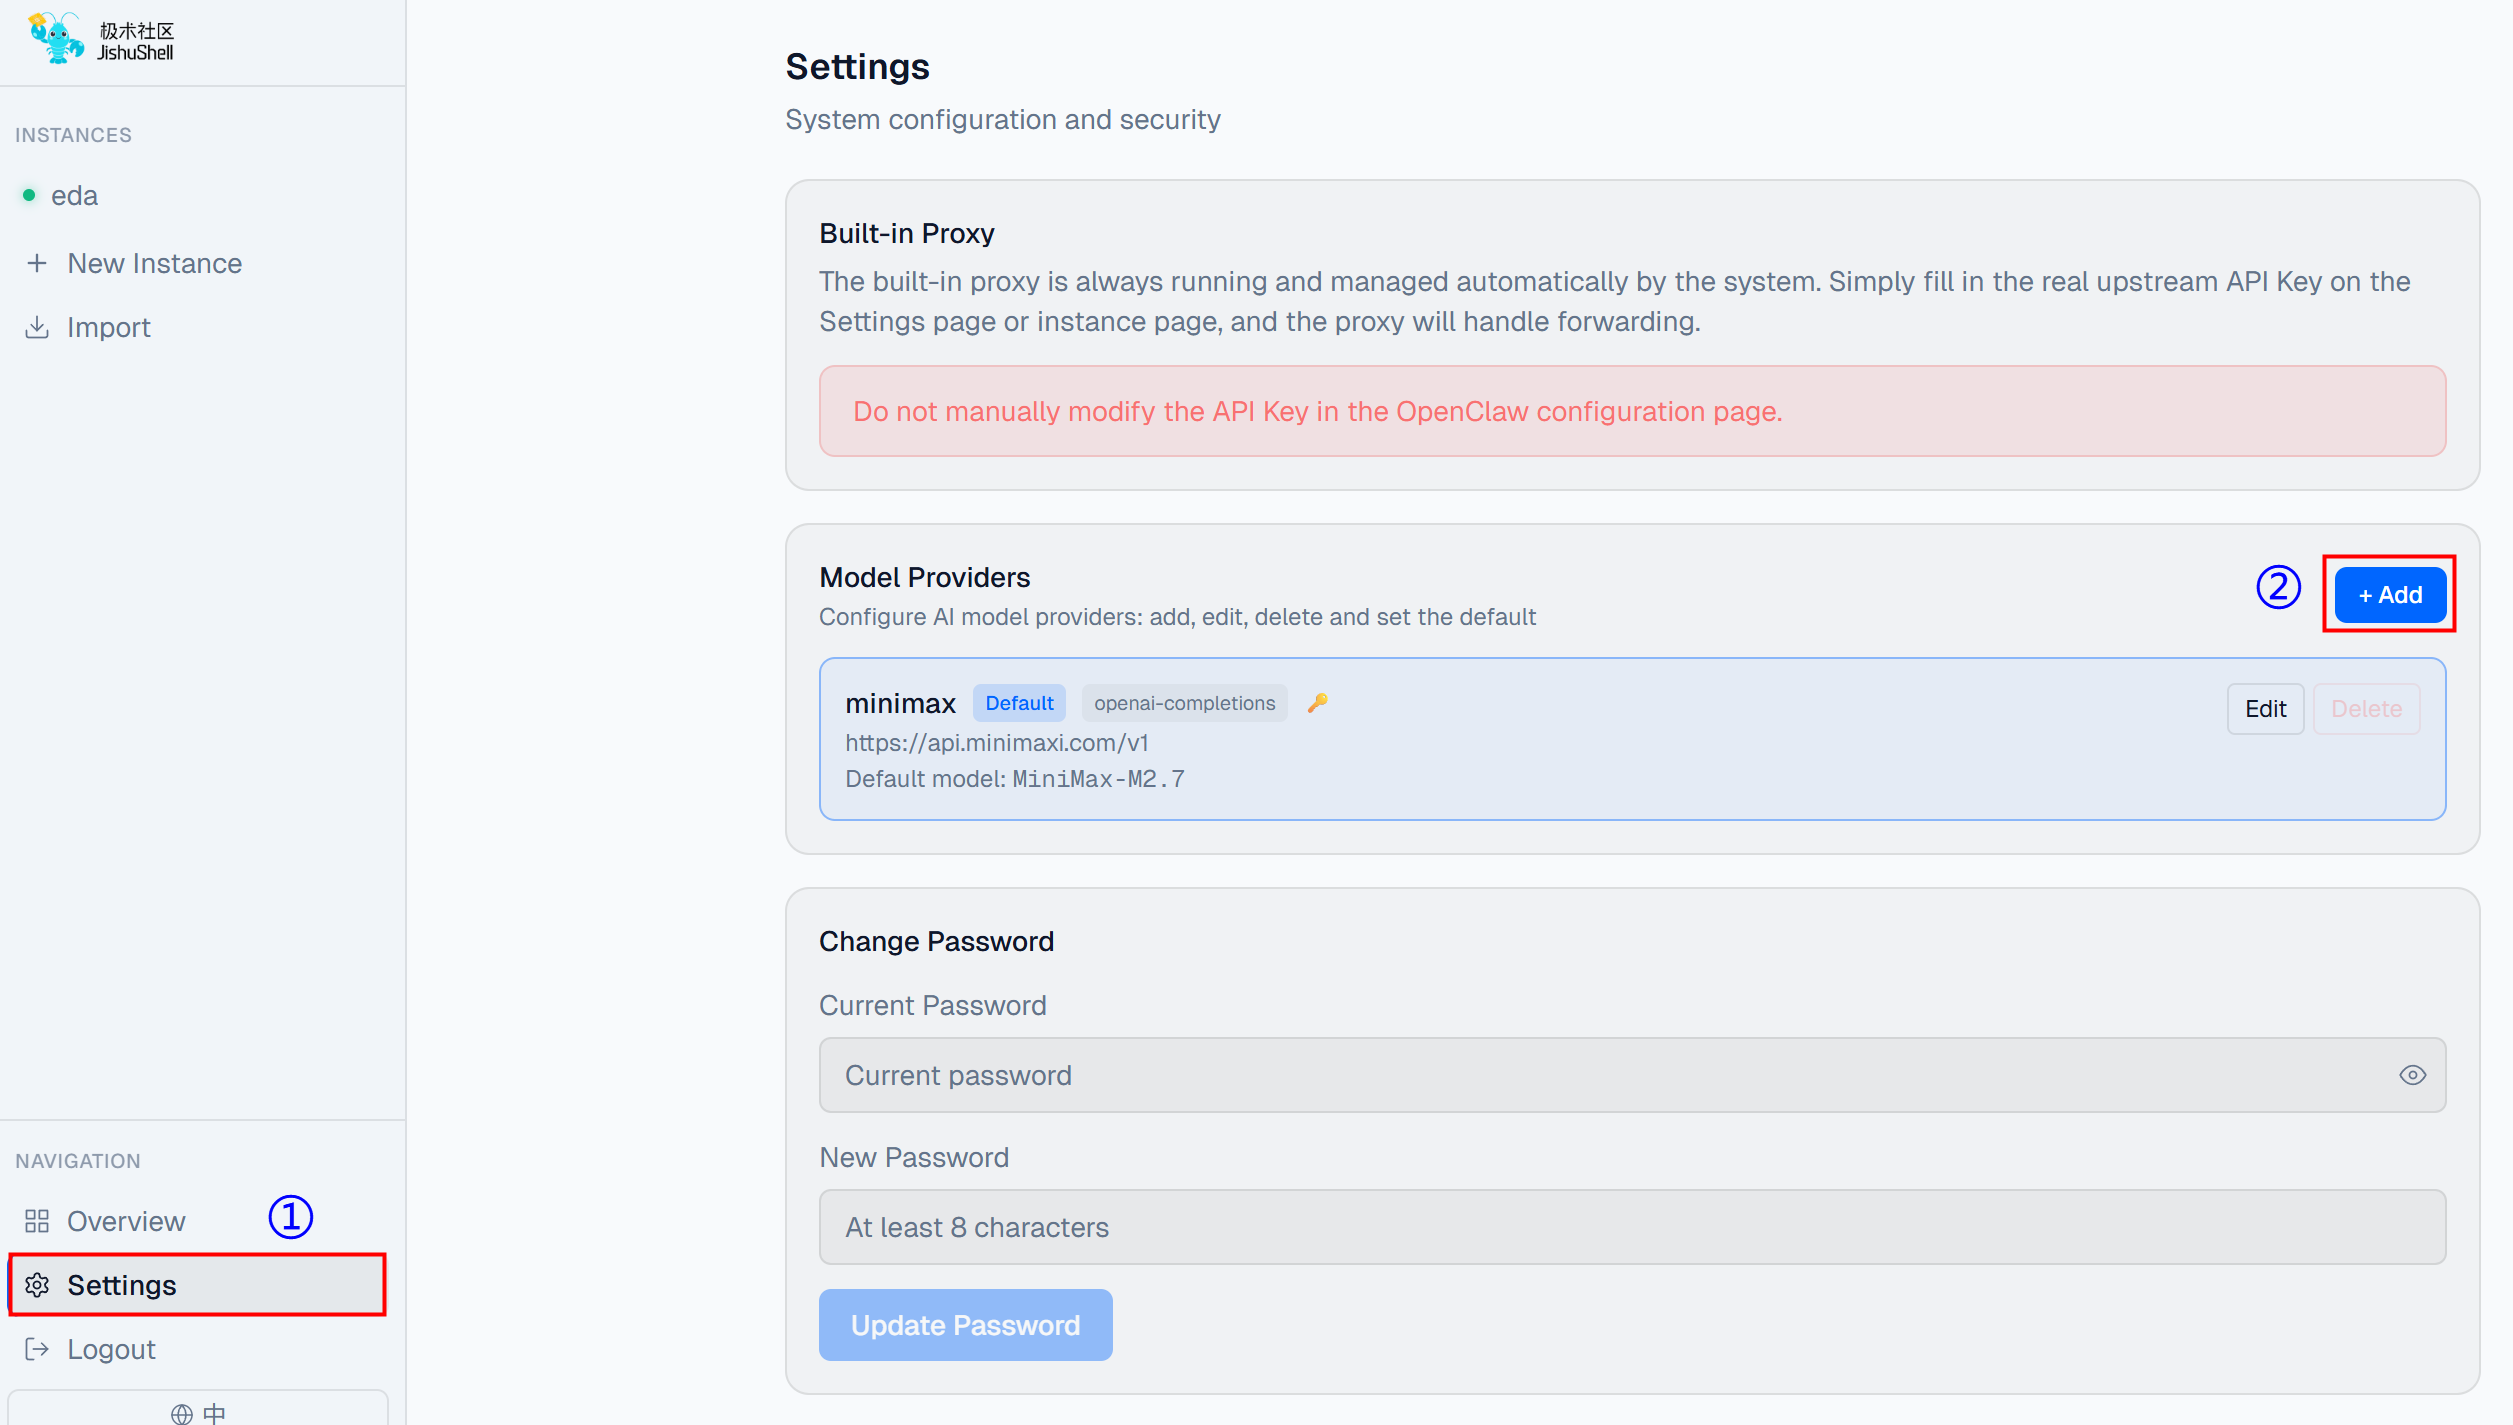
Click "Settings" in the left menu bar, then click "Add" in the "Model Providers" section.
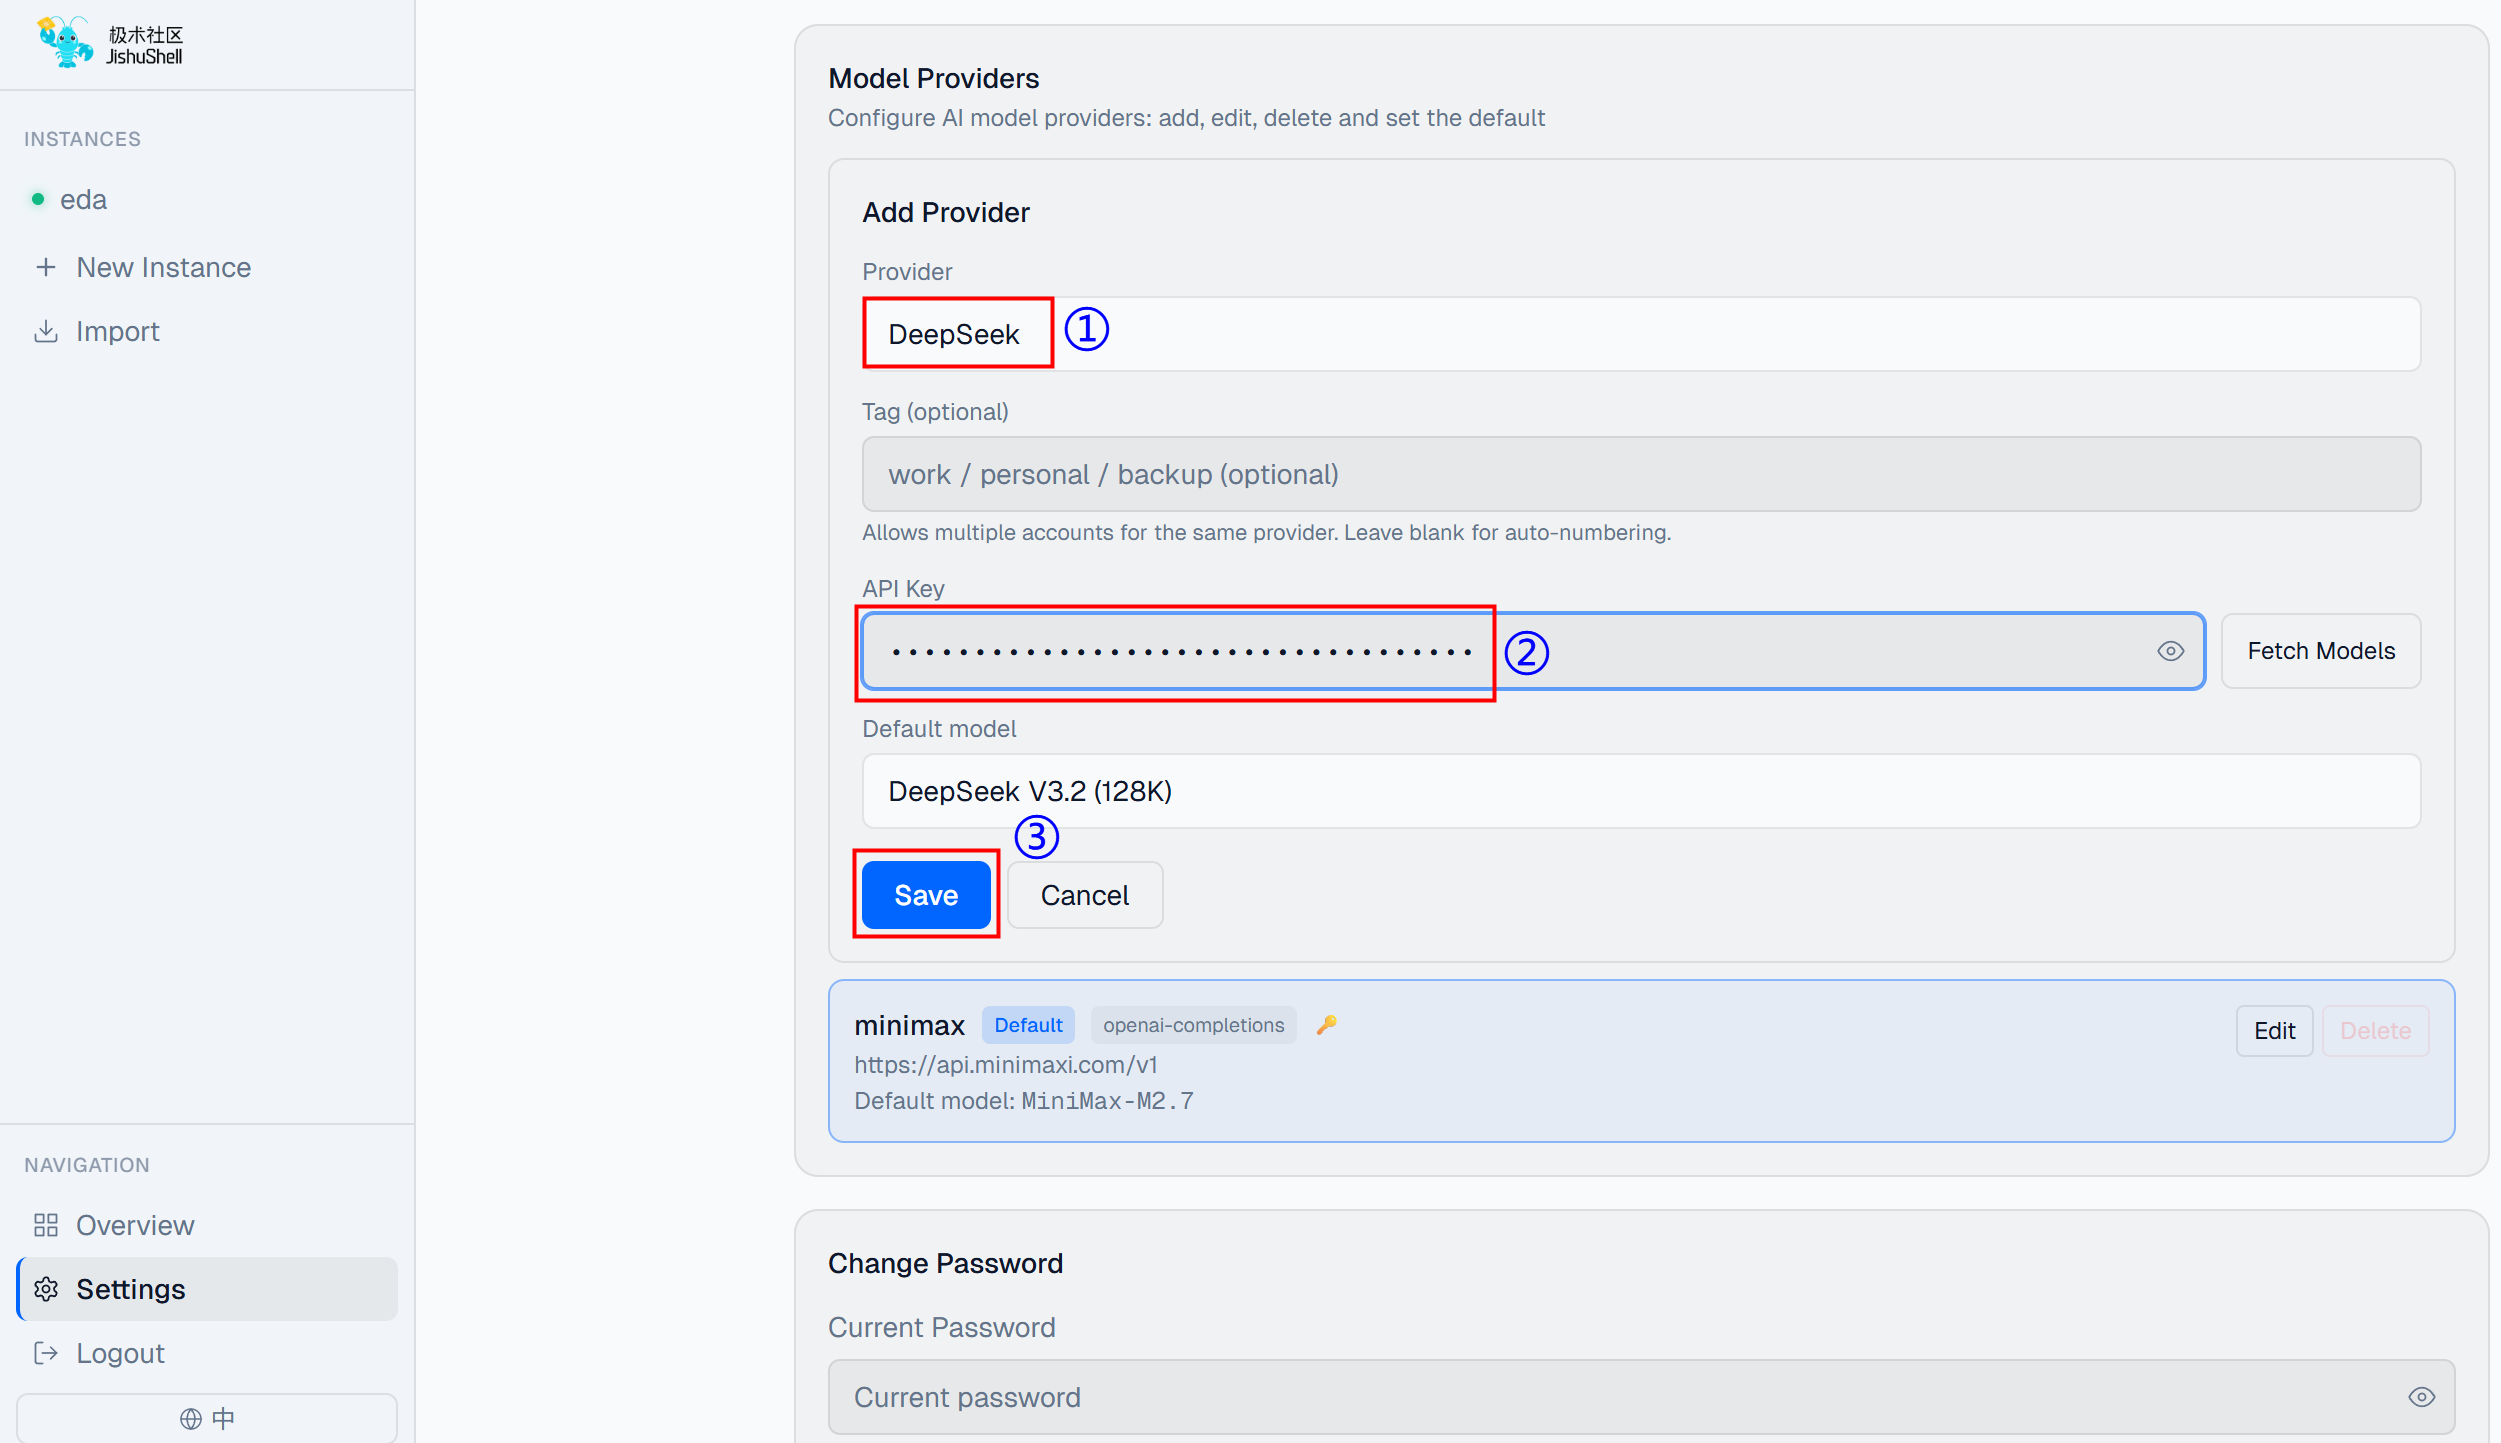
- In the expanded "Add Provider" section, first set the Model Provider to DeepSeek, then enter the obtained API Key, and finally click "Save".
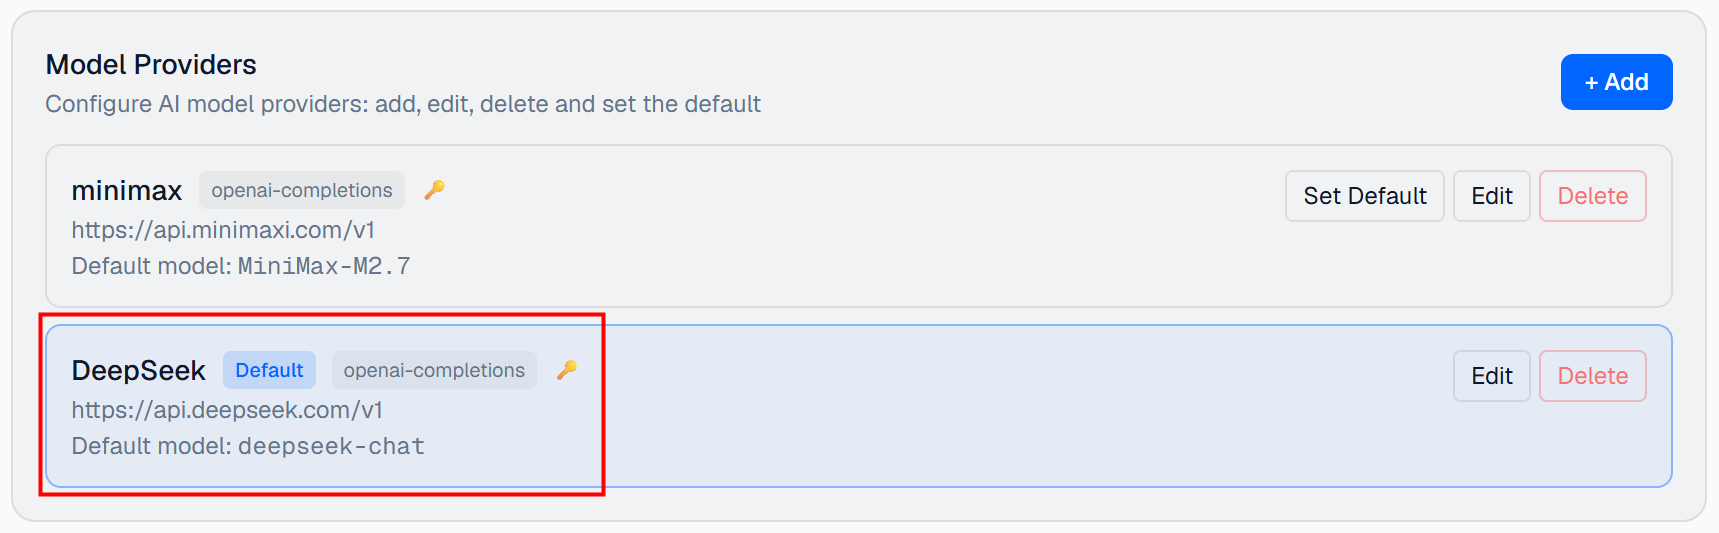
- After successful addition, the interface displays as shown below, with minimax set as the default model.
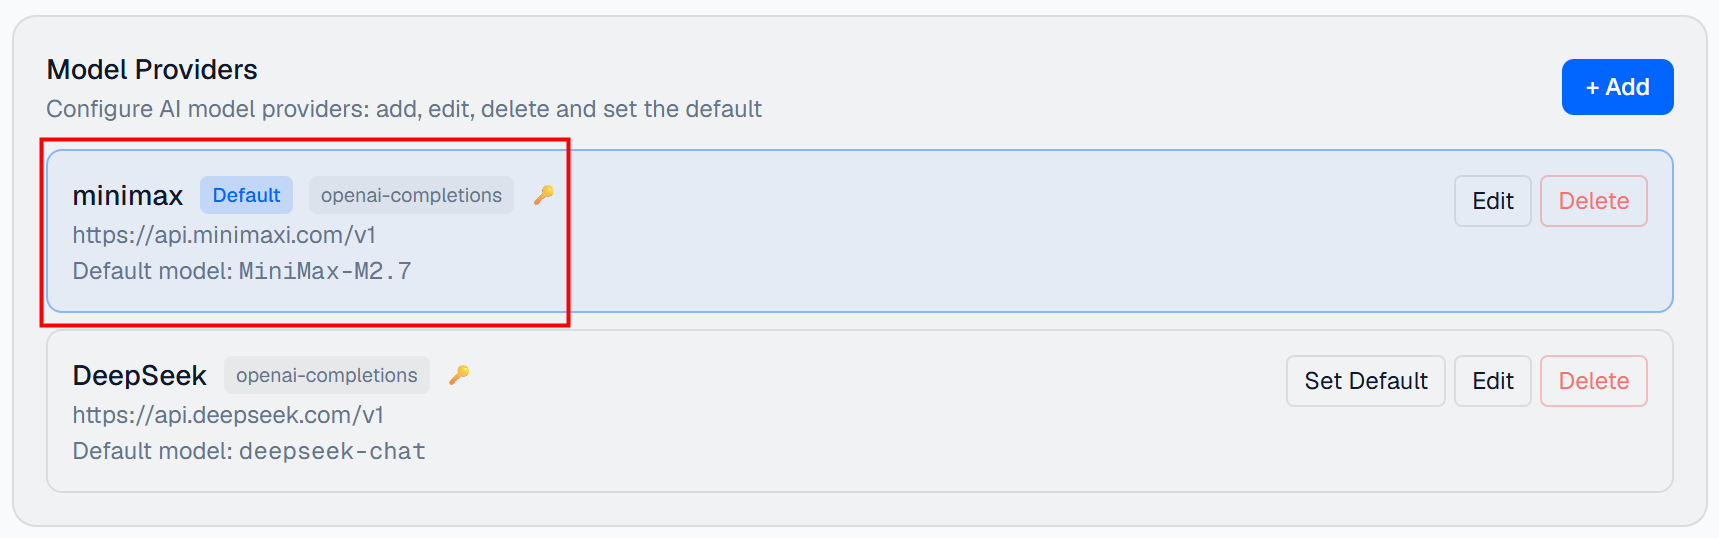
- In the added DeepSeek model, click "Set Default" to switch the active model to DeepSeek.
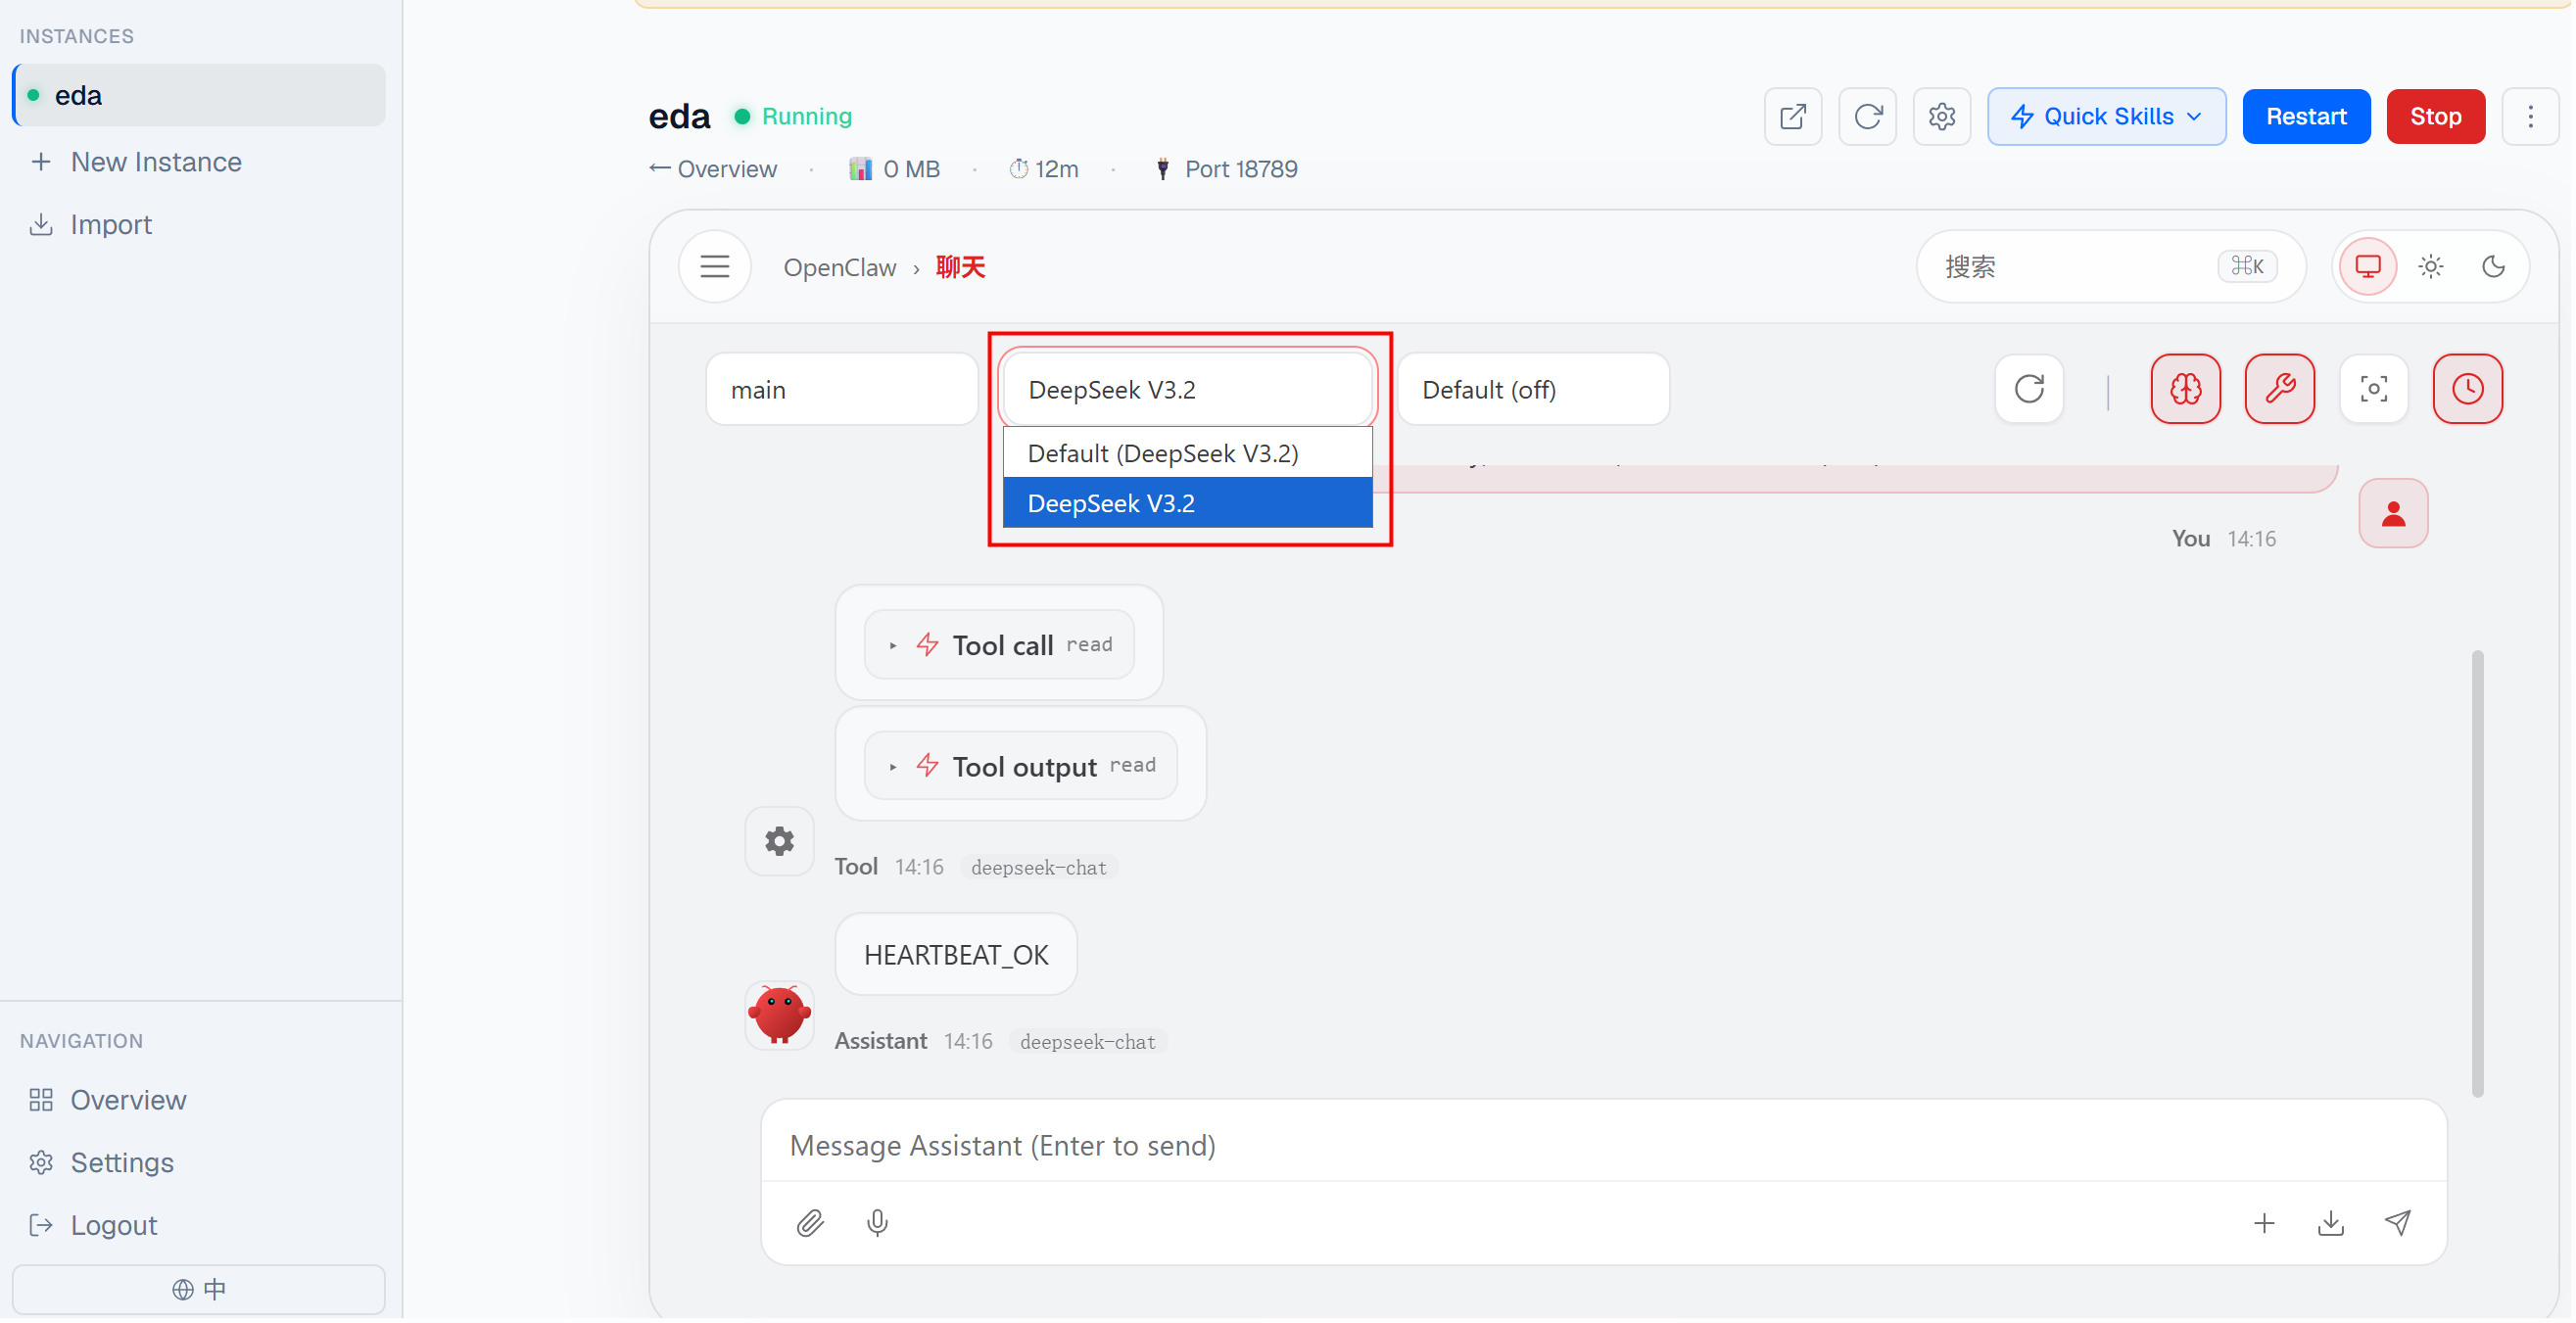
- Return to the instance conversation pane and check the switched model in the model selection menu at the top.
Connecting to Other Chat Software.
- In the upper right menu bar of the instance chat window, click "Quick Skills", then select "Feishu/Lark" or "WeChat".
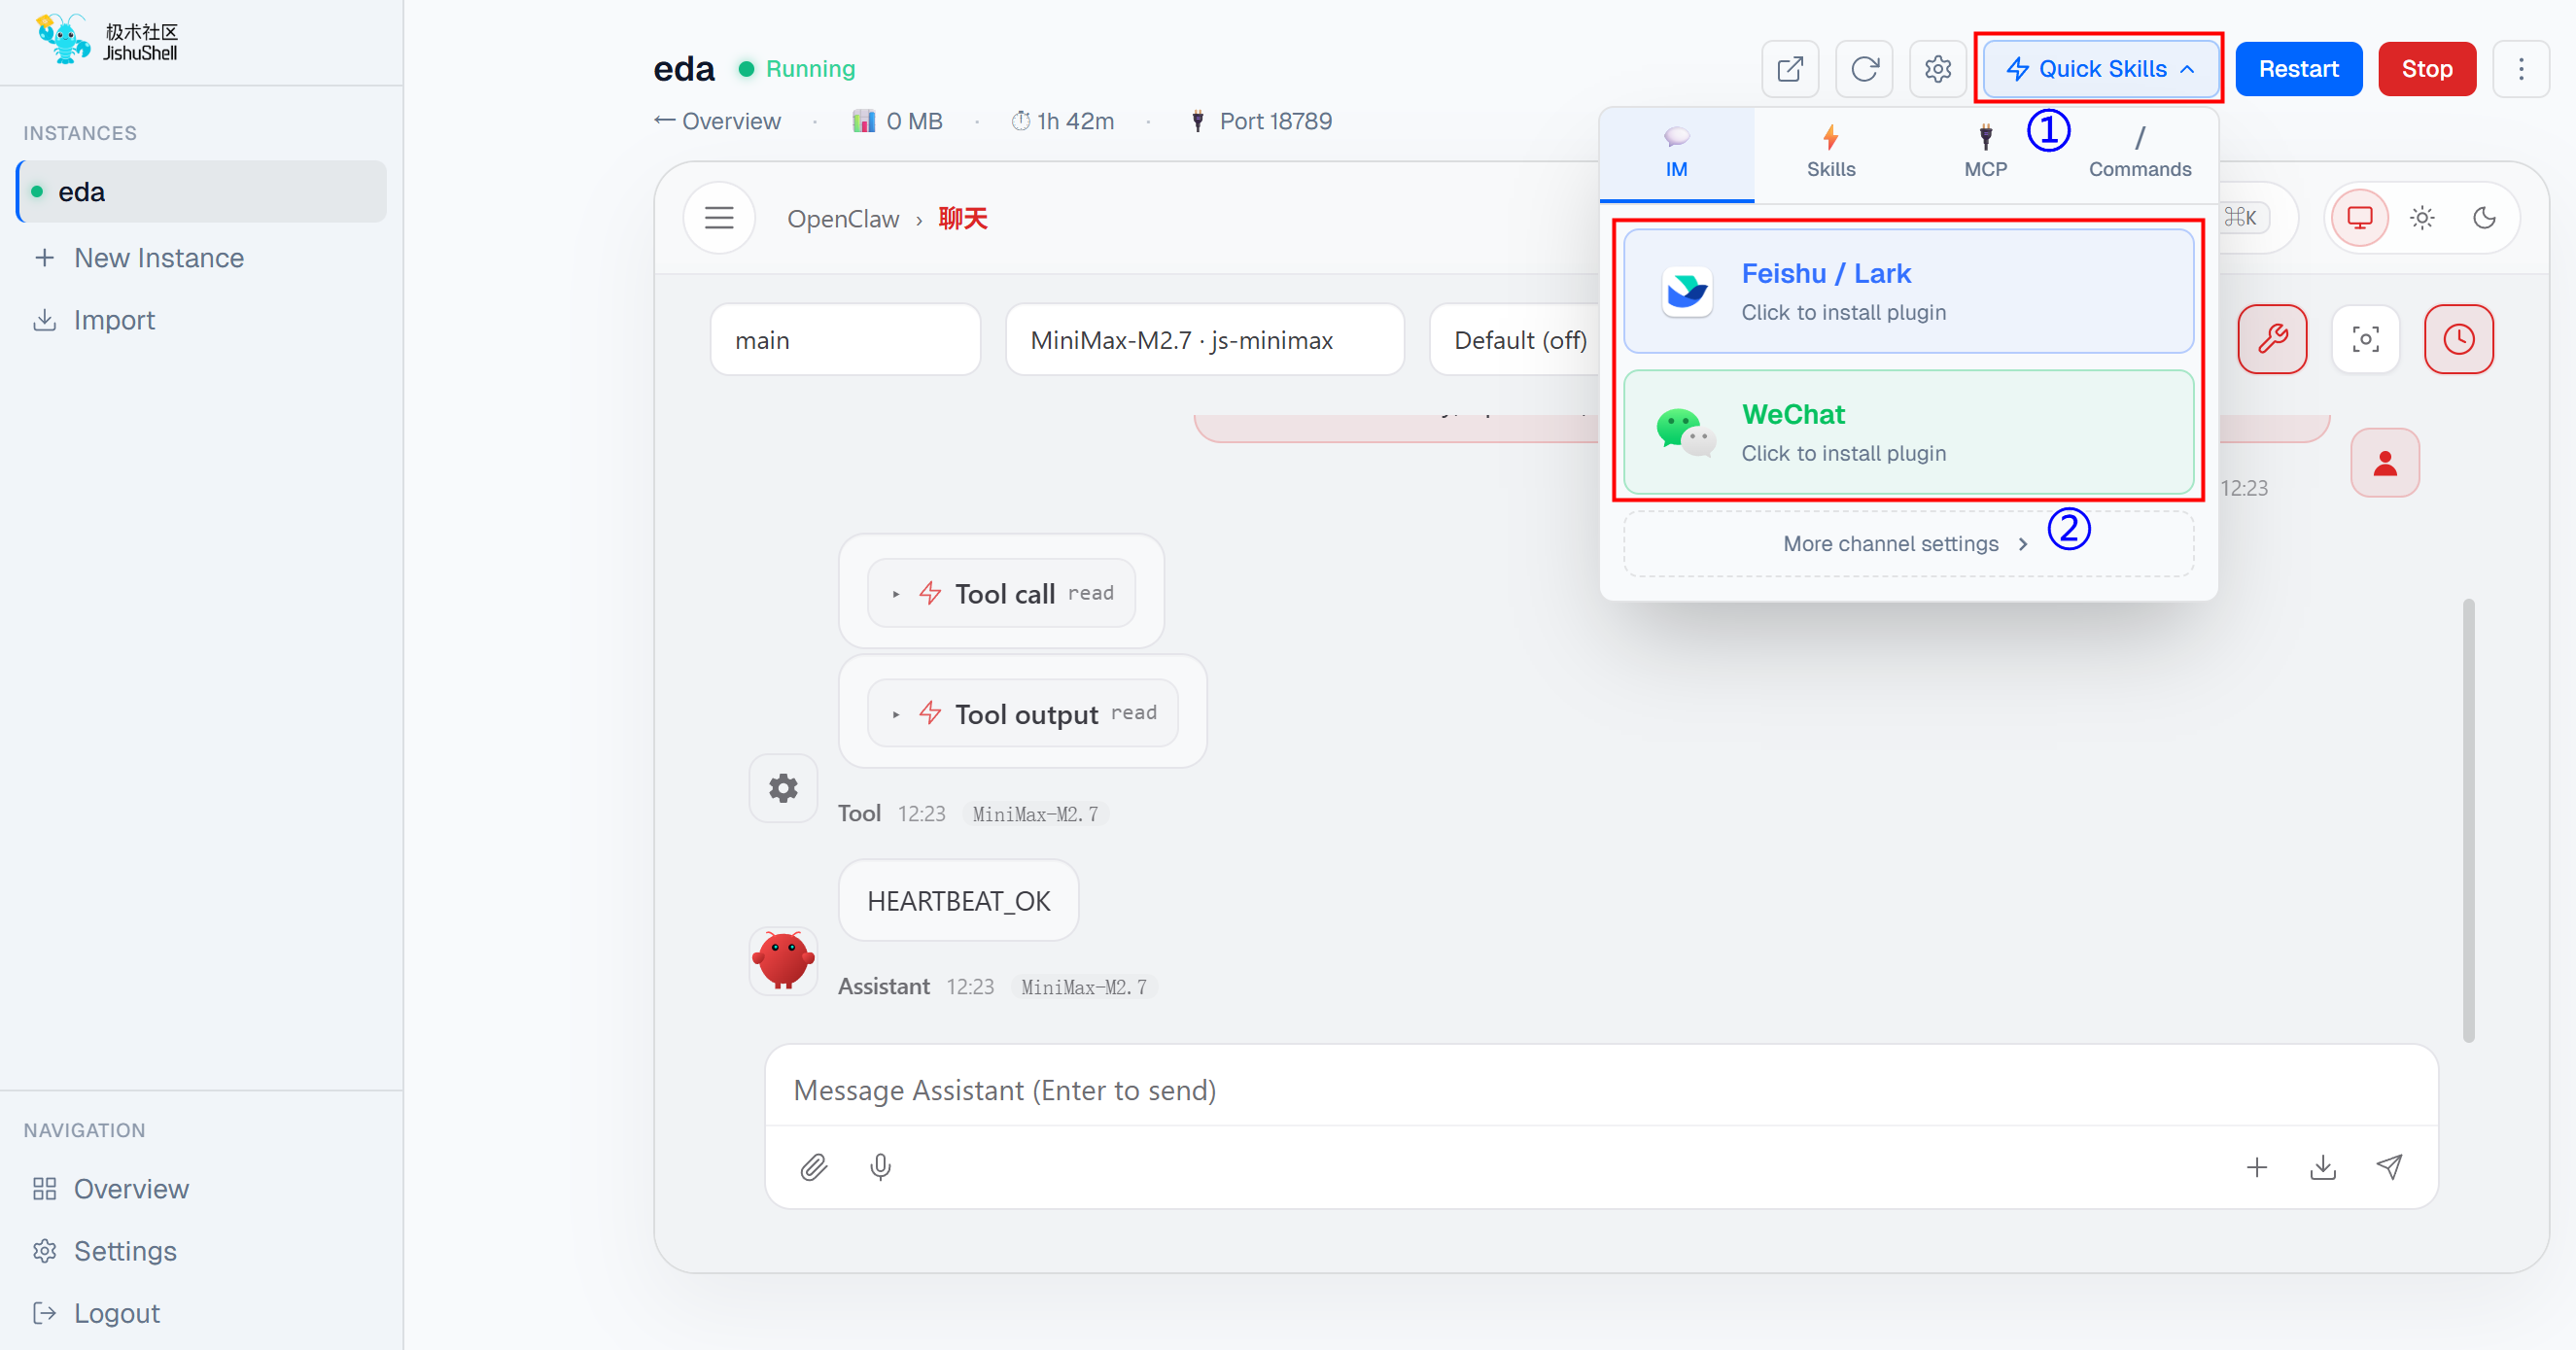
- Follow the prompts to install the corresponding plugin, log in, and configure permissions as needed.