
5 Installing OS (optional)
The device comes with a pre-installed operating system from the factory. If the operating system is damaged during use or if the user needs to replace the operating system, it is necessary to re-download the appropriate system image and flash it. Our company supports the installation of the operating system by first installing the standard Raspberry Pi OS and then installing the Firmware package.
The following sections describe the specific operations for downloading the image, flashing the SD card, and installing the Firmware package.
5.1 Downloading OS File
You can download the corresponding official Raspberry Pi OS file according to your actual needs, the download path is listed below:
| OS | Download Path |
|---|---|
| Raspberry Pi OS (Desktop) 64-bit-bookworm (Debian 12) | https://downloads.raspberrypi.com/raspios_arm64/images/raspios_arm64-2024-11-19/2024-11-19-raspios-bookworm-arm64.img.xz |
| Raspberry Pi OS (Lite) 64-bit-bookworm (Debian 12) | https://downloads.raspberrypi.com/raspios_lite_arm64/images/raspios_lite_arm64-2024-11-19/2024-11-19-raspios-bookworm-arm64-lite.img.xz |
TIP
Our engineers are currently adapting and developing firmware packages for Raspberry Pi OS-trixie (Debian 13), so it is temporarily not supported. We recommend using the Raspberry Pi OS 64-bit-bookworm (Debian 12) version of the operating system.
5.2 Flashing to SD Card
It is recommended to use the Raspberry Pi official tools. The download paths are as follows:
- Raspberry Pi Imager: https://downloads.raspberrypi.org/imager/imager_latest.exe
- SD Card Formatter: https://www.sdcardformatter.com/download/
- Rpiboot: https://github.com/raspberrypi/usbboot/raw/master/win32/rpiboot_setup.exe
Preparation:
- The downloading and installation of the official tools to the computer have been completed.
- A pair of tweezers has been prepared.
- The OS file has been obtained.
- An SD card reader has been prepared.
- Power has been disconnected.
Steps:
The steps are described using Windows system as an example.
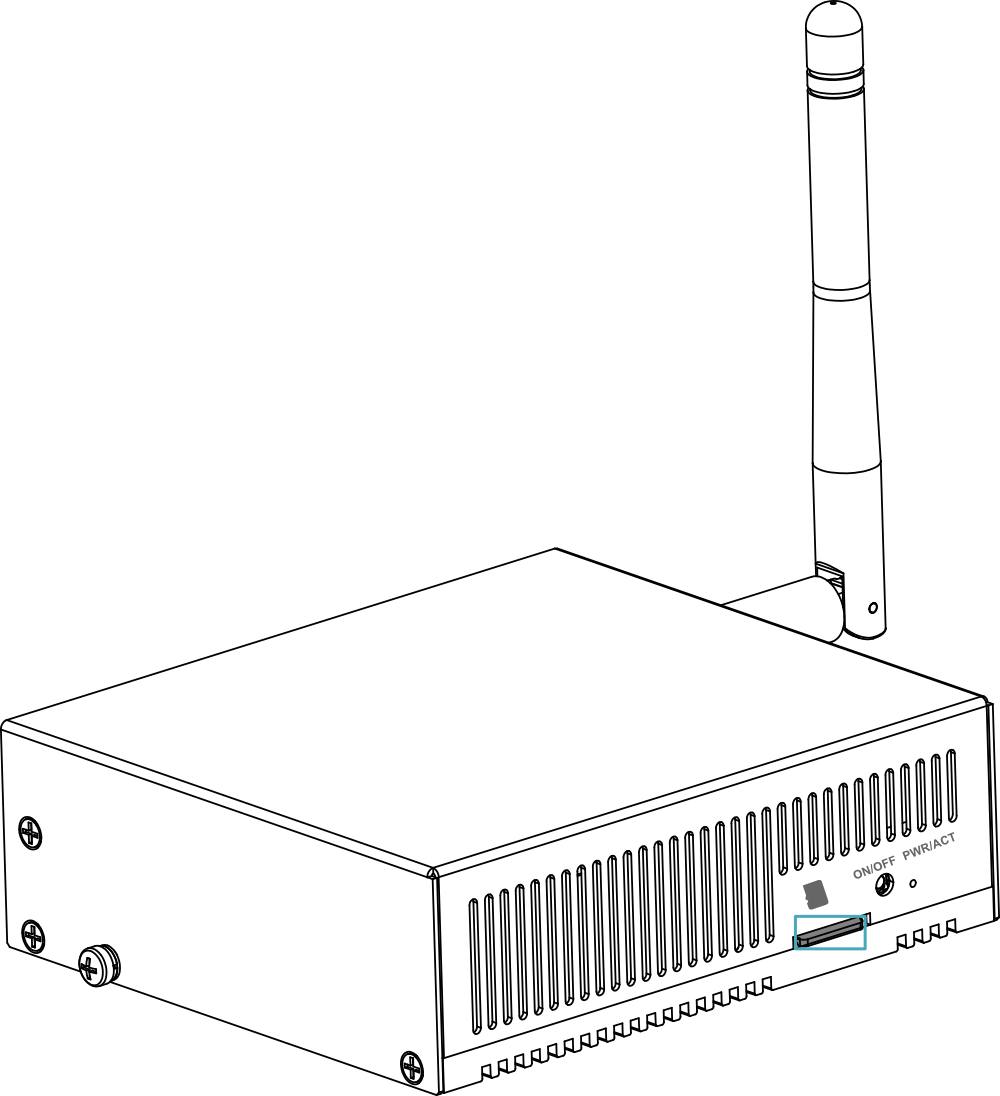
- Locate the position of the Micro SD card, as indicated in the figure below.
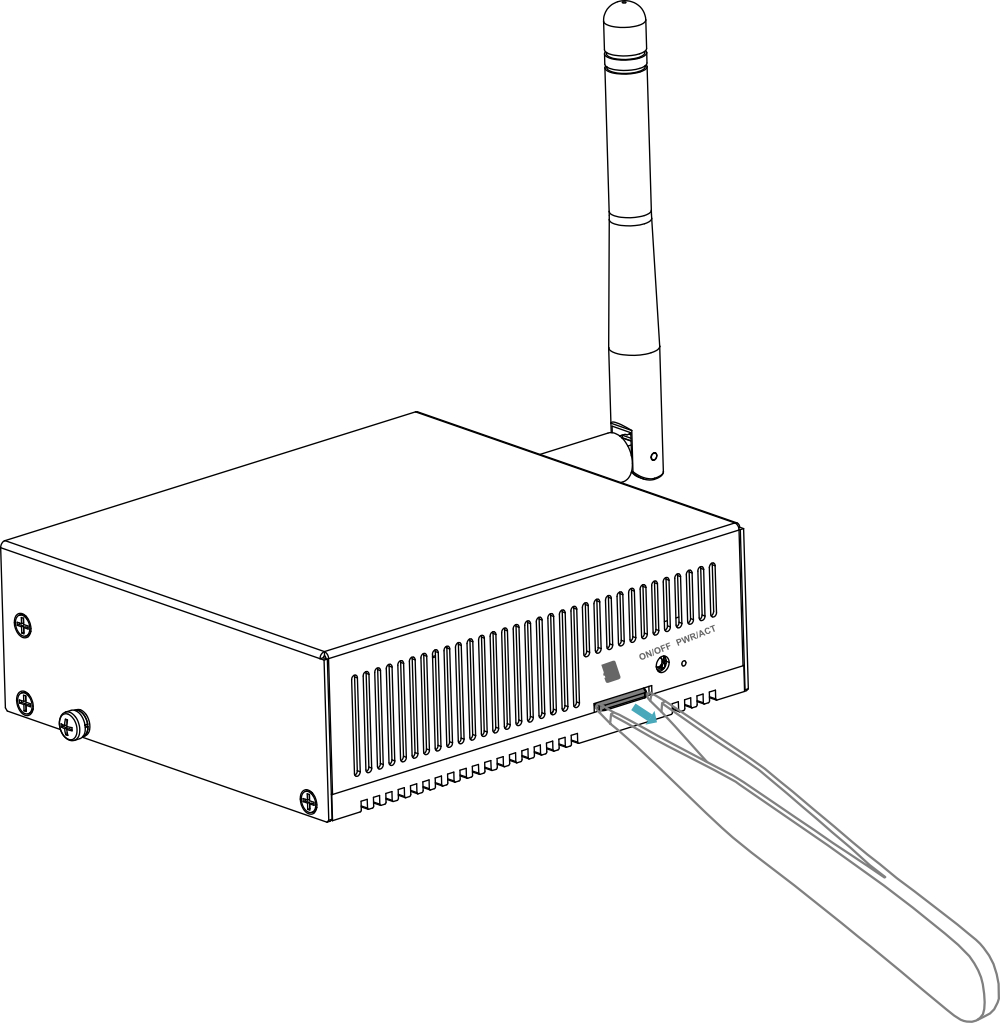
- Use the tweezers to grip the Micro SD card and pull it outward in the direction of the arrow.
Insert the removed Micro SD card into the card reader, then connect the card reader to a USB port on the computer.
Open
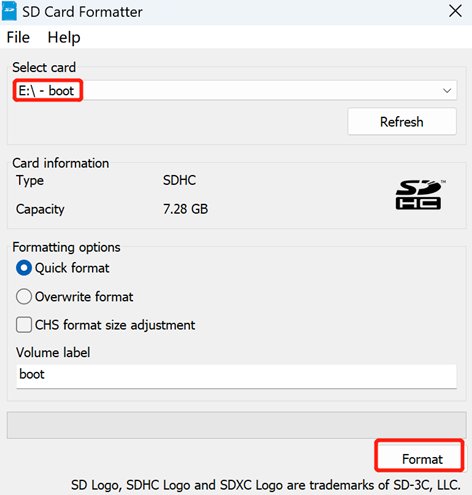
SD Card Formatter, select the drive letter to be formatted, and click "Format" at the bottom right to perform formatting.
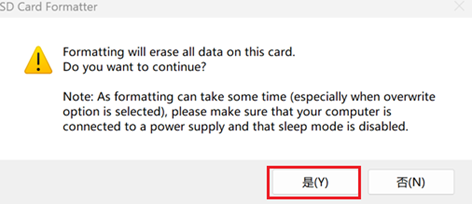
- In the pop-up confirmation dialog, click "Yes".
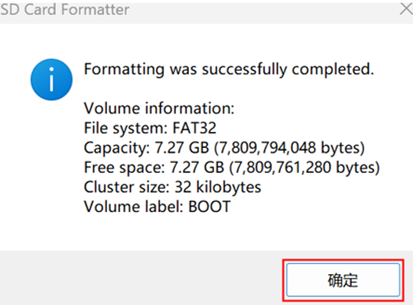
- After formatting is complete, click "OK" in the prompt dialog.
Close
SD Card Formatter.Open
Raspberry Pi Imager, click "CHOOSE OS", and select "Use custom" in the pop-up pane.
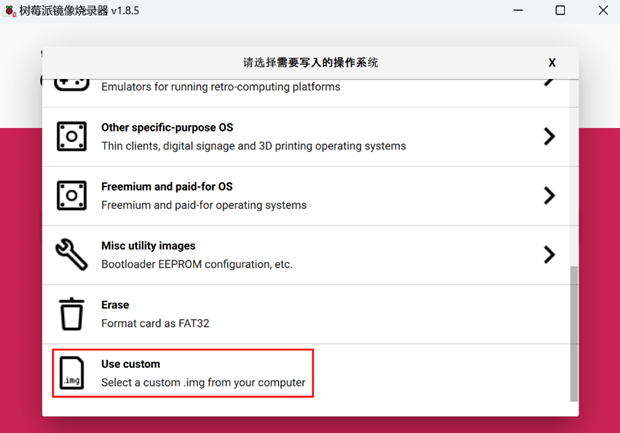
Follow the prompts to select the obtained image file under the custom path, and return to the main flashing interface.
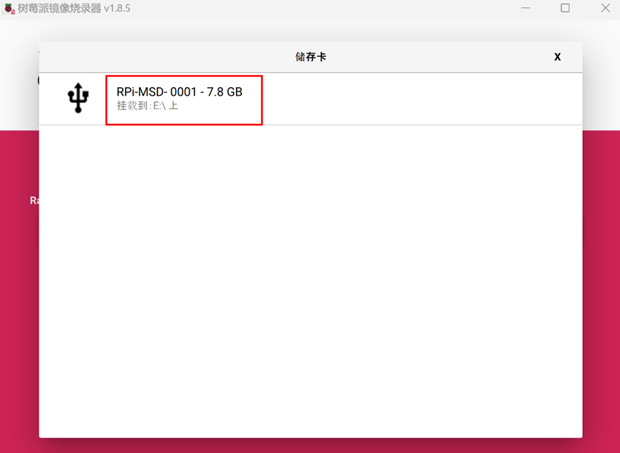
Click "CHOOSE STORAGE", select the default device in the "Storage" interface, and return to the main page.
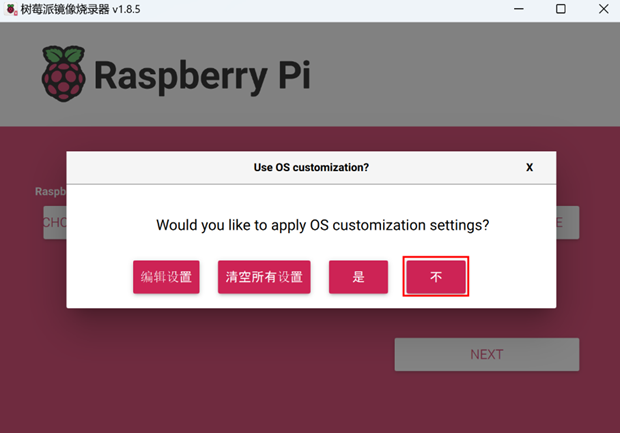
- Click “NEXT”, select "NO" in the pop-up “Use OS customization?” pane.
- Select “YES” in the pop-up “Warning” pane to start writing the image.
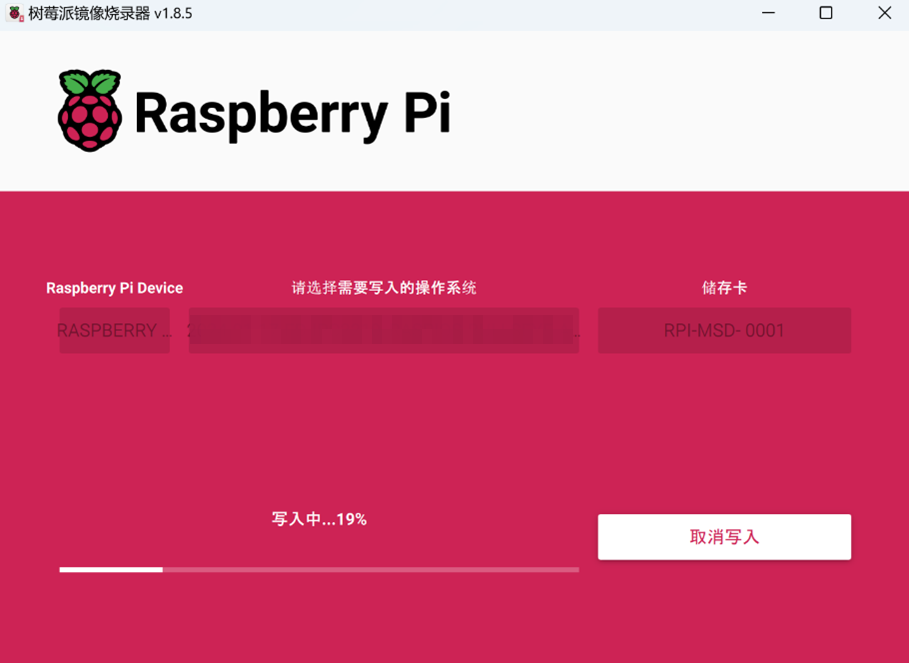
- After the OS writing is completed, the file will be verified.
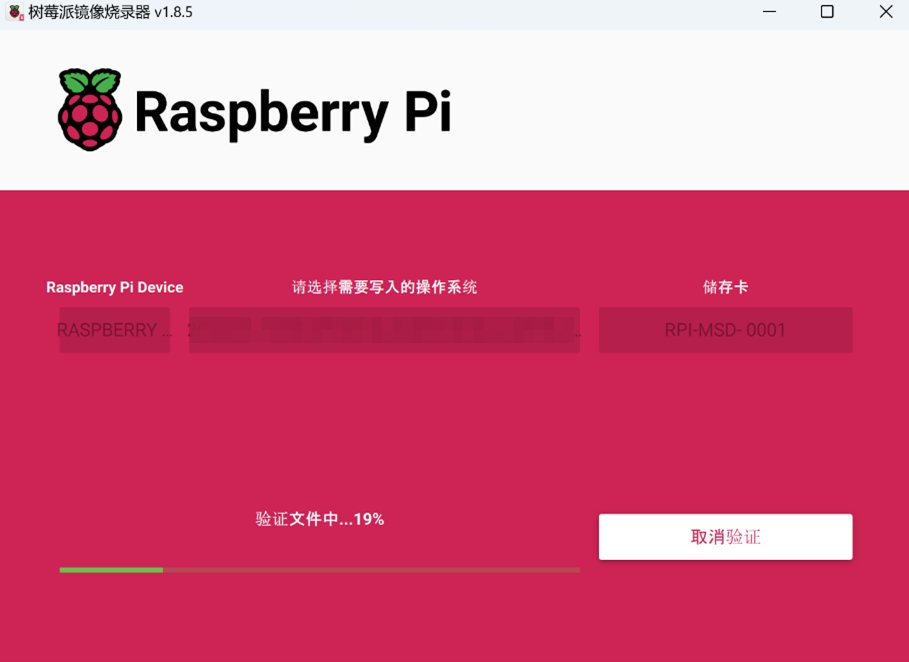
After the verification is completed, click “CONTINUE” in the pop-up “Write Successful” box.
Close
Raspberry Pi Imager, remove the card reader and SD card, and reinsert them into the device.
5.3 Installing Firmware Package
After you have finished flashing to SD card on ED-IPC3020E, you need to configure the system by adding edatec apt source and installing firmware package to make the system work. The following is an example of Debian 12 (bookworm) desktop version.
TIP
Our engineers are currently adapting and developing firmware packages for Raspberry Pi OS-trixie (Debian 13), so it is temporarily not supported. We recommend using the Raspberry Pi OS 64-bit-bookworm (Debian 12) version of the operating system.
Preparation:
- The flashing to SD card of the Raspberry Pi standard OS (bookworm) has been completed.
- The device has booted normally and the relevant boot configuration has been completed.
Steps:
- After the device starts normally, execute the following commands in the command pane to add the
edatec aptsource and installing firmware package.
curl -s https://apt.edatec.cn/bsp/ed-install.sh | sudo bash -s ipc3020e
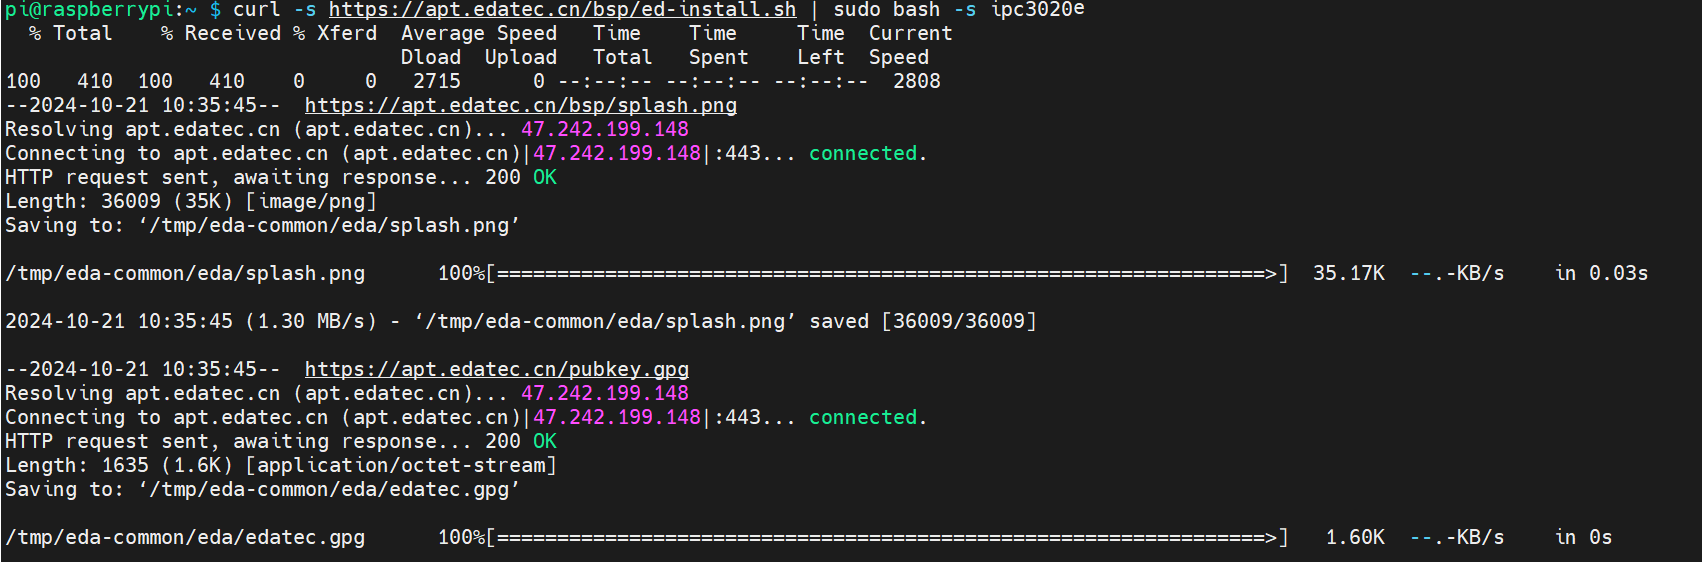
After the installation is complete, the system automatically reboots.
Execute the following command to check whether the firmware package is installed successfully.
dpkg -l | grep ed-
The result in the picture below indicates that the firmware package has been installed successfully.

TIP
If you have installed the wrong firmware package, you can execute sudo apt-get --purge remove package to delete it, where “package” is the package name.