3 Booting The Device
This chapter describes the specific operations for connecting cables and booting the device.
3.1 Connecting Cables
Introduces the method for connecting cables.
Preparation:
- Obtain accessories such as a monitor, mouse, keyboard, and power adapter that are functioning properly.
- Obtain a network connection that is functioning properly.
- Obtain an HDMI cable and an Ethernet cable that are functioning properly.
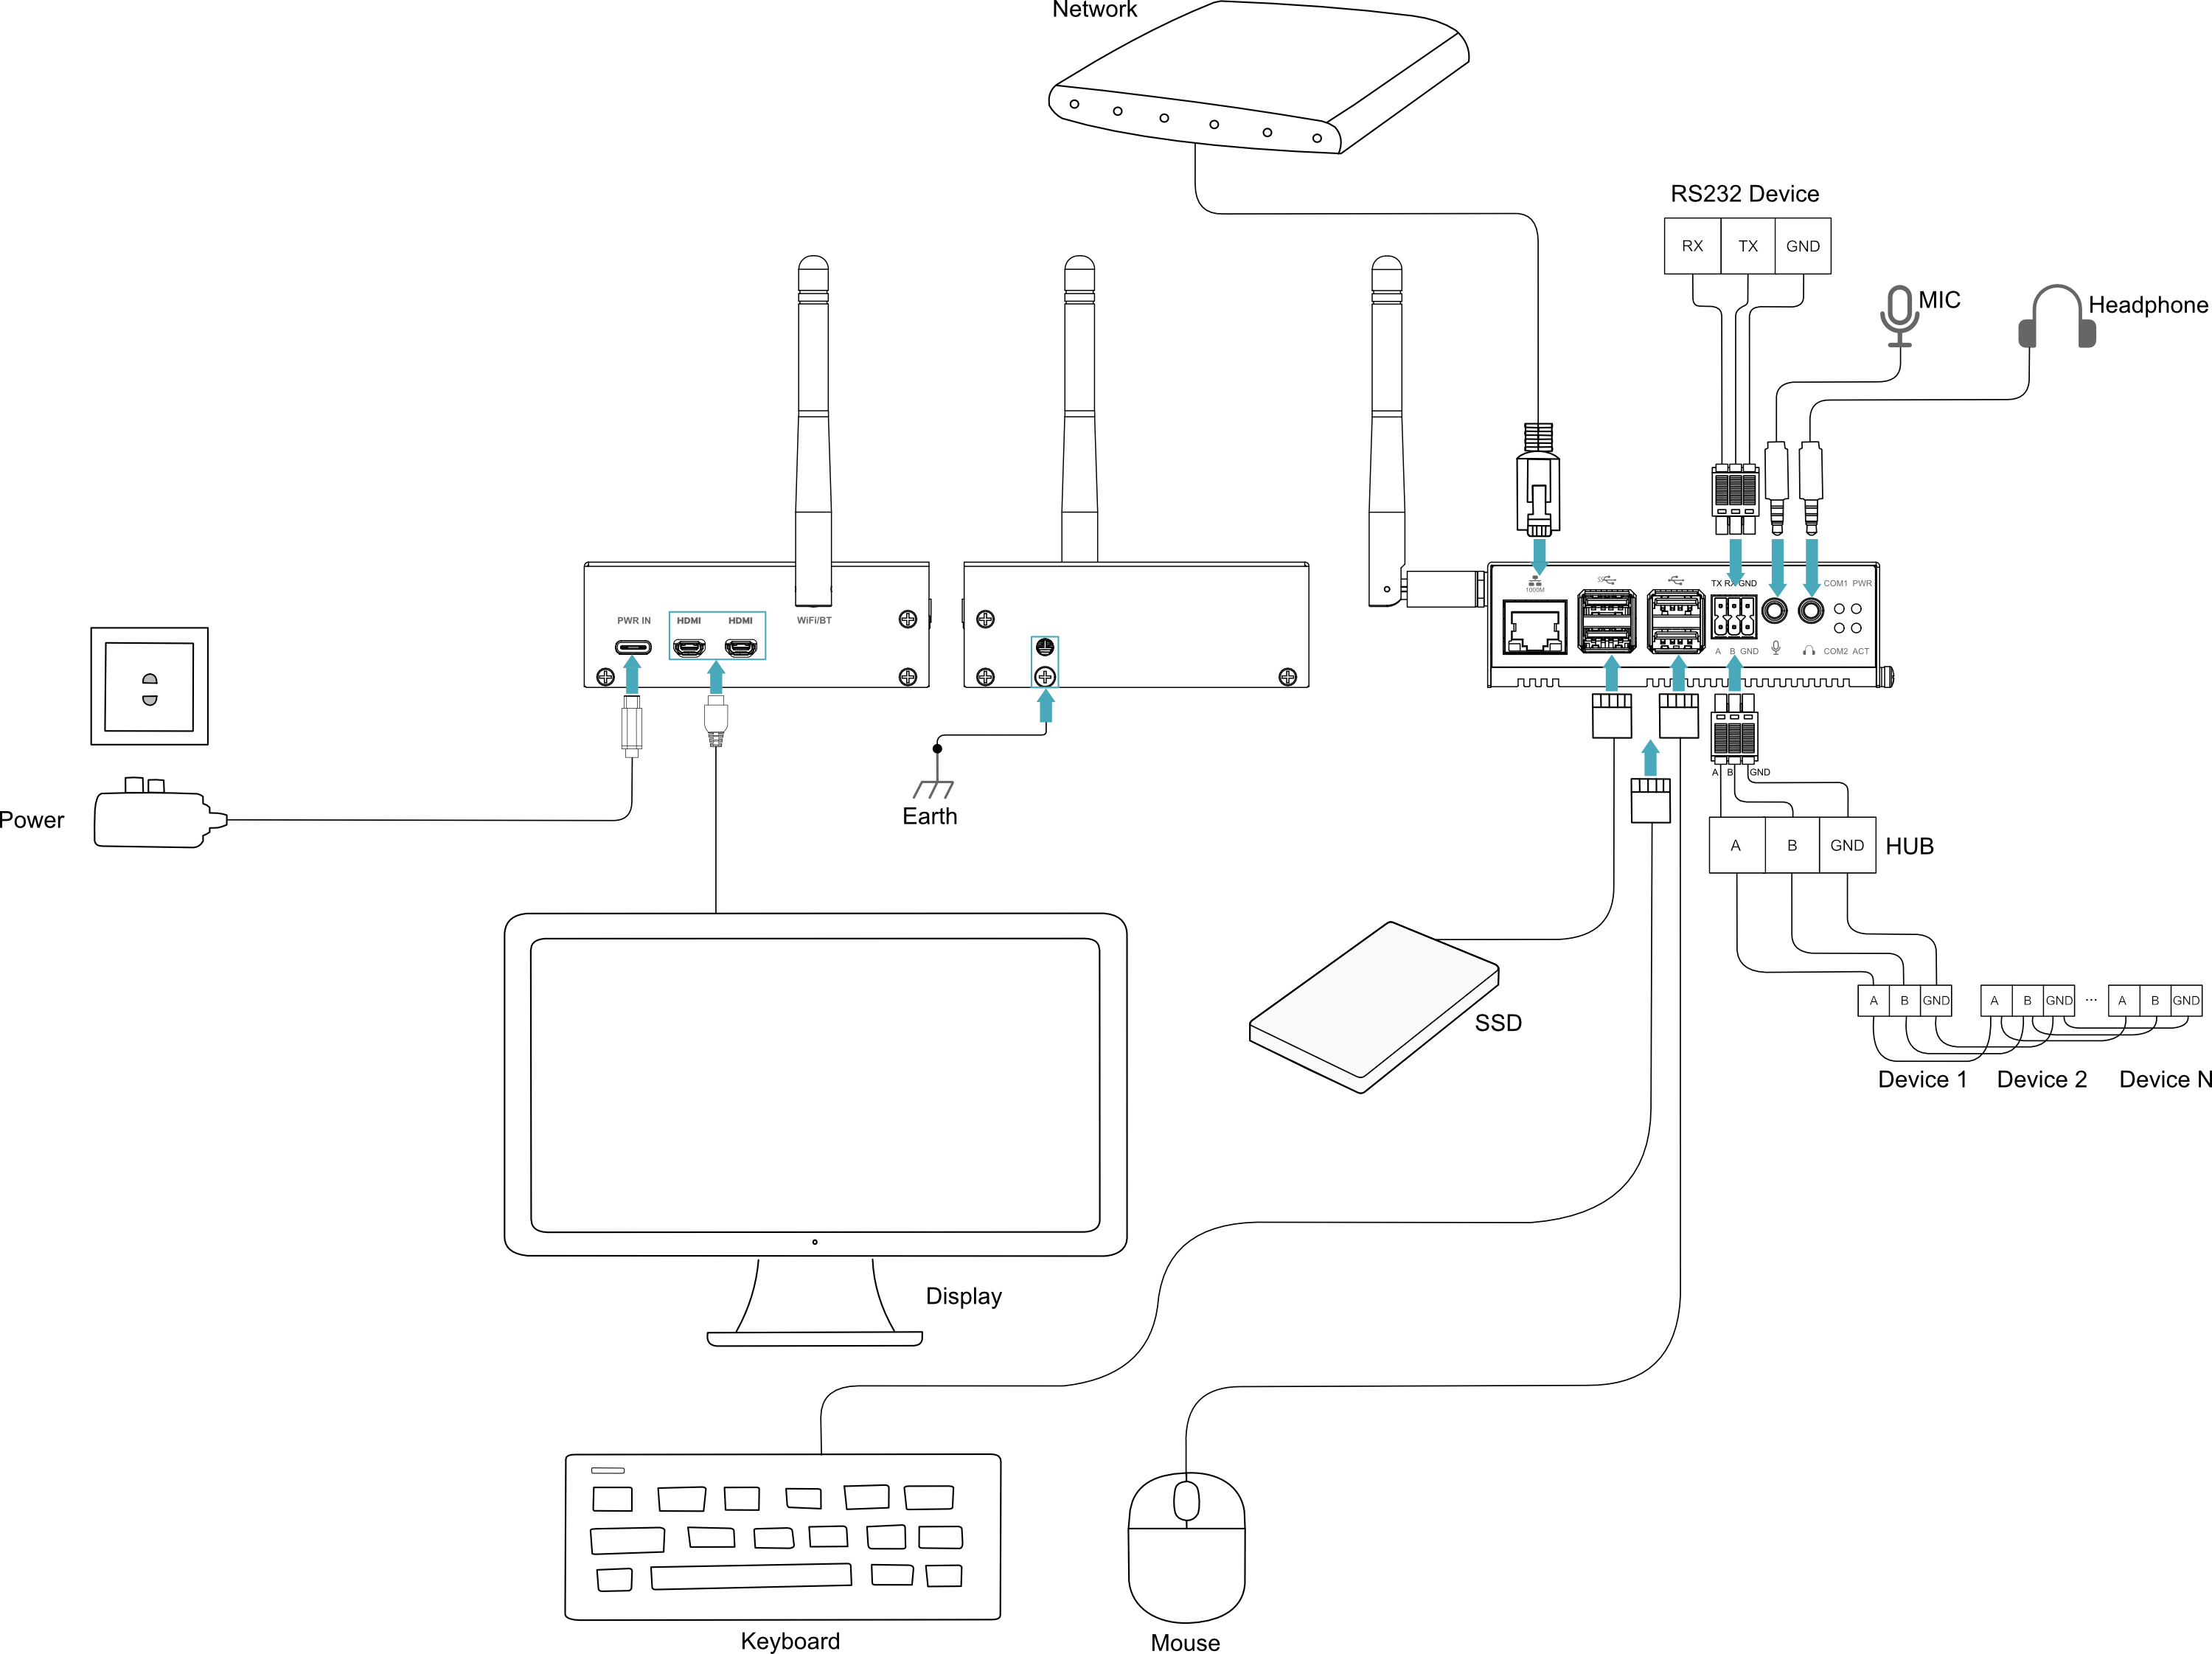
Schematic diagram of connecting cables:
For the pin definitions of each interface and the specific connection methods, please refer to 1.6 Interface.
TIP
Some Micro HDMI cables have shorter Micro HDMI connectors, which may cause HDMI connection issues. Therefore, it is recommended to use the official Raspberry Pi Micro HDMI to Standard HDMI cable.
3.2 Booting The System For The First Time
After the ED-IPC3020E is connected to power, the system will begin to start.
- The red PWR indicator turns on, indicating the device is powered normally.
- The green ACT indicator blinks, indicating the system is starting normally, and then the logo will appear on the screen.
TIP
Default username is pi, default password is raspberry.
3.2.1 Raspberry Pi OS (Desktop)
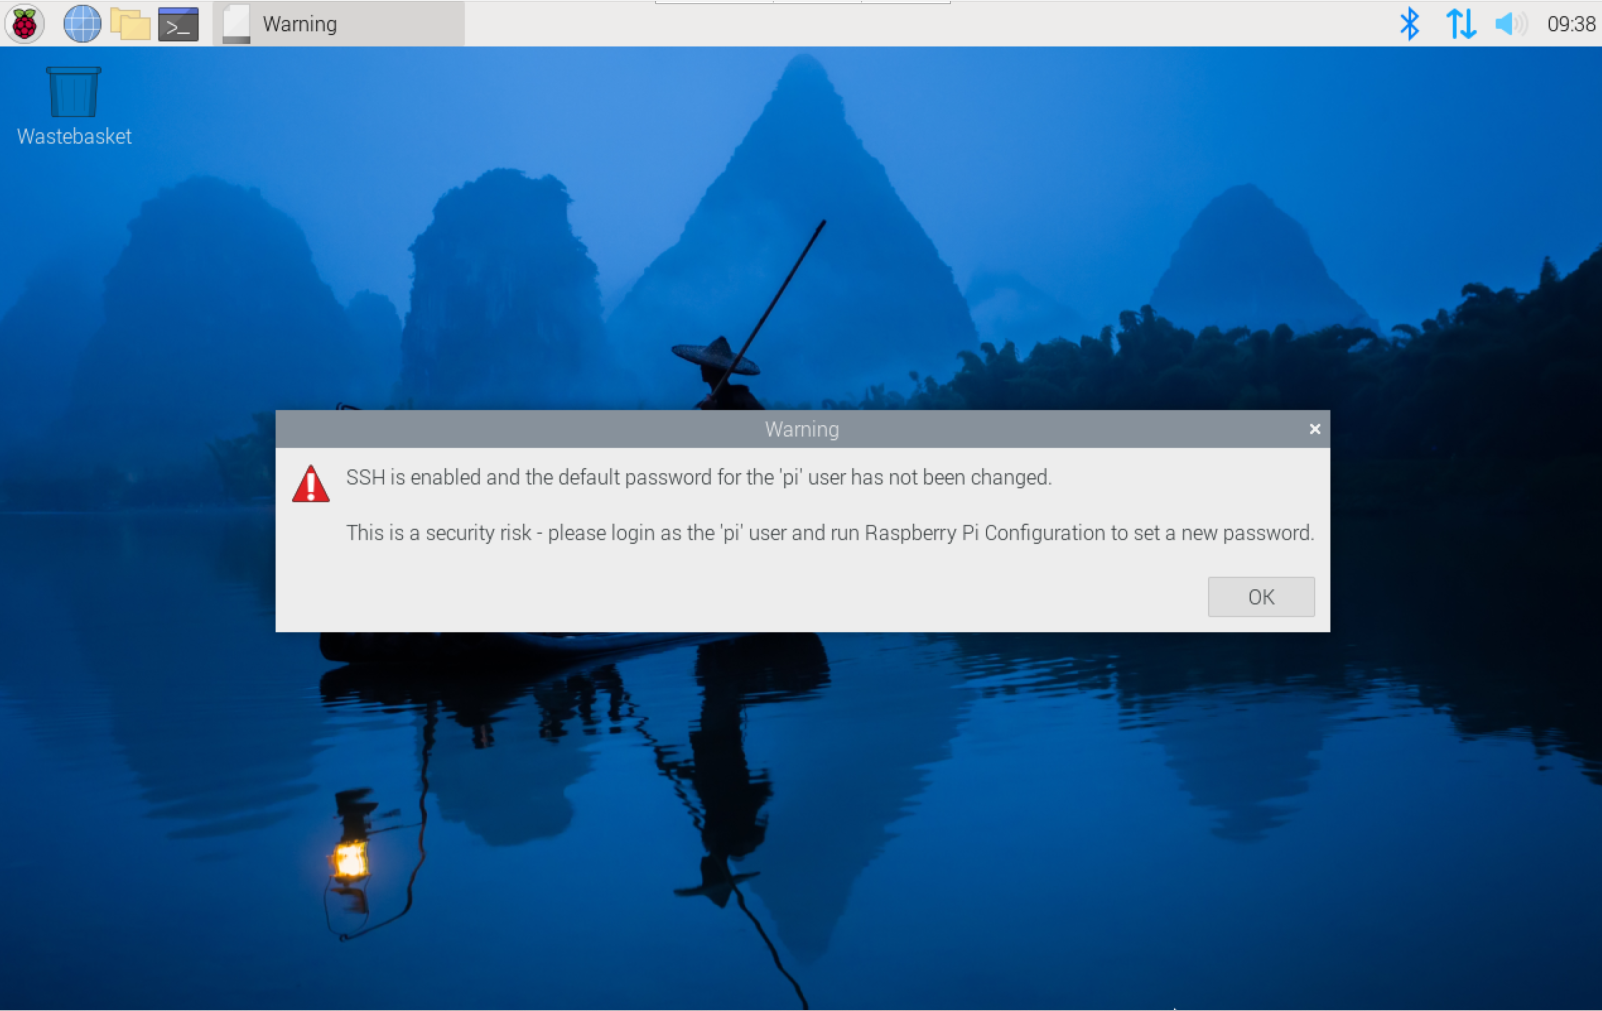
If the product is shipped with the Desktop version of the system installed, upon completion of the startup process, the device will enter the desktop directly, as shown in the figure below.
3.2.2 Raspberry Pi OS (Lite)
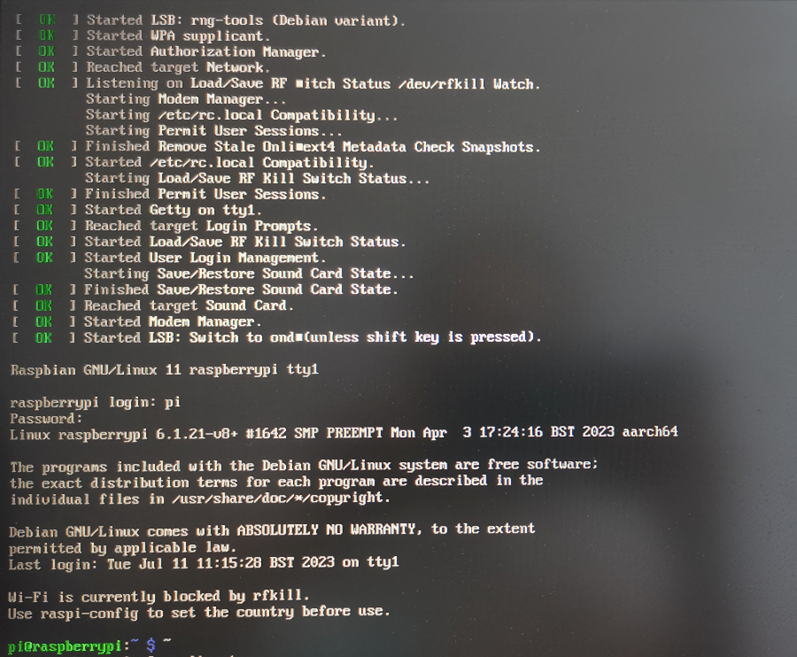
If the product is shipped with the Lite version of the system installed, upon completion of the startup process, the device will automatically log in using the default username pi, with the default password raspberry. The figure below indicates that the system has started normally.