3 Installing The Device
This chapter describes the procedures for installing the device.
3.1 DIN Rail Mounting
The ED-IPC2100 series device supports DIN rail mounting. The DIN rail bracket is pre-installed and provided as standard. The following steps describe how to mount the device on a DIN rail.
Steps:
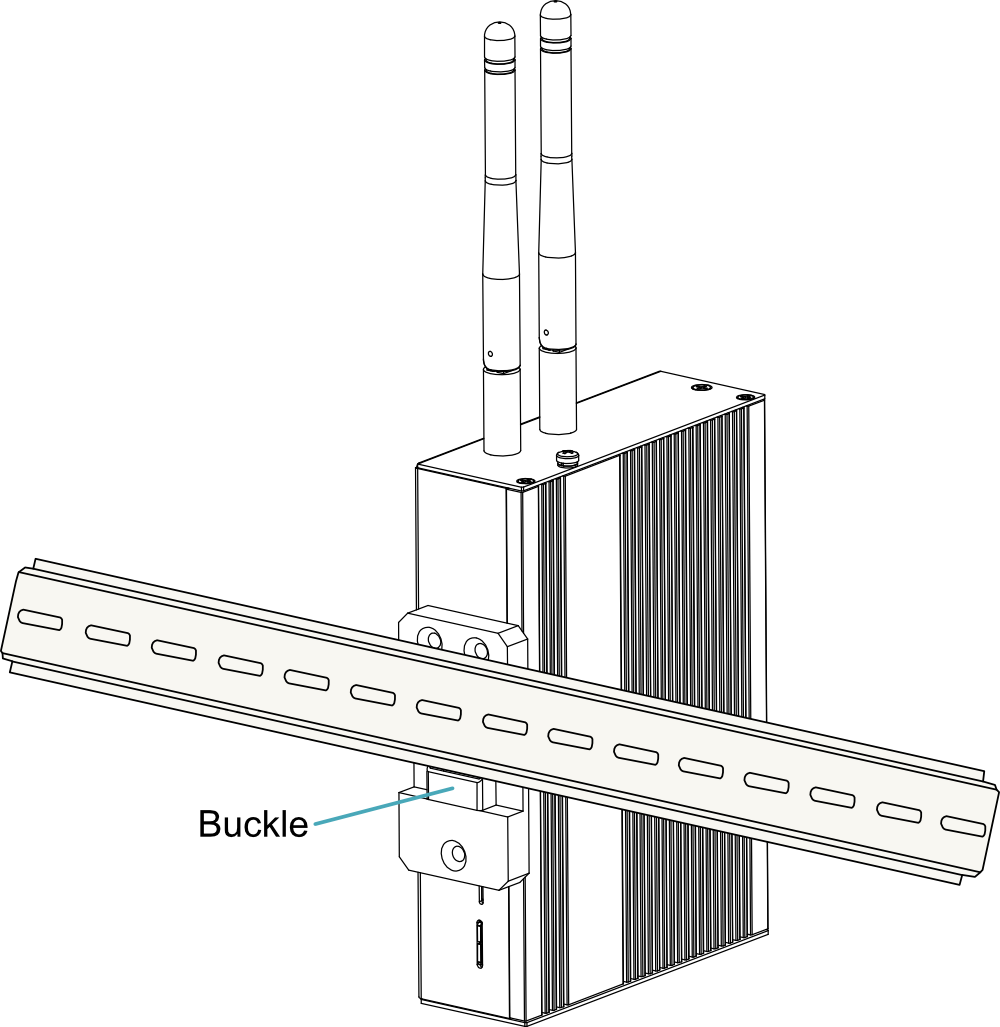
- Face the side of the device with the rail bracket toward the DIN rail, and hook the retractable buckle of the bracket onto the lower edge of the DIN rail from bottom to top.
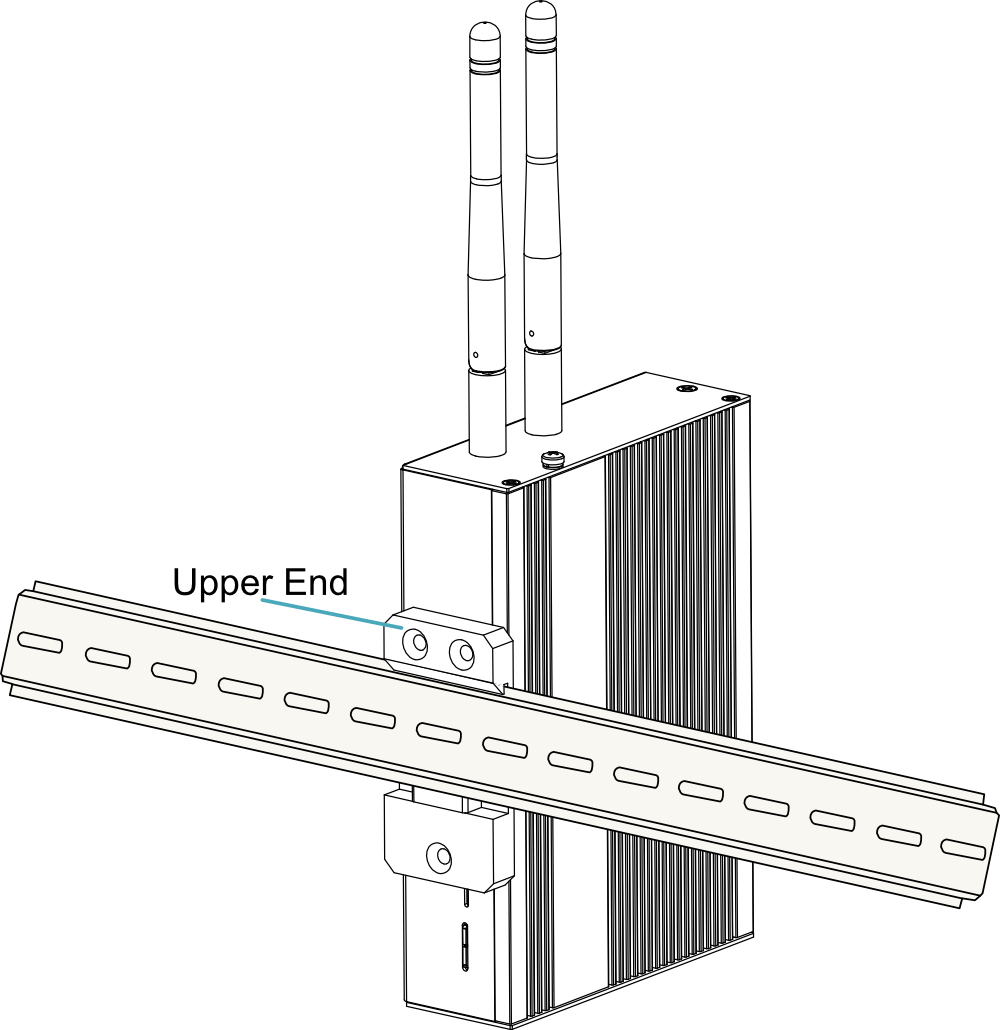
- Hold the device with your hand, press the buckle firmly upward, and ensure the top of the bracket fully snaps onto the upper edge of the DIN rail.
3.2 Wall Mounting
The ED-IPC2100 series device supports wall mounting. The wall‑mount bracket is not included as standard and can be purchased separately as needed.
Preparation:
The wall‑mount bracket ED-BKT-LB has been purchased.
Steps:
- Use a cross‑head screwdriver to remove the four M2.5 screws on the sides of the ED‑IPC2100 by turning them counter‑clockwise.

- Align the left and right brackets of ED‑BKT‑LB with the screw holes on the two sides of the ED‑IPC2100. Insert the four M2.5×6 screws and tighten them clockwise with a cross‑head screwdriver to secure ED‑BKT‑LB to the sides of the ED‑IPC2100.

TIP
The “four M2.5×6 screws” in this step refer to the screws provided with the ED‑BKT‑LB bracket.
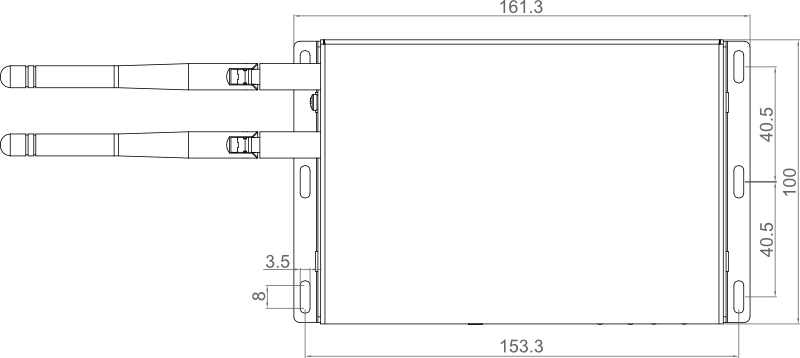
- According to the hole spacing and diameter of the wall‑mounting holes on the left and right brackets of ED‑BKT‑LB shown below, drill holes in the wall and then mount the device.
- Unit: mm
- Tolerance: 0.5-6±0.05, 6-30±0.1, 30-120±0.15