3 Installing Device
This chapter introduces how to install the device.
3.1 Embedded Installation
ED-HMI2020-101C device supports front embedded installation. The standard packaging includes the embedded installation Mounting kit (ED-ACCHMI-Front).
Preparation:
- The ED-ACCHMI-Front Mounting kit has been acquired (includes 4 × M4*10 screws, 4 × M4*16 screws, and 4 buckles).
- A cross screwdriver has been prepared.
Steps:
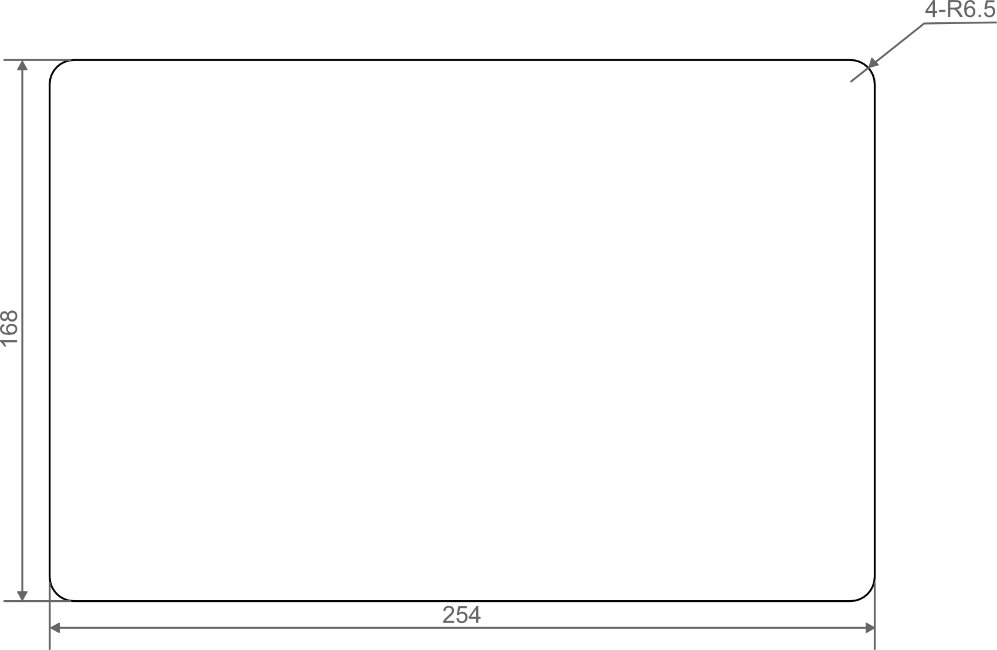
- Determine the cutout dimensions on the cabinet based on the ED-HMI2020-101C’s size, as shown in the figure below.
Unit: mm
Drill a hole on the cabinet according to the aperture size defined in Step 1.
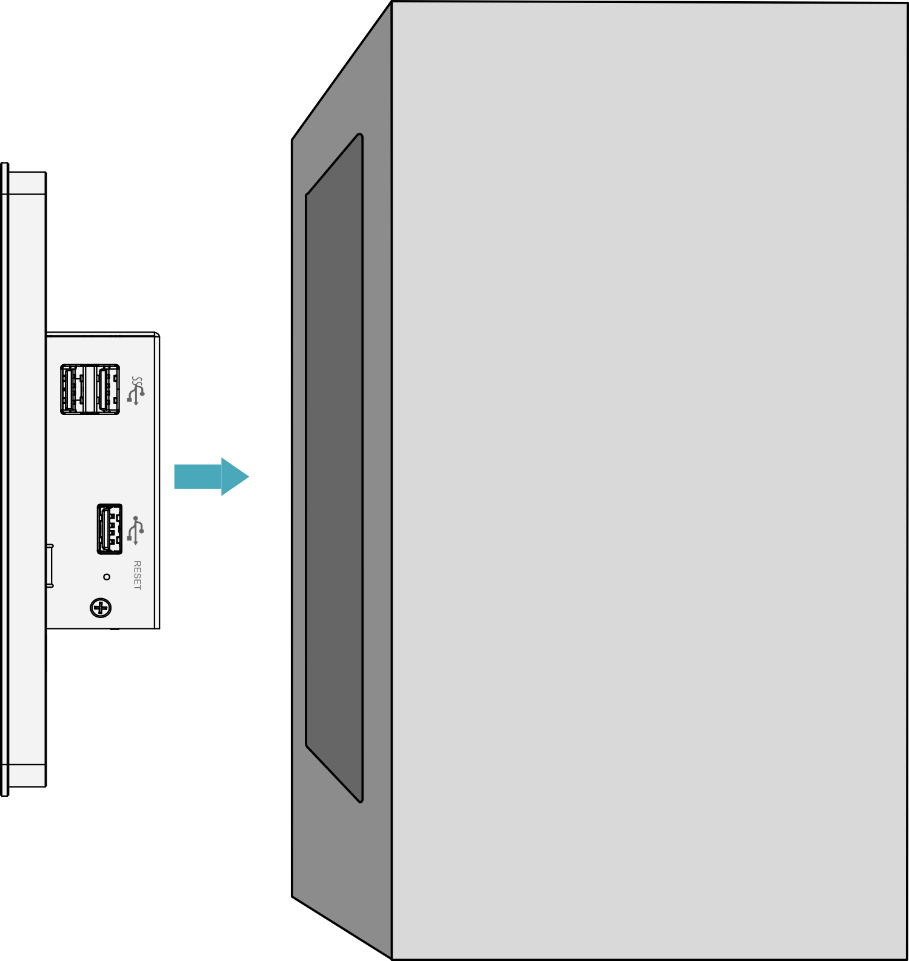
Embed the ED-HMI2020-101C into the cabinet from the exterior side.
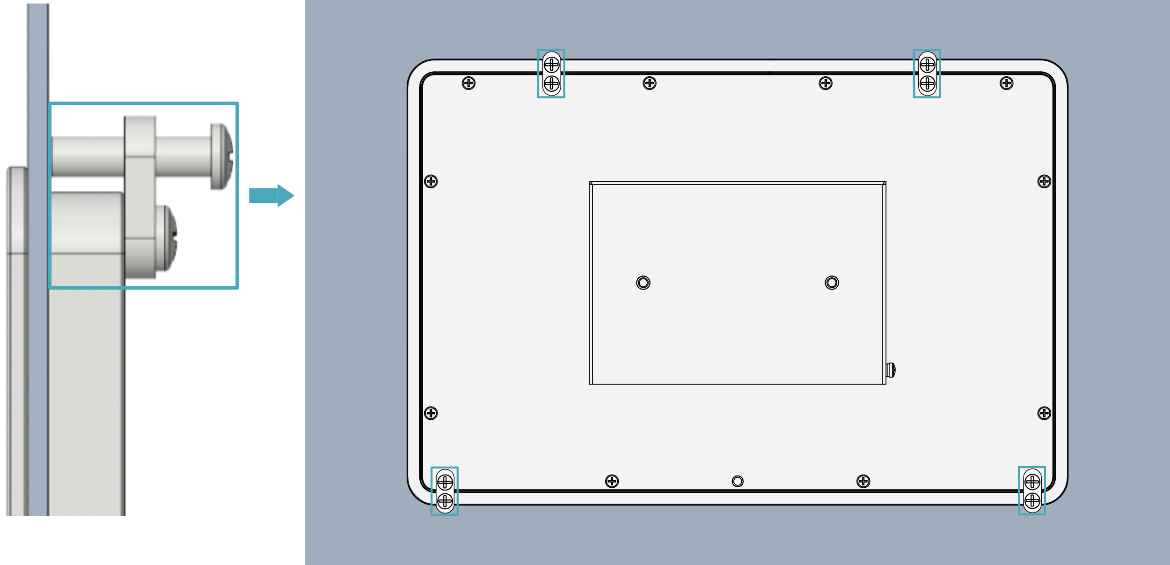
- Align the screw holes (non-threaded) of the buckles with the buckle mounting holes on the device side.
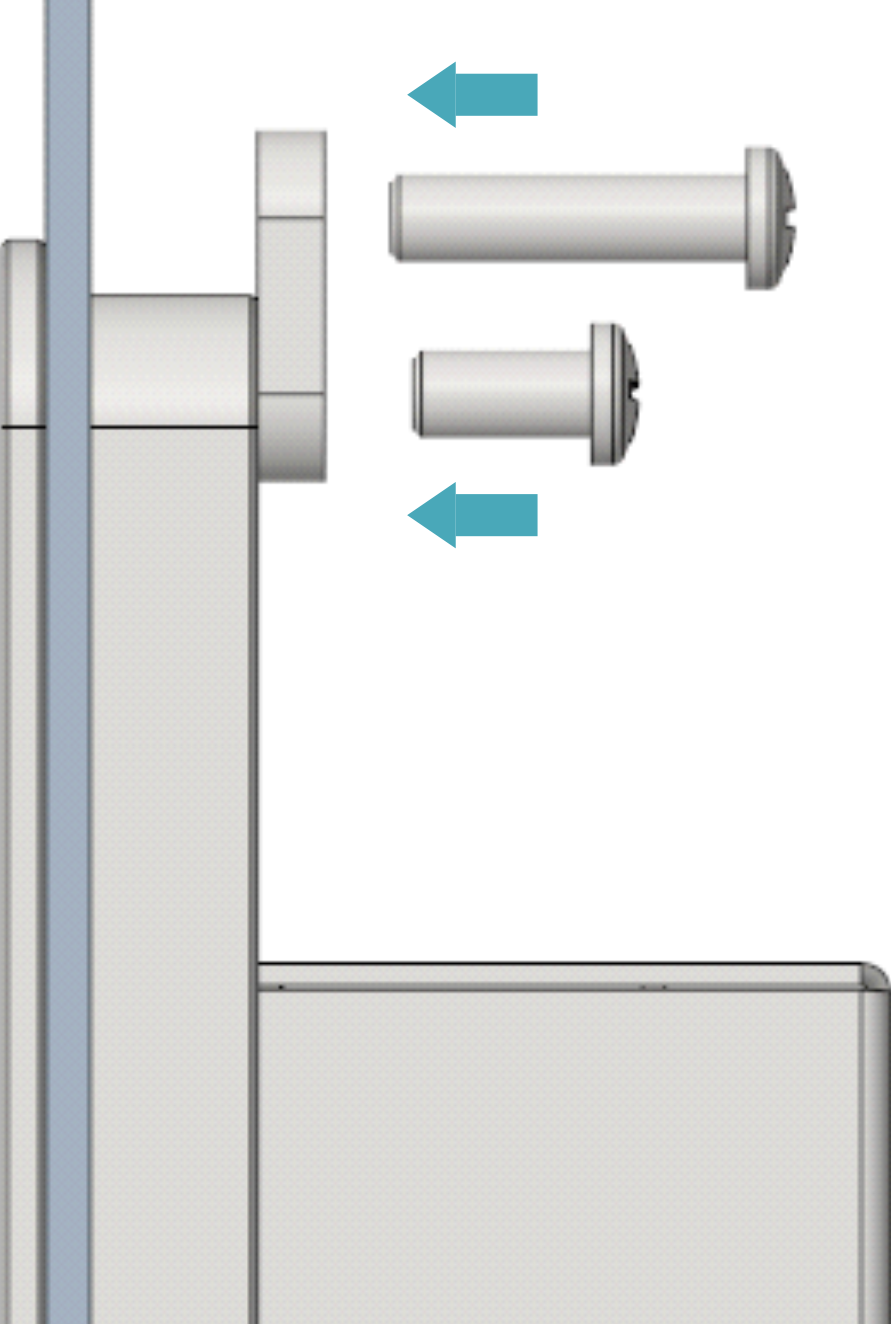
- Insert four M4*10 screws through the unthreaded holes of the buckle. Tighten clockwise with a screwdriver to secure the buckle to the device. Then, insert four M4*16 screws through the threaded holes of the buckle. Press them against the inner surface of the cabinet chassis and drive clockwise with a screwdriver until full thread engagement is achieved.