CM5-based IPC or HMI devices to be diskified in Linux - Operation Guide
1 Overview
For the time being, cm5 devices are not able to do disk talk on windows system through the rpiboot tool released by Raspberry Pi, thus not able to format and burn the system. This guide describes how to do cm5 disk talk in Linux system.
2 Application Guidelines
Using the ED-IPC3100 as an example, the CM5 emmc of the ED-IPC3100 was disked using a Raspberry Pi 4 with Linux to enable it to format and re-burn the system.
Preparation:
- Acquired Raspberry Pi 4 with Linux and network connectivity
- A Micro USB to USB-A cable has been prepared.
Steps:
- Use a cross screwdriver to loosen three screws on the DIN-rail bracket counterclockwise (red box position in the figure below) and remove the default DIN-Rail bracket.

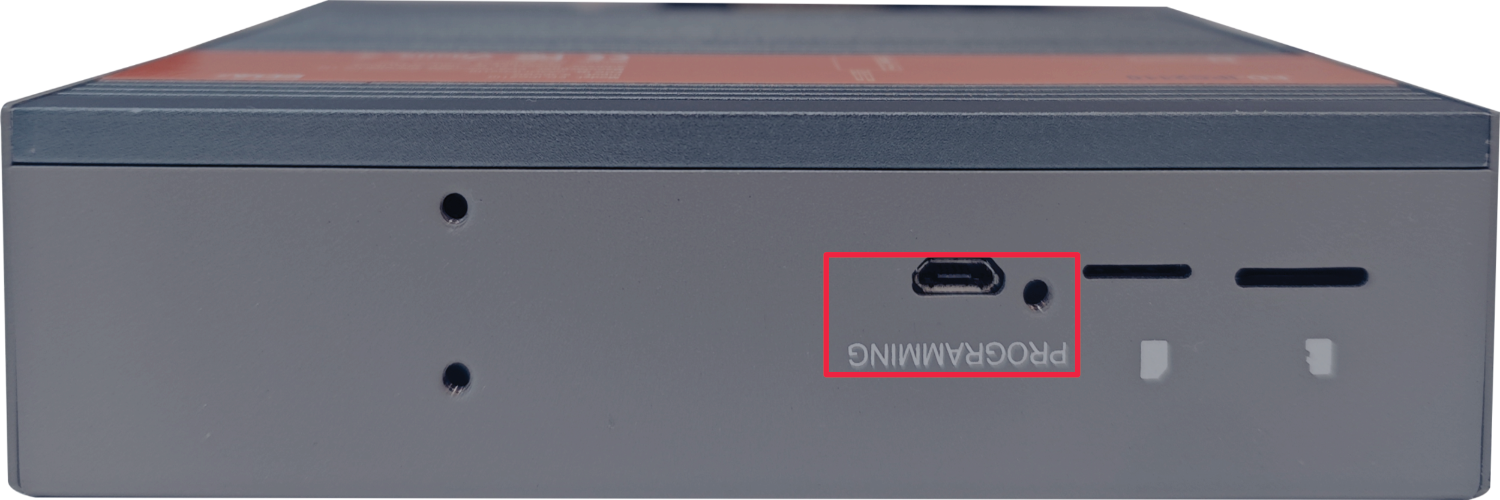
- Determine the location of the Micro USB port on the side of the device, as shown in the red box below.

- Connect the power cord and USB flashing cable (Micro-USB to USB-A).
Connecting to USB flashing cable: One end is connected to the Micro USB port on the device, and the other end is connected to the USB port on the Raspberry Pi 4.
Connecting to power cord: One end is connected to the DC 2Pin Phoenix terminalon the device, and the other end is connected to the external power supply.
TIPS
The way of connecting the burn-in cable and power cable of other products may be different from ED-IPC3100, if you use other products, you can refer to the last chapter of the User's Manual to install the operating system.
- Power up the Raspberry Pi 4, boot the system, and clone the USBBOOT from github by connecting via ssh or by connecting to the display and executing the following commands sequentially in the terminal.
sudo apt update
git clone --recurse-submodules --shallow-submodules --depth=1 https://github.com/raspberrypi/usbboot
- Execute the following commands to install the build tool build and dependencies.
sudo apt install git libusb-1.0-0-dev pkg-config build-essential -y
- Execute the following commands in sequence to compile under usbboot.
cd usbboot/
make

- Execute the following command to the mass-storage-gadget64 directory.
cd mass-storage-gadget64
- Disconnect the ED-IPC3100 power supply and re-power it up.
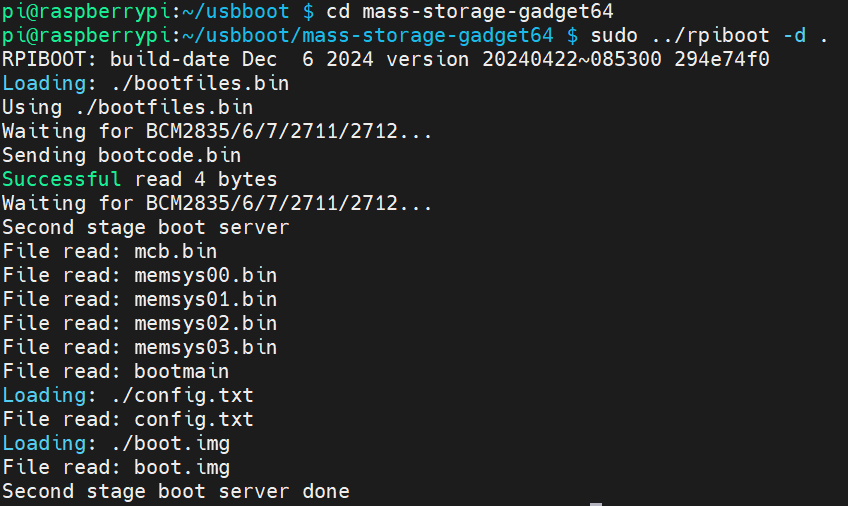
- Execute the following command in the mass-storage-gadget64 directory to start the disk talk.
sudo ../rpiboot -d .

- After the successful disk drive talk may not need to power off, pull out the USB port inserted into the Raspberry Pi 4, can be directly inserted into the USB port of windows, formatting and burning system.
