5 Configuring System
This chapter introduces how to configure system.
WARNING
The ED-PAC3630 device comes pre-installed with a valid CODESYS license by default. Reinstalling the operating system will invalidate the CODESYS license. Do not attempt to install the OS on your own.
5.1 Finding Device IP
5.2 Remote Login
5.3 Configuring Storage Devices
5.4 Configuring Ethernet IP
5.5 Configuring Buzzer
5.6 Configuring RTC
5.7 Configuring USER Indicator
5.8 Configuring Serial Port
This chapter introduces the configuration method of RS232 and RS485.
5.8.1 Installing Picocom Tool
In the Linux environment, you can use the picocom tool to debug the serial ports RS232 and RS485.
Execute the following command to install the picocom tool.
sudo apt-get install picocom
5.8.2 Configuring RS232
ED-PAC3630 includes 2 RS232 ports with corresponding COM ports and device files, as shown in the table below:
| Number of RS232 Ports | Corresponding COM Port | Corresponding Device File |
|---|---|---|
| 2 | COM1, COM3 | /dev/com1, /dev/com3 |
Preparation:
The RS232 ports of ED-PAC3630 has been connected with external device.
Steps:
- Execute the following command to open the serial port com1, and configure the serial port baud rate to 115200.
picocom -b 115200 /dev/com1
- Input commands as needed to control external device.
5.8.3 Configuring RS485
ED-PAC3630 includes 2 RS485 ports with their corresponding COM ports and device files, as shown in the table below:
| Number of RS485 Ports | Corresponding COM Port | Corresponding Device File |
|---|---|---|
| 2 | COM2, COM4 | /dev/com2, /dev/com4 |
Preparation:
The RS485 ports of ED-PAC3630 has been connected with external device.
Steps:
- Execute the following command to open the serial port com4, and configure the serial port baud rate to 115200.
picocom -b 115200 /dev/com4
- Input commands as needed to control external device.
5.9 Configuring DI
ED-PAC3630 includes 8 DI ports, which can be configured according to the actual requirement.
Preparation:
The connection of the DI port of the ED-PAC3630 to the external sensor has been completed.
Steps:
- Execute the following commands in sequence to detect and install the gpiod tool.
sudo apt update
sudo apt install gpiod
- Execute the following command to read the data from the corresponding DI port.
gpiofind DI0 | awk '{print substr($0,9)}' | xargs -i bash -c "gpioget {}"
DI0indicates the corresponding port number.
5.10 Configuring DO
ED-PAC3630 includes 8 DO ports, which can be configured according to the actual requirement.
Preparation:
The connection of the DO port of the ED-PAC3630 to the external load has been completed.
Steps:
- Execute the following commands in sequence to detect and install the gpiod tool.
sudo apt update
sudo apt install gpiod
- Execute the following commands to set the output to high or low.
- Setting the output to a high level.
gpiofind DO0 | awk '{print substr($0,9)}' | xargs -i bash -c "gpioset {}=1"
DO0 indicates the corresponding port number, 1 indicates that the pin is high level.
- Setting the output to a low level.
gpiofind DO0 | awk '{print substr($0,9)}' | xargs -i bash -c "gpioset {}=0"
DO0 indicates the corresponding port number, 0 indicates that the pin is low level.
5.11 Configuring CAN
5.11.1 Installing can-utils Tool
Execute the following commands in sequence to detect and install the can-utils tool.
sudo apt update
sudo apt install can-utils
5.11.2 Setting CAN State
Preparation:
The connection of the CAN port of the ED-PAC3630 to external devices has been completed.
Steps:
- Execute the following command to set the baud rate of the CAN port to 1000000.
sudo ip link set canb0 type can bitrate 1000000
canb0 is the port number and the values include canb0 and canb1.
- Execute the following command to open the CAN port.
sudo ip link set canb0 up
canb0 is the port number and the values include canb0 and canb1.
- Execute the following command to set up the CAN port for communication.
- Receive data:
candump canb0
- Send data:
cansend canb0 123#1122334455667788
canb0 is the port number and the values include canb0 and canb1.
123#1122334455667788 is the message to be sent, which can be customised by the user according to the format.
5.12 CODESYS License Management
The ED-PAC3630 device comes pre-installed with a CODESYS license by default. You can back up and restore the license by accessing the "PLC Setting" interface.
5.12.1 License Backup
Preparation:
- A Windows PC has been set up with an IP address in the same subnet as the device. For example, if the device’s IP (1000M Ethernet port) is
192.168.0.100, set the PC’s IP to192.168.0.99. - A functioning Ethernet cable has been prepared.
Steps:
Connect the device's 1000M Ethernet port to the PC via an Ethernet cable, then power on the device.
Enter
http://192.168.0.100:8100in the PC’s web browser to access the "PLC Setting" interface.In the "Codesys License Management" interface, click "Backup License" to download the license file and save it locally.
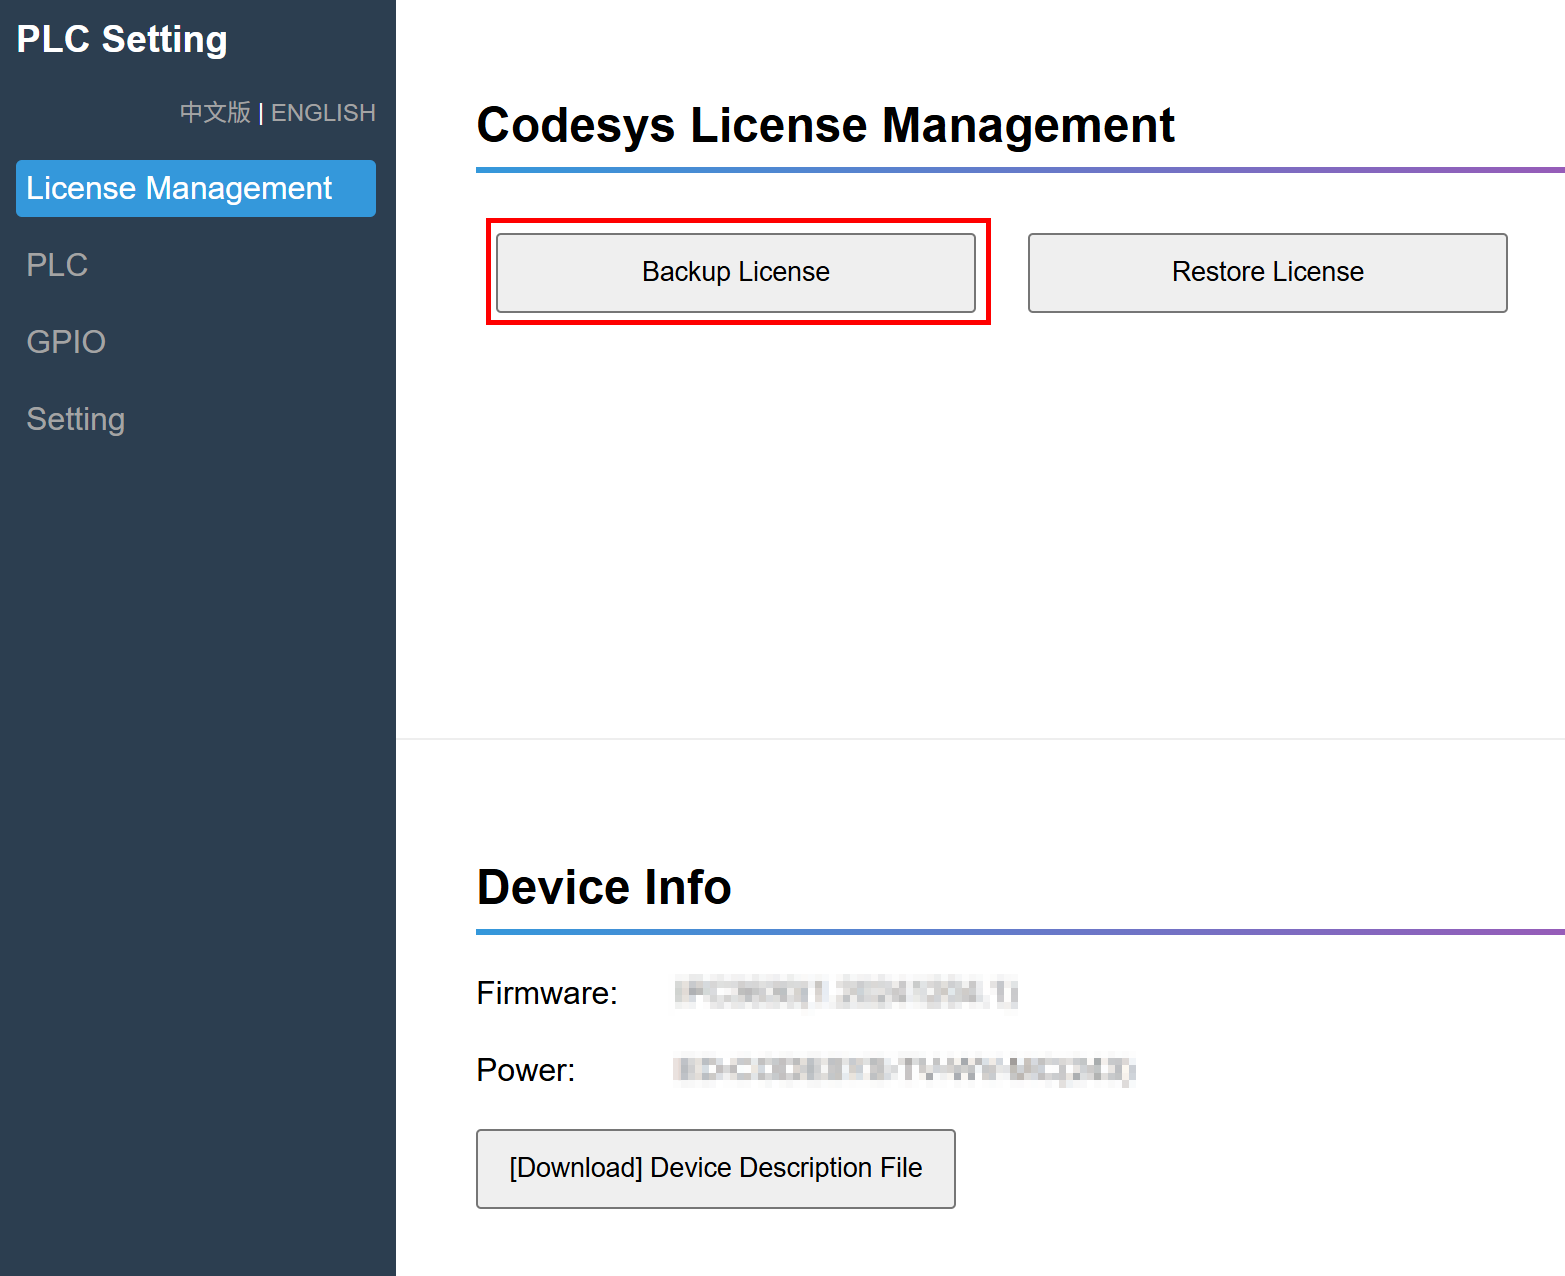
TIP
The backed-up license file can only be restored on the same device.
5.12.2 License Restore
Preparation:
- A Windows PC has been set up with an IP address in the same subnet as the device. For example, if the device’s IP (1000M Ethernet port) is
192.168.0.100, set the PC’s IP to192.168.0.99. - A functioning Ethernet cable has been prepared.
- The backed-up license file has been obtained.
Steps:
Connect the device's 1000M Ethernet port to the PC via an Ethernet cable, then power on the device.
Enter
http://192.168.0.100:8100in the PC’s web browser to access the "PLC Setting" interface.In the "Codesys License Management" interface, click "Restore License".
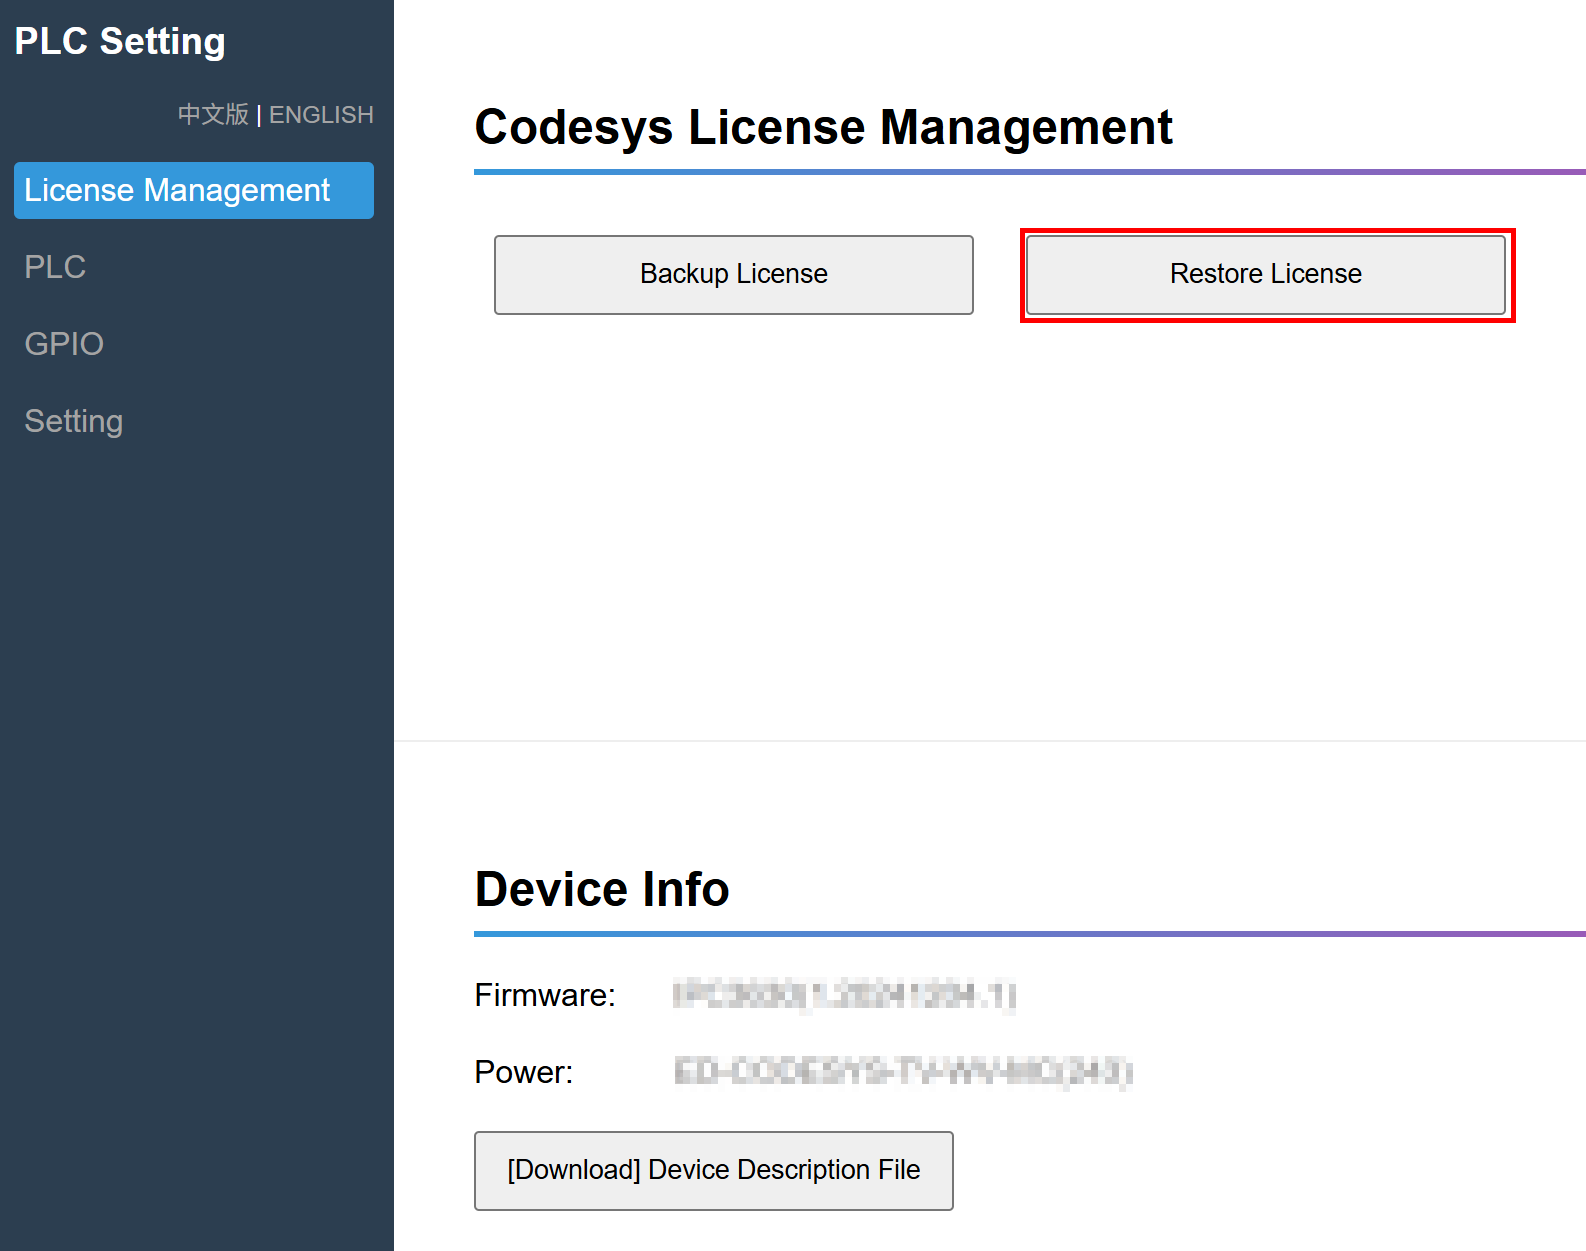
As prompted, select the obtained license file under a custom path.
After a successful License Restore, a 100% progress bar will be displayed in the right-hand panel.
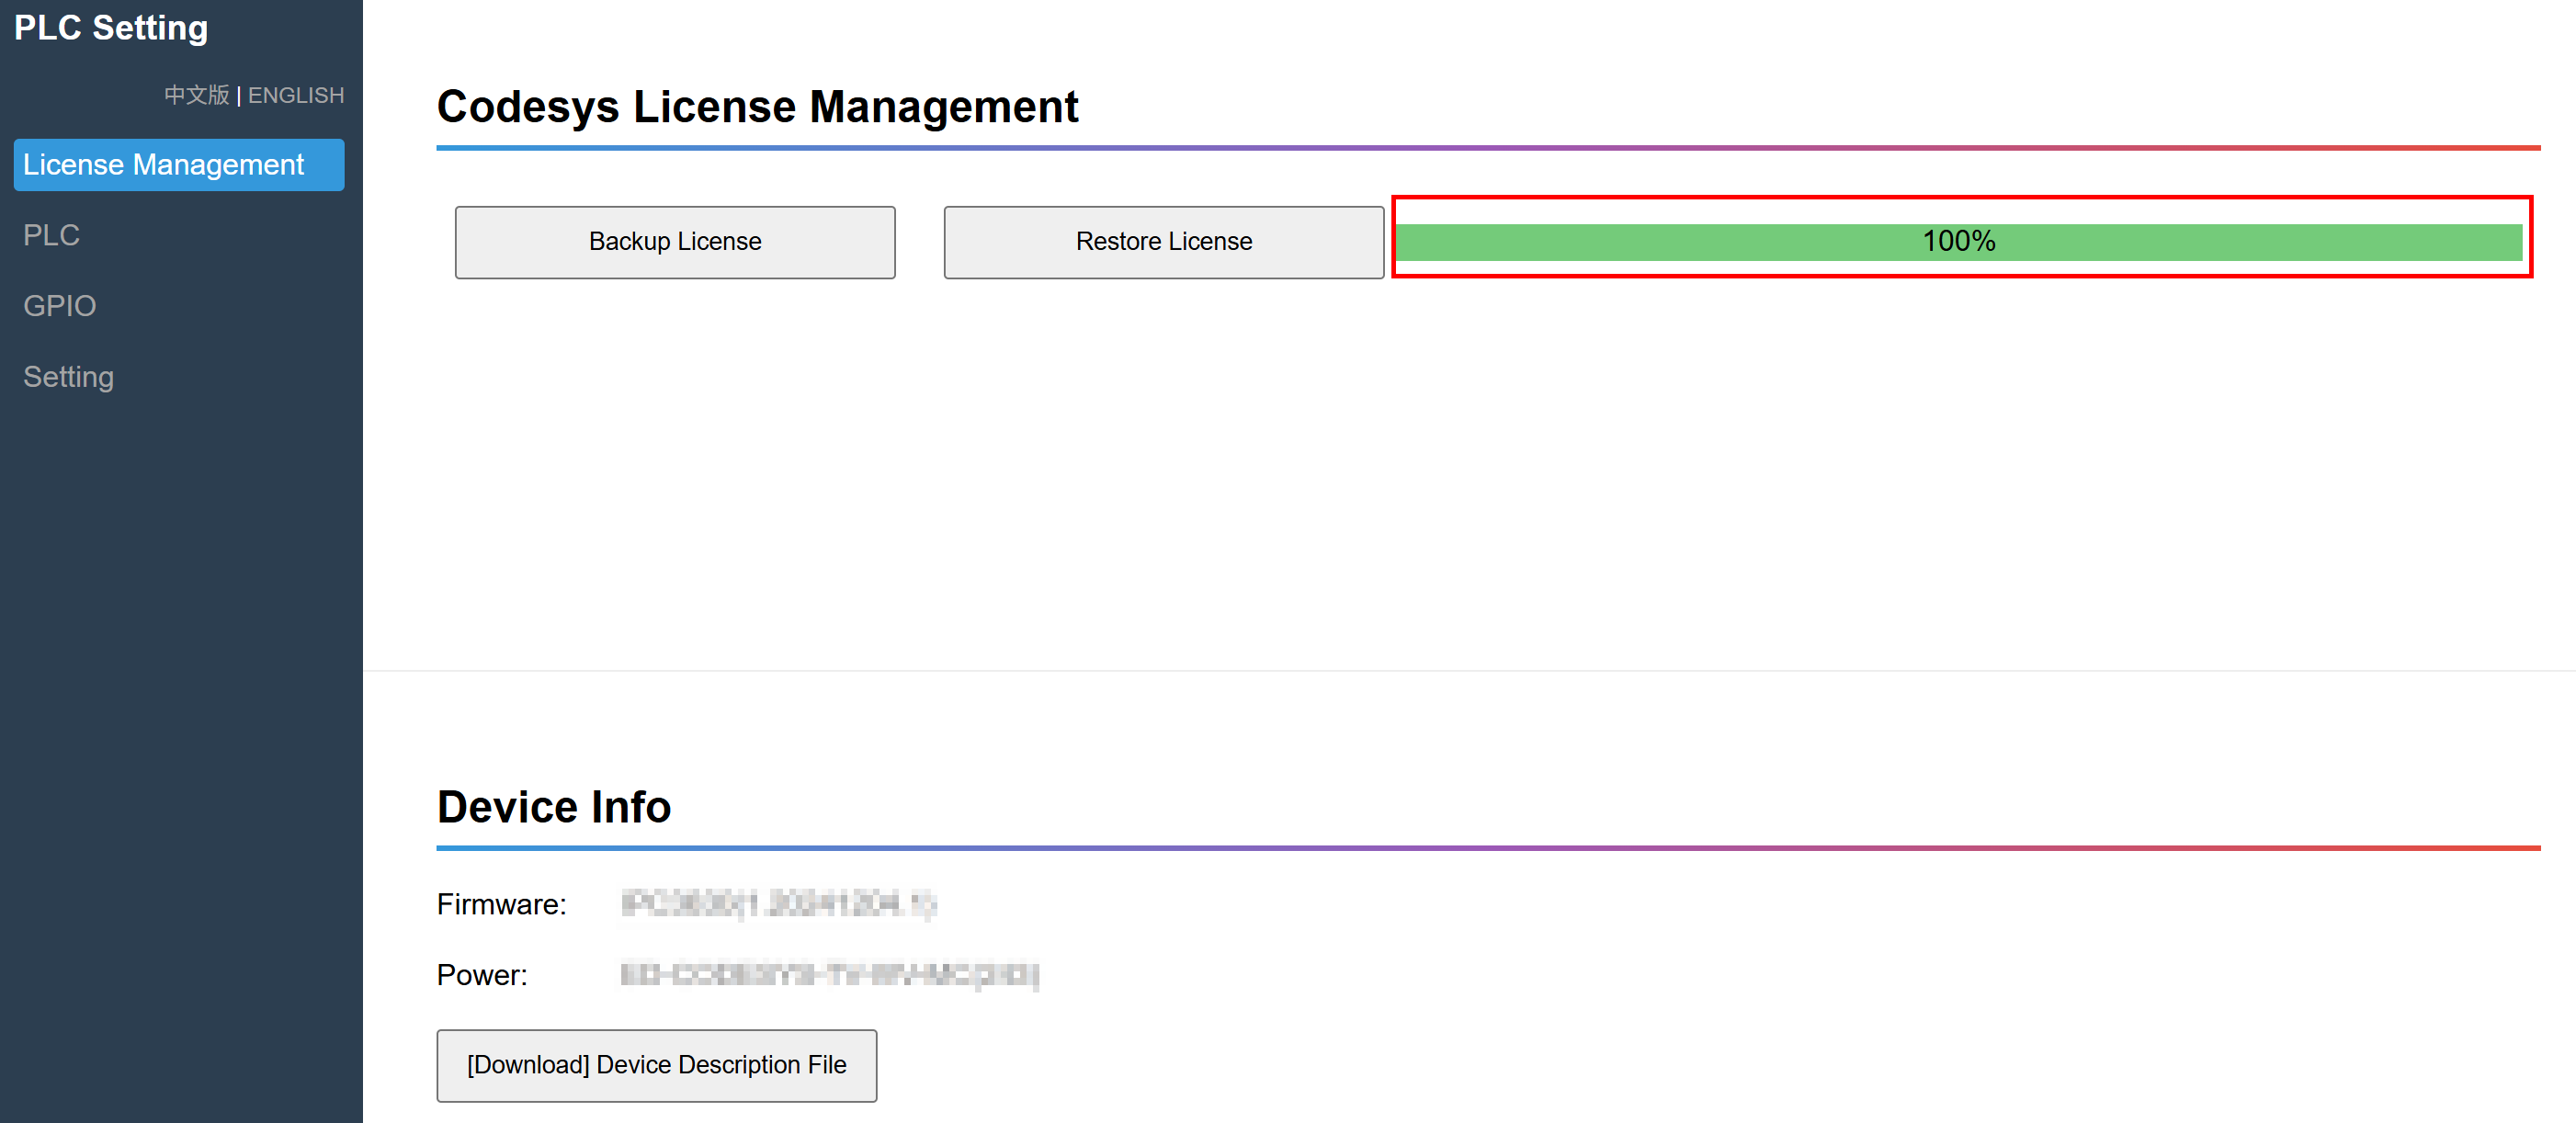
- Open the device’s terminal command pane, execute the following command, and restart the device.
sudo reboot