6 Installing OS (optional)
The device is shipped with an operating system by default. If the OS is corrupted during use or the user needs to replace the OS, it is necessary to re-download the appropriate system image and install it. Our company supports to install the OS by installing the standard Raspberry Pi OS first, and then install the Firmware package.
The following sections detail the specific steps for downloading the image, flashing the image, and installing the Firmware package.
6.1 Downloading OS File
You can download the corresponding official Raspberry Pi OS file according to your actual needs, the download path is listed below:
| OS | Download Path |
|---|---|
| Raspberry Pi OS(Desktop) 64-bit-trixie (Debian 13) | https://downloads.raspberrypi.com/raspios_arm64/images/raspios_arm64-2025-10-02/2025-10-01-raspios-trixie-arm64.img.xz |
| Raspberry Pi OS(Lite) 64-bit-trixie (Debian 13) | https://downloads.raspberrypi.com/raspios_lite_arm64/images/raspios_lite_arm64-2025-10-02/2025-10-01-raspios-trixie-arm64-lite.img.xz |
| Raspberry Pi OS(Desktop) 32-bit-trixie (Debian 13) | https://downloads.raspberrypi.com/raspios_armhf/images/raspios_armhf-2025-10-02/2025-10-01-raspios-trixie-armhf.img.xz |
| Raspberry Pi OS(Lite) 32-bit-trixie (Debian 13) | https://downloads.raspberrypi.com/raspios_lite_armhf/images/raspios_lite_armhf-2025-10-02/2025-10-01-raspios-trixie-armhf-lite.img.xz |
TIP
It is recommended to use the Lite version of the image. For the latest version, please refer to the Raspberry Pi official website: Raspberry Pi OS.
6.2 Flashing to eMMC
It is recommended to use the Raspberry Pi official tools. The download paths are as follows:
- Raspberry Pi Imager: https://downloads.raspberrypi.org/imager/imager_latest.exe
- SD Card Formatter: https://www.sdcardformatter.com/download/
- Rpiboot: https://github.com/raspberrypi/usbboot/raw/master/win32/rpiboot_setup.exe
Preparation:
- The flashing tool has been downloaded and installed on the computer.
- A USB-A to USB Type-C cable (USB flashing cable) has been prepared.
- The OS file to be flashed has been obtained.
Steps:
The steps are described using Windows system as an example.
- Use a Phillips screwdriver to turn the three screws on the DIN rail bracket counterclockwise and remove the default DIN rail bracket.

- Find the location of Type-C USB interface, as indicated in the figure below.

- Connect the power cable and the USB flashing cable (Type-C USB to USB-A) properly.
Connect the USB flashing cable: one end to the Type-C USB interface on the device side, and the other end to the USB interface on the PC.
Connect the power cable: one end to the DC Jack terminal on the device side, and the other end to an external power supply.
Disconnect the power supply from the ED-IPC1100.
Launch the installed
rpiboottool to automatically assign a drive letter.
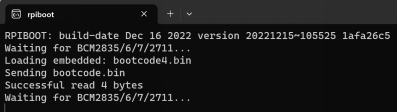
After the drive letter assignment is complete, a new drive letter notification will appear in the system tray (bottom-right corner of the computer).
Open
SD Card Formatter, select the drive letter to be formatted, and click "Format" at the bottom right to begin formatting.
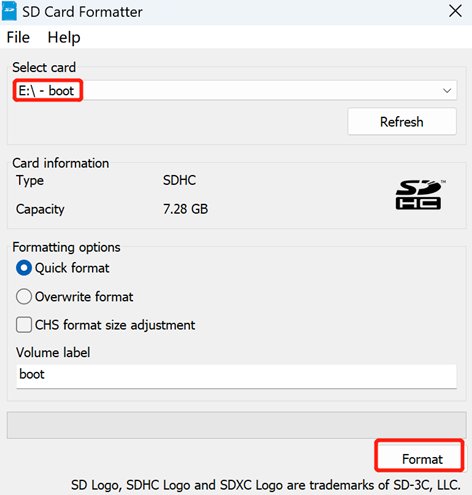
In the pop-up dialog box, click "Yes".
When the formatting is completed, click "OK" in the prompt box.
Close
SD Card Formatter.Open
Raspberry Pi Imager, select "CHOOSE OS" and select "Use Custom" in the pop-up pane.
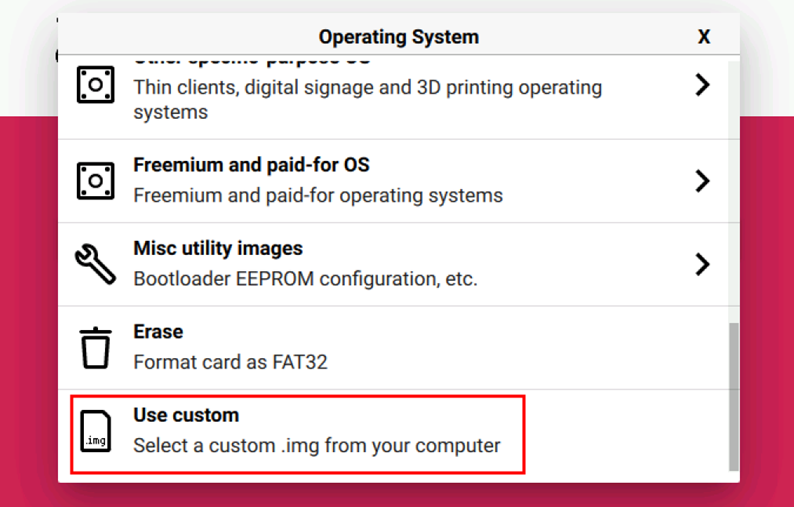
According to the prompt, select the OS file under the user-defined path and return to the main page.
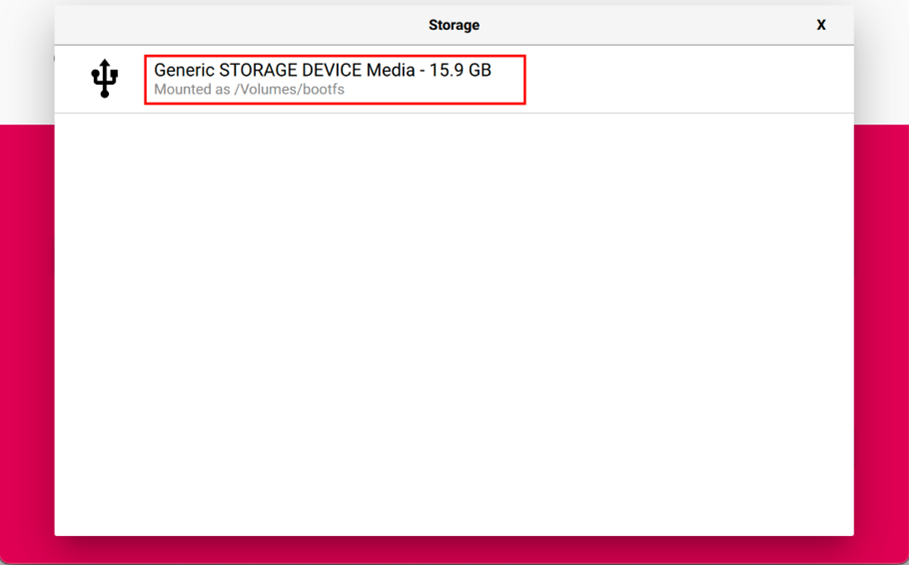
Click "CHOOSE STORAGE", select the default device in the "Storage" interface, and return to the main page.
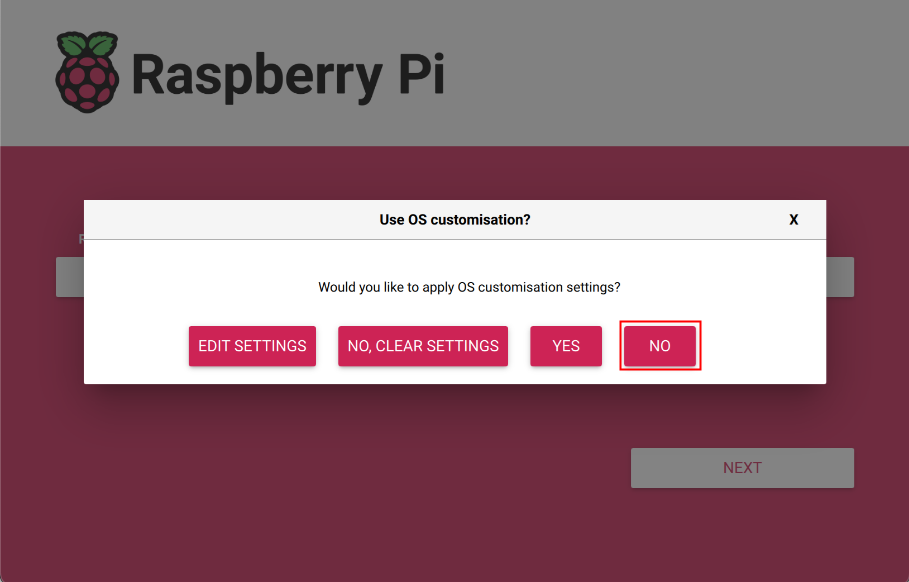
- Click “NEXT”, select "NO " in the pop-up “Use OS customization?” pane.
- Select “YES” in the pop-up “Warning” pane to start writing the image.
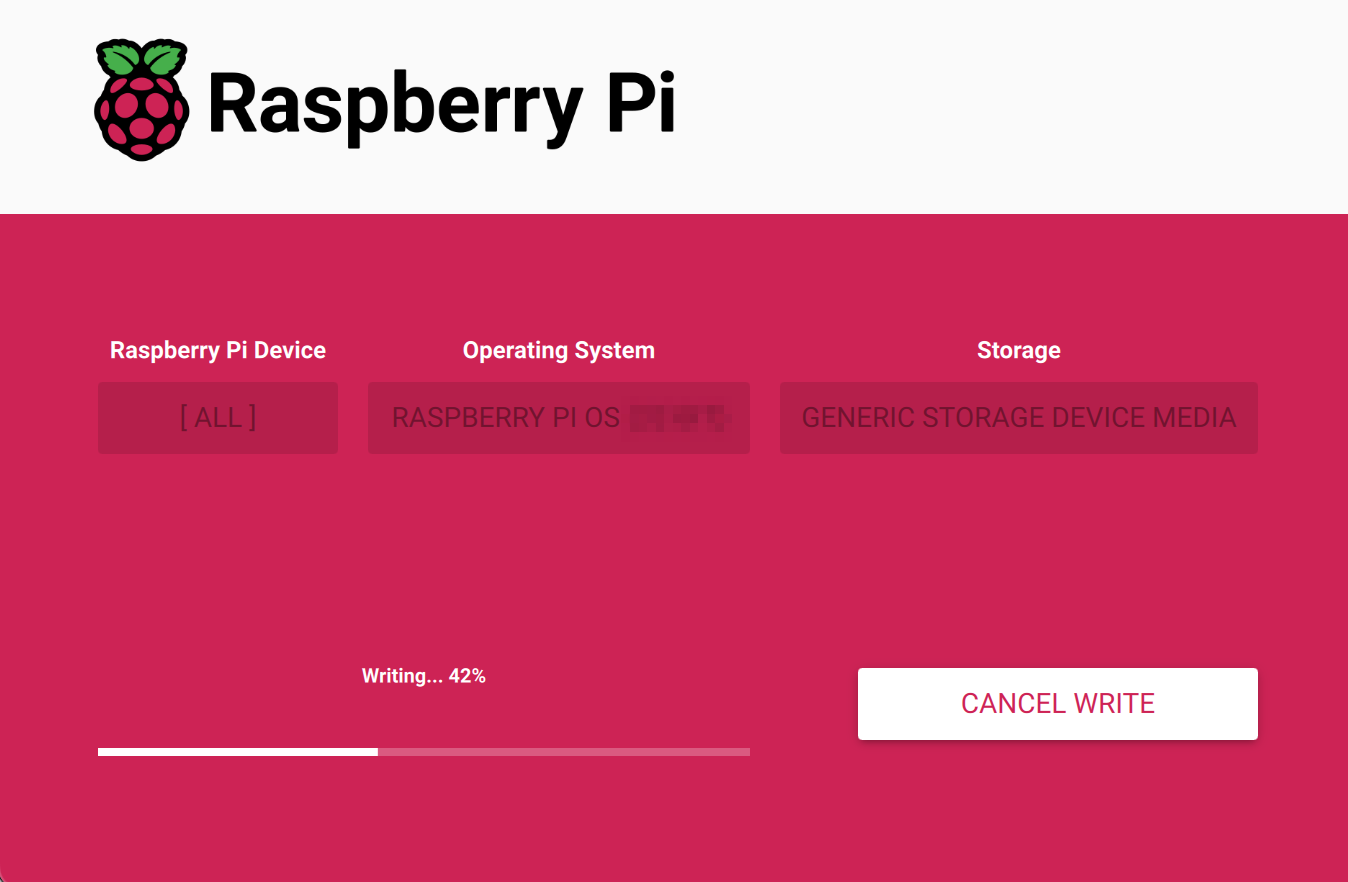
- After the OS writing is completed, the file will be verified.
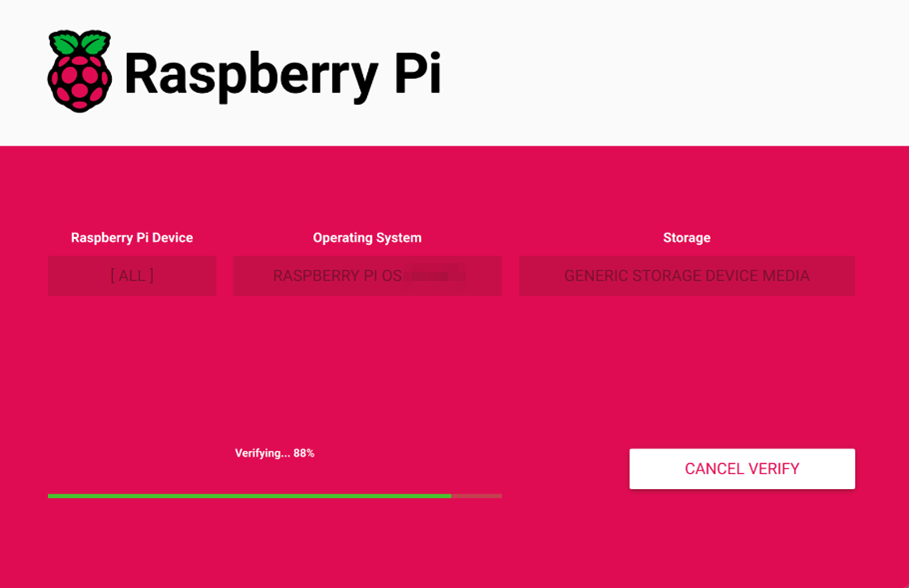
After the verification is completed, click “CONTINUE” in the pop-up “Write Successful” box.
Close
Raspberry Pi Imager, disconnect the USB flashing cable,Install the DIN rail bracket onto the device and finally repower the ED-IPC1100.
6.3 Installing Firmware Package
After you have finished flashing image on ED-IPC1100, you need to configure the system by adding edatec apt source and installing firmware package to make the system work. The following is an example of Debian 13 (trixie) desktop version.
Preparation:
- The flashing of the standard Raspberry Pi OS (trixie) image has been completed.
- ED-IPC1100 has booted normally and the required startup configuration has been finalized.
Steps:
- After the ED-IPC1100 starts normally, execute the following commands in the command pane to add the edatec apt source and installing firmware package.
curl -s https://apt.edatec.cn/bsp/ed-install.sh | sudo bash -s ipc1100
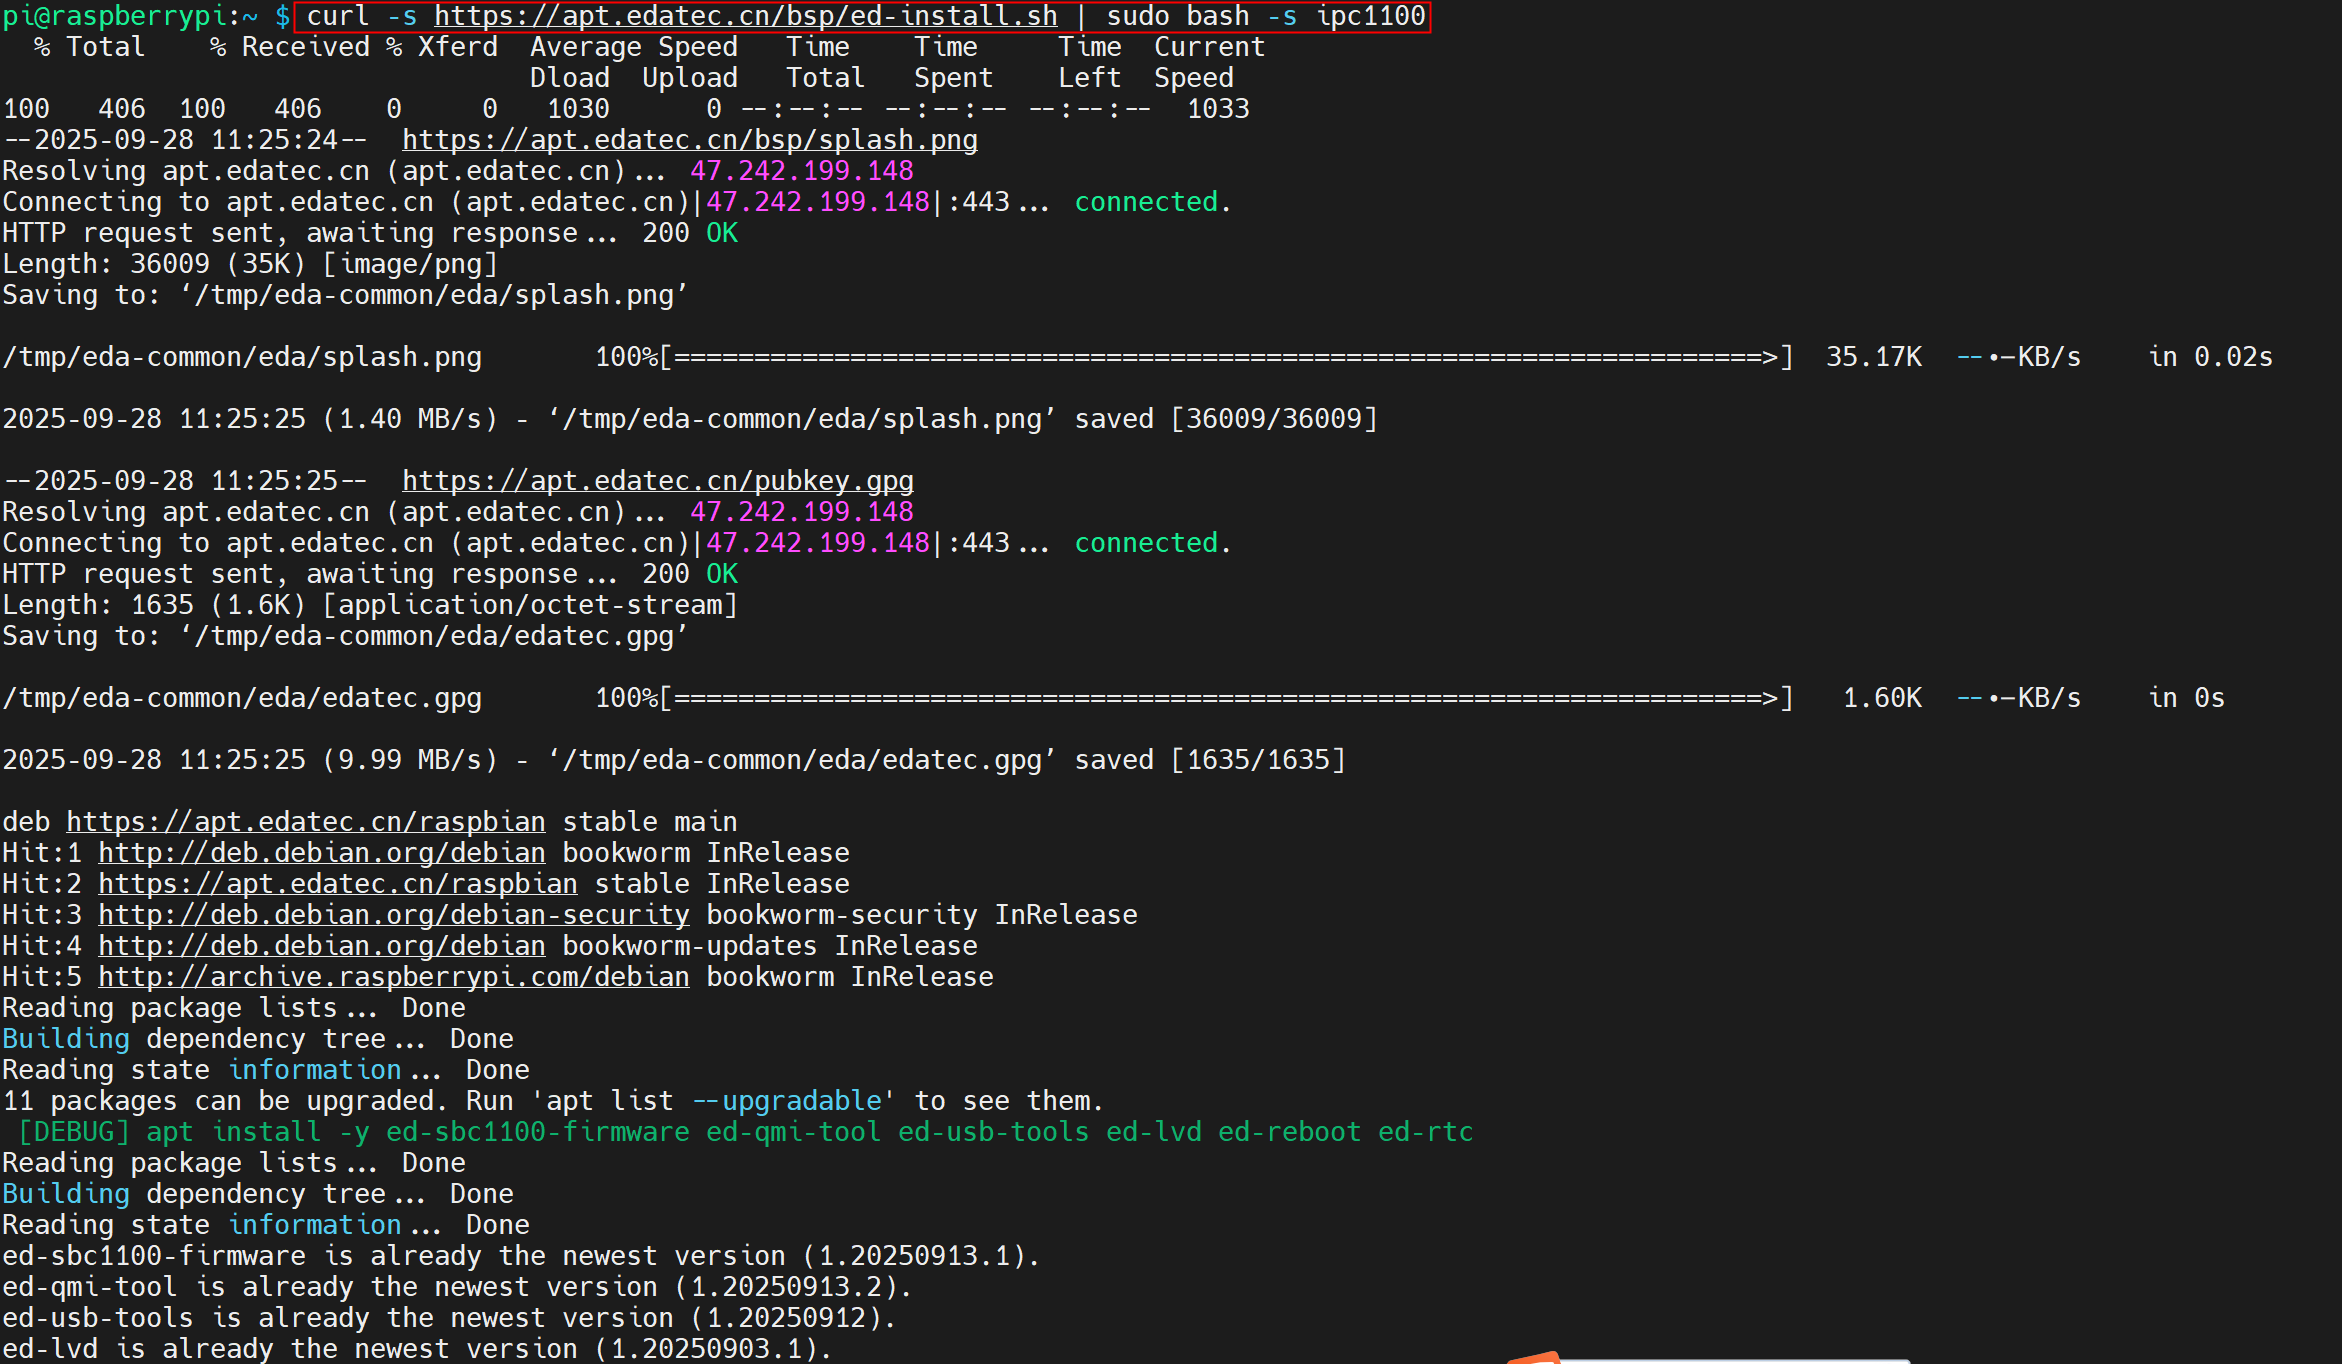
After the installation is complete, the system automatically reboots.
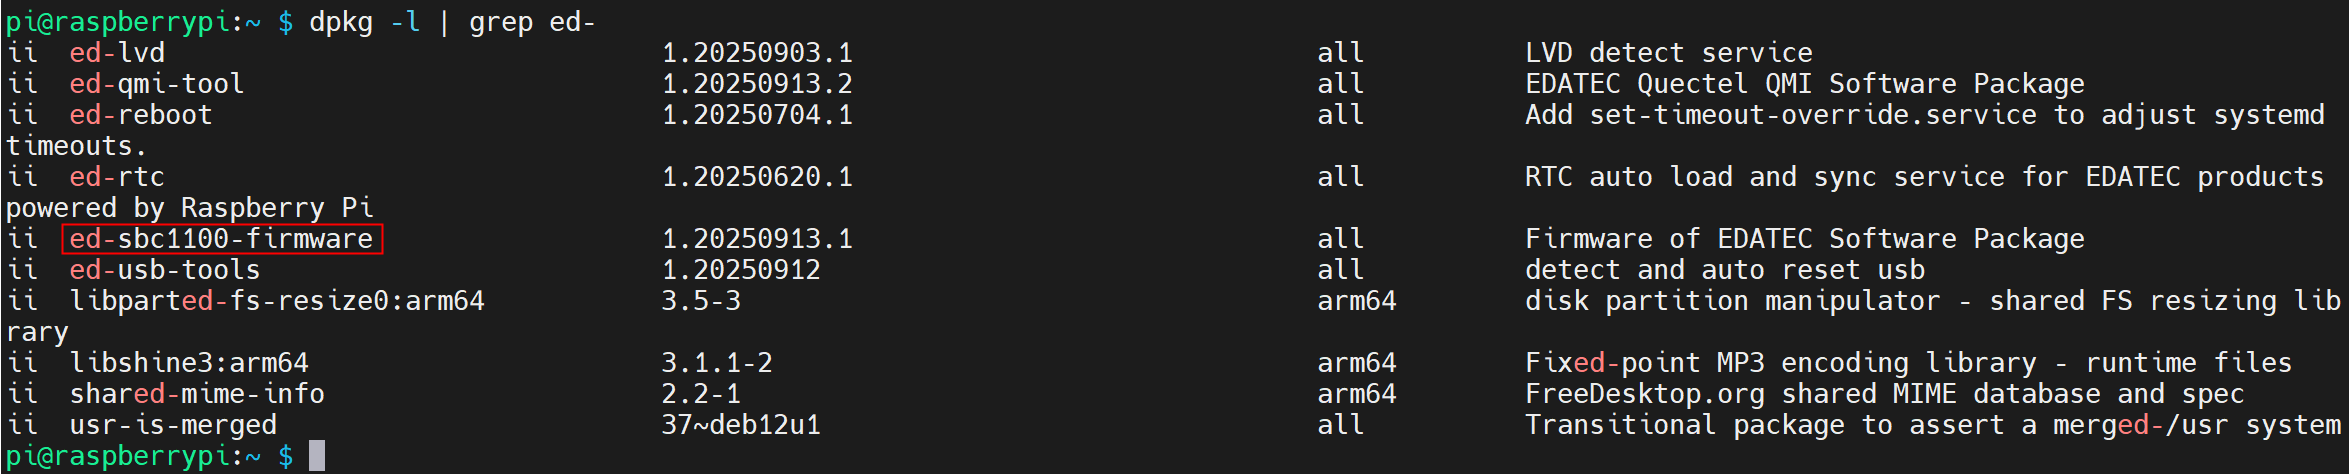
Execute the following command to check whether the firmware package is installed successfully.
dpkg -l | grep ed-
The result in the picture below indicates that the firmware package has been installed successfully.
TIP
If you have installed the wrong firmware package, you can execute sudo apt-get --purge remove package to delete it, where “package” is the package name.