5 Installing OS (optional)
ED-CM4NANO ships with a pre-installed operating system. Reinstall a suitable system image if the OS becomes corrupted or if you need to replace it.
5.1 Downloading System Images
Raspberry Pi OS with desktop, 32-bit
- Release date: July 08nd 2022
- System: 32-bit
- Kernel version: 5.10
- Debian version: 11 (bullseye)
- Release notes
- Downloads: https://vip.123pan.cn/1826505135/20273097
Raspberry Pi OS Lite, 32-bit
- Release date: July 08nd 2022
- System: 32-bit
- Kernel version: 5.10
- Debian version: 11 (bullseye)
- Release notes
- Downloads: https://vip.123pan.cn/1826505135/20273290
Raspberry Pi OS with desktop, 64-bit
- Release date: July 08nd 2022
- System: 64-bit
- Kernel version: 5.10
- Debian version: 11 (bullseye)
- Release notes
- Downloads: https://vip.123pan.cn/1826505135/20273319
Raspberry Pi OS Lite, 64-bit
- Release date: July 08nd 2022
- System: 64-bit
- Kernel version: 5.10
- Debian version: 11 (bullseye)
- Release notes
- Downloads: https://pan.baidu.com/s/1iZ0UlpqvCD-yR6hEDdOxLw?pwd=hkr0
5.2 Flashing to eMMC
5.2.1 Downloading Tools
- Raspberry Pi Imager: Raspberry Pi Imager
- SD Card Formatter: SD Card Formatter
- rpiboot: rpiboot
5.2.2 Flashing to eMMC
Preparation:
- USB-A to USB-A data cable (USB flashing cable) is available.
- Windows PC with flashing tools installed is available.
- The OS file has been obtained.
Steps:
The steps are described using Windows system as an example.
Connect Cables & Short-circuit Pins.
- Use jumper wires to short-circuit the BOOT and GND pins.
- Connect the USB flashing cable:
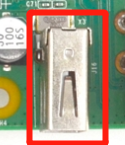
- Device side: USB 2.0 port (location shown below)
- PC side: USB interface
Disconnect the power supply of ED-CM4NANO and then power it on again.
Open rpiboot tool to automatically convert the drive to a letter
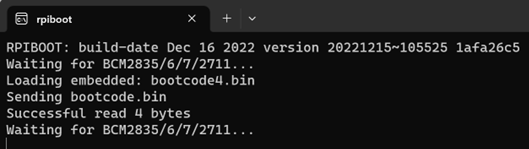
After the completion of the drive letter, the drive letter will pop up in the lower right corner of the computer.
Open
SD Card Formatter, select the formatted drive letter, and click "Format" at the lower right to format.
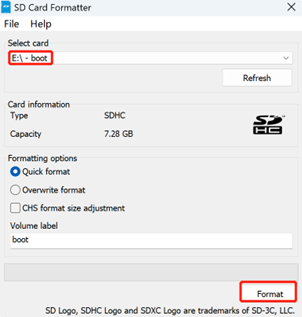
Complete the formatting as prompted, then close
SD Card Formatter.Open
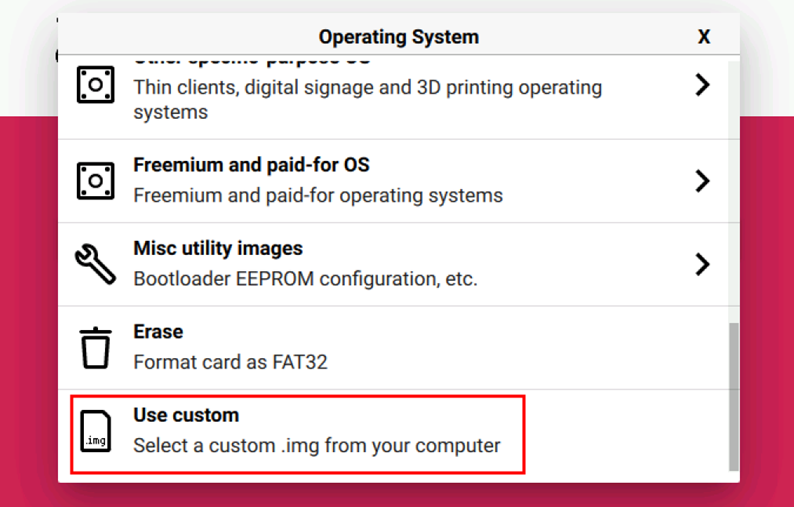
Raspberry Pi Imager, select "CHOOSE OS" and select "Use Custom " in the pop-up pane.
According to the prompt, select the OS file under the user-defined path and return to the main page.
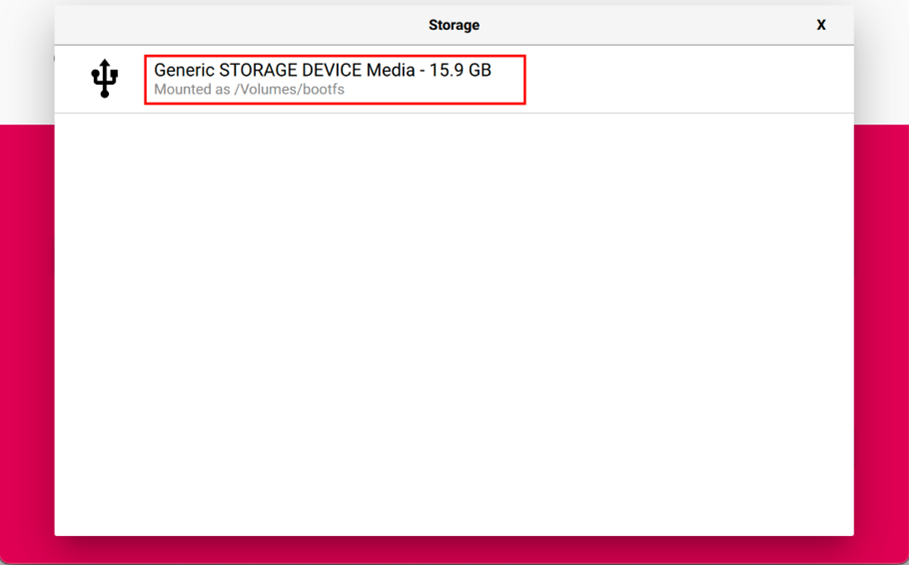
Click "CHOOSE STORAGE", select the default device in the "Storage" interface, and return to the main page.
Click “NEXT”, select "NO " in the pop-up “Use OS customization?” pane.
After the OS writing is completed, the file will be verified.
After the verification is completed, click “CONTINUE” in the pop-up “Write Successful” box.
Close
Raspberry Pi Imager, remove the USB flashing cable and jumper wires, and then power on the device again.
5.3 Install BSP Based On The Offical Raspberry Pi OS
When using the official Raspberry Pi OS image, you must install our Board Support Package (BSP) to enable device-specific functionalities.
- Execute the following commands sequentially to add the repository and BSP.
curl -sS https://apt.edatec.cn/pubkey.gpg | sudo apt-key add -
echo "deb https://apt.edatec.cn/raspbian stable main" | sudo tee /etc/apt/sources.list.d/edatec.list
- Install BSP:
sudo apt update
sudo apt install ed-cm4nano-bsp ed-rtc
5.4 Install the NetworkManager network management tool
The NetworkManager tool makes it easier to configure routing rules and set priorities.
- Raspberry Pi OS (Lite)
sudo apt install ed-networkmanager
- Raspberry Pi OS (Desktop)
sudo apt install ed-networkmanager-gnome