ED-HMI Series Products Backlight Adjustment
1 Overview
Introduces the background and applicable scope of backlight adjustment for the ED-HMI series products.
1.1 Background
The ED-HMI series products support adjusting backlight brightness and turning off the backlight. Some users have different brightness requirements for the LCD screen in different usage scenarios and wish to manually adjust the LCD screen's brightness or turn off the backlight to meet various scene needs. In response to this requirement, our company provides detailed operating instructions to help users correctly adjust the LCD screen's backlight brightness.
1.2 Scope of Application
This application applies to the following ED-HMI products.
- ED-HMI2002-070C/101C
- ED-HMI2020-070C/101C
- ED-HMI2120-070C/101C
- ED-HMI2220-070C/101C
- ED-HMI2630-101C
- ED-HMI3010-070C/101C
- ED-HMI3020-070C/101C
- ED-HMI3120-070C/101C
- ED-HMI3630-101C
2 Application Guide
The methods for adjusting backlight brightness differ between Raspberry Pi OS (Desktop) and Raspberry Pi OS (Lite). The following sections provide detailed introductions for each.
2.1 Raspberry Pi OS (Desktop)
Describes the specific operations for adjusting backlight brightness and configuring automatic screen blanking on Raspberry Pi OS (Desktop).
2.1.1 Adjusting Backlight Brightness
Preparation:
The ED-HMI device has started normally and entered the desktop.
Steps:
- Left-click the
 icon in the upper-left corner of the desktop, and select "Preferences" → "Screen Configuration" from the menu.

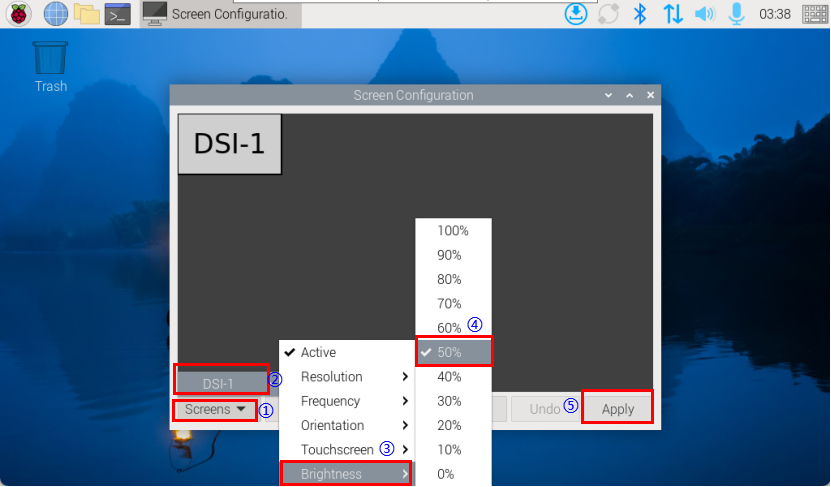
- In the
Screen Configurationinterface, click "Screens" in the lower-left corner and then select "DSI-1". In the menu, select "Brightness", and then set the brightness percentage as needed. After setting the brightness percentage, click "Apply" in the lower-right corner to make the configuration effective.
TIP
- The default screen name for the ED-HMI device is "DSI-1". Only "DSI-1" supports backlight brightness adjustment; an externally connected HDMI display does not support backlight brightness adjustment.
- The adjustable range for backlight brightness is 0% to 100%.
- If the backlight brightness is adjusted to 0%, the screen will go black.
2.1.2 Configuring Automatic Screen Blanking
When using the ED-HMI device, if there are scenarios with prolonged inactivity, users can configure automatic screen blanking. After configuration, the device will automatically blank the screen if there is no operation for 10 minutes. After the screen blanks, it can be restored by touching the screen.
Preparation:
The ED-HMI device has started normally and entered the desktop.
Steps:
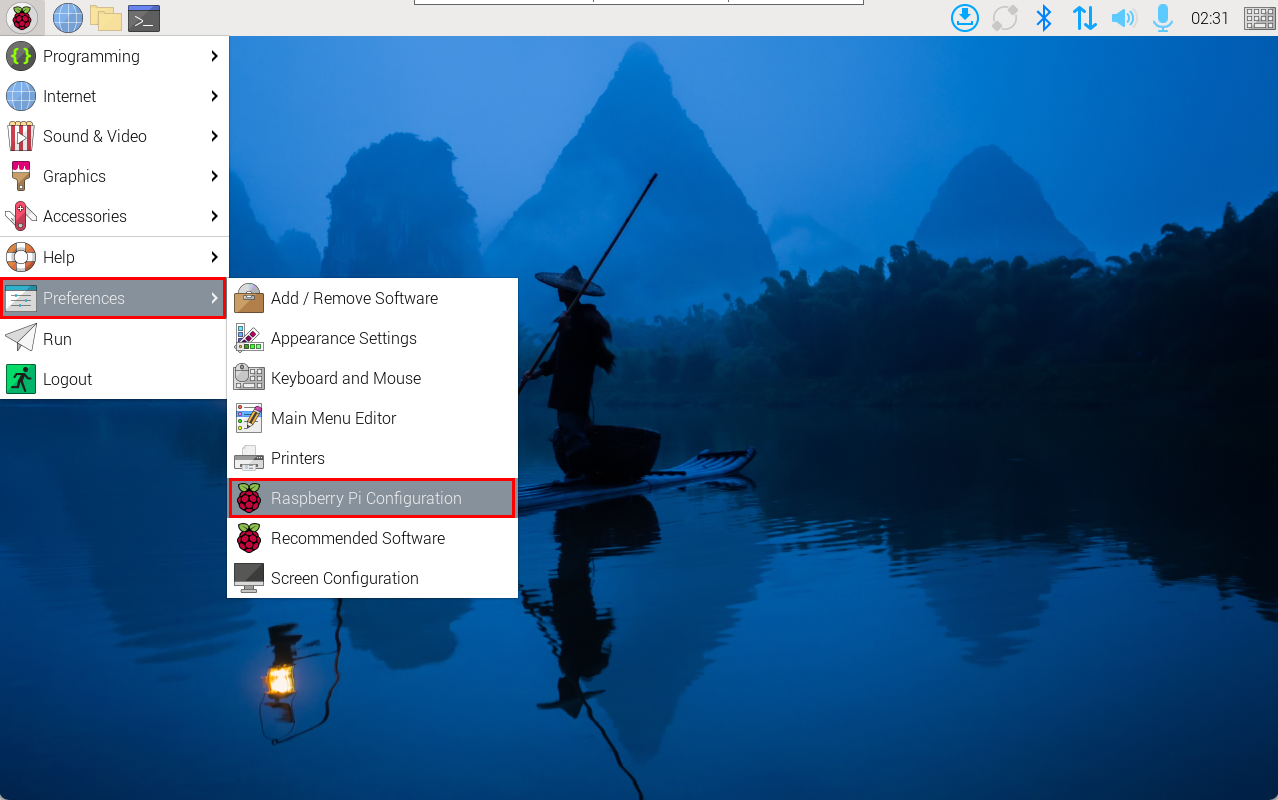
- Left-click the icon in the upper-left corner of the desktop, and select "Preferences" → "Raspberry Pi Configuration" from the menu.
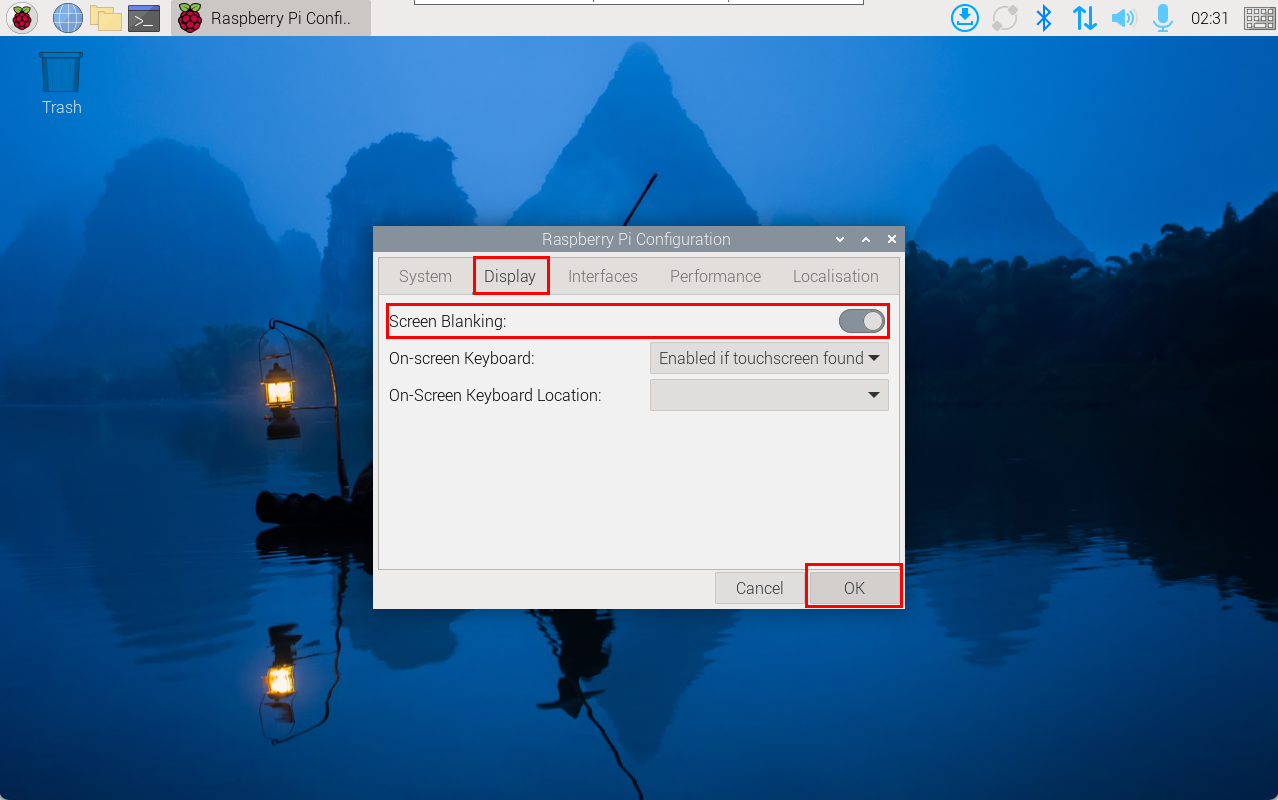
- Select the "Display" tab, enable "Screen Blanking", and then click "OK".
2.2 Raspberry Pi OS (Lite)
Describes the specific operations for adjusting backlight brightness and configuring automatic screen blanking on Raspberry Pi OS (Lite).
2.2.1 Adjusting Backlight Brightness
Supports turning the backlight on/off and adjusting brightness via command line.
| Command | Description |
|---|---|
| echo 1 | tee /sys/class/backlight/*/bl_power | Turn off screen backlight |
| echo 0 | tee /sys/class/backlight/*/bl_power | Turn on screen backlight |
| echo x | tee /sys/class/backlight/*/brightness | Adjust screen brightness, where the value range of x is 0~255 |
2.2.2 Configuring Automatic Screen Blanking
When using the ED-HMI device, if there are scenarios with prolonged inactivity, users can configure automatic screen blanking. After configuration, the device will automatically blank the screen if there is no operation for 10 minutes. After the screen blanks, it can be restored by touching the screen.
Preparation:
The ED-HMI device has started normally.
Steps:
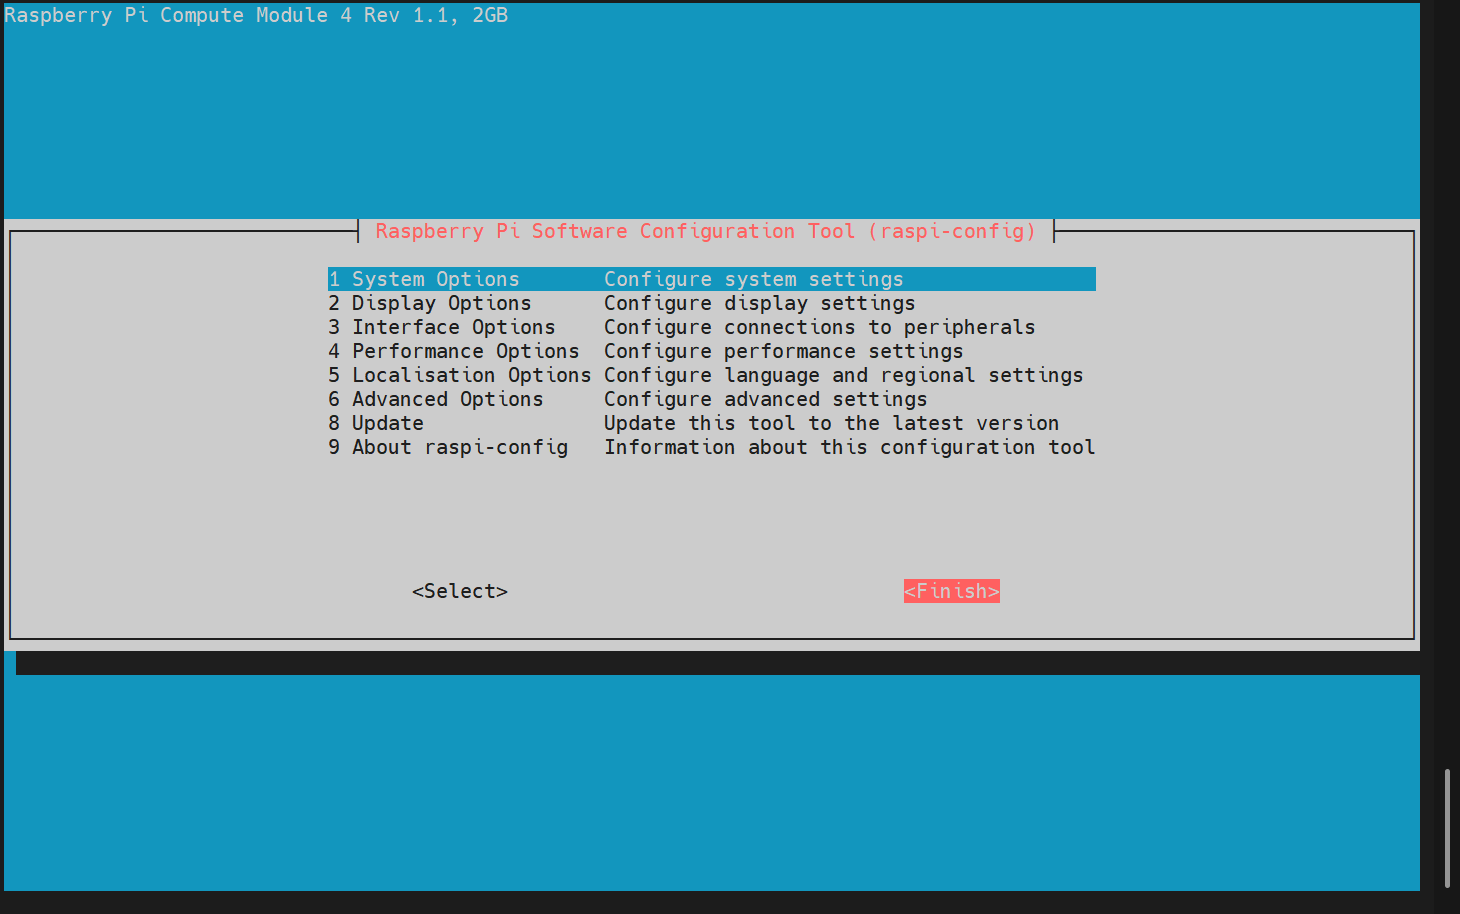
- Open a command terminal window and execute the following command to open the
Raspberry Pi Software Configuration Tool (raspi-config)interface.
sudo raspi-config
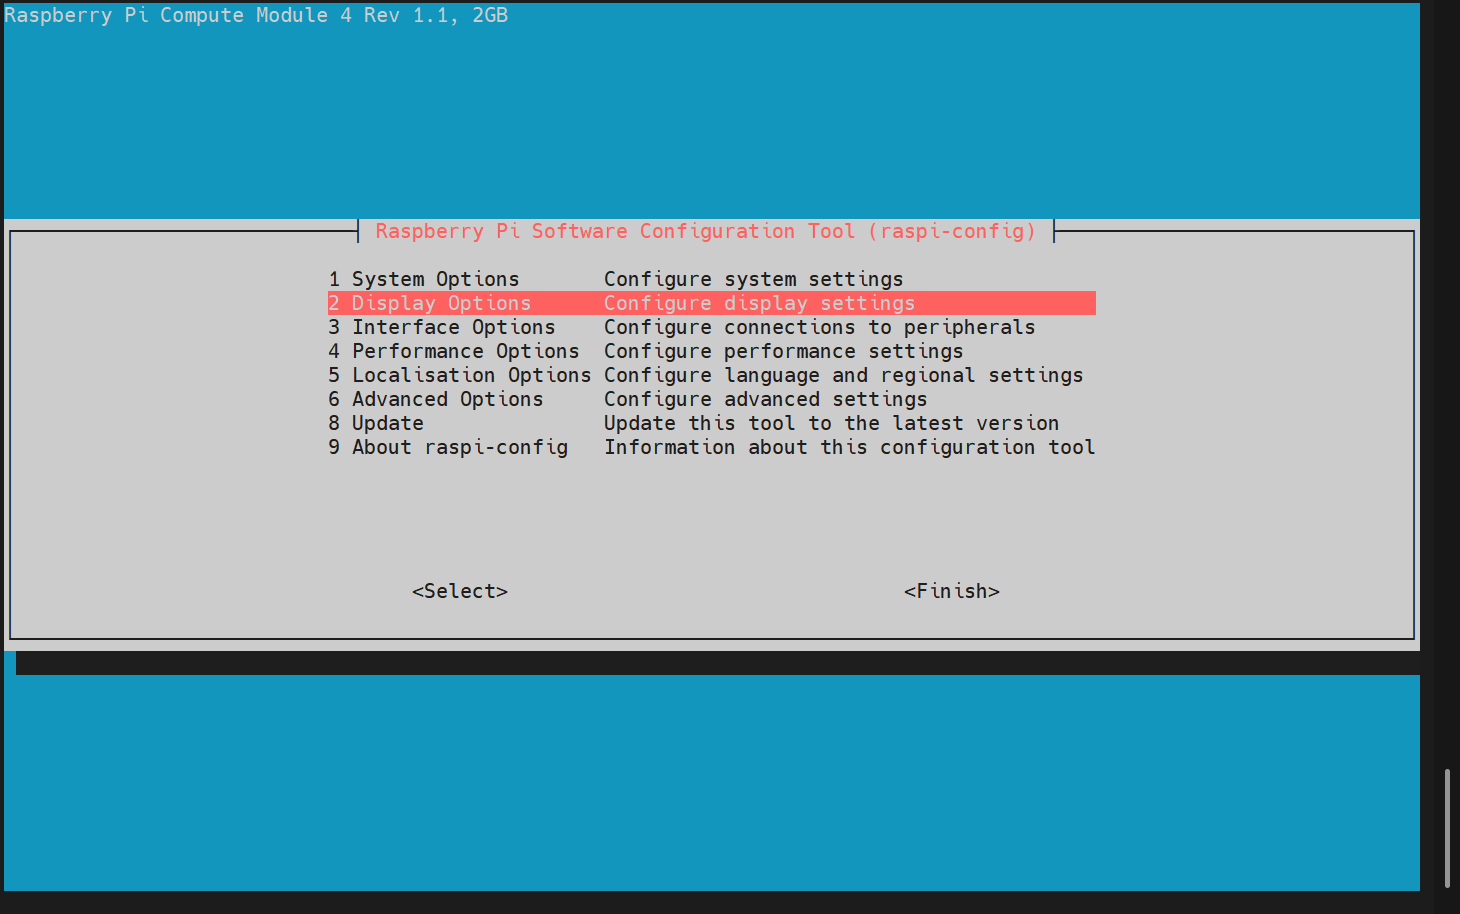
- In the main interface, select
2 Display Optionsand pressEnter.
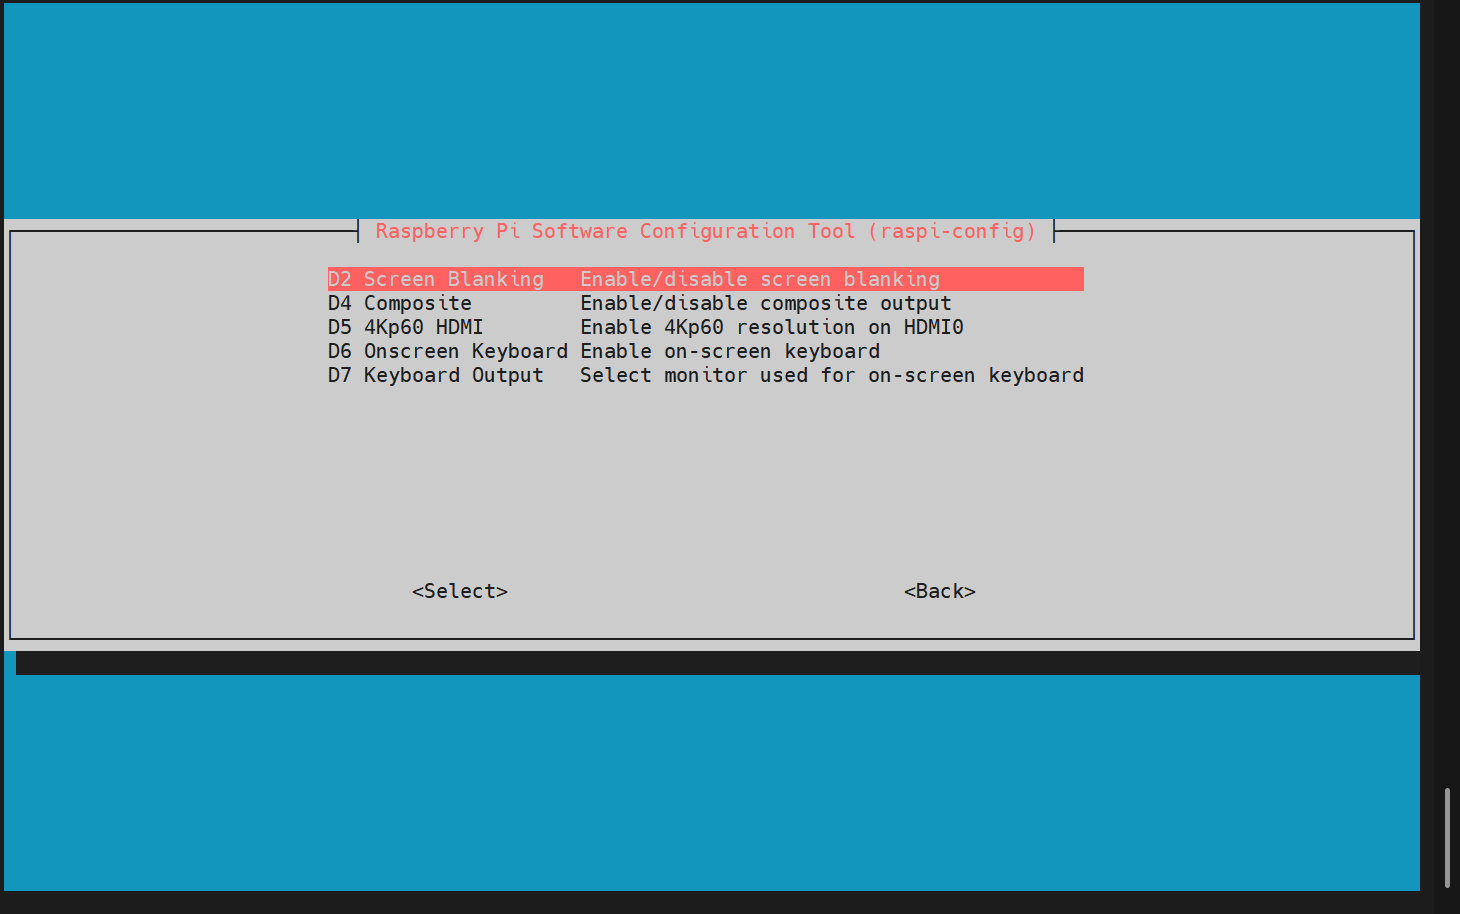
- In the opened interface, select
D2 Screen Blankingand pressEnter.
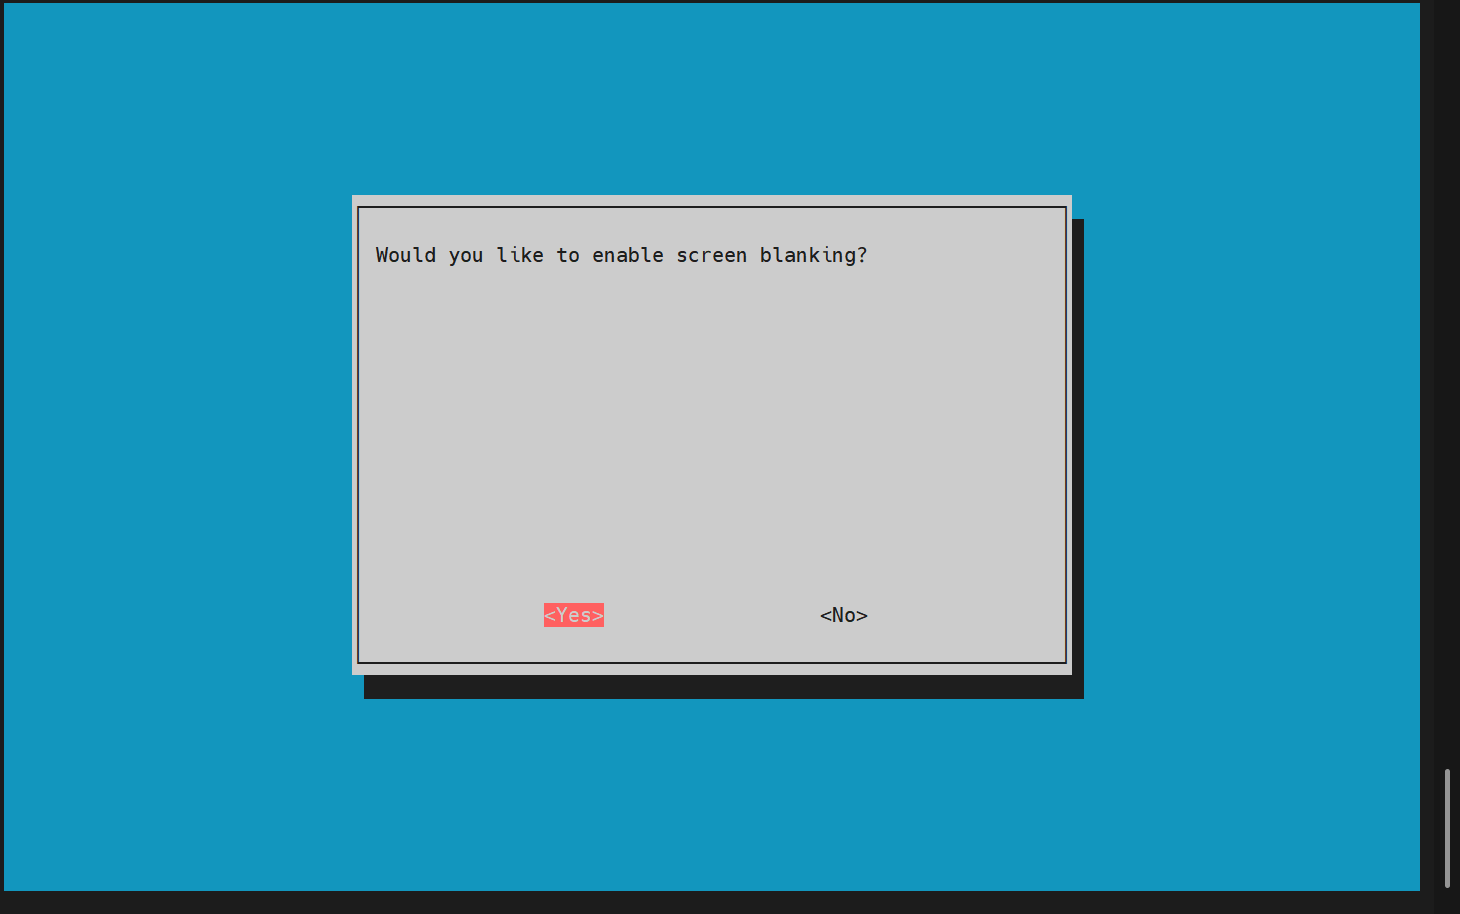
- In the opened prompt, select
Yesand pressEnter.
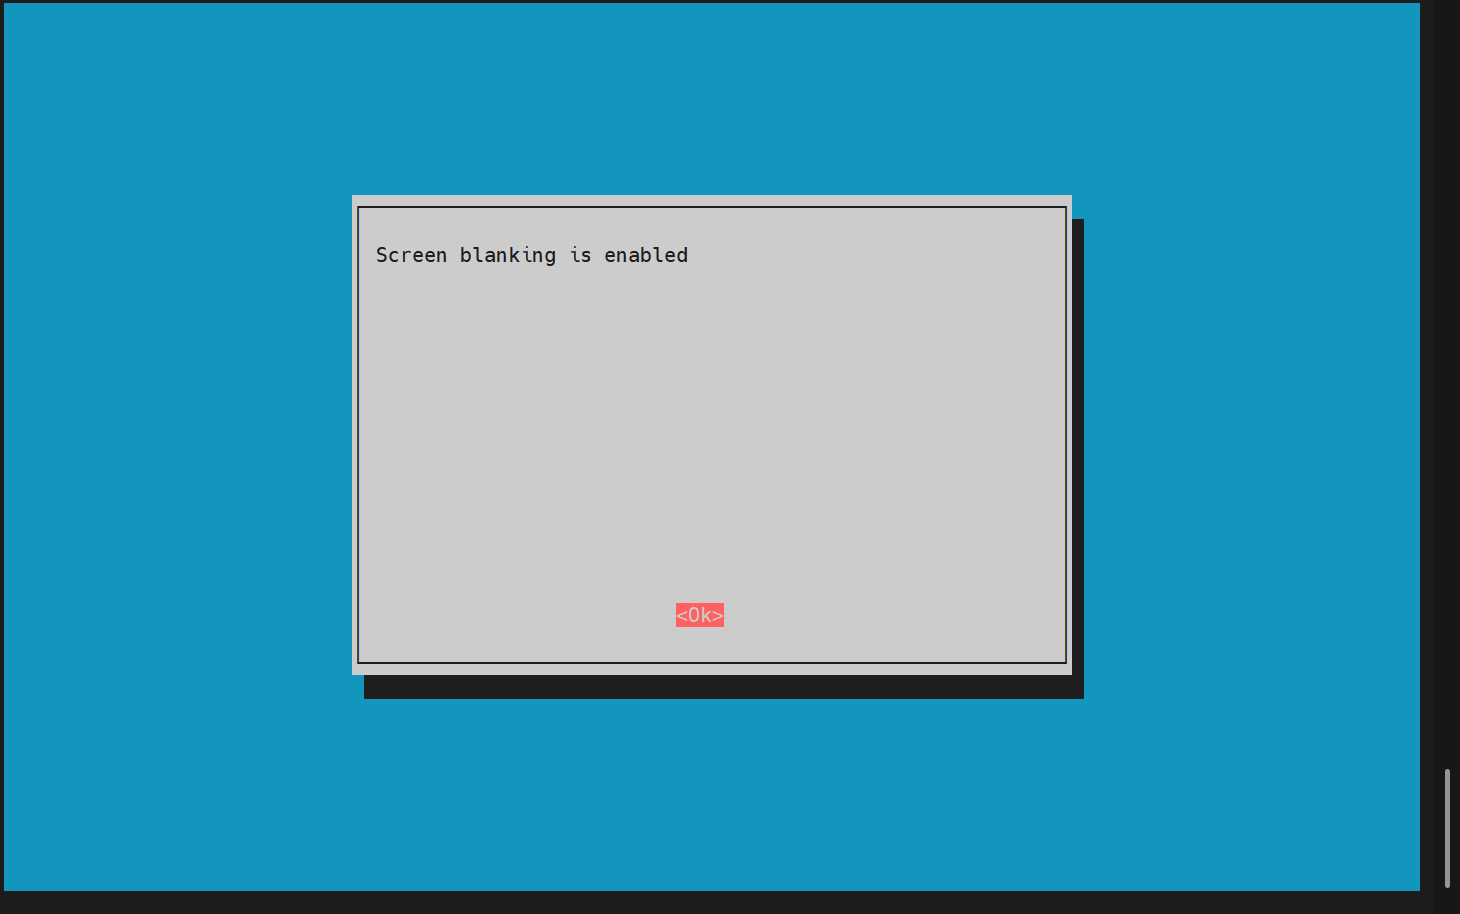
- In the opened prompt, press
Enterto confirm the configuration.
- In the main interface, select
Finishand pressEnterto complete the configuration.
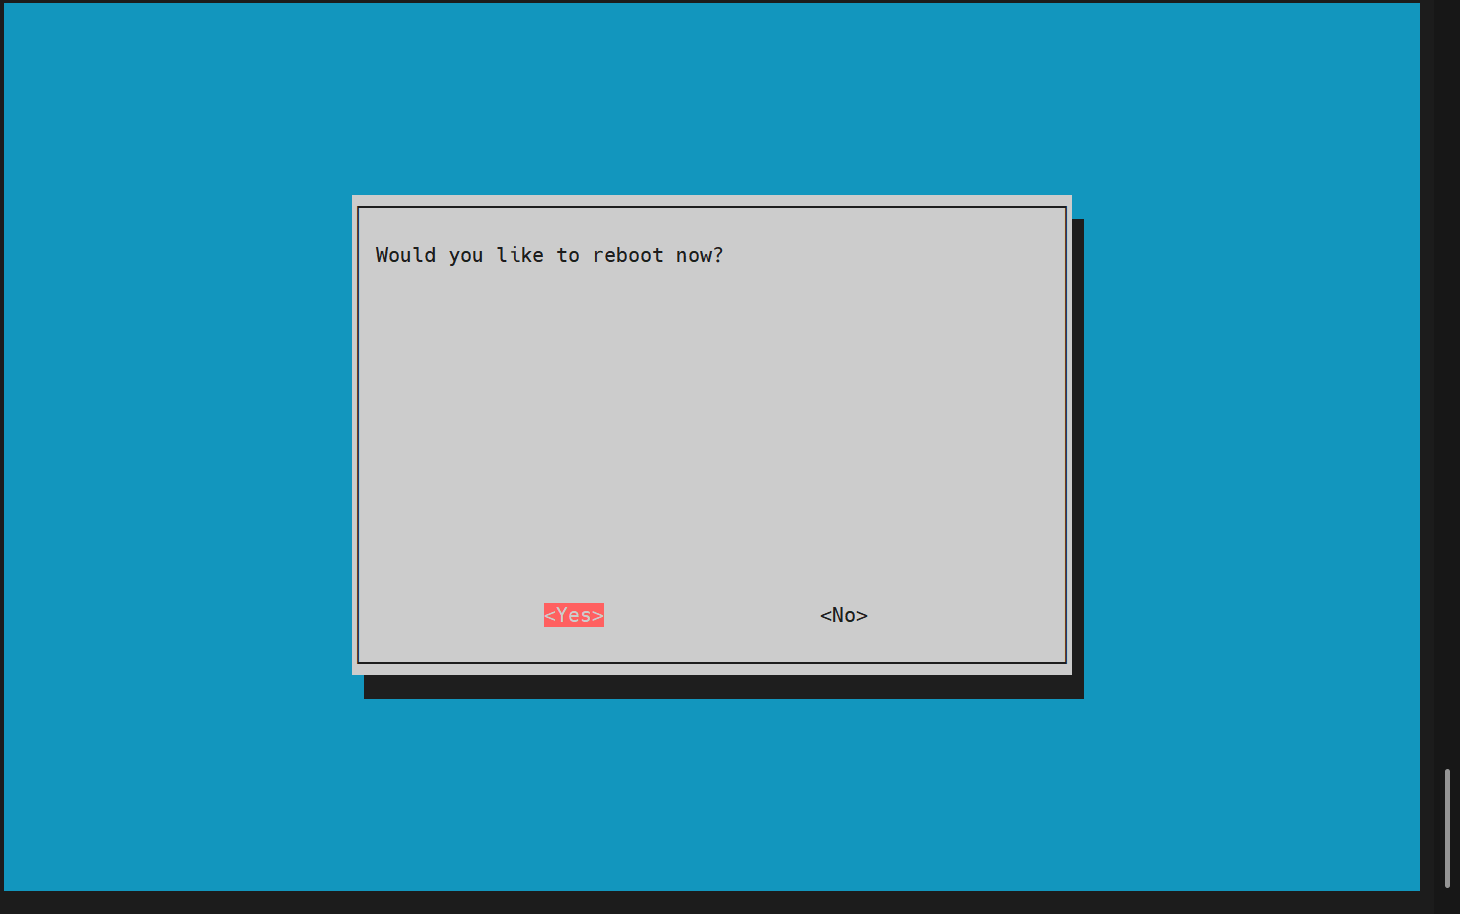
- In the prompt, select
Yesand pressEnterto restart the device, making the configuration effective.