Configuring Primary and Secondary Screens on ED-HMI
1 Overview
Introduces the background and scope of configuring primary and secondary screens on ED-HMI devices.
1.1 Background
Our company's ED-HMI devices generally include an HDMI output interface, meaning they support both the local screen display and an external monitor. Some users, when using our ED-HMI series products (Desktop operating system) for specific scenarios, need to connect an external monitor via HDMI and wish to freely switch the primary and secondary screens. To address this requirement, our company provides detailed operating instructions to help users correctly configure the primary and secondary screens.
TIP
For our ED-HMI series products, if an external monitor is connected via the HDMI interface, the external monitor will become the primary screen by default.
1.2 Scope of Application
This application applies to all ED-HMI products with HDMI output.
TIP
Applicable only to the Desktop operating system.
2 Application Guide
Introduces the specific operational steps for setting primary and secondary screens on ED-HMI products. The following description uses configuring the primary screen on an ED-HMI2120-070C as an example.
2.1 Configuring ED-HMI as the Primary Screen When an External Monitor is Connected
Preparation:
- The ED-HMI2120-070C has booted normally into the desktop system.
- An external monitor is connected to the HDMI interface of the ED-HMI2120-070C.
- A mouse and keyboard are connected to the USB interface of the ED-HMI2120-070C.
Steps:
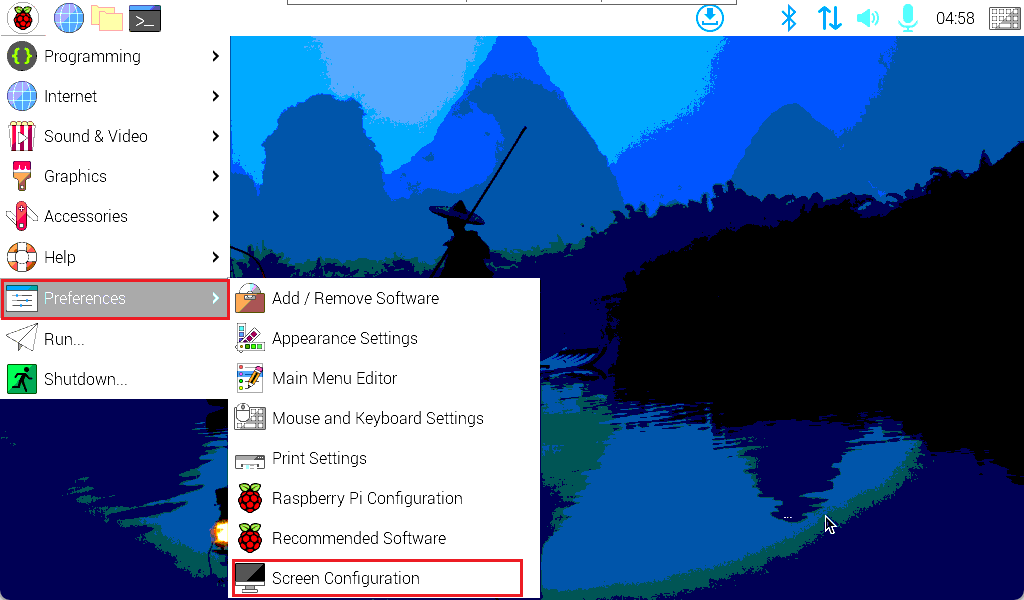
- Left-click the
 icon in the upper-left corner of the desktop, and select "Preferences" → "Screen Configuration" from the menu.
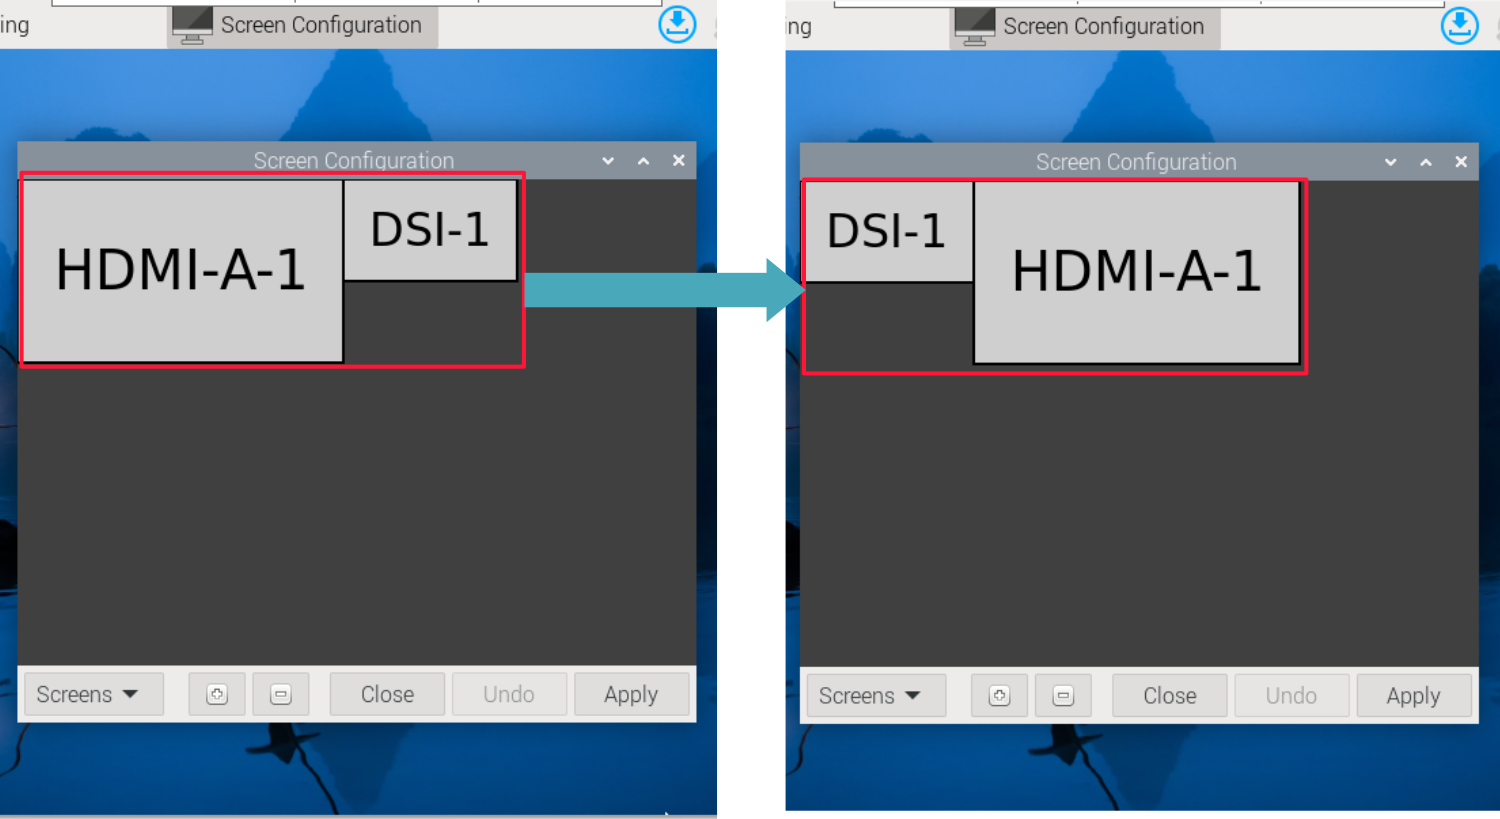
- The opened
Screen Configurationinterface will display the names of two displays:HDMI-A-1andDSI-1. Here,DSI-1represents the screen name of the ED-HMI, andHDMI-A-1represents the name of the external monitor. Use the left mouse button to dragDSI-1andHDMI-A-1to positionDSI-1on the left andHDMI-A-1on the right.
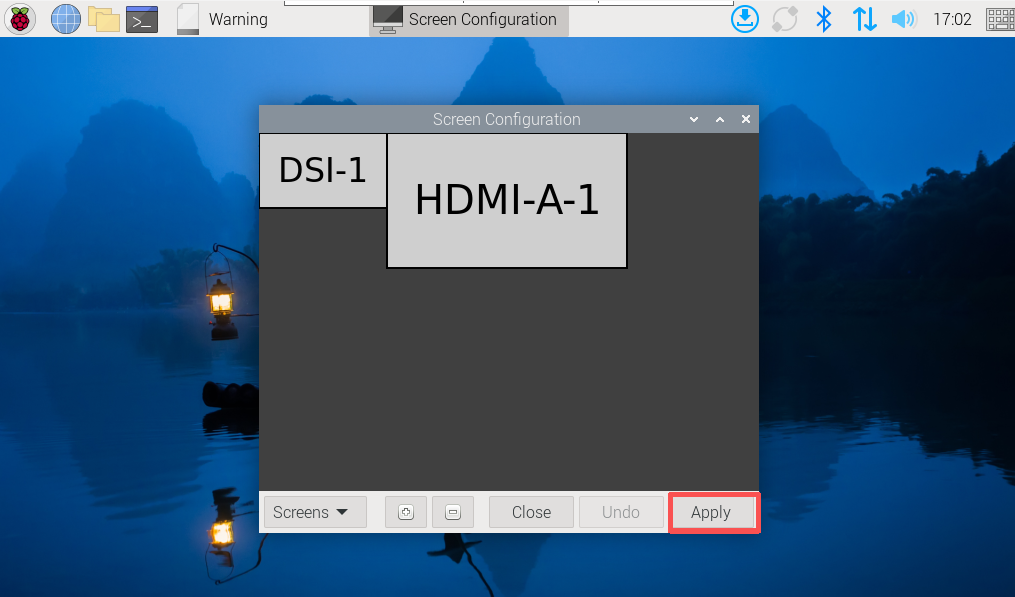
- Click "Apply" in the lower right corner.
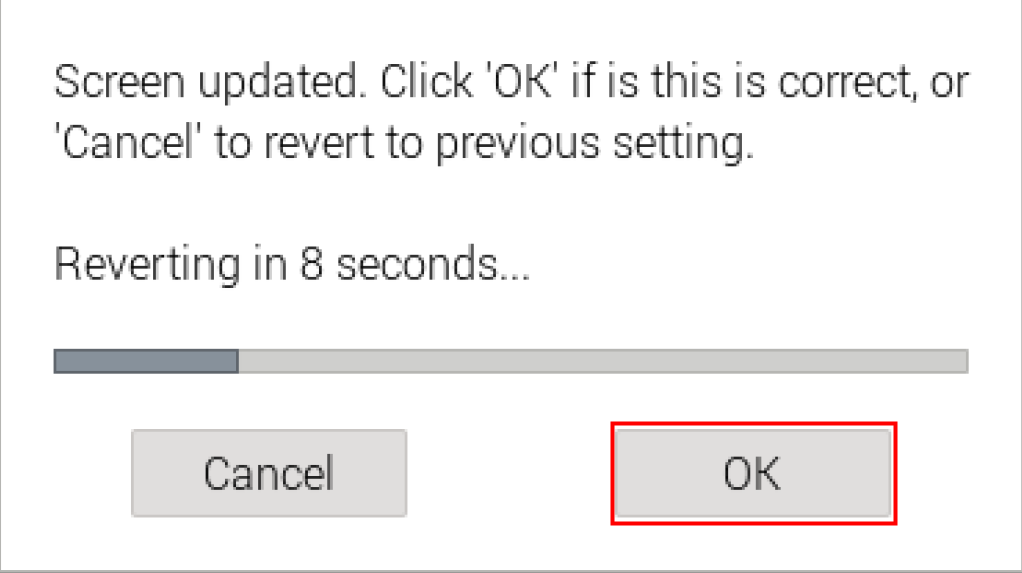
- In the pop-up prompt box, click "OK" to complete the configuration.
- Right-click on a blank area of the desktop and select "Desktop Preferences" from the menu.

- In the opened
Appearance Settingsinterface, under the "Desktop" tab, confirm that the box to the right of the "Monitor" entry is checked for "Use common desktop".
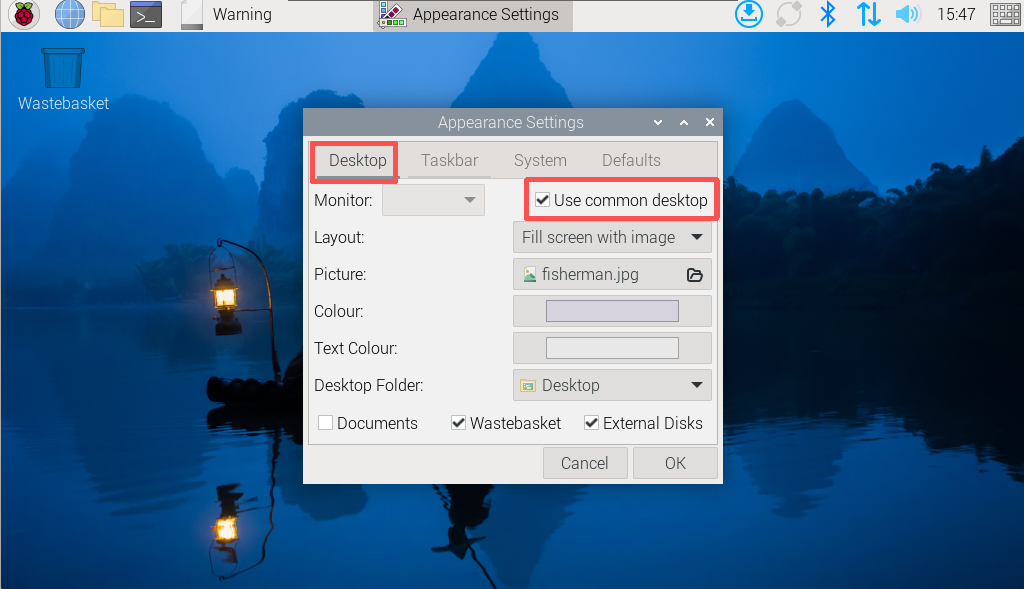
TIP
- Checking "Use common desktop": Both displays use the same desktop workspace, which is the default and already checked.
- Unchecking "Use common desktop": Each display has an independent desktop workspace.
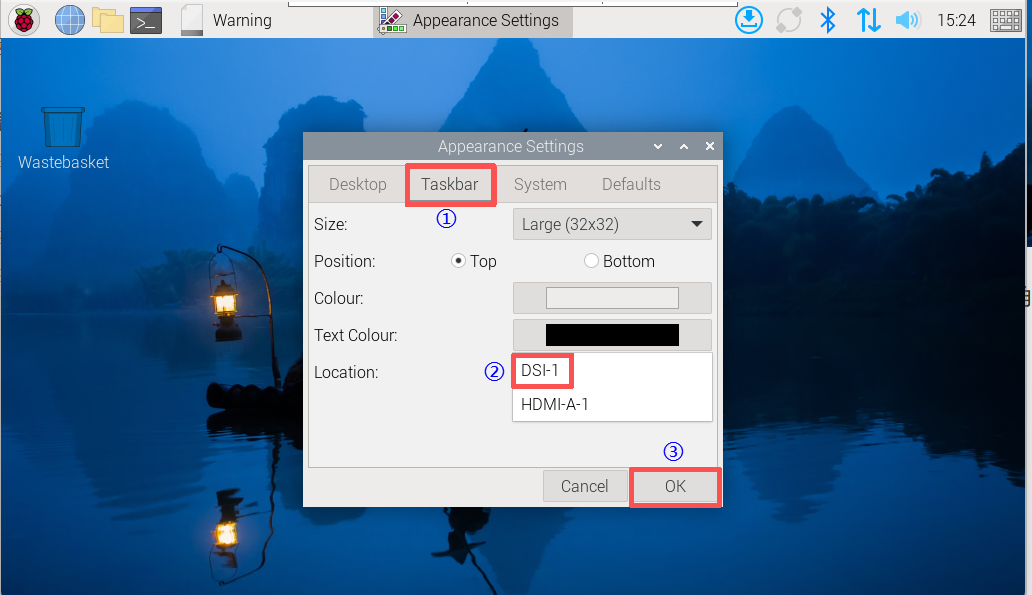
- In the opened
Appearance Settingsinterface, select the "Taskbar" tab, choose "DSI-1" in the "Location" entry, and click "OK".
- (Optional) If it is necessary to keep the desktop plugins installed also on the primary screen, you can refer to the following steps.
a. Open a command window, and execute the following commands in sequence to open the DSI-1 startup file.
cd .config/pcmanfm/LXDE-pi/
sudo nano desktop-items-DSI-1.conf
b. In the configuration file, customize and modify the following content to ensure the relevant plugins remain on the primary screen.
[*]
wallpaper_mode=crop          # Wallpaper mode: crop (maintain aspect ratio and fill screen)
wallpaper_common=1           # Use common wallpaper (multiple displays use the same image)
wallpaper=/usr/share/rpd-wallpaper/fisherman.jpg  # Wallpaper path
desktop_bg=#d6d6d3d3dede     # Desktop background color (hexadecimal ARGB format)
desktop_fg=#e8e8e8e8e8e8     # Desktop foreground color (icon text color)
desktop_shadow=#d6d6d3d3dede # Desktop shadow color
desktop_font=PibotoLt 12     # Desktop font: PibotoLt size 12
show_wm_menu=0      # Whether to display the window manager menu (0=do not display)
show_documents=0    # Whether to display the "Documents" icon
sort=mtime;ascending; # Icon sorting: by modification time, ascending
desktop-items-0.conf (first display)
show_trash=0    # Do not show trash
show_mounts=0   # Do not show mounted devices (USB drives, hard drives, etc.)
c. Execute the following command to restart the device for the configuration to take effect.
sudo reboot