Using GPIO on the device in CODESYS
1 Overview
Introducing the background and scope of application of using GPIO on the device in CODESYS.
1.1 Background
To address the issue where some users are unable to control GPIO through the CODESYS IDE when using a standalone CODESYS license on ED-IPC devices, our company has specifically developed a GPIO feature enhancement component. This includes a corresponding deb installation package and updated device description files. This upgrade helps users configure and control device GPIO more stably and conveniently within the CODESYS IDE environment.
Users only need to install the provided GPIO deb package online to activate the full GPIO control functionality, enabling direct operation of device GPIO from the CODESYS IDE, thereby improving development efficiency and user experience.
TIP
Both the standalone CODESYS license and the volume license shipped with the device support controlling the device's GPIO by installing the GPIO deb package.
1.2 Scope of Application
This application is compatible with all ED-IPC and ED-HMI products equipped with GPIO. The specific product models included are listed in the table below.
| Category | Product Models |
|---|---|
| ED-IPC | ED-IPC2000 ED-IPC2100 ED-IPC2200 ED-IPC2400 ED-IPC2600 ED-IPC3100 ED-IPC3630 ED-PAC3100 ED-PAC3630 |
| ED-HMI | ED-HMI2020-070C ED-HMI2020-101C ED-HMI2120-070C ED-HMI2120-101C ED-HMI2220-070C ED-HMI2220-101C ED-HMI2630-101C ED-HMI3120-070C ED-HMI3120-101C ED-HMI3630-101C |
2 Application Guide
The following section uses the ED-IPC3630 device as an example to describe the specific operations for using GPIO in the CODESYS IDE.
Preparation:
- A PC installed with CODESYS software version V3.5 SP19 (64-bit).
- A CODESYS-authorized ED-IPC3630 device available.
- Set the PC's IP address to be in the same subnet as the device's IP, and ensure both the device and the PC are connected to the CODESYS network.
Steps:
The ED-IPC3630 device has started up normally and is connected to the network.
In the terminal, execute the following commands in sequence to add the edatec APT repository.
curl -sS https://apt.edatec.cn/pubkey.gpg | sudo apt-key add -
echo "deb https://apt.edatec.cn/raspbian stable main" | sudo tee /etc/apt/sources.list.d/edatec.list
sudo apt update
NOTE
If you directly copy the command and line breaks appear when pasting, please delete the line breaks and add spaces in their place.
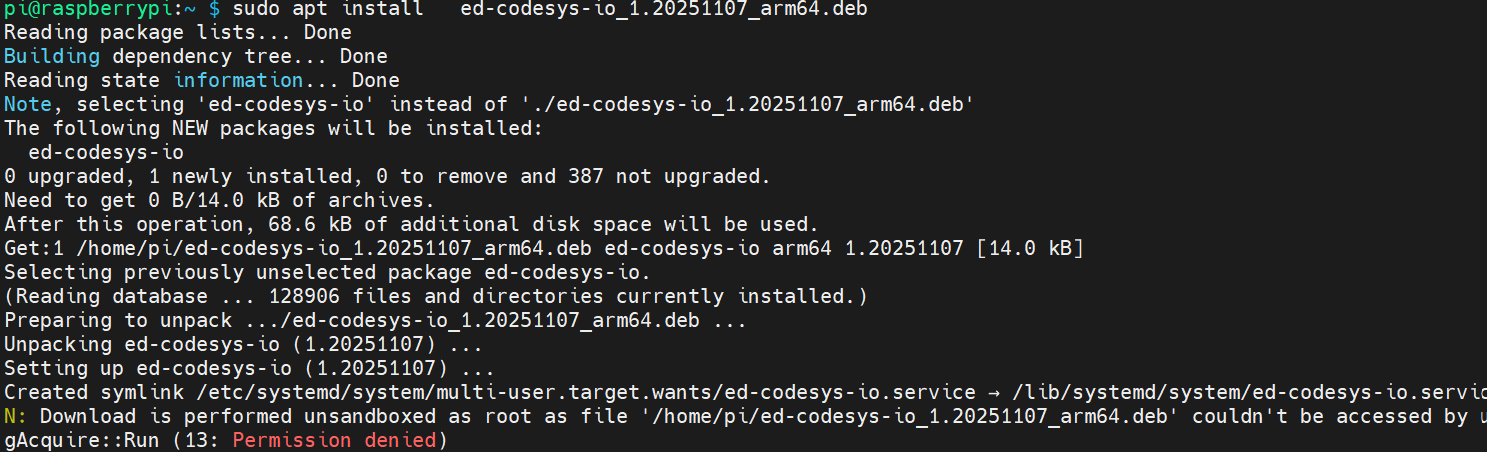
- Execute the following command to install the GPIO deb package.
sudo apt install ed-codesys-io_1.20251107_arm64.deb
- Execute the following command to restart the device.
sudo reboot
Obtain the GPIO description file. The specific download path is: EDATEC GPIO.
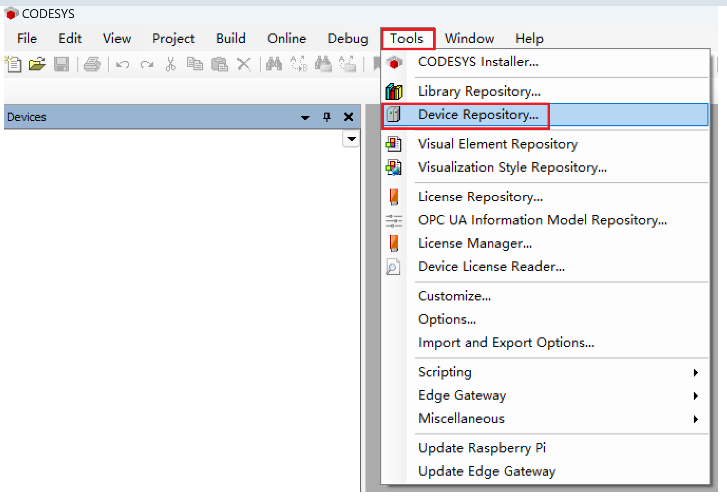
Double-click the CODESYS software icon on the PC desktop to open the CODESYS software. In the menu bar, select "Tools" → "Device Repository".
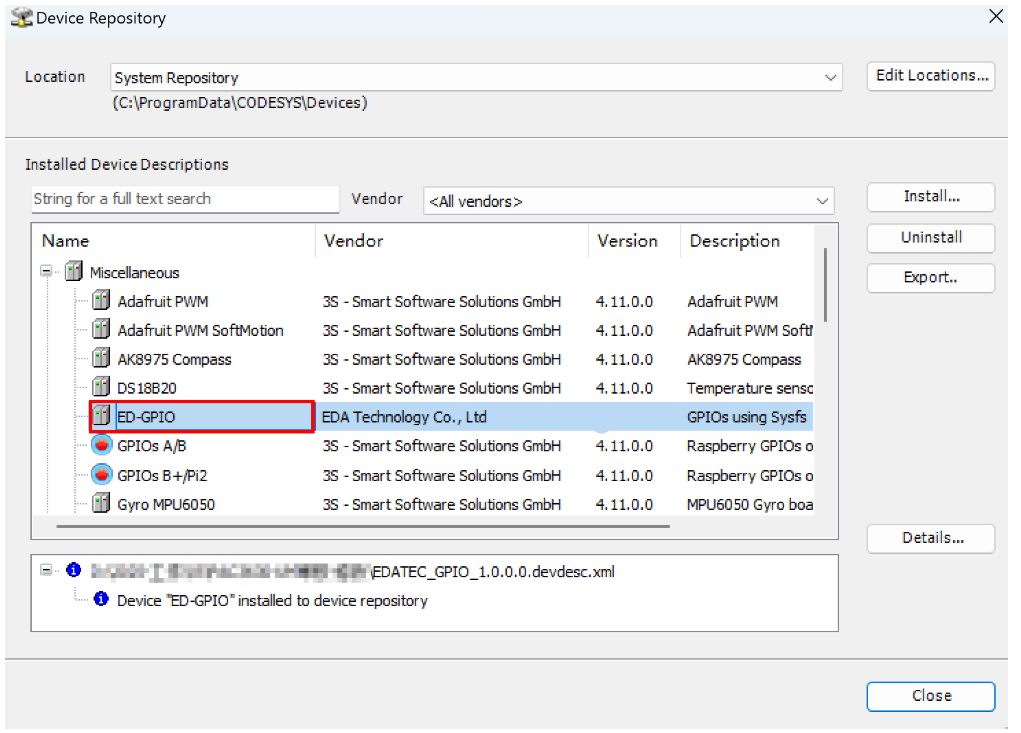
- In the opened "Device Repository" pane, click "Install".
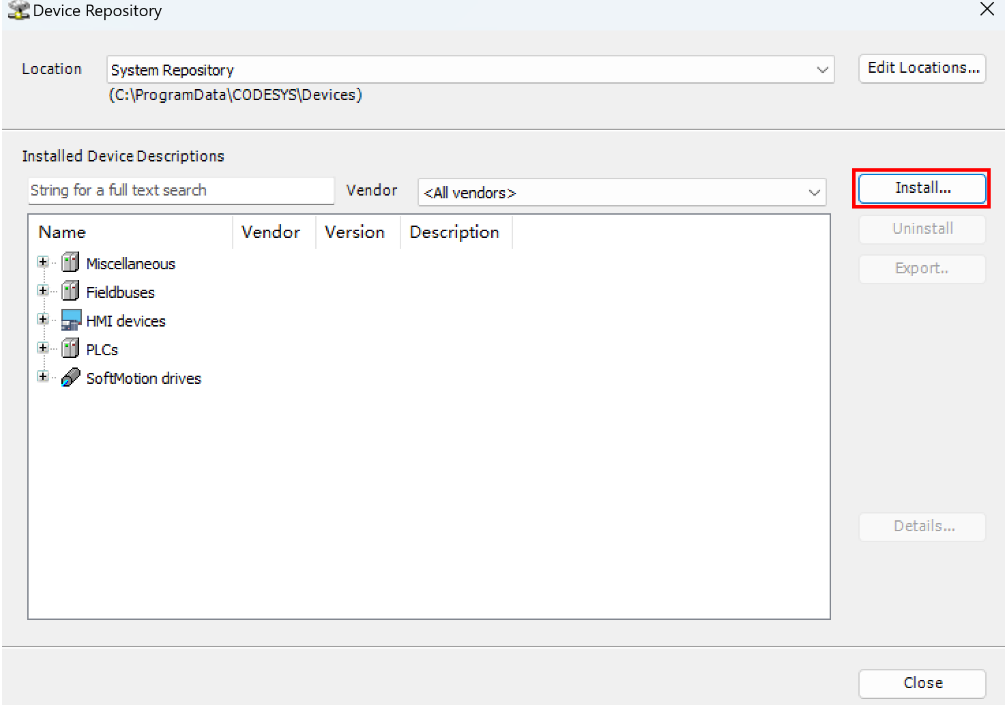
In the pop-up "Install Device Description" pane, select the device file to be installed, and click "Open" to perform the installation.
After successful installation, you can check that the device description file has been added successfully in the "Device Repository".
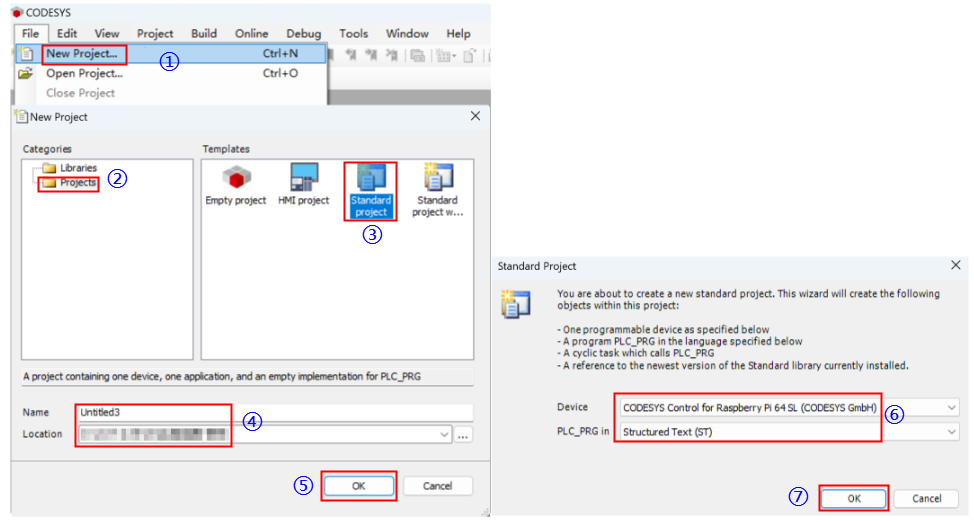
- Create a new standard project with reference to the following figure.
Category: Select "Projects"
Template: Select "Standard project"
Name: Customize as needed
Location: Customize as needed
Device: Select "CODESYS Control for Raspberry Pi 64 SL"
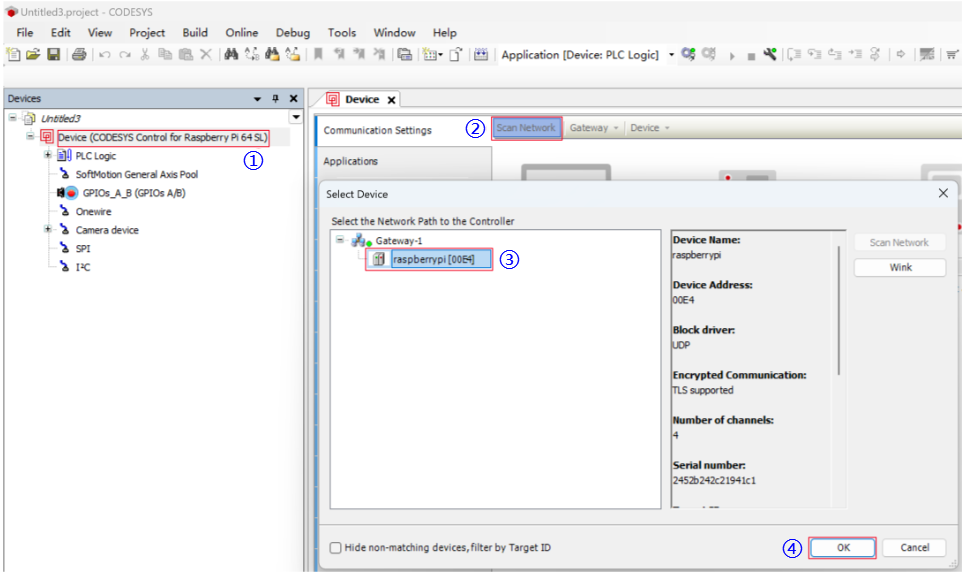
- Double-click "Device" on the left side of the interface with the left mouse button. On the right side, select the "Scan Network" tab. In the pop-up "Select Device" tab, choose the device to be authorized, then click "OK".
TIP
If the device is not detected, the possible reasons are as follows:
- The PC and the device are not in the same network segment. You need to reconfigure the PC and the device to be in the same network segment.
- The CODESYS runtime is not installed or has been damaged, and needs to be reinstalled.
- The CODESYS Gateway v3 service is not enabled. It can be enabled in the local services.
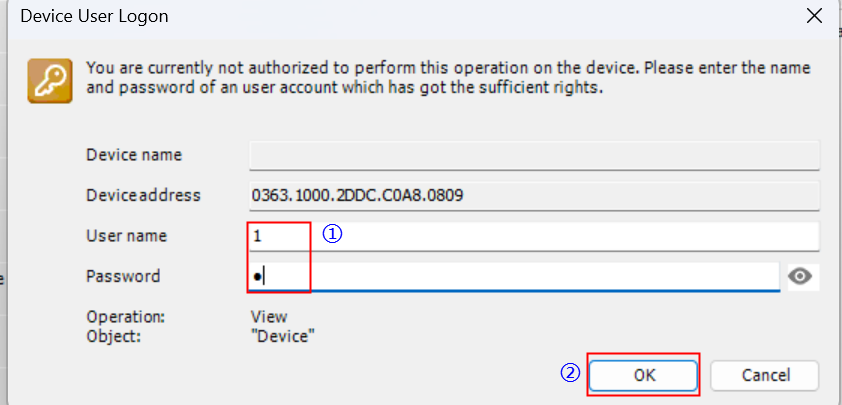
- In the pop-up "Device User Login" tab, enter the username and password, then click "OK" to log in to the device.
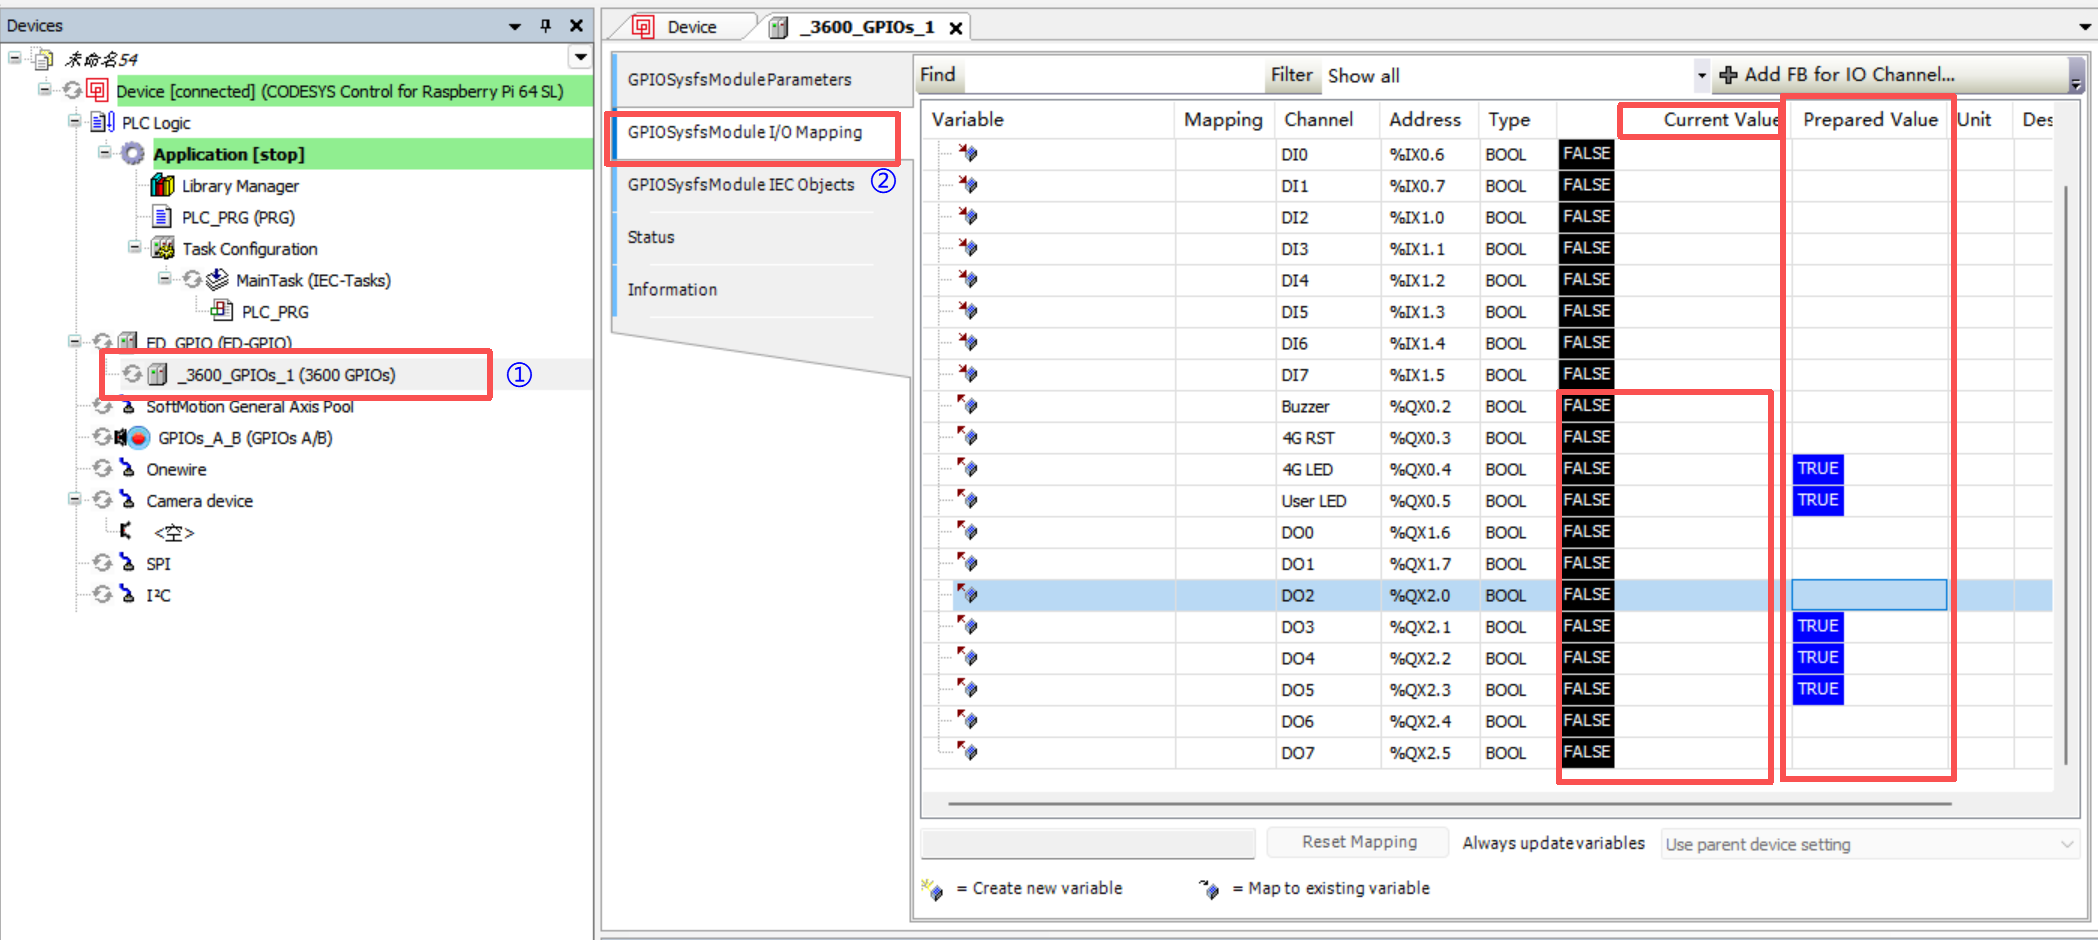
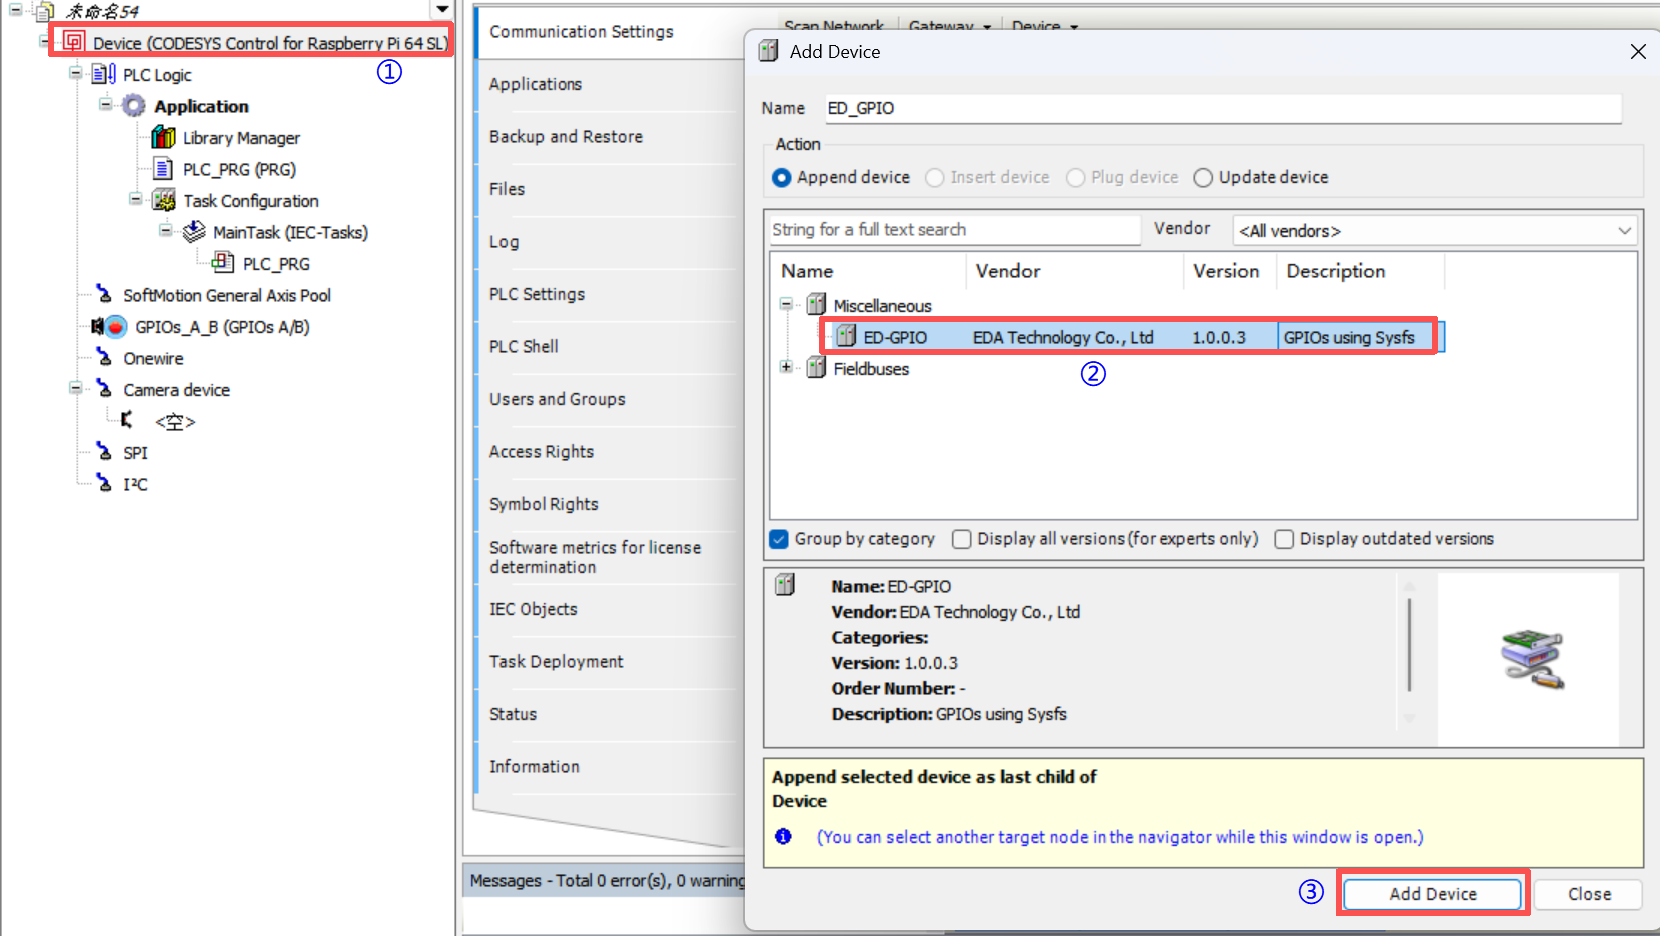
- After successful login, add the GPIO module. Right-click "Device", select "Add Device" from the menu, and add ED-GPIO.
- Right-click "ED_GPIO" and select "ADD Device" from the menu, then choose the device that needs to be added.

If the corresponding device appears under the ED_GPIO device directory, it indicates that the addition is successful.
Double-click the GPIO device with the left mouse button, and view and control the GPIO in the interface on the right. You can manually test writing the preset value to the current value, and the state of the GPIO pin will change at this time.