How to rotate the screen
1 Overview
Introducting the Background and Applicability to Screen Rotation on ED-HMI Series Products.
1.1 Background
The ED-HMI series products are configured with a landscape orientation as the factory default screen display. However, some users may require portrait orientation for specific use cases to meet practical needs. To address this requirement, we provide detailed step-by-step instructions to guide users in correctly rotating the screen orientation.
1.2 Applicability
This application is compatible with all ED-HMI series products.
2 Configuration Guide
Introducting steps to Rotate the Screen on ED-HMI Series Products. The following instructions use the ED-HMI2120-070C as an example.
2.1 Configure on Raspberry Pi OS (Desktop, bookworm)
2.1.1 Rotate the Screen
Preparation:
- The ED-HMI2120-070C has successfully booted to the desktop environment and established network connectivity.
Steps:
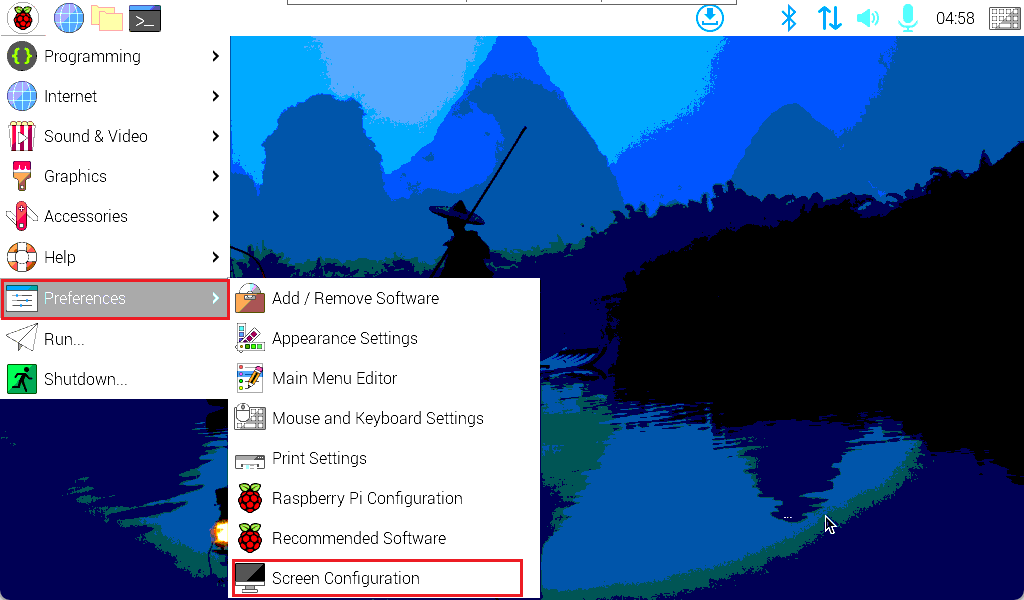
- Left-click
 icon in the top-left corner of the desktop, then navigate to "Preferences"→"Screen Configuration" in the menu.
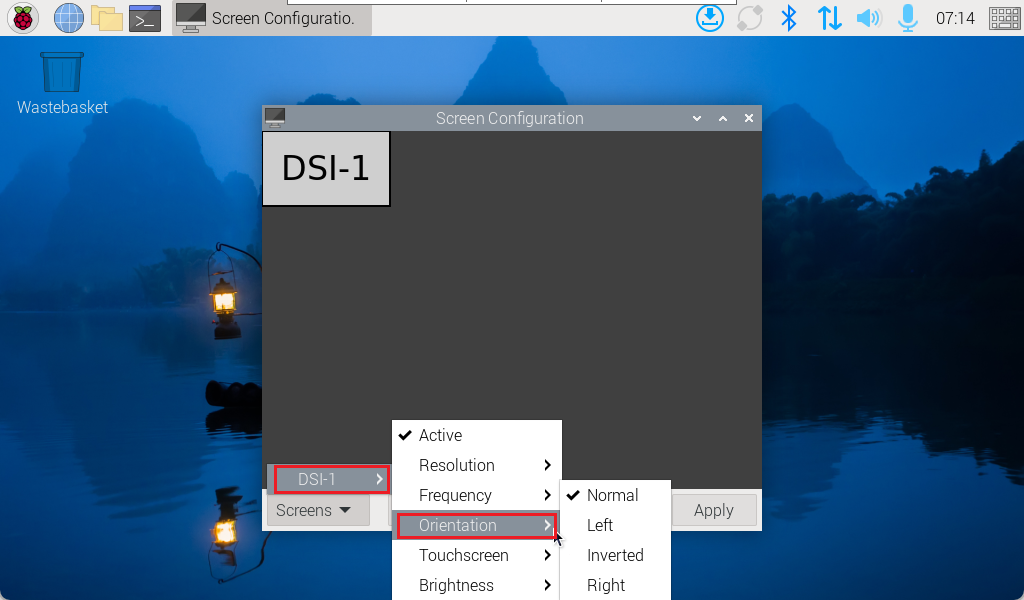
- In the opened
Screen Configurationinterface, Click the "Screens" in the bottom-left corner. Then select "DSI-1"→"Orientation"→“Normal/Left/Inverted/Right”.
Choose the desired rotation angle:
- Normal: No rotation (default).
- Left: Rotate 90° counterclockwise (left).
- Right: Rotate 90° clockwise (right).
- Inverted: Rotate 180°.
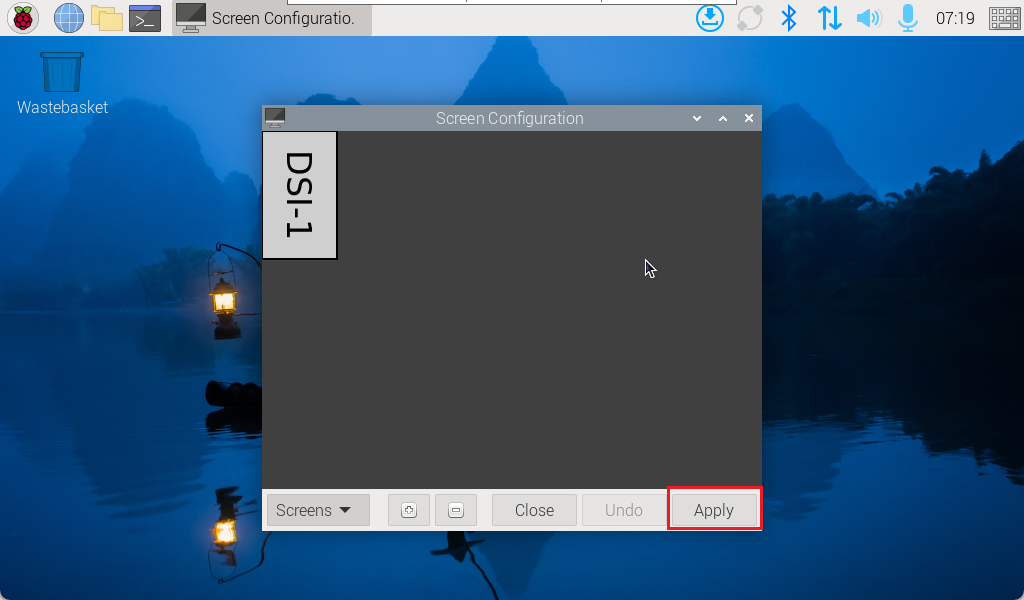
- After selecting the rotation angle, click "Apply" in the lower-right corner.
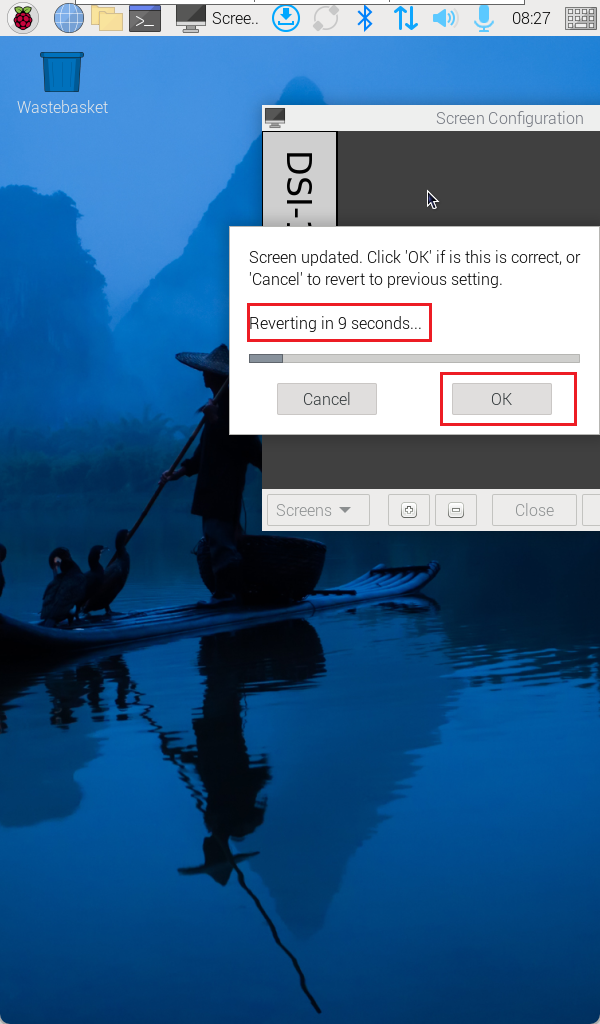
- In the confirmation dialog, click "OK" to complete the configuration.
2.1.2 Rotate Touchscreen (Optional)
- If the Raspberry Pi OS (Desktop) is running the labwc environment, no additional touchscreen rotation is needed after rotating the screen.
- If the Raspberry Pi OS (Desktop) uses the X11 environment and the touchscreen fails to rotate automatically, follow the steps below to manually adjust touchscreen orientation.
Preparation:
- The ED-HMI2120-070C has completed screen rotation.
Steps:
- Execute the following commands in the terminal to open
140-libinput.confconfiguration file.
sudo nano /usr/share/X11/xorg.conf.d/40-libinput.conf
- Adjust the touchscreen angle as needed based on your specific requirements. Modify the
CalibrationMatrixvalues to match the desired orientation.
- 0 degrees (default): Option "CalibrationMatrix" "1 0 0 0 1 0 0 0 1"
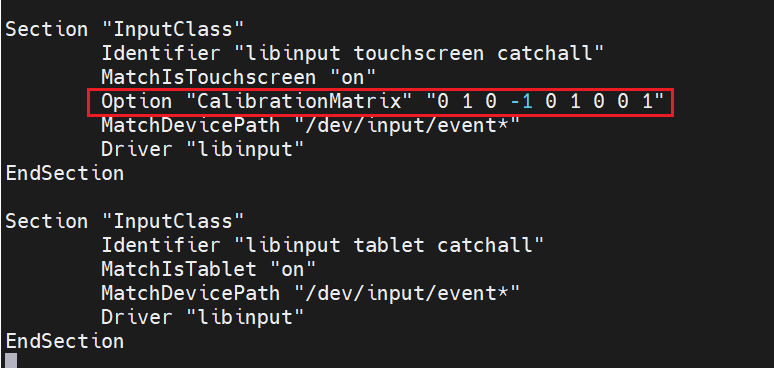
- 90° clockwise rotation: Option "CalibrationMatrix" "0 1 0 -1 0 1 0 0 1"
- 180° clockwise rotation: Option "CalibrationMatrix" "-1 0 1 0 -1 1 0 0 1"
- 270° clockwise rotation: Option "CalibrationMatrix" "0 -1 1 1 0 0 0 0 1"
- Horizontal/Vertical flip: Option "CalibrationMatrix" "-1 0 1 1 0 0 0 0 1"
The configuration below demonstrates a 90° clockwise rotation:
Save and Exit the File:
- Press Ctrl+O to save changes.
- Press Enter to confirm.
- Press Ctrl+X to exit the editor.
Execute the following command to restart the device and activate the new configuration.
sudo reboot
2.2 Configure on Raspberry Pi OS (Lite)
2.2.1 Rotate the Screen
Preparation:
- The ED-HMI2120-070C has successfully booted into the Lite system and established network connectivity.
Steps:
- Execute the following commands in the terminal to open
cmdline.txtboot configuration file.
sudo nano /boot/firmware/cmdline.txt
- Add the following content to the end of the file to rotate the screen by 90°:
video=DSI-2:800x1280@40,rotate=90
- The value after
rotate=specifies the rotation angle in degrees. Valid values are 0, 90, 180, and 270. DSI-2:800x1280@40represents the screen resolution and refresh rate settings.
Save and Exit the File:
- Press Ctrl+O to save changes.
- Press Enter to confirm.
- Press Ctrl+X to exit the editor.
2.2.2 Rotate Touchscreen
After rotating the screen on Raspberry Pi OS (Lite), you must manually adjust the touchscreen orientation separately.
Preparation:
- The ED-HMI2120-070C has completed screen rotation.
Steps:
- Execute the following commands in the terminal to open
140-libinput.confconfiguration file.
sudo nano /usr/share/X11/xorg.conf.d/40-libinput.conf
- Adjust the touchscreen angle as needed based on your specific requirements. Modify the
CalibrationMatrixvalues to match the desired orientation.
- 0 degrees (default): Option "CalibrationMatrix" "1 0 0 0 1 0 0 0 1"
- 90° clockwise rotation: Option "CalibrationMatrix" "0 1 0 -1 0 1 0 0 1"
- 180° clockwise rotation: Option "CalibrationMatrix" "-1 0 1 0 -1 1 0 0 1"
- 270° clockwise rotation: Option "CalibrationMatrix" "0 -1 1 1 0 0 0 0 1"
- Horizontal/Vertical flip: Option "CalibrationMatrix" "-1 0 1 1 0 0 0 0 1"
The configuration below demonstrates a 90° clockwise rotation:
Save and Exit the File:
- Press Ctrl+O to save changes.
- Press Enter to confirm.
- Press Ctrl+X to exit the editor.
Execute the following command to restart the device and activate the new configuration.
sudo reboot