Flashing to eMMC via a USB drive
1 Overview
Introduce the background and applicable scope of flashing to eMMC via a USB drive.
1.1 Background
Currently, our company's ED-IPC and ED-HMI products support eMMC flashing via Micro USB. However, for some older models (e.g., ED-CM4SEN), the Micro USB port is located inside the device, requiring the removal of the outer casing to perform flashing, which complicates the process.
For devices with externally accessible Micro USB ports, frequent plugging/unplugging may lead to port damage, and the flashing speed via Micro USB is relatively slow.
To address these issues, customers have requested the ability to flash to eMMC using a Type-A USB port with an external USB drive. For this application scenario, our engineers have conducted validation and developed a step-by-step guide to assist users in flashing to eMMC via a USB drive.
1.2 Applicability
Applicable device models for this solution are as follows:
- ED-IPC2100
- ED-IPC2600
- ED-HMI2120-070C
- ED-HMI2120-101C
- ED-HMI2630-101C
2 Configuration Guide
To flash to eMMC via a USB drive, follow these steps:
- Install Raspberry Pi OS on the USB drive.
- Configure the device's boot order to prioritize USB boot.
- Insert the USB drive and allow the device to boot normally.
- Copy the Raspberry Pi OS to the device's directory.
- Use the built-in Raspberry Pi Imager tool on the device to flash the eMMC.
The following steps use the ED-IPC2100 device as an example to demonstrate the detailed process of eMMC flashing via a USB drive.
2.1 Flash the image to the USB drive
It is recommended to use the official Raspberry Pi flashing tool, which can be downloaded from the following path:
Preparation:
- The flashing tool has been downloaded and installed on the Windows PC.
- The image file to be flashed has been obtained.
Steps:
The operating steps are explained using the Windows system as an example.
Insert the USB drive into a USB port on the Windows PC.
Open
SD Card Formatter, select the drive to be formatted, and click the "Format" button at the bottom right to proceed with formatting.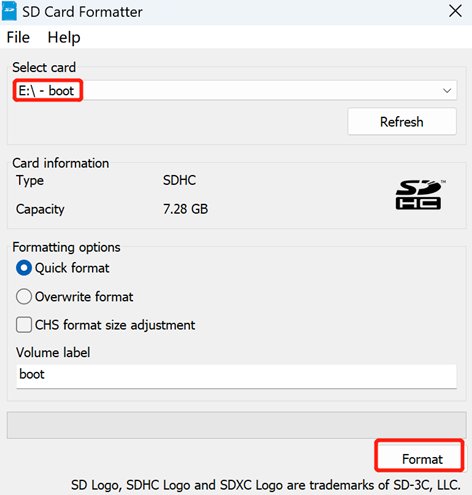
In the pop-up dialog box, click "Yes".
After formatting is completed, click "OK" in the dialog box.
Close
SD Card Formatter.Open
Raspberry Pi Imager, click "CHOOSE OS", and select "Use custom" in the pop-up pane.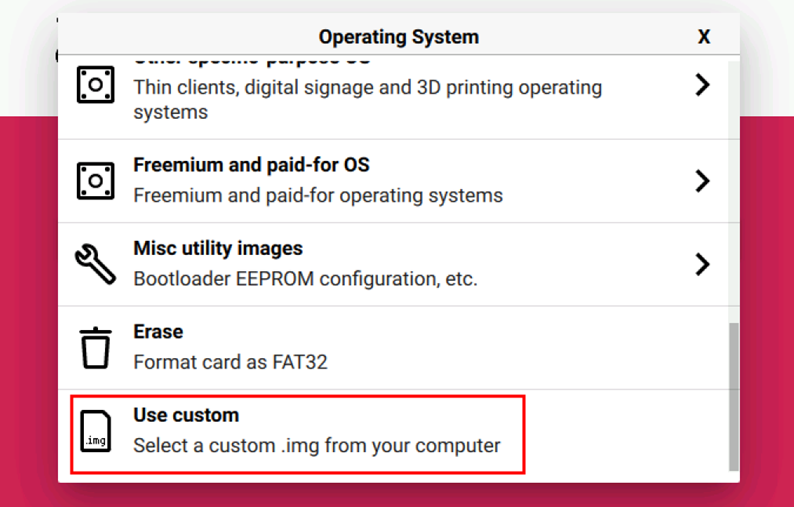
Follow the prompts to select the obtained image file from the custom path, then return to the flashing main interface.
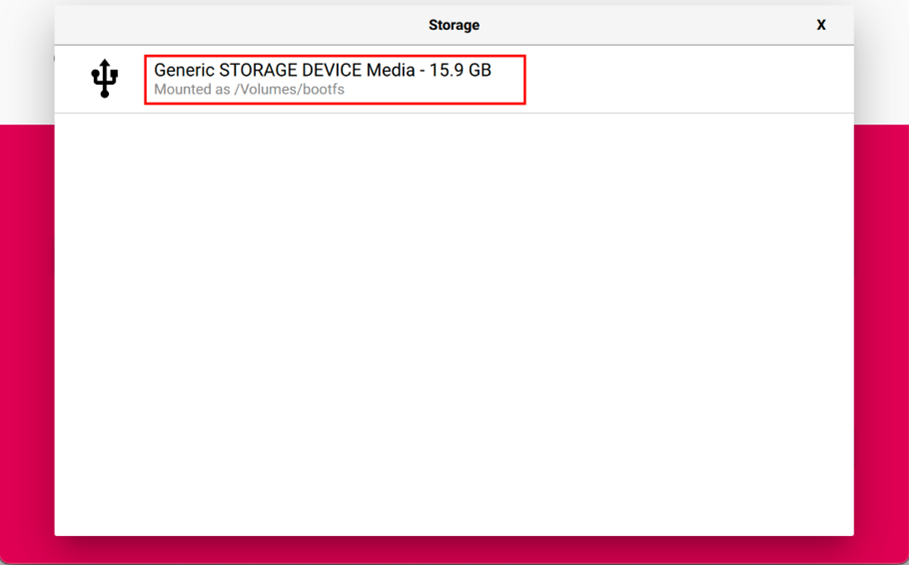
Click "CHOOSE STORAGE", then in the "Storage" interface, select the default SD card and return to the main flashing interface.
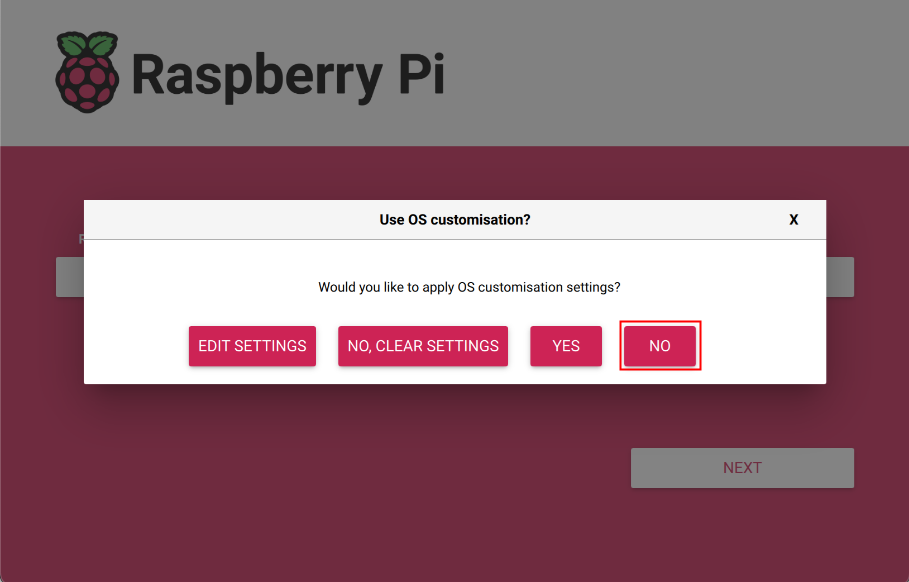
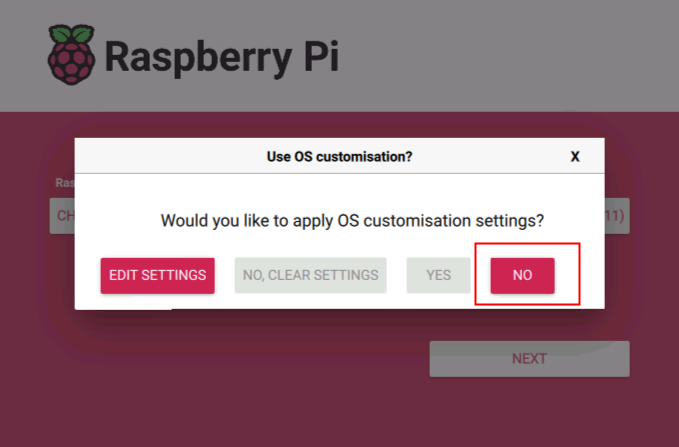
Click "NEXT", then in the pop-up dialog box "Use OS customization?", select "NO".
In the pop-up "Warning" dialog box, select "Yes" to start writing the image.
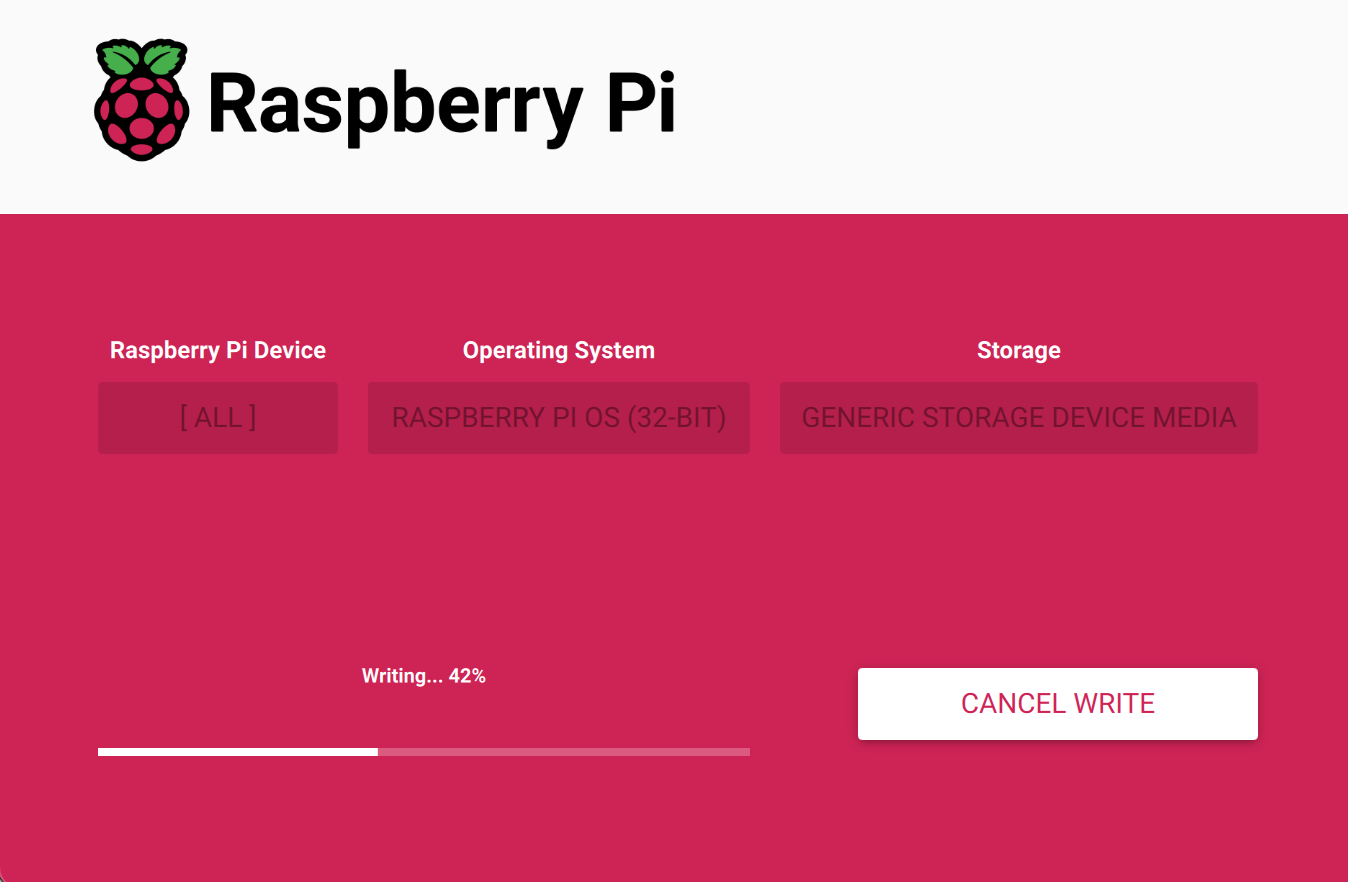
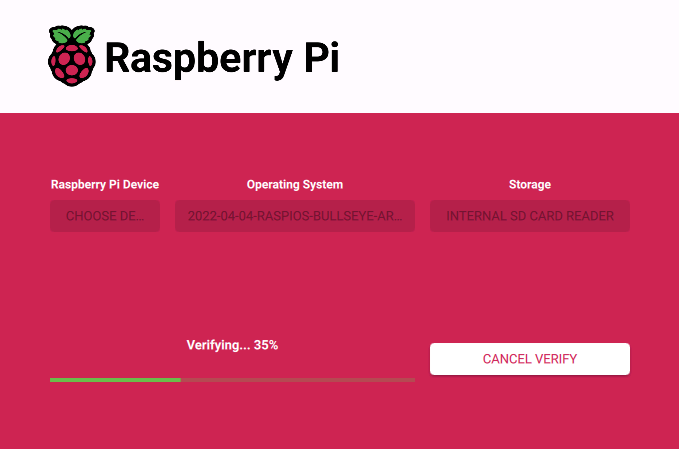
After the image writing is completed, file verification will be performed.
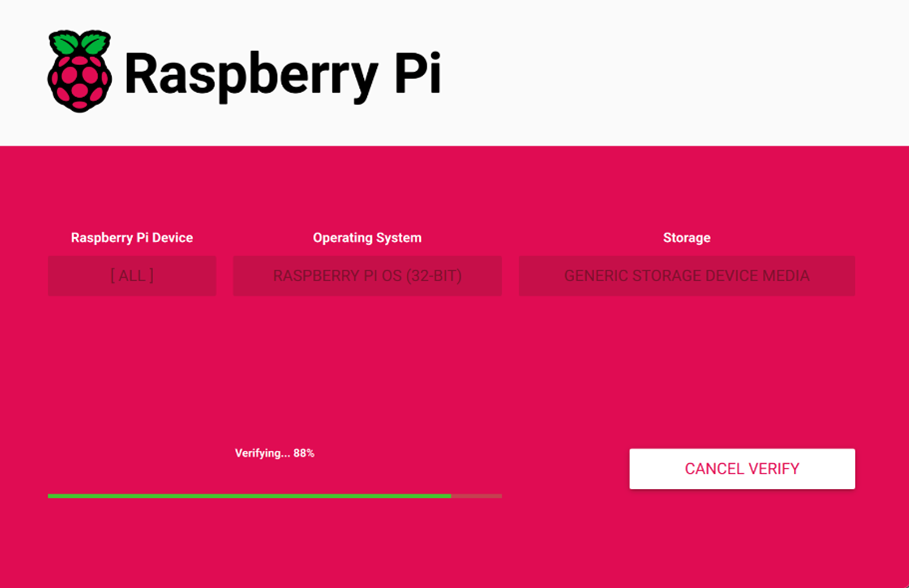
After verification is completed, a "Write Successful" dialog box will appear. Click "CONTINUE" to complete the flashing process.
Close
Raspberry Pi Imagerand safely remove the USB drive.
2.2 Configure the device to boot from USB
Configuring the device to boot from USB includes two methods:
- Using the
Raspberry Pi Imagertool - Configuring via a Linux device
2.2.1 Configure via the Raspberry Pi Imager Tool
We recommend using the official Raspberry Pi Imager tool. The download link is as follows:
Preparation:
- The flashing tool has been downloaded and installed on the Windows PC.
- A Micro USB to Type-A USB cable (USB flashing cable) has been prepared.
Steps:
Connect the ED-IPC2100 device’s power cable and USB flashing cable.
- Power cable connection:
- One end connects to the 2-pin Phoenix terminal on the device side.
- The other end connects to an external power supply.
- USB flashing cable connection:
- One end connects to the Micro USB port on the device side.
- The other end connects to a USB port on your PC.
- Power cable connection:
Disconnect the power supply, then reconnect it.
Open the installed
rpiboottool to automatically mount the drive.
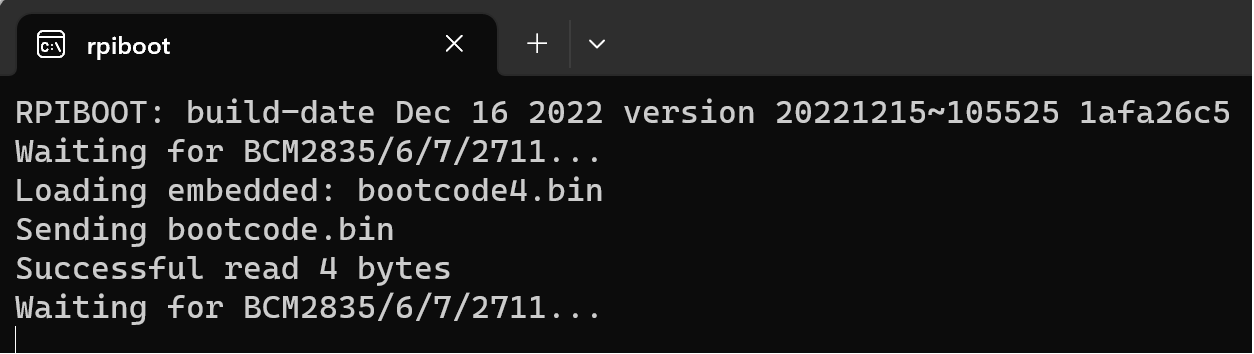
After the drive is recognized and assigned a letter, a notification with the drive letter (e.g., E:) will appear in the system tray (lower-right corner of the screen), as shown in the image below.
Open
Raspberry Pi Imager, click "CHOOSE OS", and select "Misc utility images" in the pop-up pane.
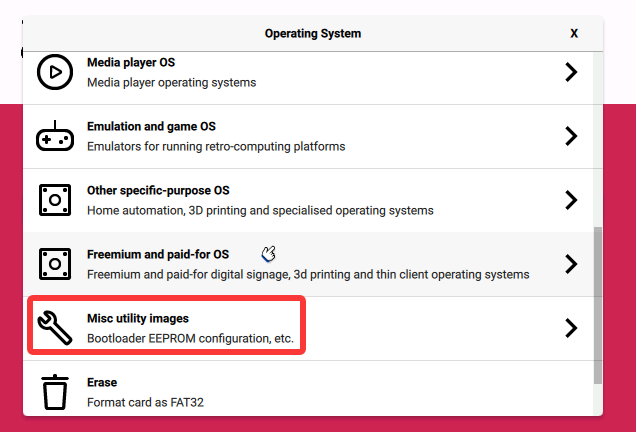
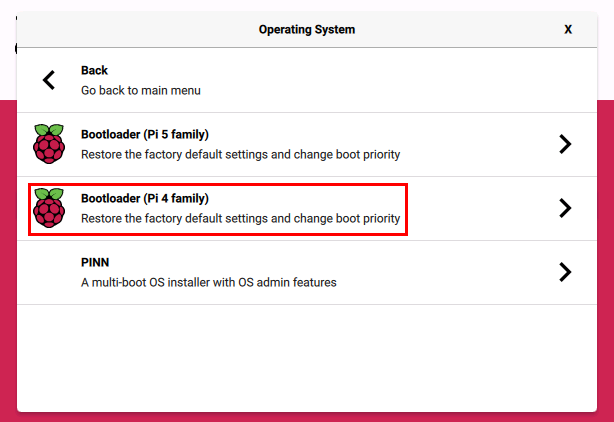
- Based on the product model (ED-IPC2100), select "Bootloader (Pi 4 family)" in the interface.
TIP
The selection here depends on the specific product:
- For CM5/Pi5 platform-based products, choose "Bootloader (Pi 5 family)".
- For CM4/Pi4 platform-based products, choose "Bootloader (Pi 4 family)".
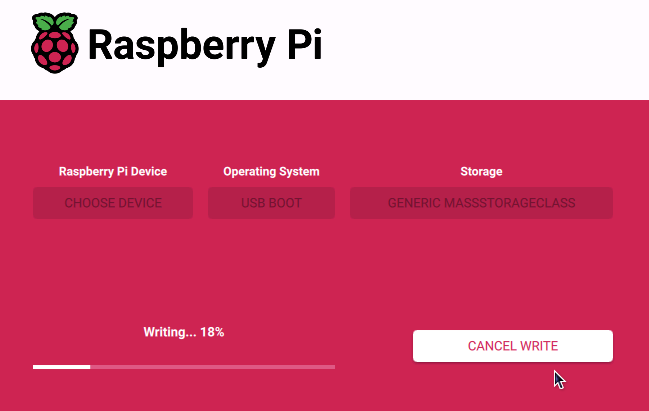
- Select "USB Boot" in the open interface.

- Click "NEXT", then select "Yes" in the pop-up dialog box to start writing the image.
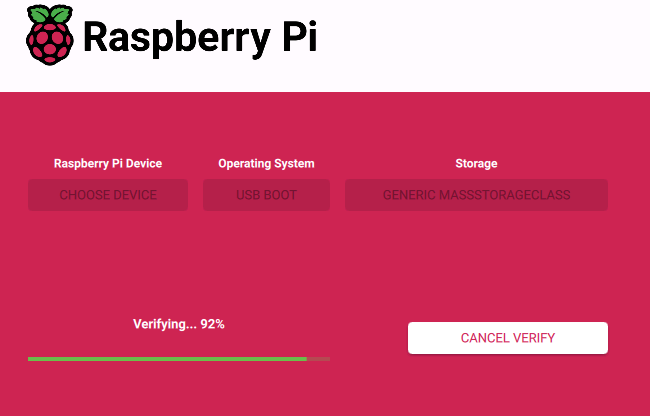
- After flashing is completed, file verification will be performed.
- In the pop-up dialog box, click "CONTINUE" to complete the flashing process.
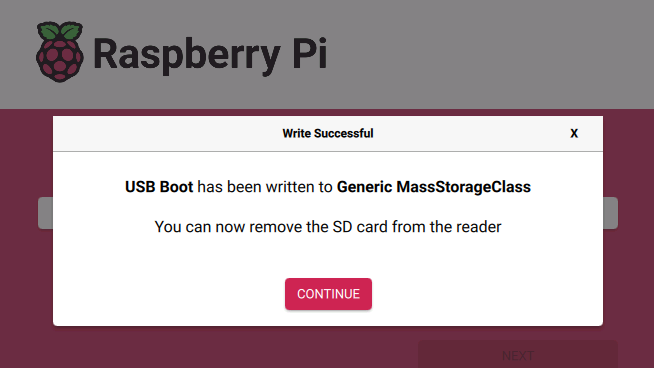
- After flashing is completed, disconnect the Micro USB to Type-A USB cable (USB flashing cable).
- Insert the USB drive flashed with the OS into the device’s Type-A USB port, then power off the device and restart it. The device will boot from the USB drive.
2.2.2 Configure via a Linux device
Configure the ED-IPC2100 to boot from USB using another Linux device. The following example uses a Raspberry Pi 4 as the Linux host for configuration.
Preparation:
- A Raspberry Pi 4 has been prepared, is bootable, and connected to the network via an Ethernet interface.
- A Micro USB to Type-A USB cable (USB flashing cable) has been prepared.
Steps:
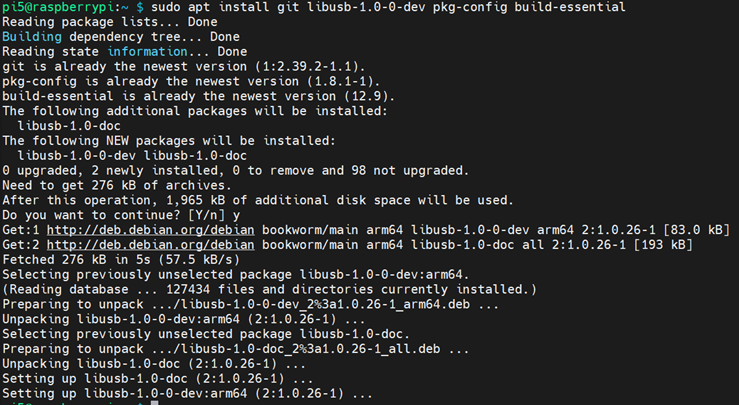
- Power on the Raspberry Pi 4 to ensure it boots normally, then open the terminal and execute the following command to install Git.
sudo apt install git libusb-1.0-0-dev pkg-config build-essential
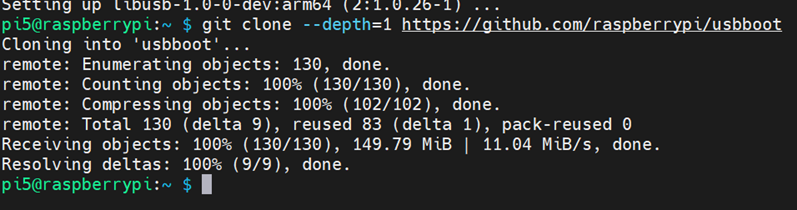
- Execute the following commands to clone and install the
usbboottool.
git clone --depth=1 https://github.com/raspberrypi/usbboot
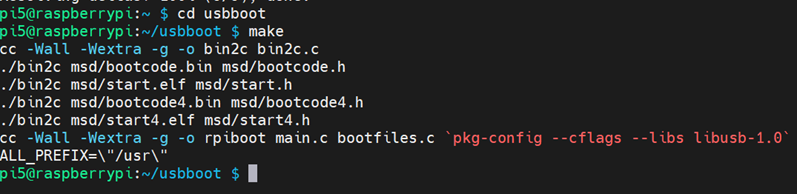
- Execute the following commands in sequence to configure the environment.
cd usbboot
make
- Execute the following commands in sequence to copy the "customer" folder and navigate into it.
cp -r recovery customer
cd customer

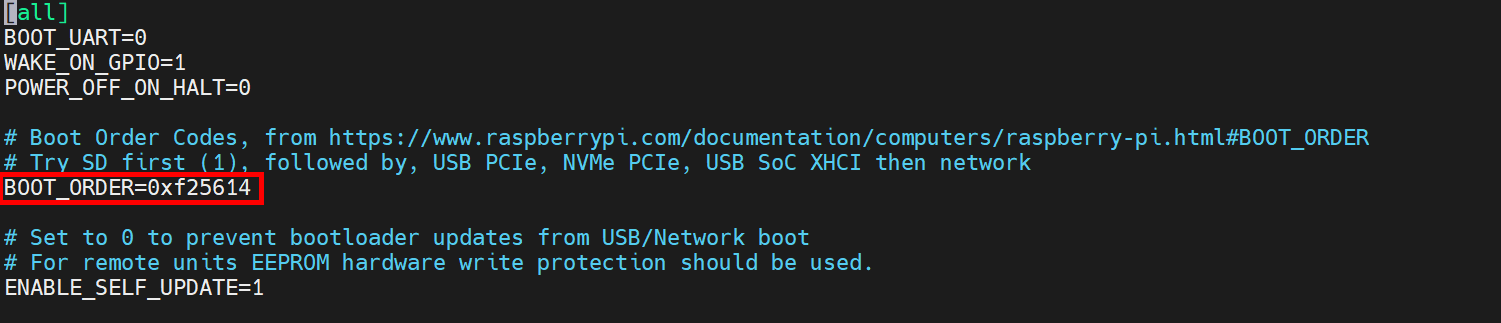
- Execute the following commands to open the
boot.conffile and modify the value after "BOOT_ORDER=" to "0xf25614".
BOOT_ORDER=0xf25614indicates priority booting from USB. For details, refer to the raspberry pi boot_order-fields.
nano boot.conf
Press
Ctrl+Ofollowed byCtrl+Xto save the file and exit the editor.Connect the Raspberry Pi 4 to the ED-IPC2100 using a Micro USB to Type-A USB flashing cable, then power cycle the ED-IPC2100 (turn it off and restart).
- Connect the Micro USB end of the cable to the Micro USB port on the ED-IPC2100.
- Connect the Type-A USB end of the cable to a USB port on the Raspberry Pi 4.
- Execute the following command in the terminal window of the Raspberry Pi 4 to update the EEPROM.
./update-pieeprom.sh

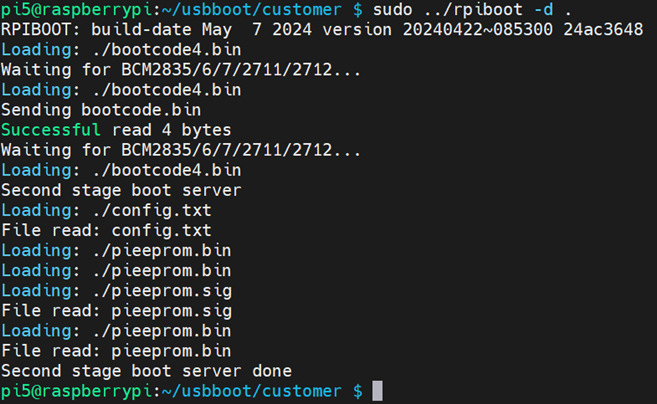
- Execute the following commands in the terminal window of the Raspberry Pi 4 to mount the drive.
sudo ../rpiboot -d .
Disconnect the Micro USB to Type-A USB flashing cable between the Raspberry Pi 4 and the ED-IPC2100.
Insert the USB drive flashed with the OS into the ED-IPC2100 device's Type-A USB port, then power cycle the device (turn it off and back on). The device will now boot from the USB drive.
TIP
If the ED-IPC2100's eMMC contains an operating system, follow these steps:
- Use a disk utility and erase tool to wipe the existing OS from the eMMC.
- Insert the USB drive flashed with the new OS into the Type-A USB port of the ED-IPC2100.
- Power cycle the device (turn it off and restart) to boot from the USB drive.
3 Flash the image to eMMC
Steps to Flash eMMC on the ED-IPC2100 Using the Built-in Raspberry Pi Imager Tool.
Preparation:
- The ED-IPC2100 device has successfully booted from the USB drive.
- The image file to be flashed has been obtained
Steps:
The following steps are explained using a Windows system as an example.
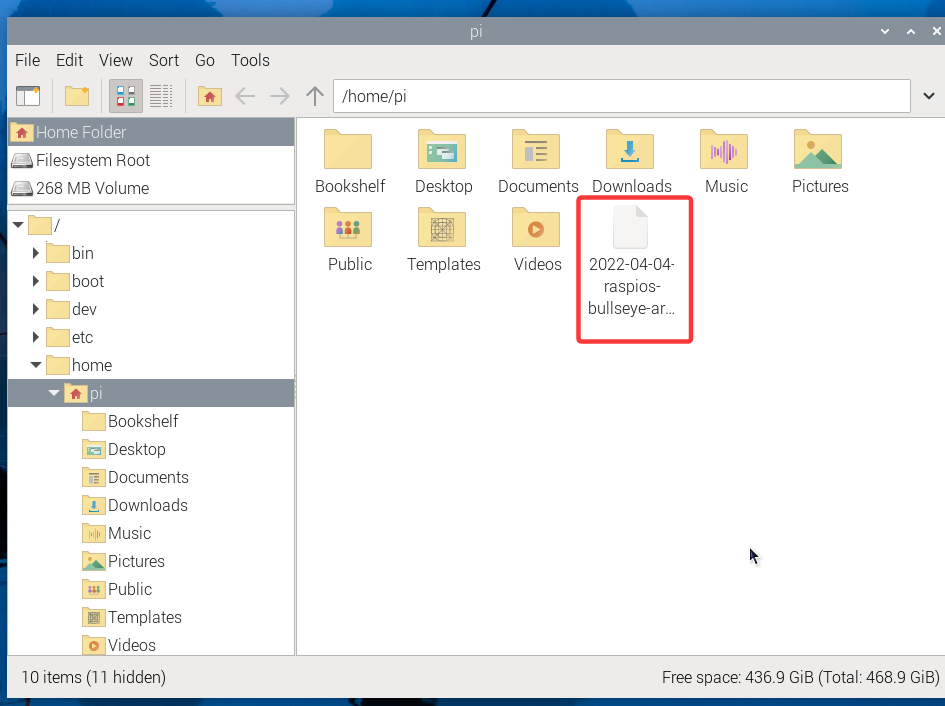
Copy the downloaded image file to the
pidirectory on the ED-IPC2100 device.After copying is completed, check the image file in the
pidirectory on the device.
- Click the icon
 in the upper-left corner of the desktop, then select "Accessories" → "Imager" from the menu to open
 Raspberry Pi Imager.
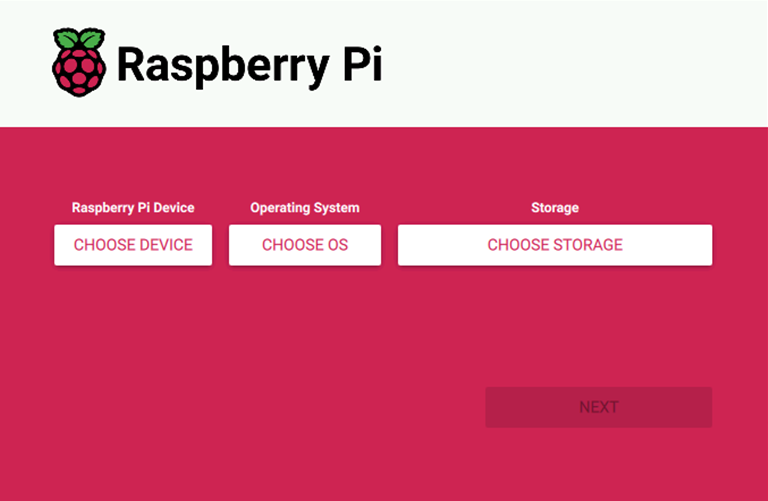
- Click "CHOOSE OS", then in the pop-up "Operating System" interface, select "Use custom".
- In the opened "Select image" interface, choose the image file to be flashed.

Click "Open" to return to the
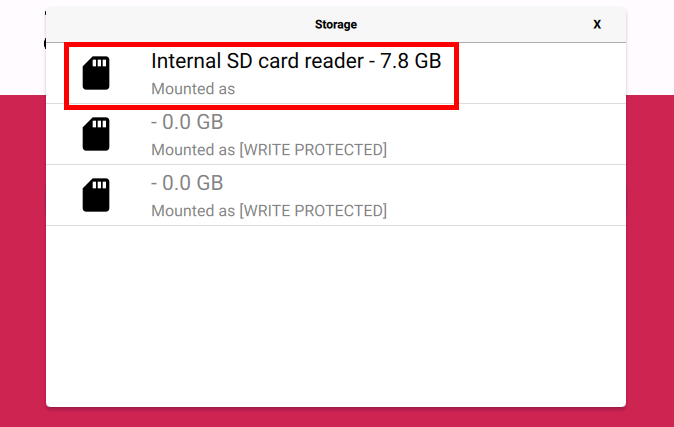
Raspberry Pi Imagermain interface.Click "CHOOSE STORAGE", then in the pop-up "Storage" interface, select the eMMC as the target storage device.
- On the
Raspberry Pi Imagermain interface, click "NEXT", then select "NO" in the pop-up "Use OS customization?" dialog.
- In the pop-up "Authenticate" window, enter the login password (raspberry), then click "Authenticate" to start writing the image.
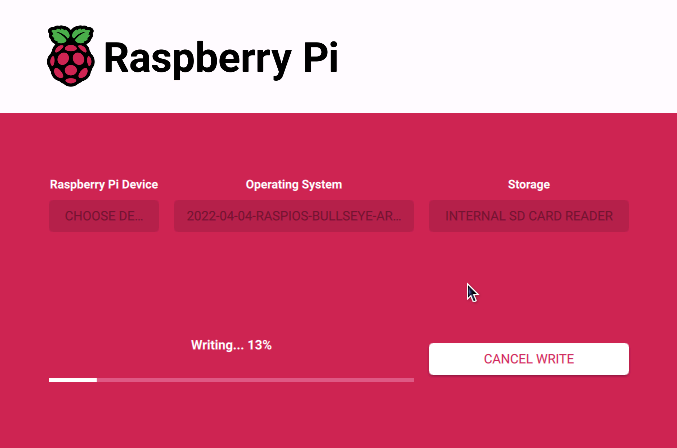
- After flashing is completed, file verification will be performed.
After verification is completed, re-enter the login password (raspberry) in the pop-up "Authenticate" window, then click "Authenticate".
In the pop-up "Write Successful" interface, click "CONTINUE" to return to the
Raspberry Pi Imagermain interface.After completing the flashing process, power off the device, remove the USB drive, then power it back on. The ED-IPC2100 device will boot from the eMMC.