CODESYS Standalone Edition License Activation and Recovery
1 Overview
Background and Scope of Application for Using CODESYS Standalone Licenses on ED-IPC, ED-HMI, and ED-PLC Products.
1.1 Background
Some customers who purchase our ED-IPC, ED-HMI, and PLC products configure their devices with a standalone CODESYS license (CODESYS Control for Raspberry Pi SL). However, during deployment, they may encounter questions about license activation, backup, and recovery. To assist users, we have developed a technical guide document tailored to this scenario, providing clear instructions for activating, backing up, and recovering standalone CODESYS licenses.
1.2 Applicability
This documentation applies to the standalone CODESYS licenses shipped with ED-IPC, ED-HMI, and ED-PLC devices.
2 Configuration Guide
Steps for Using CODESYS Standalone Licenses on ED-IPC, ED-HMI, and ED-PLC Products. The following steps are demonstrated using the ED-PLC device as an example.
2.1 Activate License
Preparation:
- The CODESYS IDE software (version V3.5 SP20 Patch1) has been downloaded and installed on the Windows PC.
- The ED-PLC device to be licensed has been properly booted and connected via Ethernet.
- Ensure the Windows PC is connected to the network and on the same subnet as the ED-PLC device to be licensed.
- SSH is enabled on the ED-PLC device.
- The IP address and login credentials (username/password) of the ED-PLC device to be licensed have been obtained.
- The authorized license has been obtained.
Steps:
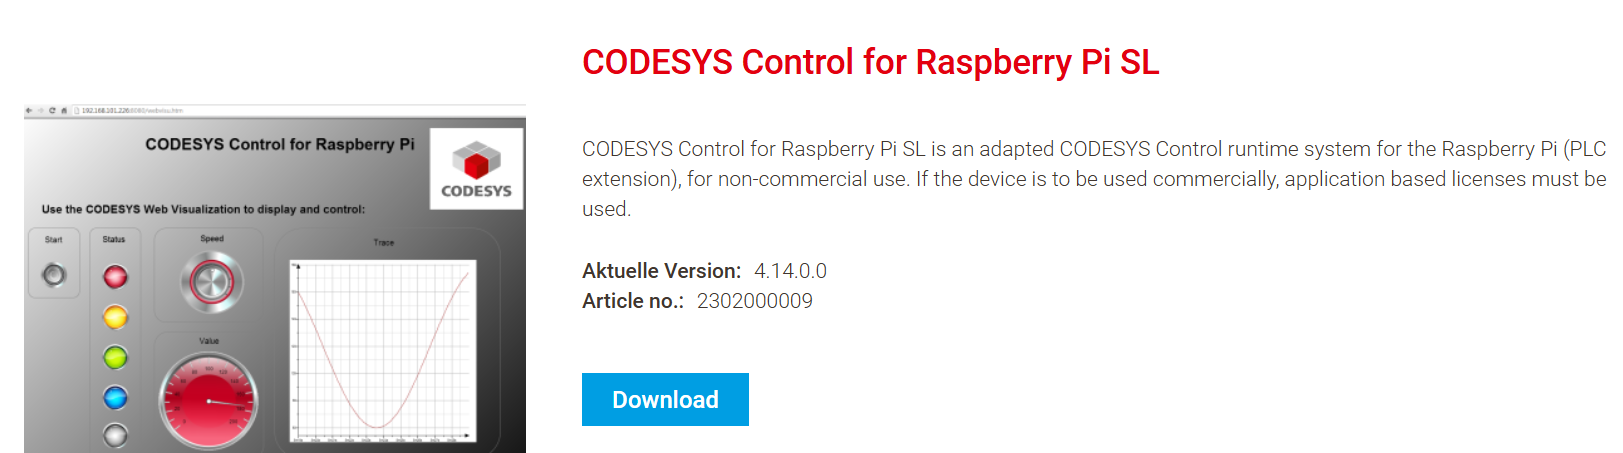
- Visit the official CODESYS website to download the dedicated
CODESYS Control for Raspberry Pi SLruntime system for Raspberry Pi (PLC extension), download link:
CODESYS Control for Raspberry Pi SL | CODESYS Store International
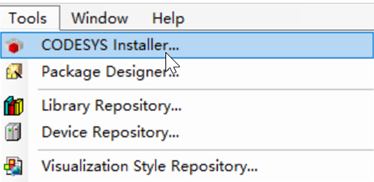
- On the Windows PC, open the CODESYS IDE software. In the menu bar, select "Tools" → "CODESYS Installer..." to open the
CODESYS Installerinterface.
- In the
CODESYS Installerinterface, click "Browse", enter "Raspberry" in the search box to filter results, select the corresponding version of the runtime system from the search results, and then click "Install" to begin the installation.
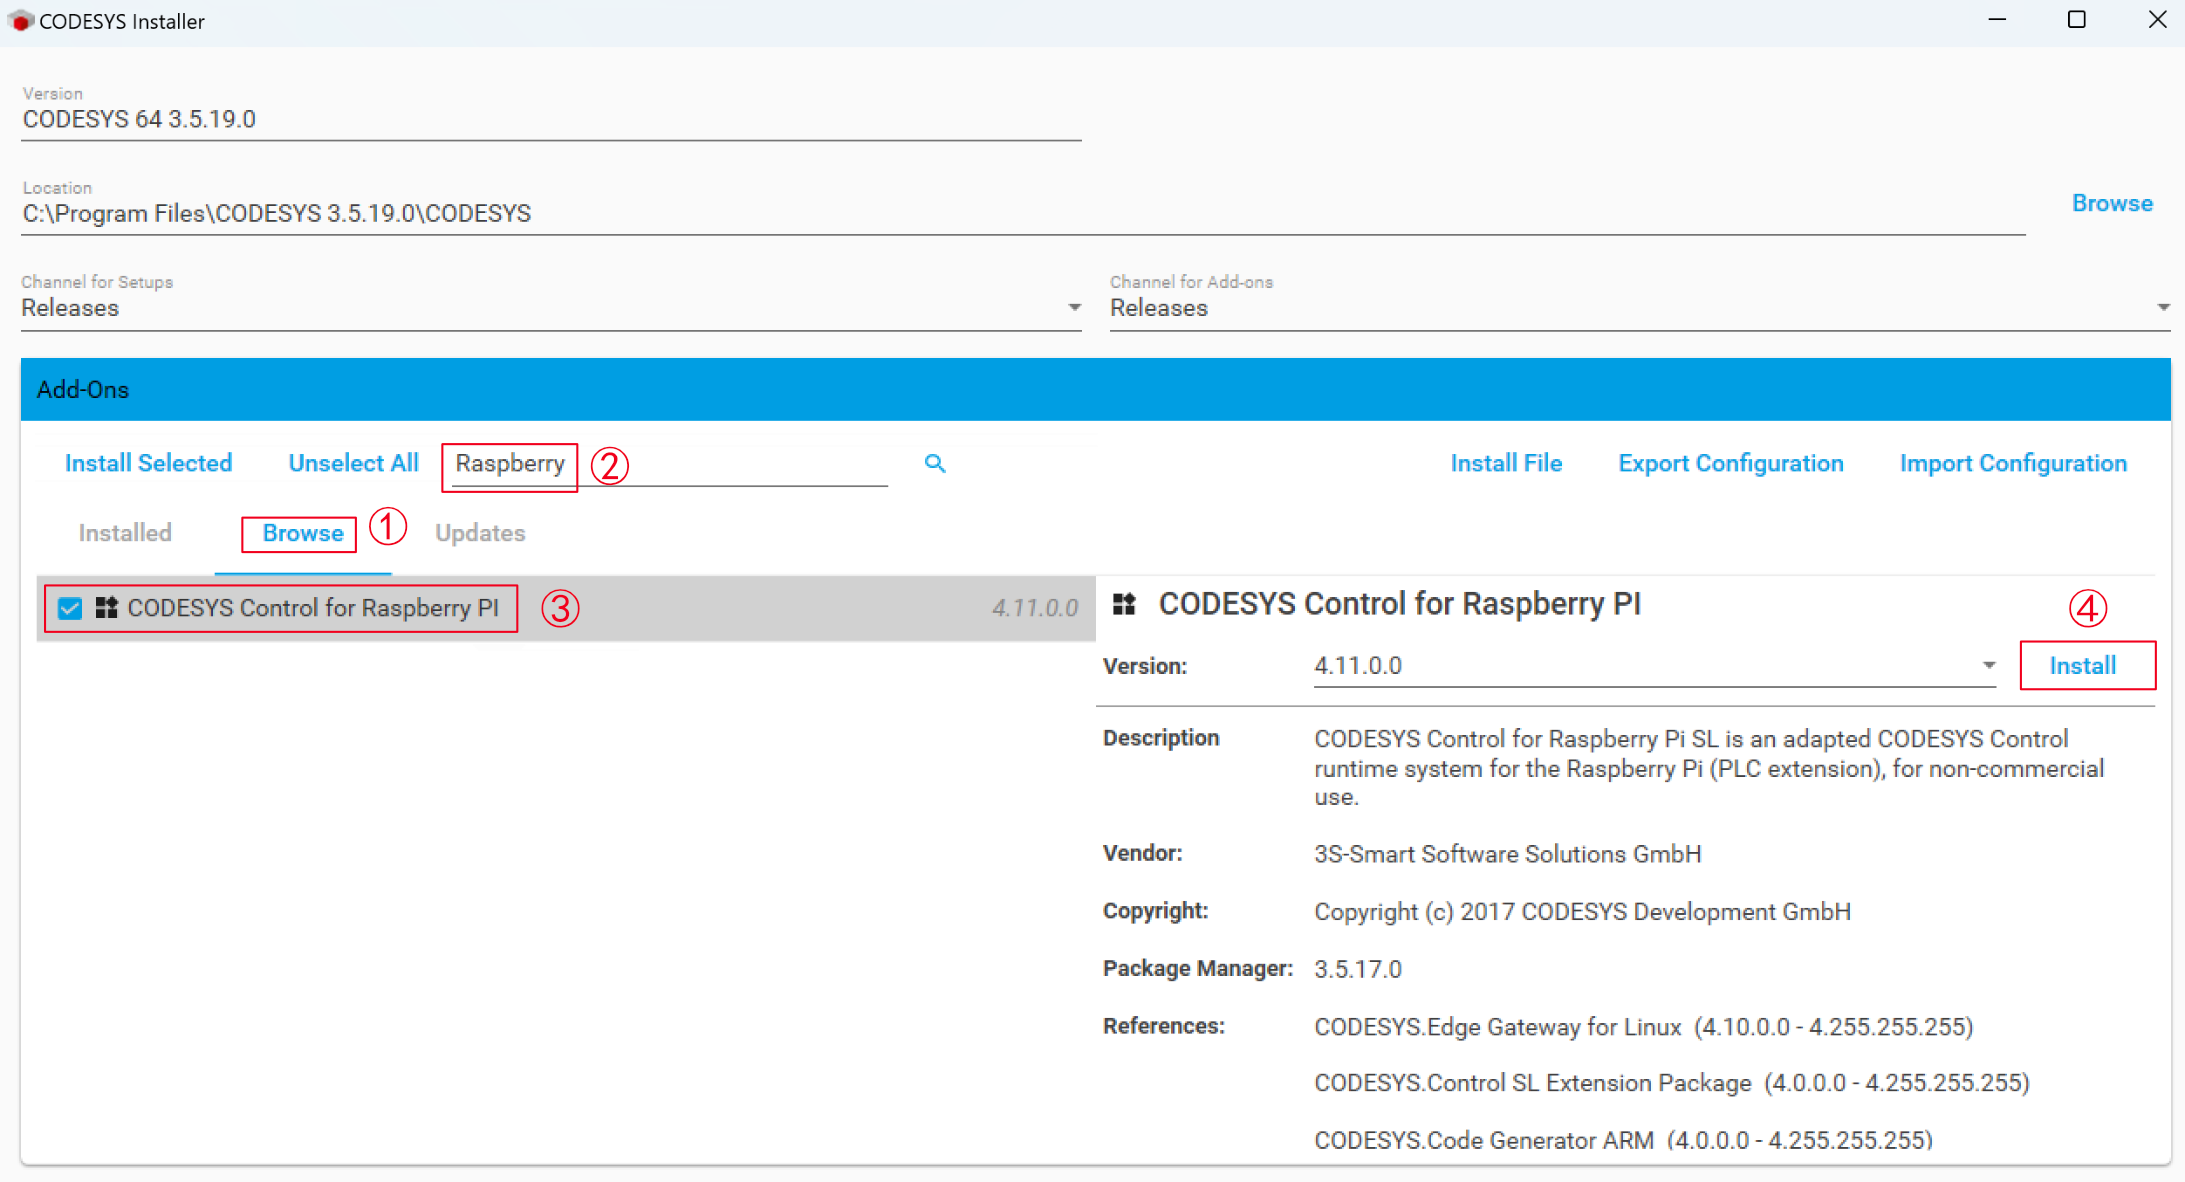
Follow the prompts to complete the installation.
After the installation is complete, select "Tools" → "Deploy Control SL" in the menu bar to open the
Deploy CODESYS Control SLinterface.

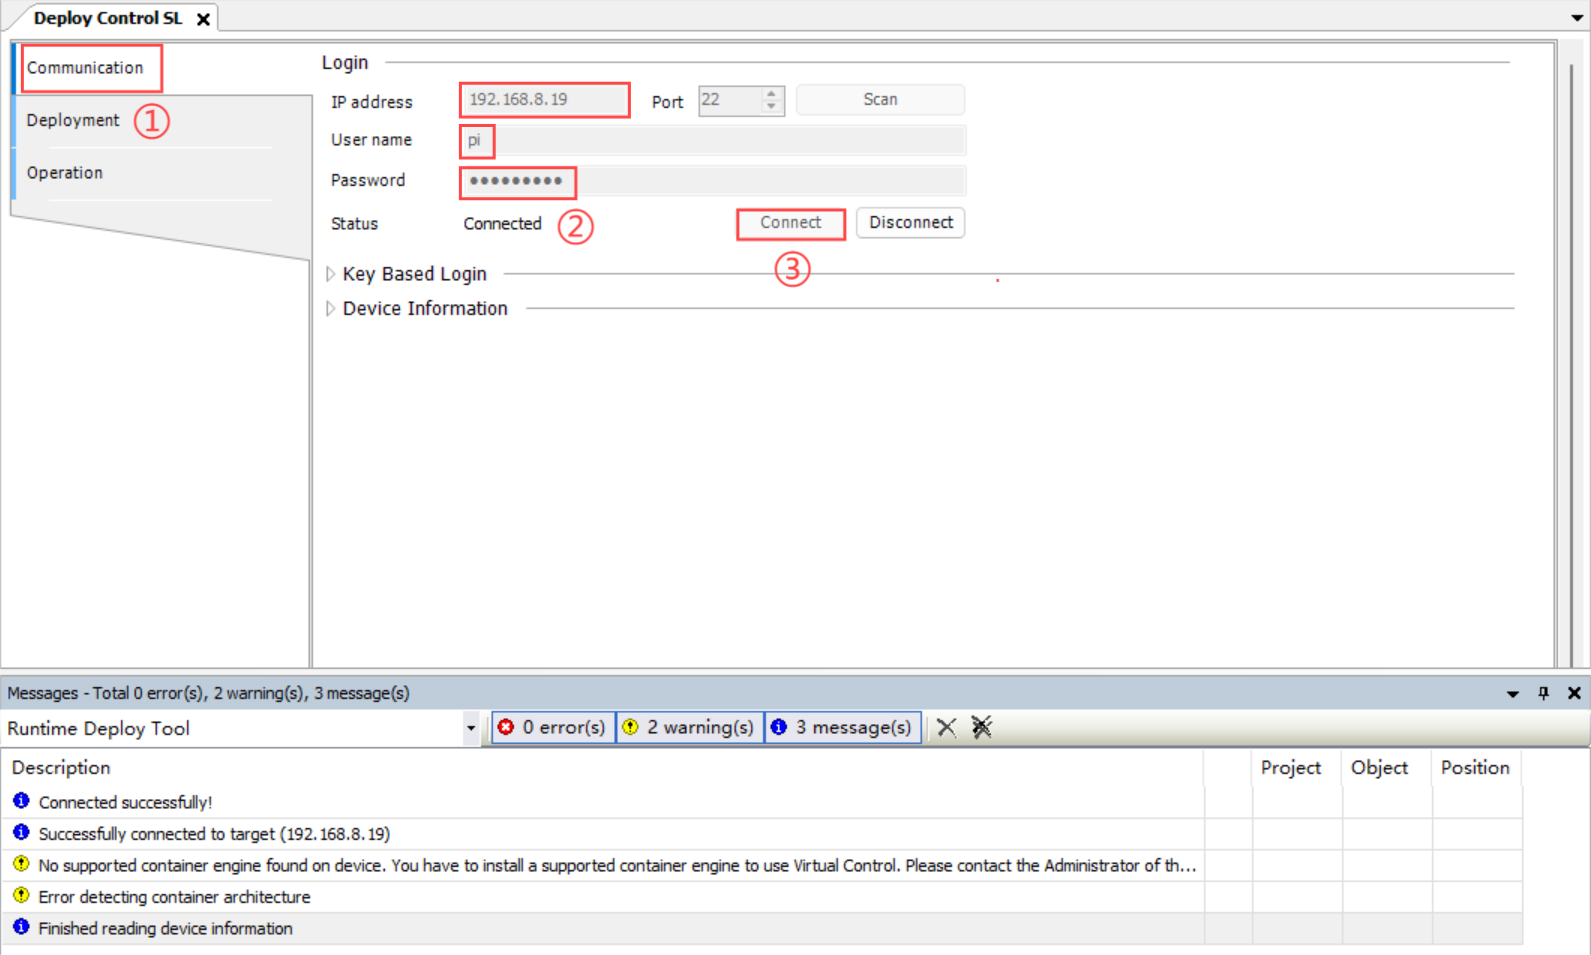
- In the
Deploy Control SLinterface, go to the "Communication" tab, enter the device’s IP address, username, and password, and then click "Connect".
TIP
Upon successful connection, the information bar at the bottom will display a "Connection successful" notification.
- After successfully connecting to the target device, select the "Deployment" tab in the
Deploy Control SLinterface. Under "Product" and "Version", select "CODESYS Control for Raspberry Pi SL" and "4.14.0.0" respectively, then click "Install".
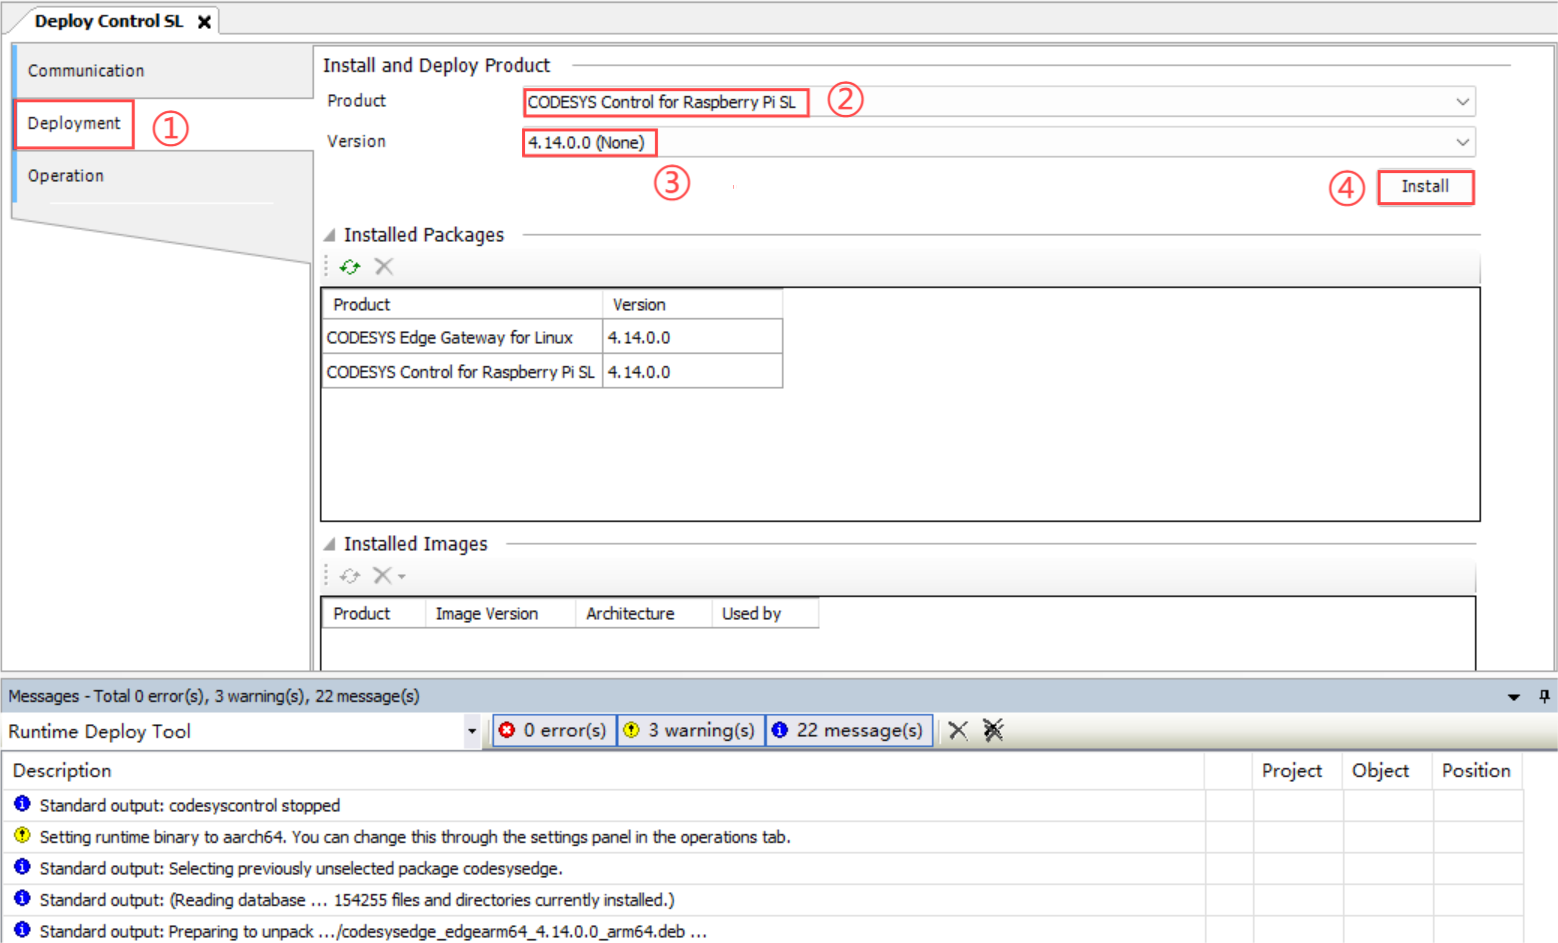
- After installing CODESYS Control for Raspberry Pi SL, select the "Deployment" tab in the
Deploy Control SLinterface. Under "Product" and "Version", choose "CODESYS Edge Gateway for Linux" and "4.14.0.0" respectively, then click "Install".

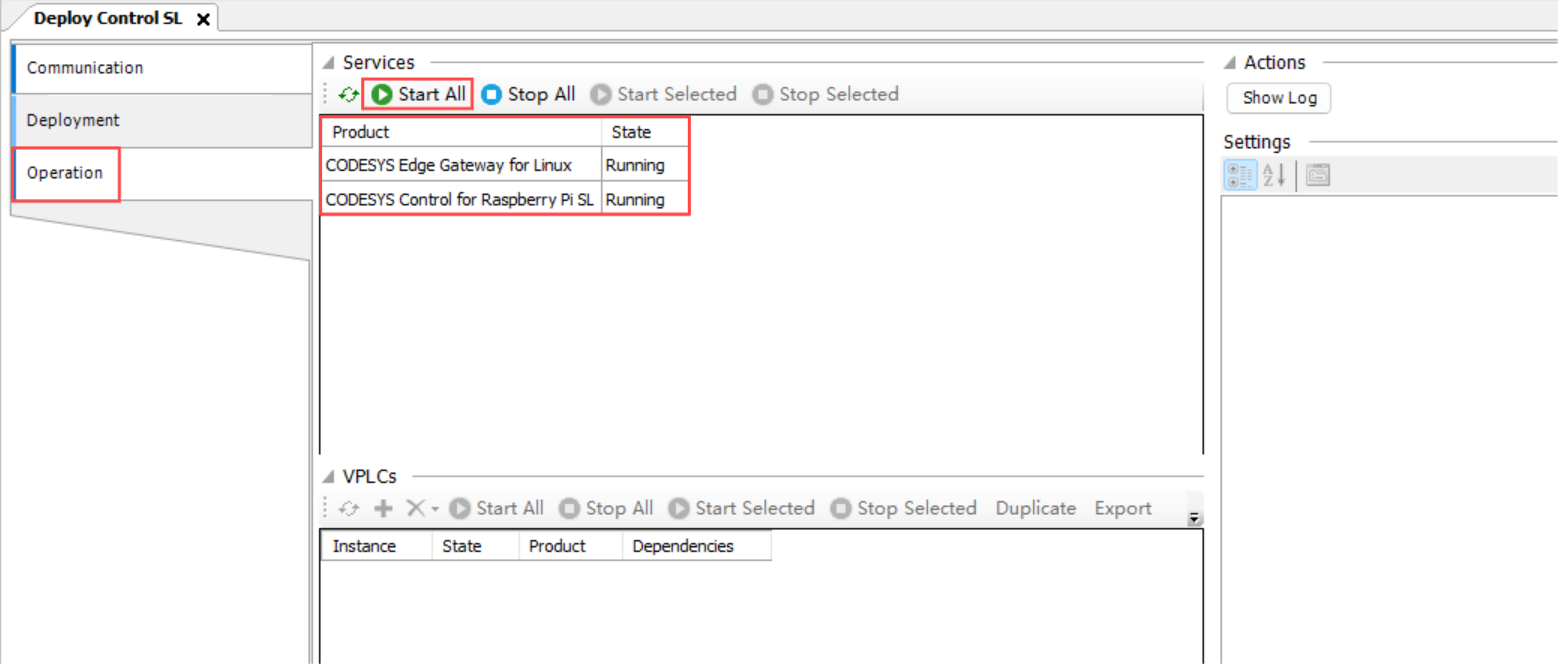
- After installing CODESYS Control for Raspberry Pi SL, select the "Operation" tab in the
Deploy Control SLinterface. Check whether the installed runtime is running. If it shows "Not Running", click "Start All".
- Execute the following command to reboot the device.
sudo reboot
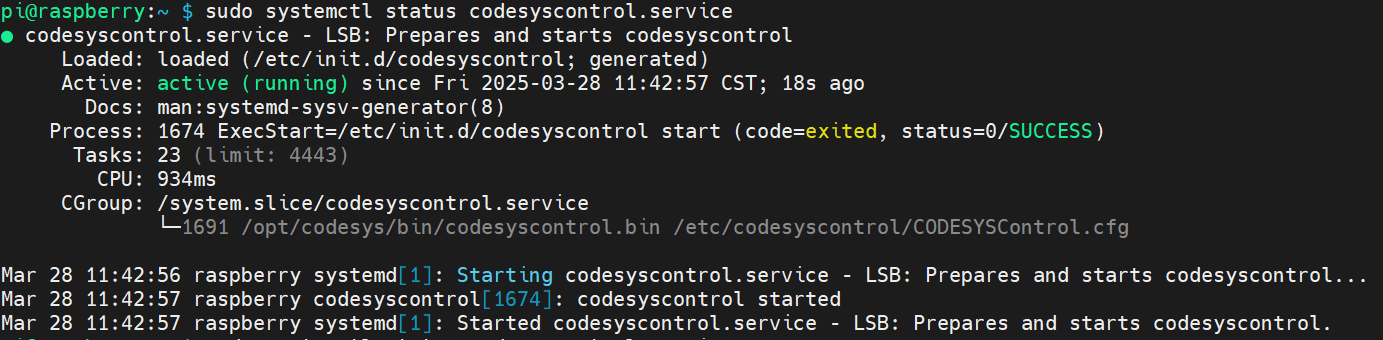
- Once the device has fully booted, execute the following commands in the terminal window.
sudo systemctl status codesyscontrol.service
- The returned information, as shown in the figure below, indicates that the CODESYS runtime has been successfully started on the device.
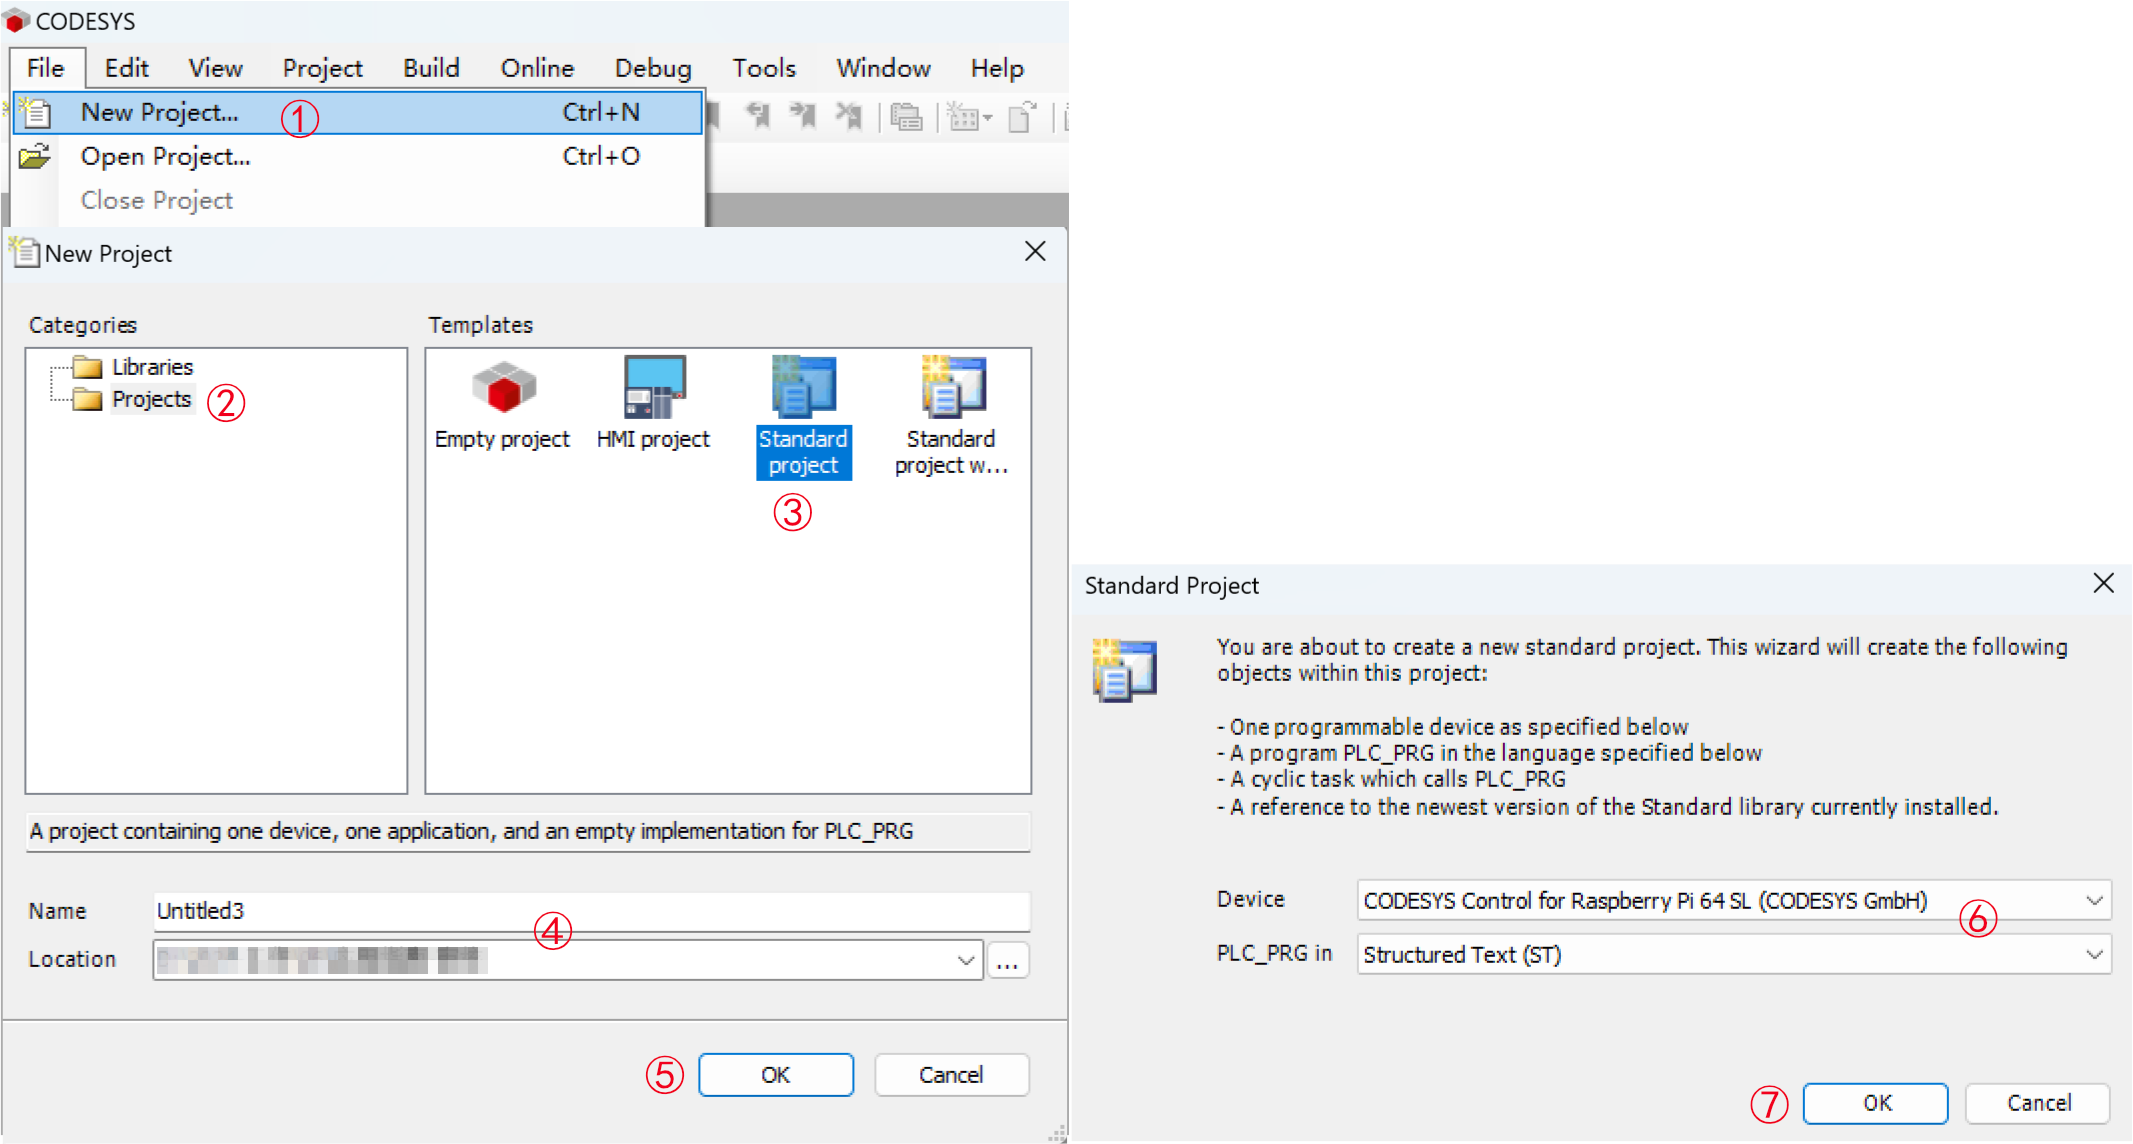
- Create a new standard project by following the steps below.
- Categories: Select "Projects".
- Templates: Choose "Standard project".
- Name: Custom (define your project name).
- Location: Custom (specify the save directory).
- Device: Select "CODESYS Control for Raspberry Pi 64 SL".
- Double-click the "Device" node in the left panel of the interface. On the right side, select the "Scan Network" tab. In the "Select Device" dialog box that appears, choose the ED-PLC device to be authorized, then click "OK".
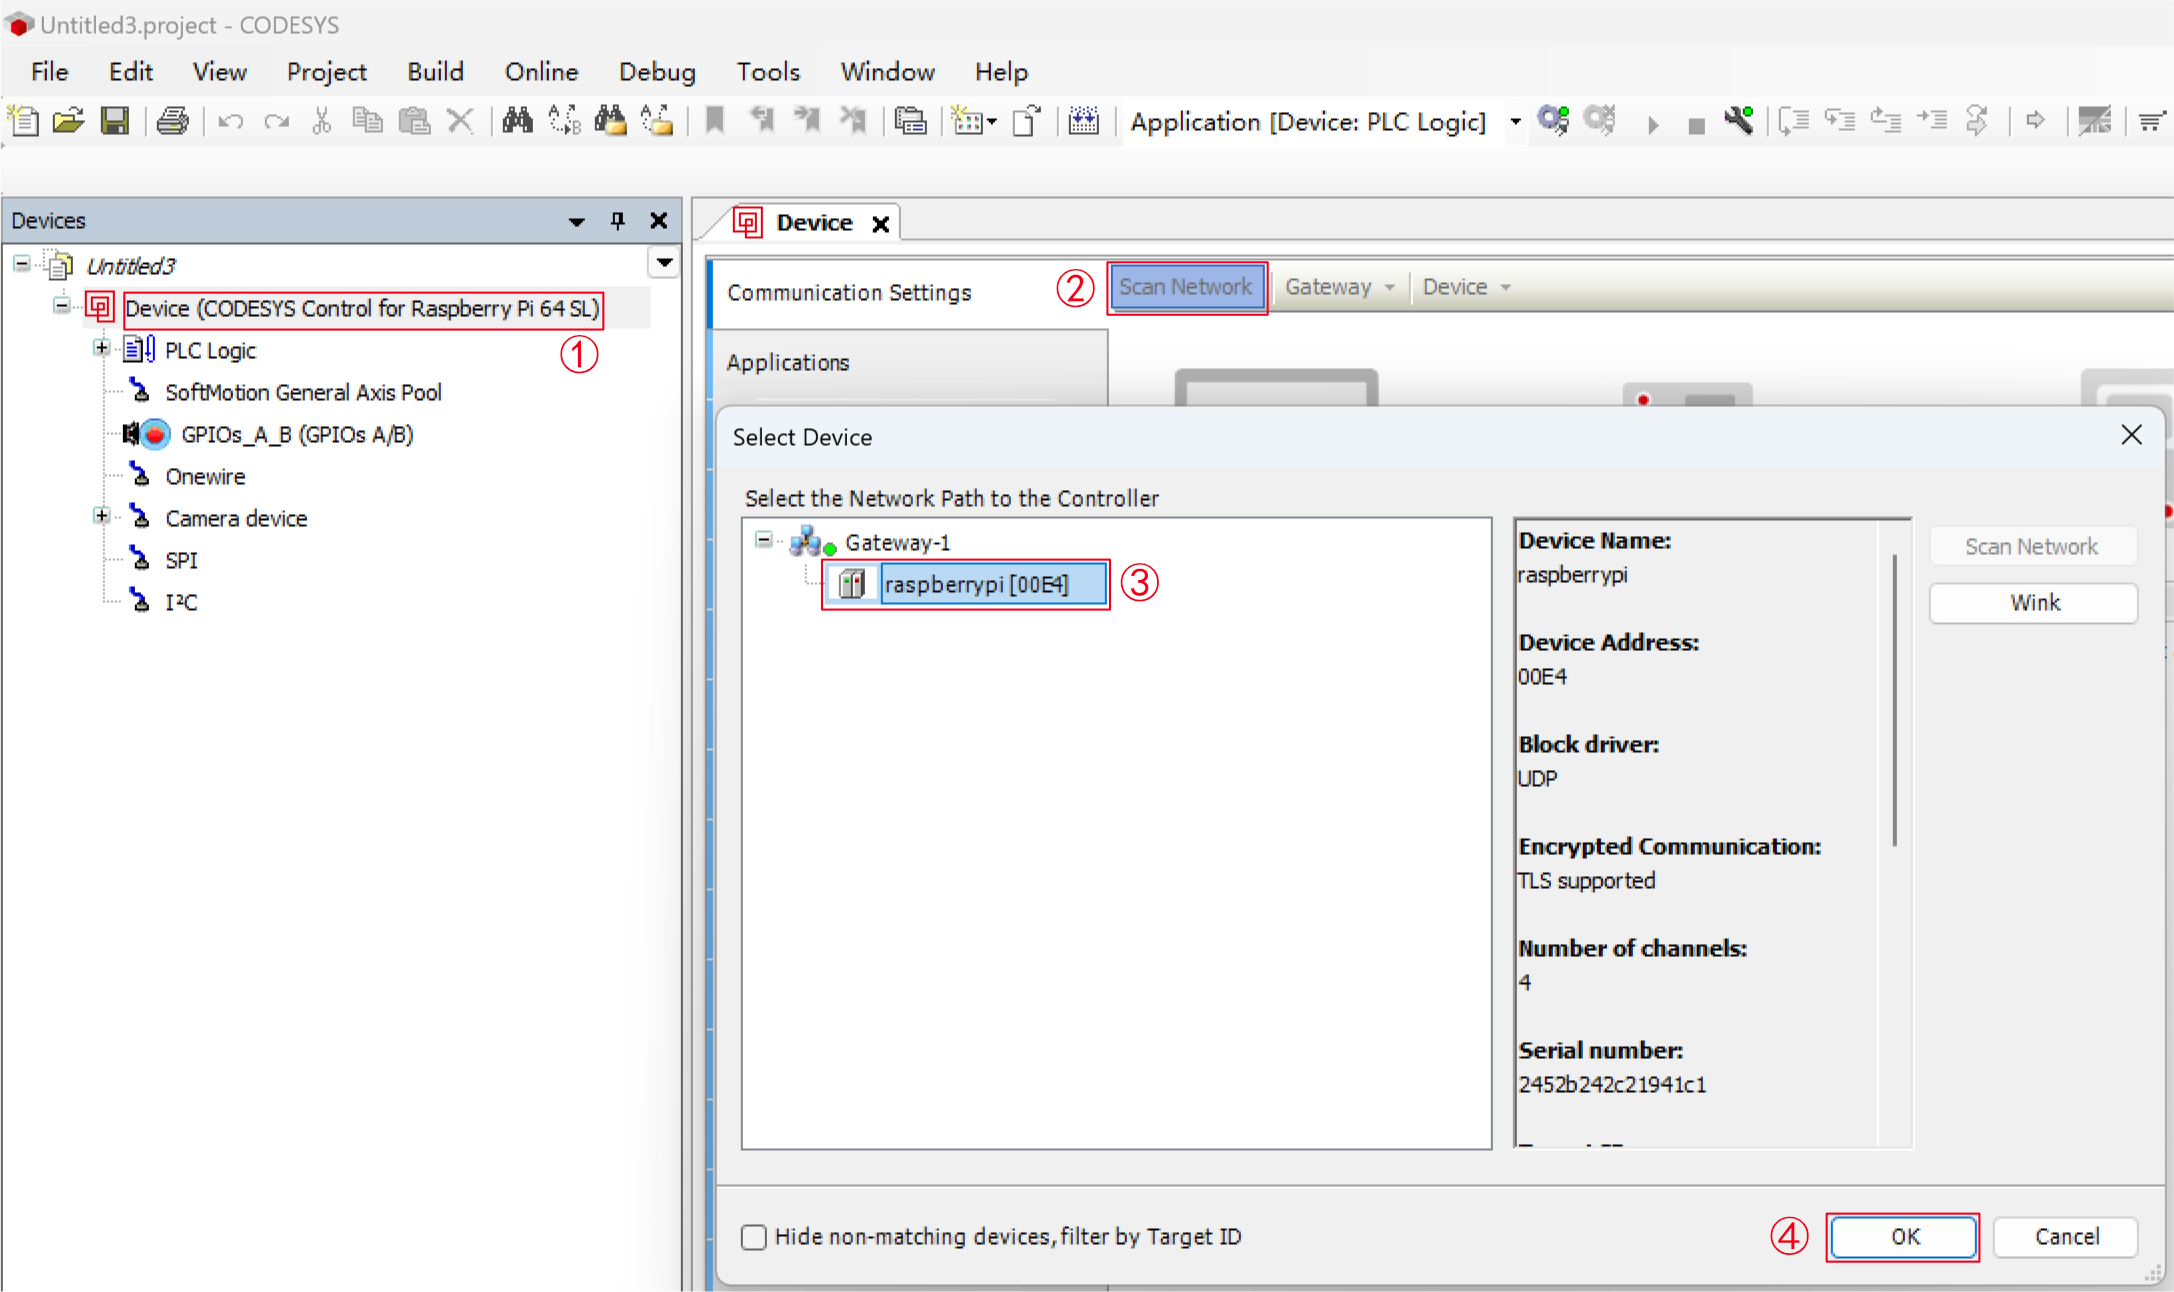
TIP
If no devices are detected, potential causes include:
- PC and ED-PLC device are on different subnets: Ensure both the PC and device are configured to share the same subnet.
- Runtime not installed or corrupted: Reinstall the CODESYS runtime system.
- CODESYS Gateway v3 service is disabled: Enable the service via the local system services (e.g., Windows Services Manager).
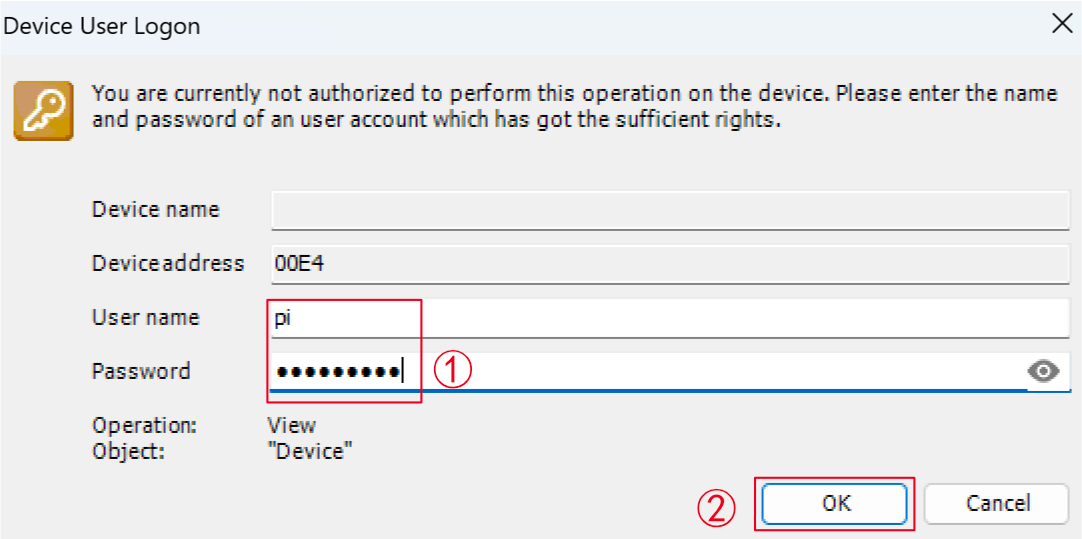
- In the "Device User Logon" tab that pops up, input your user name and password, then click"OK" to log in to the device.
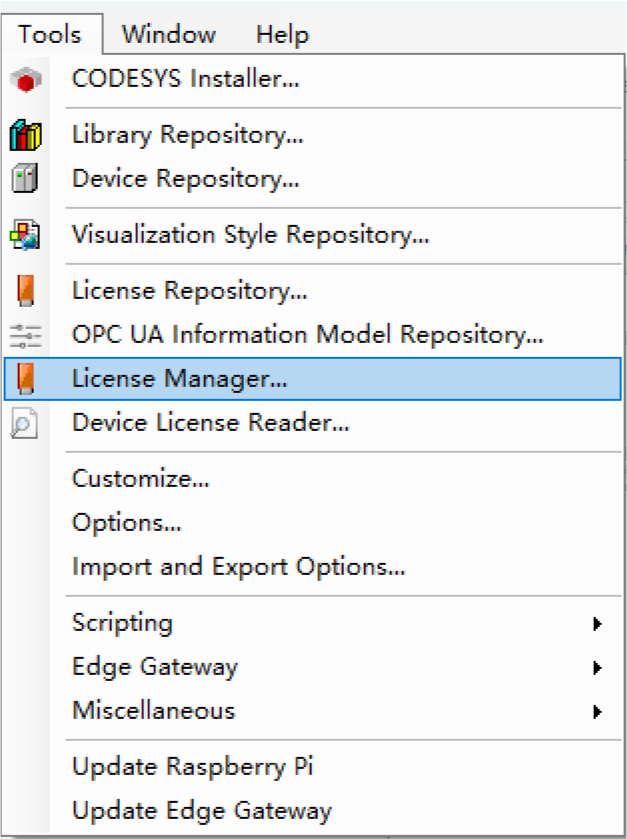
- After successfully logging into the device, select "Tools" → "License Manager..." in the menu bar to open the License Manager interface.
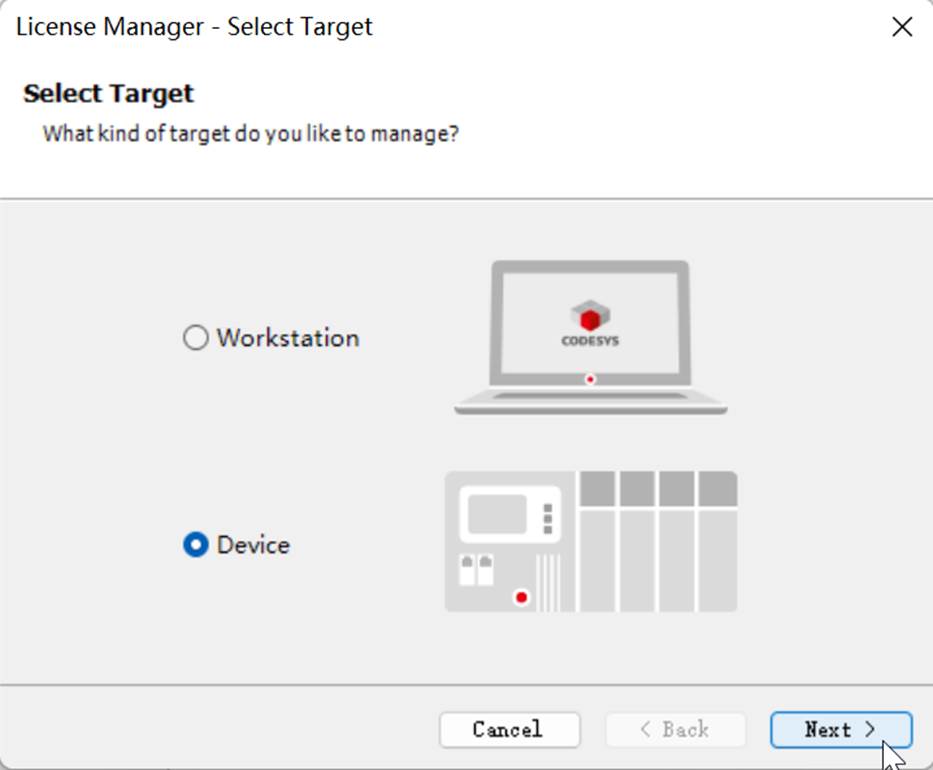
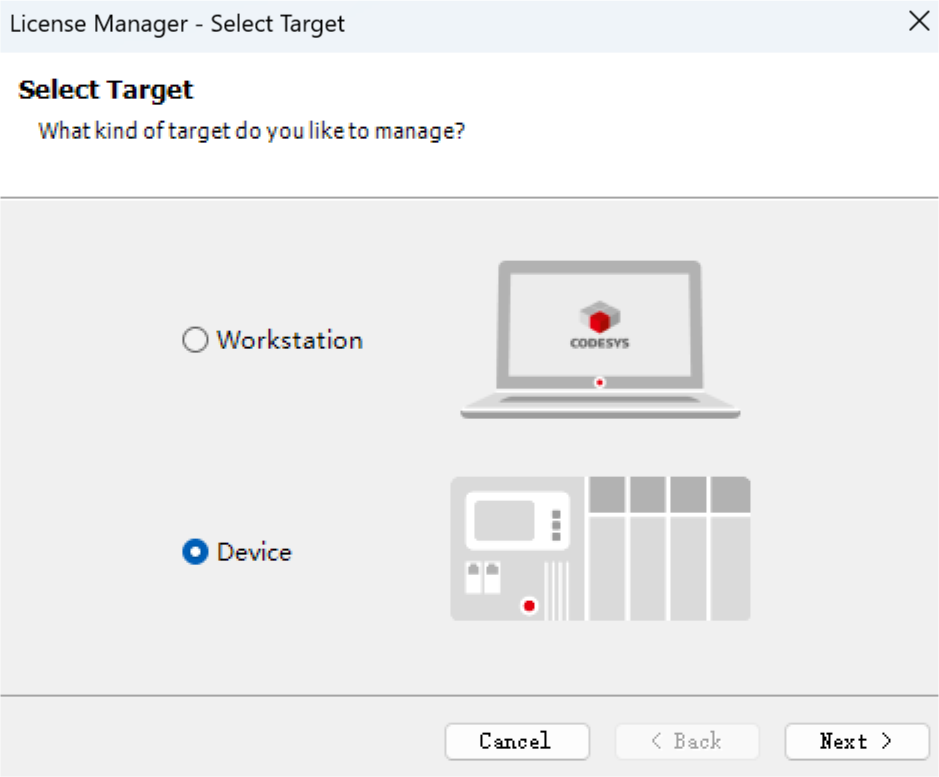
- In the "Select Target" interface, select "Device" and click "Next".
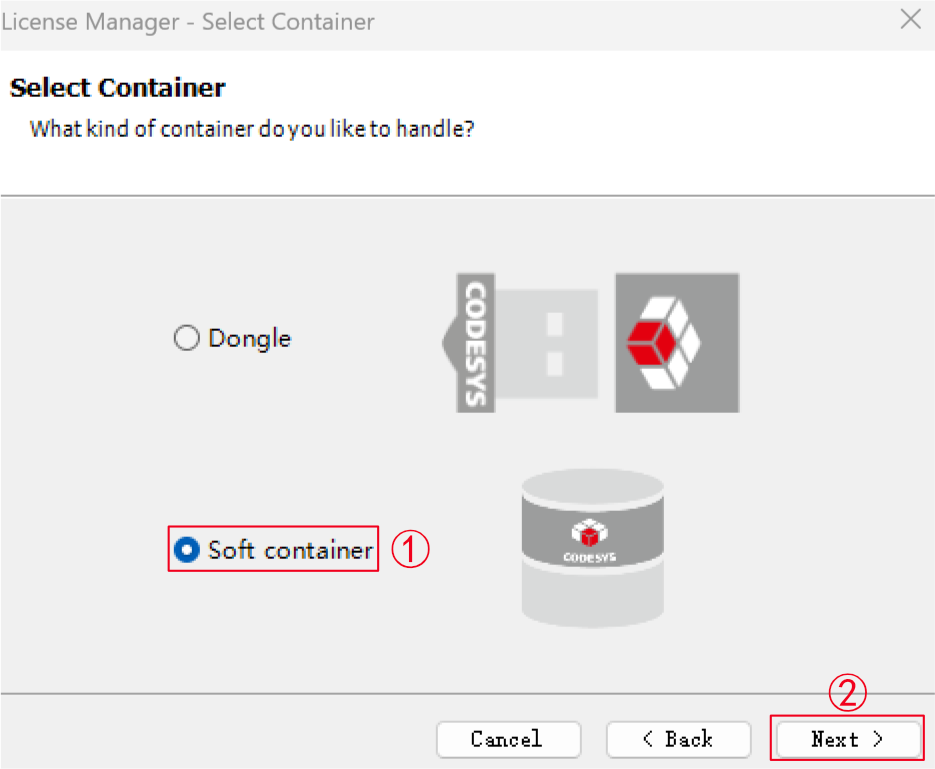
- In the "Select Container" interface, choose "Soft container" and click "Next".
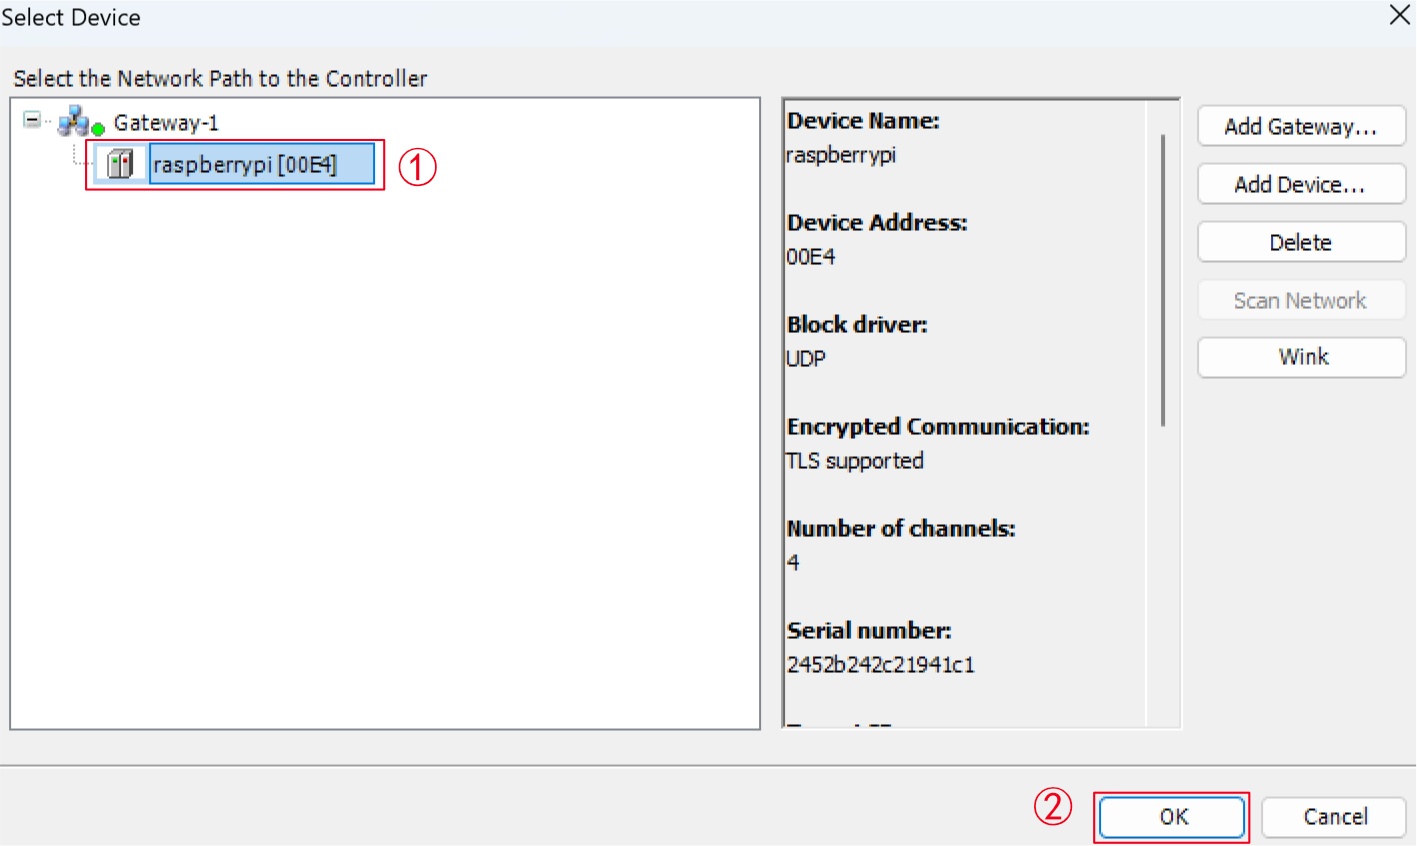
- In the "Select Device" interface, choose the device to be authorized and click "OK".
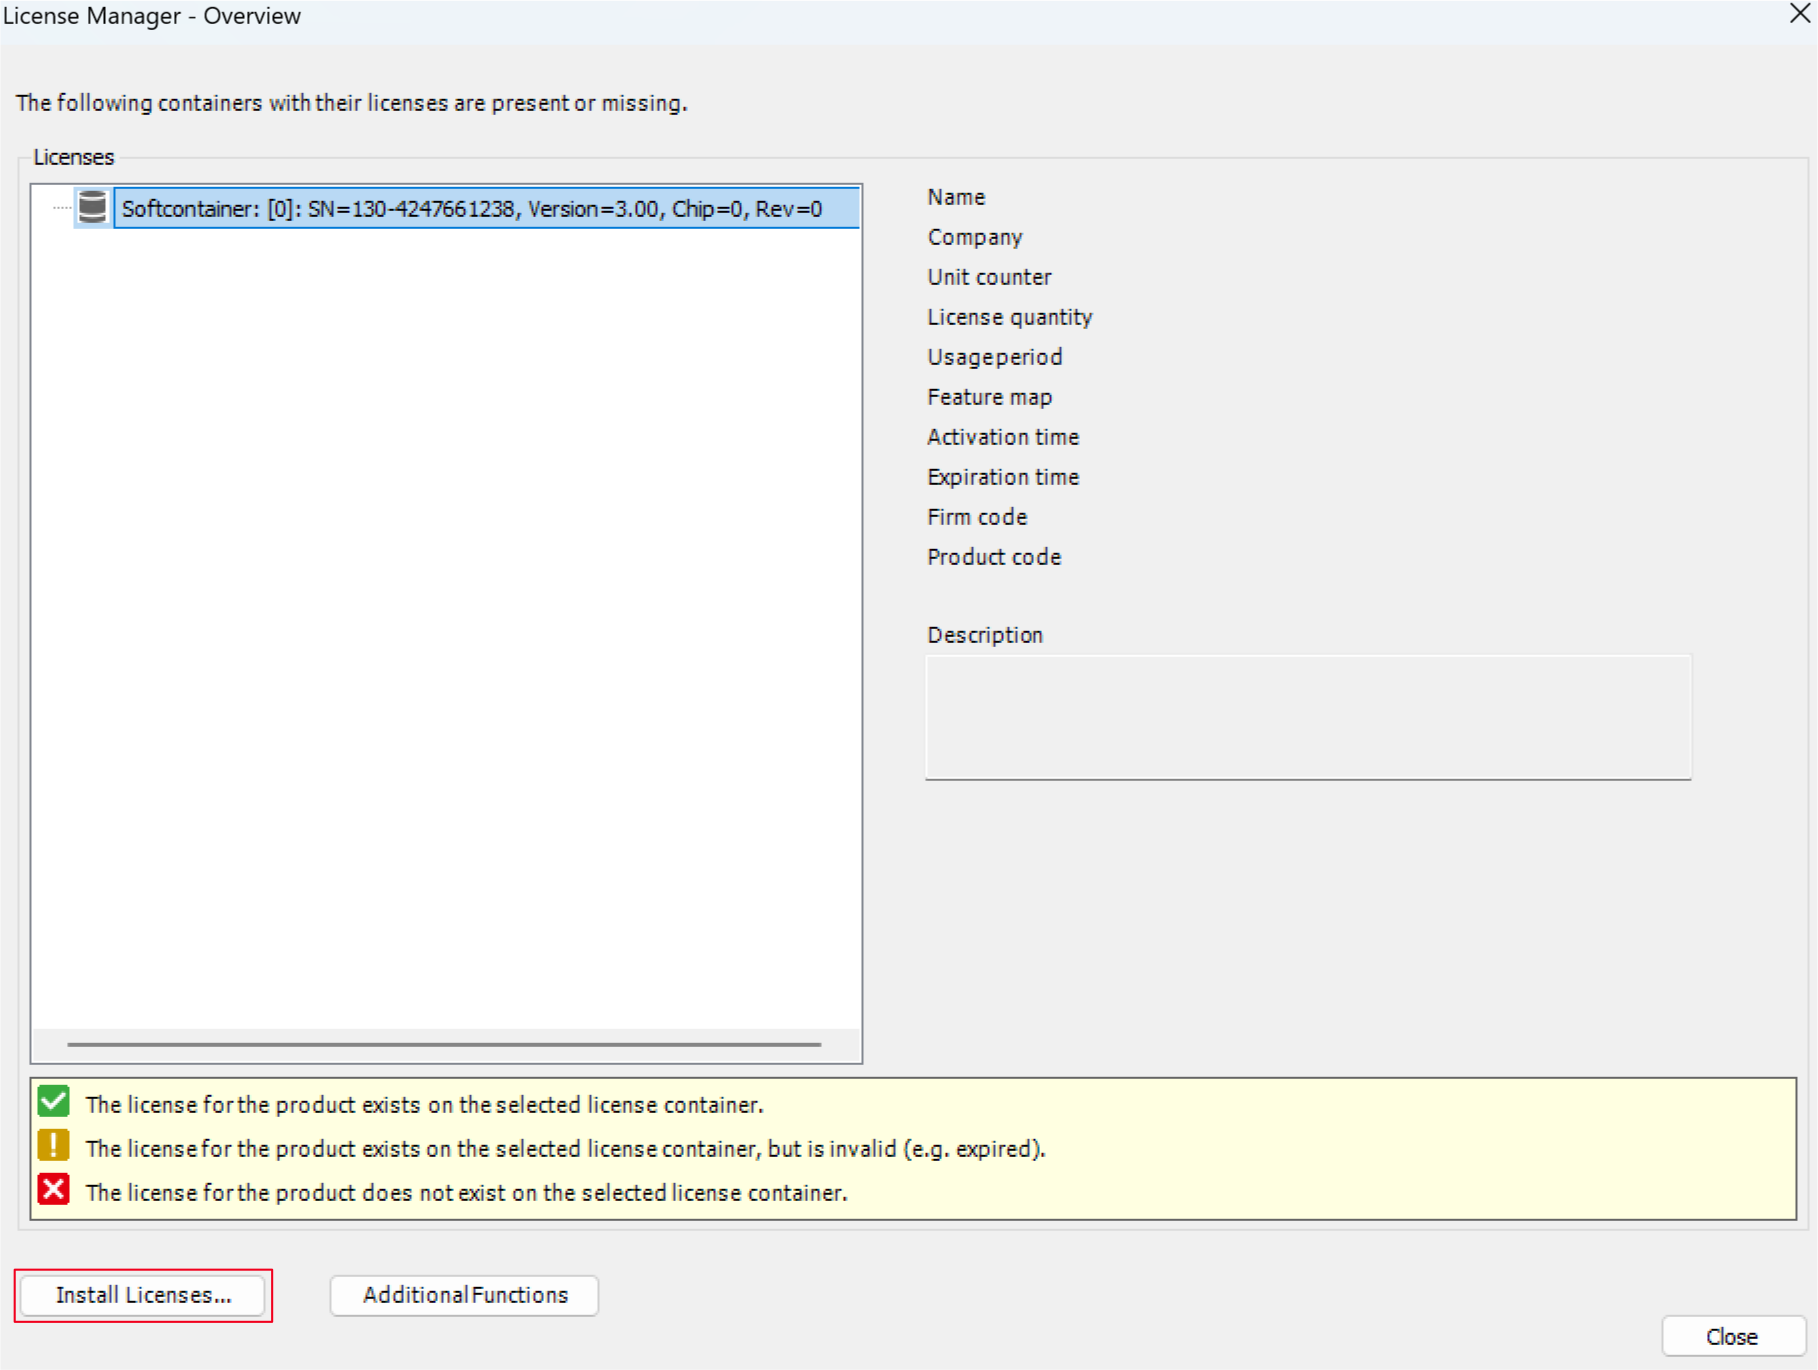
- In the "License Manager" interface, click "Install License".
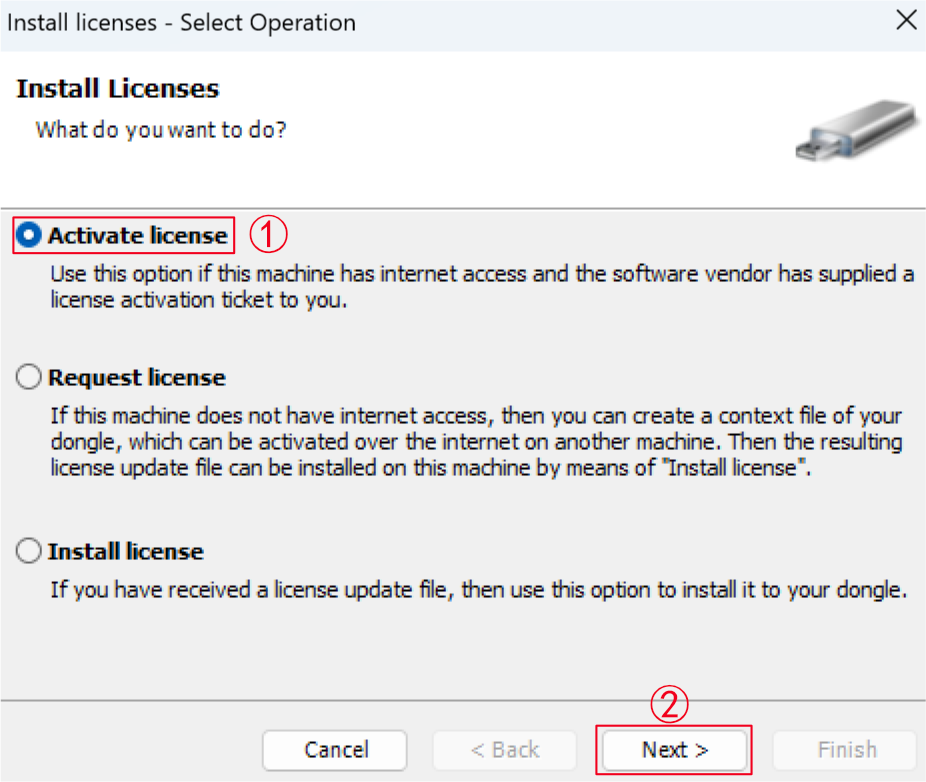
- In the "Install Licenses" interface, select "Activate license" and click "Next".
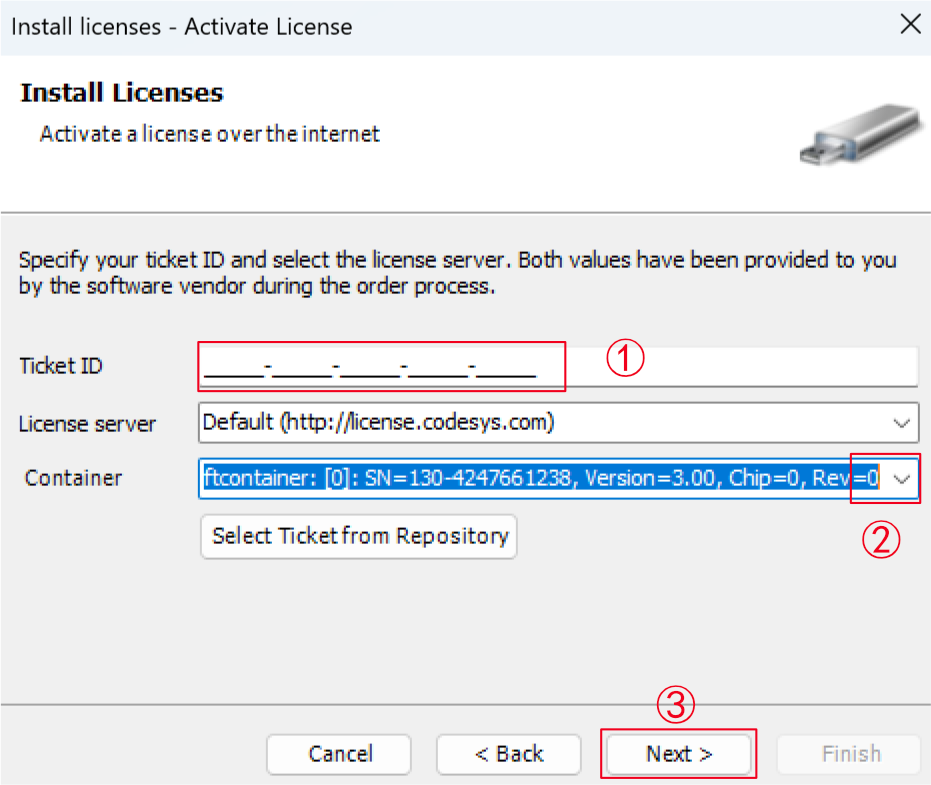
- In the "Install Licenses" interface, enter the License in the "Ticket ID" field, select the container, and click "Next".
- Click "Finish" to complete the activation.
2.2 Backup License
During use, if users back up the license file, they can later restore the license using this backup file.
TIP
For CODESYS V3.5 SP13 and later versions, license files are automatically backed up and generate a file with the extension ".WibuCmRaU" in the root directory of the ED-PLC device.
Preparation:
The ED-PLC device has been connected and the license activated in the CODESYS IDE software.
Steps:
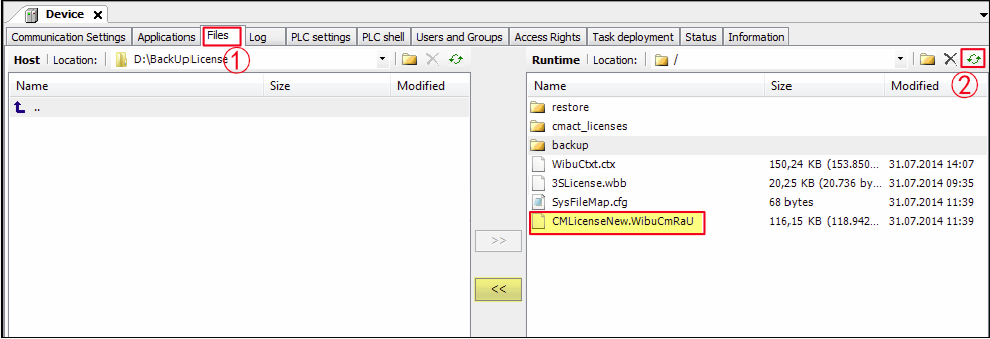
- Double-click the "Device" node in the left panel of the interface. In the right-side panel, select the "Files" tab. Within the Runtime section, click
 to display the files in the ED-PLC device’s root directory. Files with the extension ".WibuCmRaU" are license backup files.
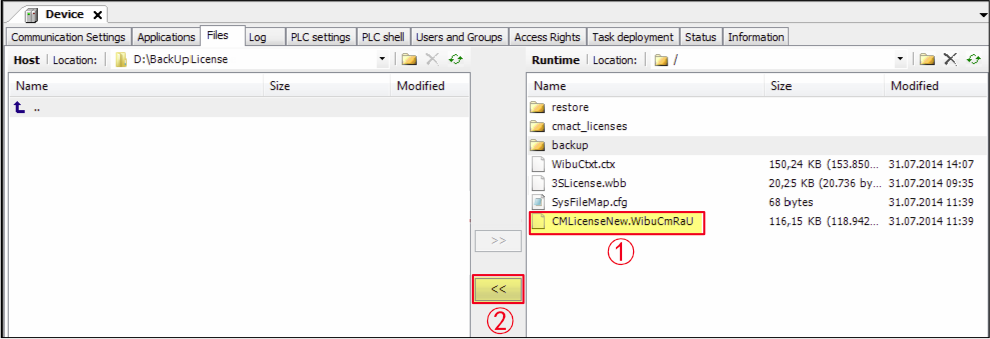
- Select the license file, click
 to download, and save it to a custom directory on your local PC.
2.3 Restoring a license
If the user reinstalls the operating system on the PLC device, it is necessary to restore the device authorization. Restoring authorization supports two different operation methods: reinstalling license and restoring through the backup license file. Please refer to the following for operation.
TIP
License activation locks the license to your Raspberry Pi device. Activation and reactivation are possible only on the same device.
Preparation:
The PLC device has been connected in the CODESYS IDE software.
Steps:
◆ Restoring the license in the License Manager
After the device is logged in normally, select "Tools" → "License Manager..." in the menu to open the License Manager page.
In the “Select Target” page, select “Device”,then click “Next”.
In the “Select Container” page, select “Soft container”,then click “Next”.
In the “Select Device” page, select the device,then click “OK”.
In the “License Manager” page, click “Additional Functions” and select "Restore license".

In the “Restore Licenses” page, input "Ticket ID" (License number) , then click “Restore”.

◆ Restoring a license from the explicitly created license update file"xxxx.WibuCmRaU"
After the device is logged in normally, select "Tools" → "License Manager..." in the menu to open the License Manager page.
In the “Select Target” page, select “Device”,then click “Next”.
In the “Select Container” page, select “Soft container”,then click “Next”.
In the “Select Device” page, select the device,then click “OK”.
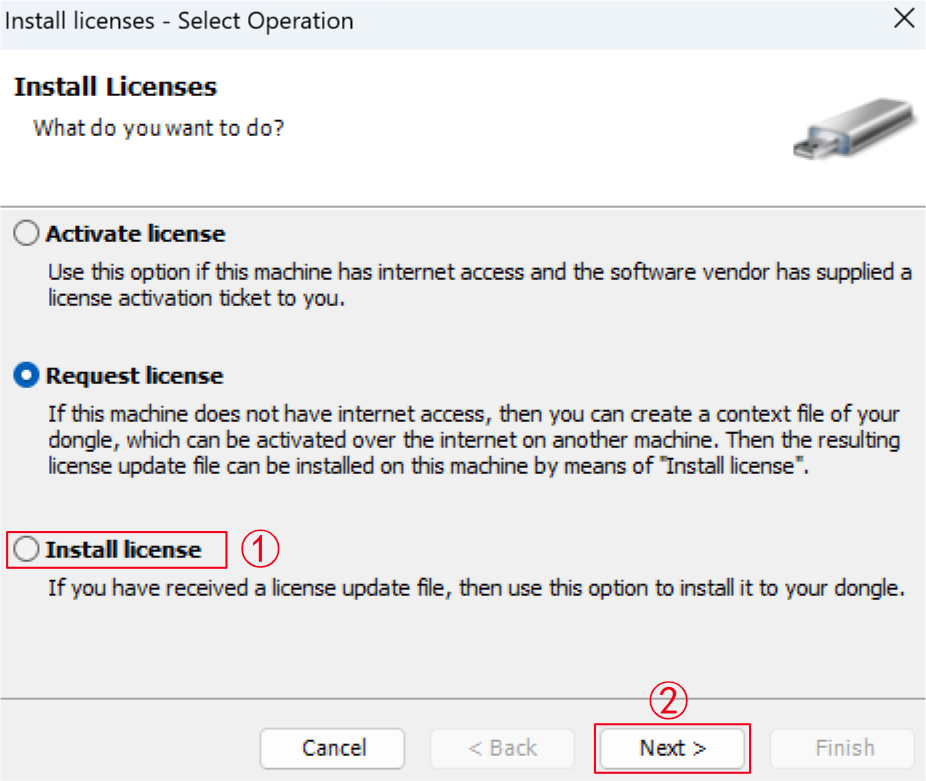
In the “License Manager” page, click “Install Licenses...”.
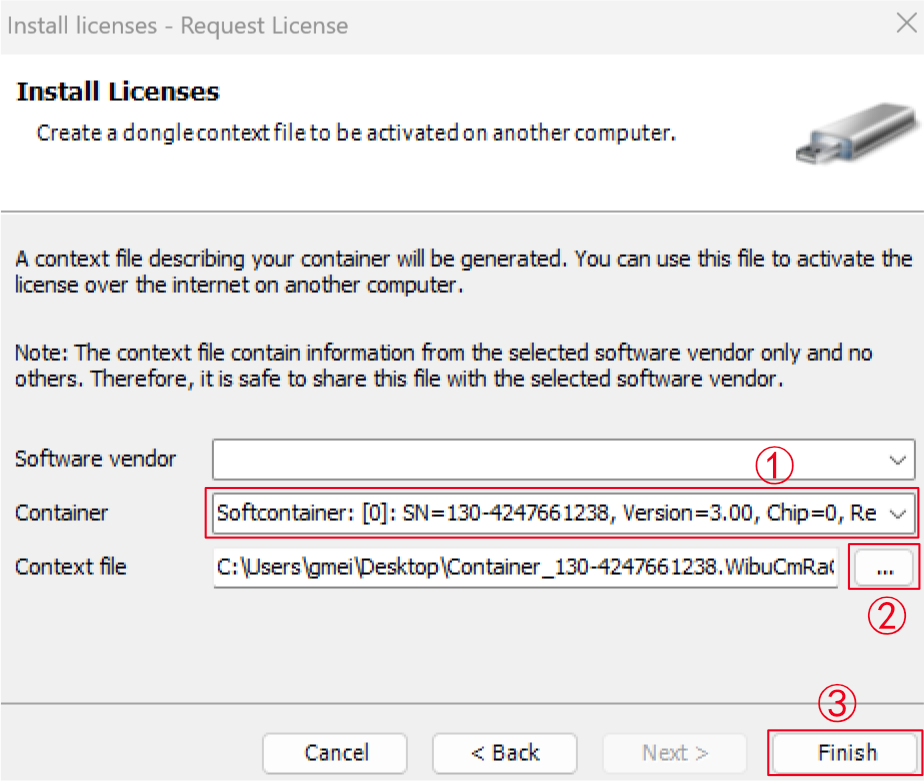
In the “Install Licenses” page, select "Install license", then click “Next”.
Select Container,import the license file, then click "Finish".