Configuring IP Addresses on Raspberry Pi OS
1 Overview
This document describes how to use graphical tools to configure IP addresses on Raspberry Pi OS for devices such as the ED-CM4SEN, ED-CM4IND, ED-IPC series, and ED-HMI series.
1.1 Background
Some users encounter difficulties configuring IP addresses on devices like the ED-CM4SEN, ED-CM4IND, ED-IPC series, and ED-HMI series due to unfamiliarity with the Debian-based Raspberry Pi OS. To address this issue, detailed instructions are provided to guide users through the IP configuration process.
1.2 Applicability
This guide applies to the following products:
- ED-CM4SEN
- ED-CM4IND
- ED-IPC series
- ED-HMI series
2 Configuration Guide
The operating system includes Desktop and Lite editions. Below are the steps for configuring IP addresses on each edition.
2.1 Configuring IP Addresses on Raspberry Pi OS (Desktop)
For the Desktop edition, use the graphical NetworkManager tool.
TIP
The NetworkManager graphical tool is pre-installed on the Desktop edition.
Preparation:
- The device’s HDMI port is connected to a display.
- A mouse and keyboard are connected to the USB ports of device.
- The device is connected to a network.
Steps:
- Click
 icon in the top-right corner of the desktop, then select "Advanced Options"→"Edit Connections".
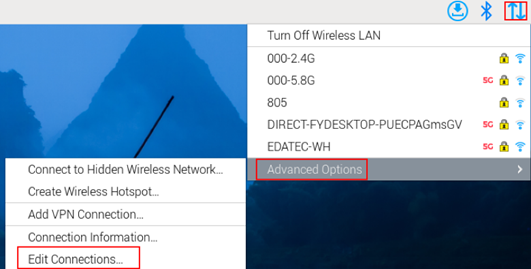
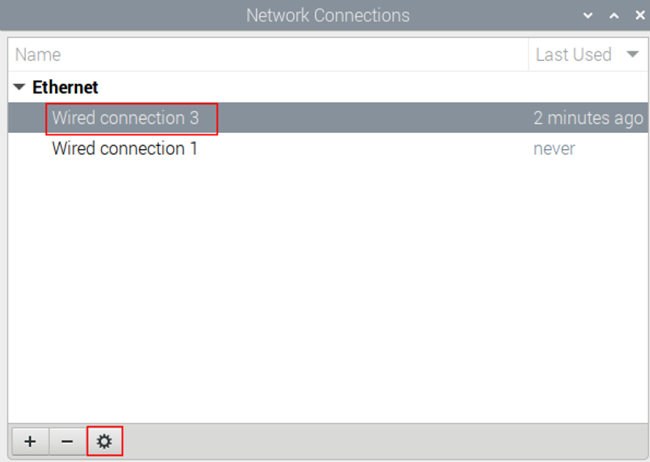
- In the Network Connections window, select the target connection name and click the Settings button.
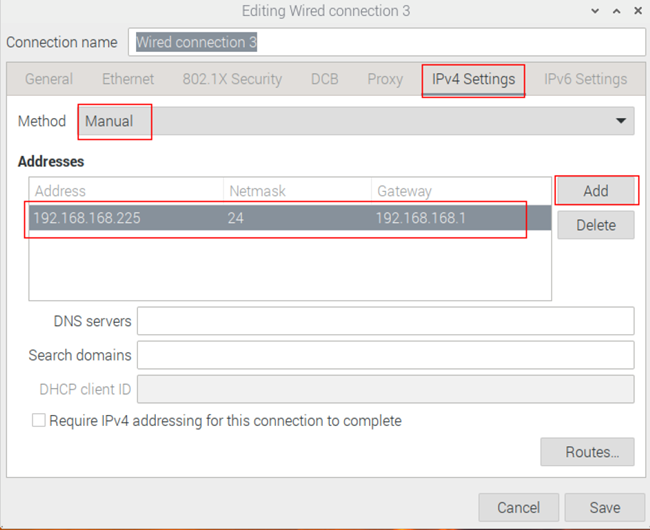
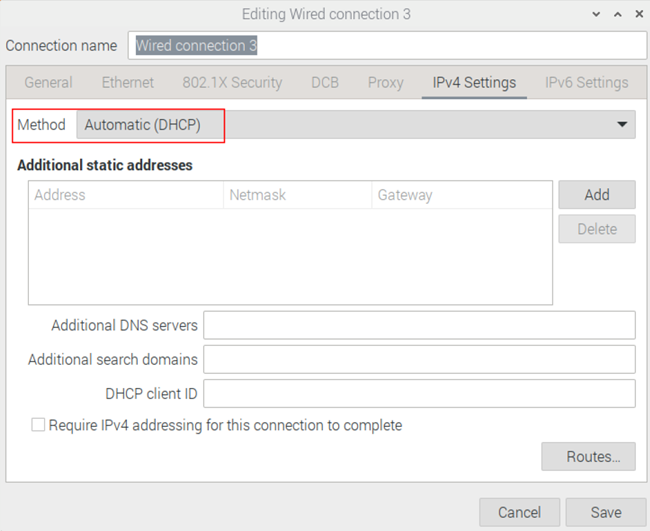
- In the Editing Wired Connection window, navigate to the IPv4 Settings tab:
TIP
If the device has multiple Ethernet ports, verify the correct port in the Ethernet tab of the Editing Wired Connection window.
- Static IP: Set Method to Manual, then add an entry under Addresses with the desired IP configuration.
- Dynamic IP (DHCP): Set Method to Automatic (DHCP).
Click Save to back to Network Connections window, then close the windows.
Execute
sudo rebootin the terminal to apply the settings.
2.2 Configuring IP Addresses on Raspberry Pi OS (Lite)
For the Lite edition, use the command-line interface to enable graphical IP configuration.
Preparation:
- The device’s HDMI port is connected to a display.
- A mouse and keyboard are connected to the USB ports of device.
- The device is connected to a network.
- NetworkManager is enabled.
Steps:
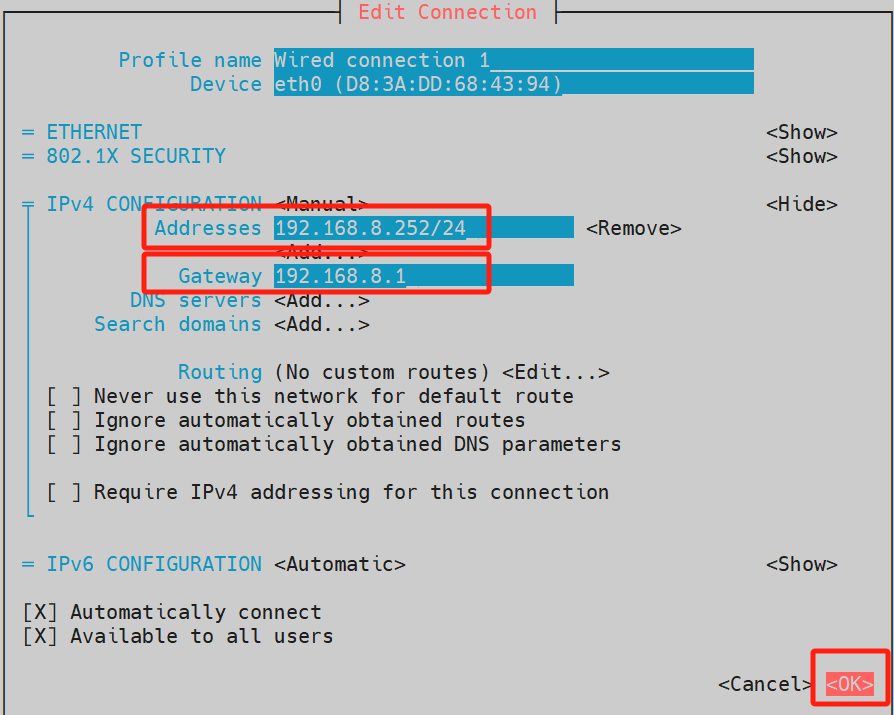
Below is an example of setting the device’s eth0 IP address to 192.168.8.252.
- Execute the following command in the command window to retrieve the
DEVICEandCONNECTIONinformation of the network interface.
nmcli device status
In the figure below, the DEVICE is eth0, and the CONNECTION is "Wired connection 1".

- Execute the following command in the command window to access the graphical IP configuration interface for the eth0 network interface, where "Wired connection 1" is the network connection name.
sudo nmtui edit "Wired connection 1"
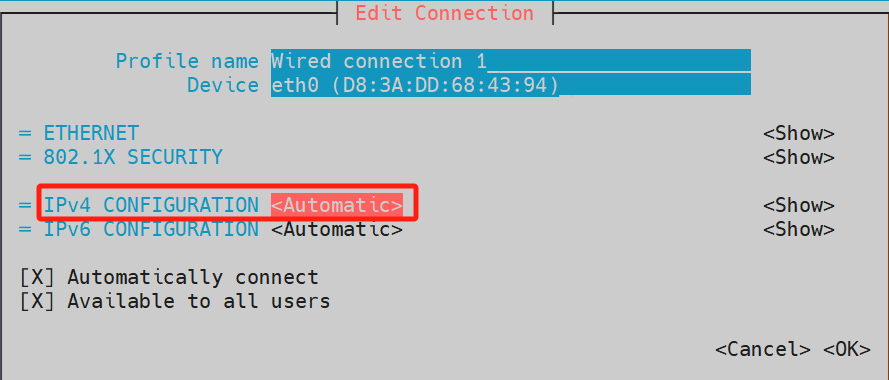
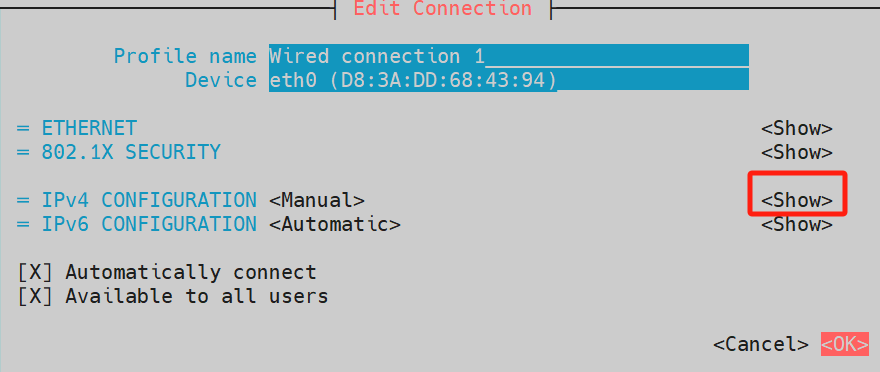
- On the graphical configuration interface for the eth0 network interface:
a. Use the ↑ and ↓ arrow keys on the keyboard to select IPv4 CONFIGURATION, then press the Enter key to expand the parameters.
b. Navigate using the ↑ and ↓ arrow keys again to set the parameter to Manual, and press Enter to confirm the setting.
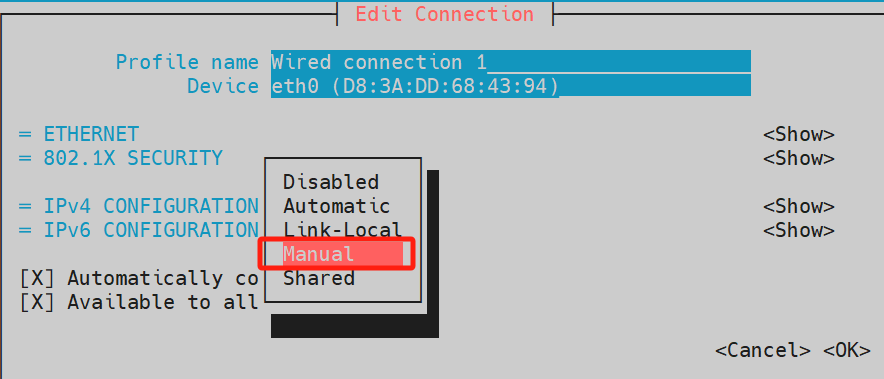
TIP
To configure automatic IP acquisition (DHCP) for the eth0 interface:
a. On the eth0 configuration interface, use the ↑ and ↓ arrow keys to select IPv4 CONFIGURATION, then press Enter to expand the parameters.
b. Navigate with the ↑ and ↓ arrow keys to set the parameter to Automatic, and press Enter to confirm.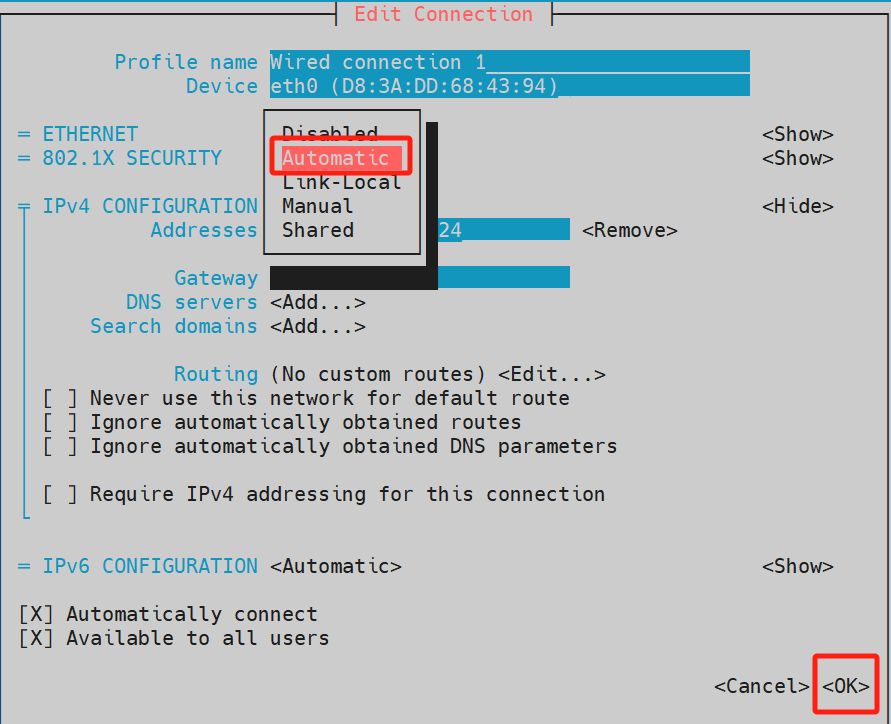
- Press the → (right arrow) key to select show under IPV4 CONFIGURATION, then press the Enter key to confirm.
- In the expanded parameters of IPV4 CONFIGURATION, select add under Address, then enter the IP address and subnet mask. Select Gateway and input the gateway address, use the ↑ and ↓ arrow keys to navigate to OK in the lower-right corner, then press Enter to complete the configuration.
- Execute the
sudo rebootcommand in the command window to restart the device and apply the configuration.