Installation of Ubuntu OS on ED-IPC
1 Overview
Describes the background and scope of installing the Ubuntu operating system on the ED-IPC.
1.1 Background
ED-IPC products are shipped with Raspberry Pi OS with BSP installed by default, which has added support for BSP, created users, enabled SSH, and supported BSP online upgrade, and is safe and reliable, so users can use this OS with confidence.
If users want to use Ubuntu OS after receiving the product, after changing the OS to Ubuntu OS, it will lead to some functions can not be used. In order to solve this problem, our company supports online installation of Firmware package to make the device better compatible with Ubuntu OS.
1.2 Application Scope
This application applies to product models including ED-CM4SEN,ED-IPC2110,ED-IPC2630.
The Ubuntu OS versions of ED-IPC products are listed in the table below:
| Model | For Ubuntu version |
|---|---|
| ED-CM4SEN | Ubuntu-20.04 Server、Ubuntu-24.04 Server、Ubuntu-24.04 Desktop |
| ED-IPC2110 | Ubuntu-20.04 Server、Ubuntu-24.04 Server、Ubuntu-24.04 Desktop |
| ED-IPC2630 | Ubuntu-20.04 Server、Ubuntu-24.04 Server、Ubuntu-24.04 Desktop |
2 Application Guide
This section describes the steps to install Ubuntu OS on ED-IPC. The following section describes the procedure for installing Ubuntu OS on ED-IPC2110 as an example only.
2.1 Operation Process
- Download image
- eMMC burn
- First boot
- Install Firmware package
- Check if the firmware package is installed successfully.
- Reboot the device
2.2 Download Image
You can download the corresponding standard Ubuntu image according to the actual need, the download path is listed in the table below:
2.3 Flashing to eMMC
It is recommended to use the Raspberry Pi official tools. The download paths are as follows:
- Raspberry Pi Imager: https://downloads.raspberrypi.org/imager/imager_latest.exe
- SD Card Formatter: https://www.sdcardformatter.com/download/
- Rpiboot: https://github.com/raspberrypi/usbboot/raw/master/win32/rpiboot_setup.exe
Preparation:
- The downloading and installation of the official tools to the computer have been completed.
- A Micro USB to USB-A cable has been prepared.
- The OS file has been obtained.
Steps:
The steps are described using Windows system as an example.
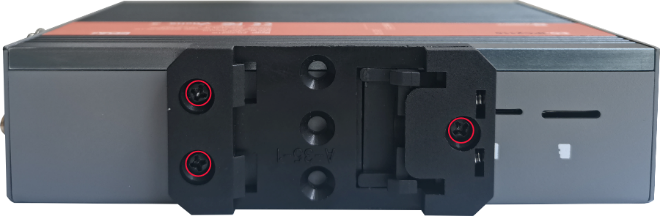
Use a cross screwdriver to loosen three screws on the DIN-rail bracket counterclockwise (red box position in the figure below) and remove the default DIN-Rail bracket.
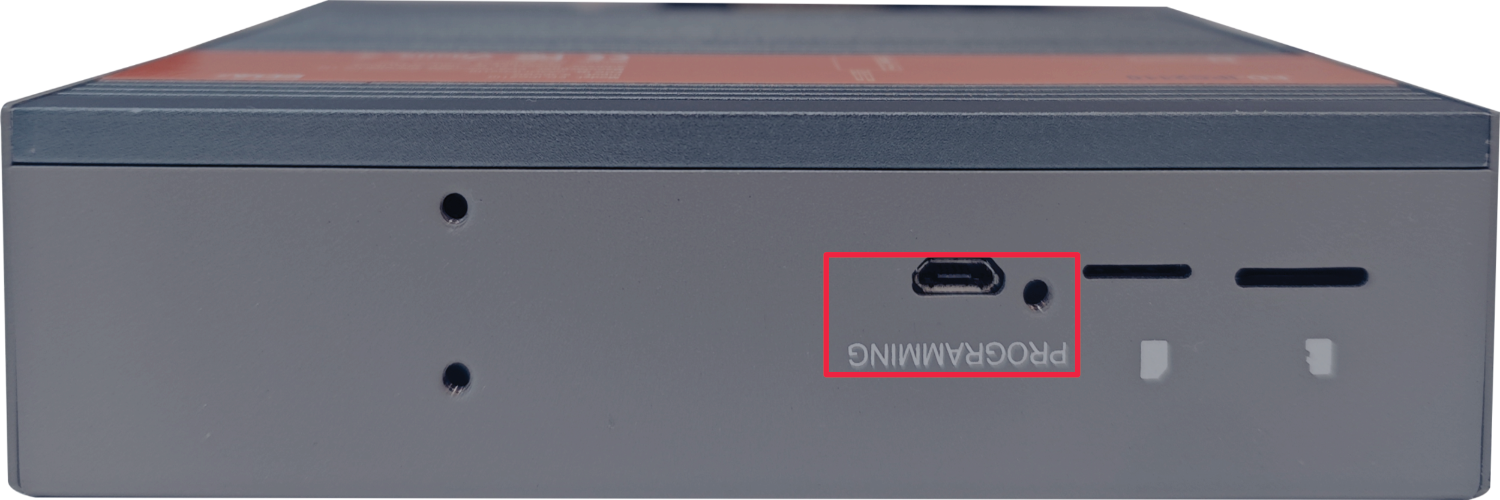
Determine the location of the Micro USB port on the side of the device, as shown in the red box below.
Connect the power cord and USB flashing cable (Micro-USB to USB-A).
- Connecting to USB flashing cable: One end is connected to the Micro USB port on the device, and the other end is connected to the USB port on the PC.
- Connecting to power cord: One end is connected to the DC 2Pin Phoenix terminalon the device, and the other end is connected to the external power supply.
Disconnect the power supply of ED-IPC2100 and then power it on again.
Open rpiboot tool to automatically convert the drive to a letter
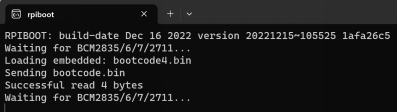
After the completion of the drive letter, the drive letter will pop up in the lower right corner of the computer.
Open SD Card Formatter, select the formatted drive letter, and click "Format" at the lower right to format.
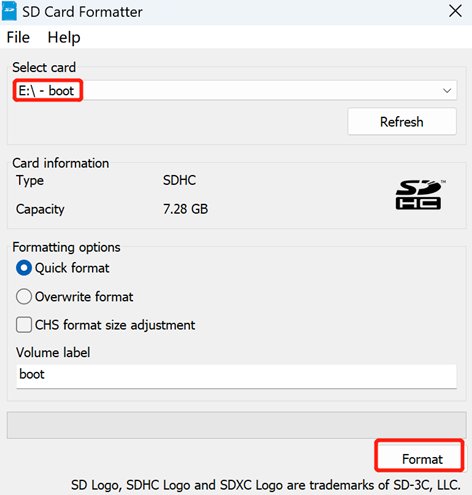
In the pop-up prompt box, select "Yes".
When the formatting is completed, click "OK" in the prompt box.
Close SD Card Formatter.
Open Raspberry Pi Imager, select "CHOOSE OS" and select "Use Custom " in the pop-up pane.
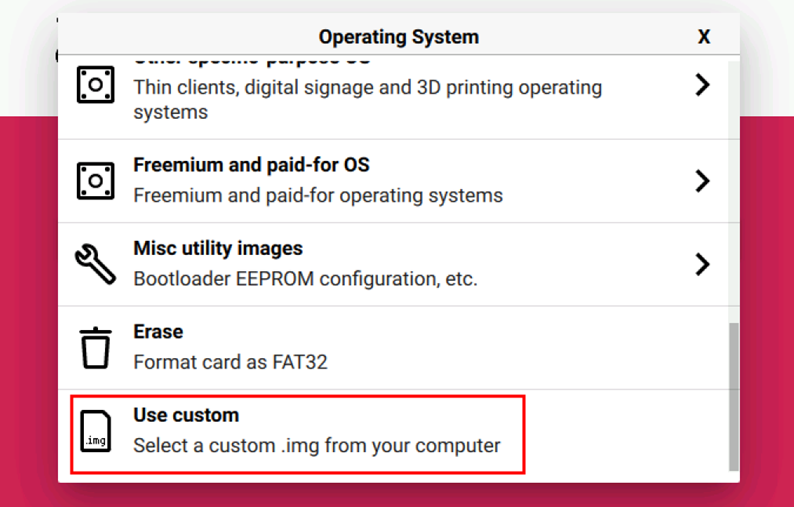
According to the prompt, select the OS file under the user-defined path and return to the main page.
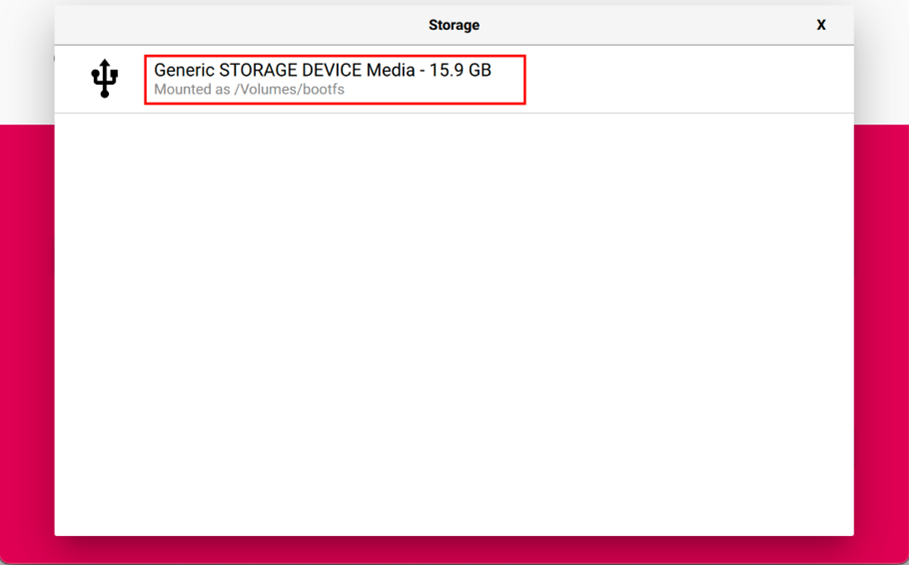
Click "CHOOSE STORAGE", select the default device in the "Storage" interface, and return to the main page.
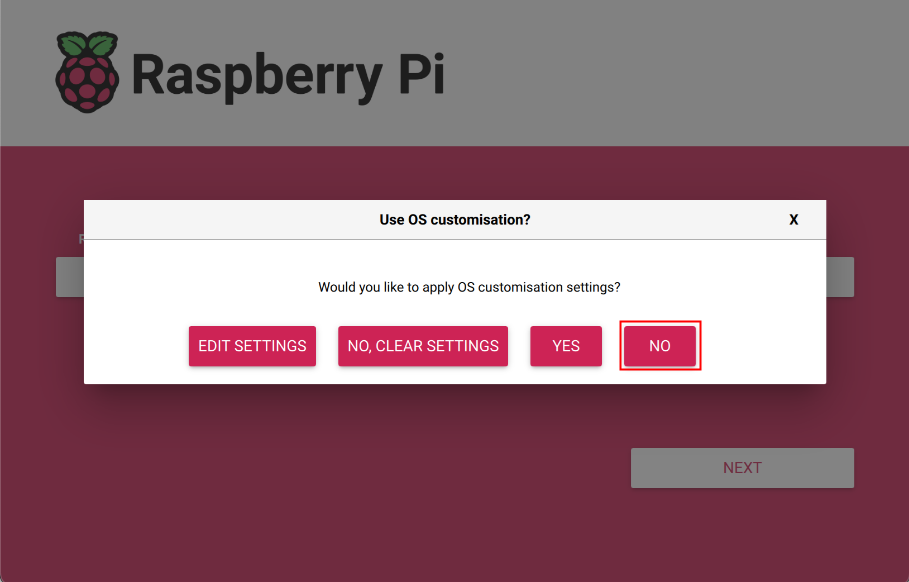
- Click “NEXT”, select "NO " in the pop-up “Use OS customization?” pane.
- Select “YES” in the pop-up “Warning” pane to start writing the image.
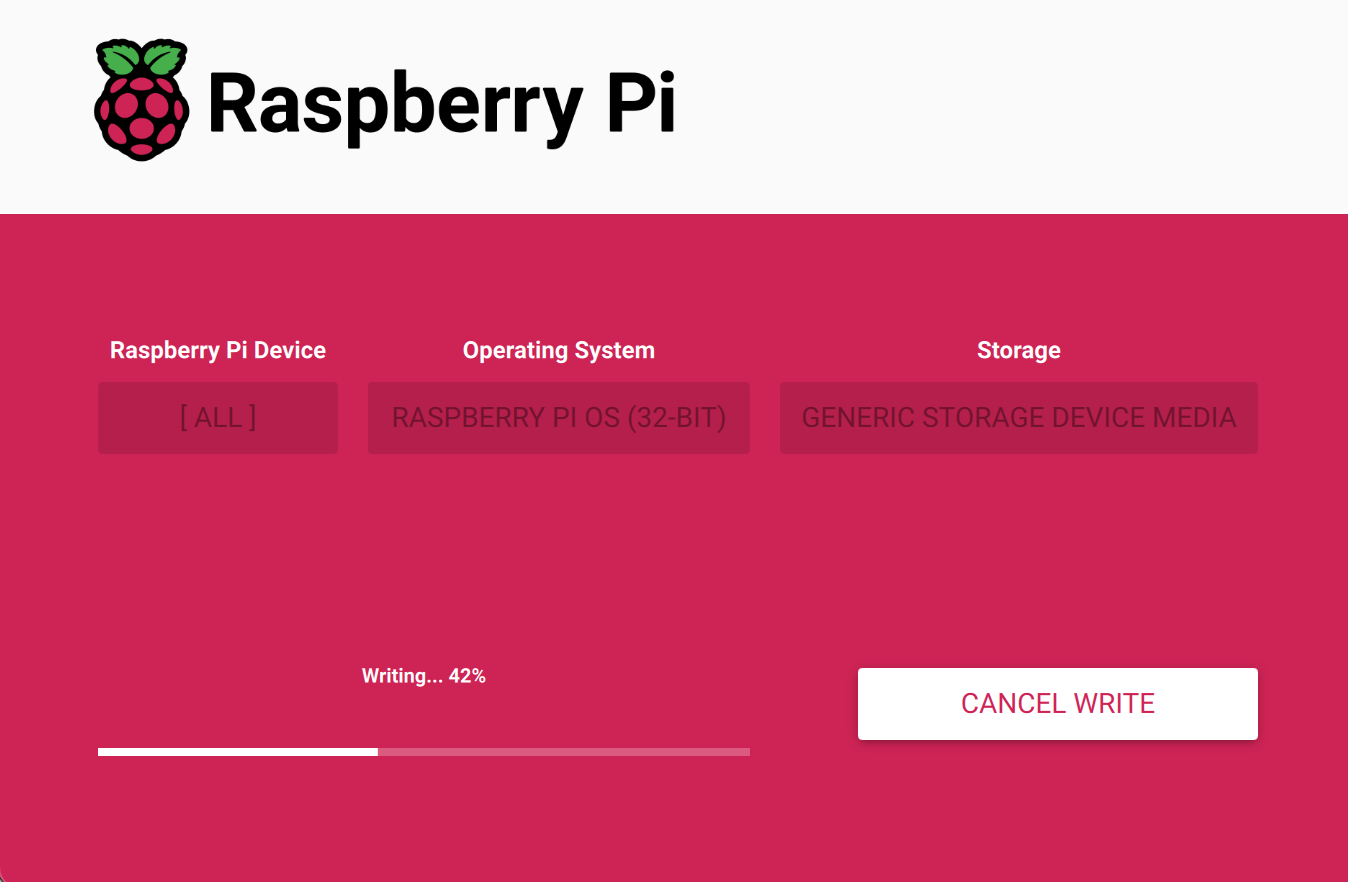
- After the OS writing is completed, the file will be verified.
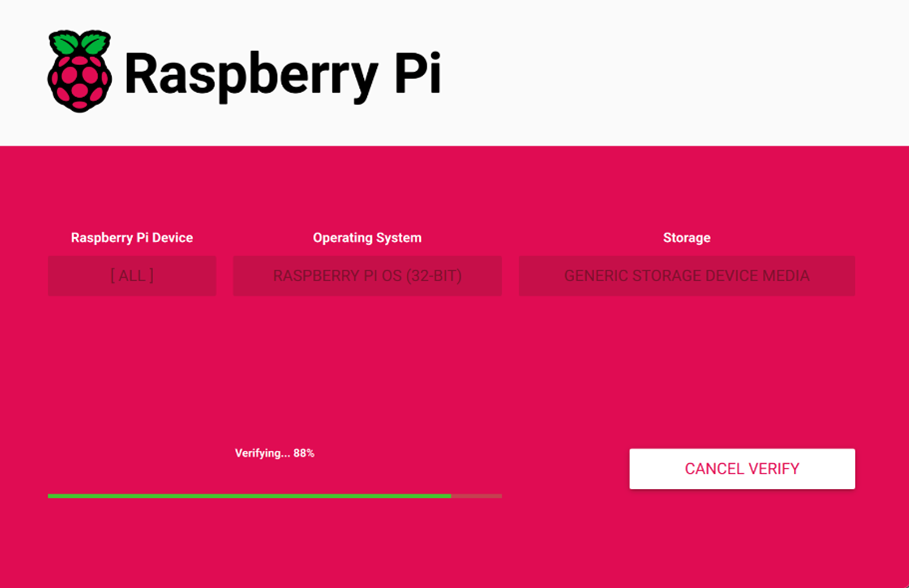
After the verification is completed, click “CONTINUE” in the pop-up “Write Successful” box.
Close Raspberry Pi Imager, remove USB cable and power on the device again.
2.4 First Boot
When the device enters the Ubuntu system for the first time, you need to enter your username and password to access the system directly.
TIP:
Use our standard Ubuntu image, default username is ubuntu ,default password is raspberry.
2.5 Installing Firmware Package
This section describes how to install Firmware packages on Ubuntu OS. Configure the system by adding edatec apt source and installing Firmware packages, disabling raspberry kernel update and other operations after burning the image on the device so that the system can be used normally.
After adding the edatec apt source, the execution command of the device model to install the Firmware package is shown in the following table:
| Model | Execute command |
|---|---|
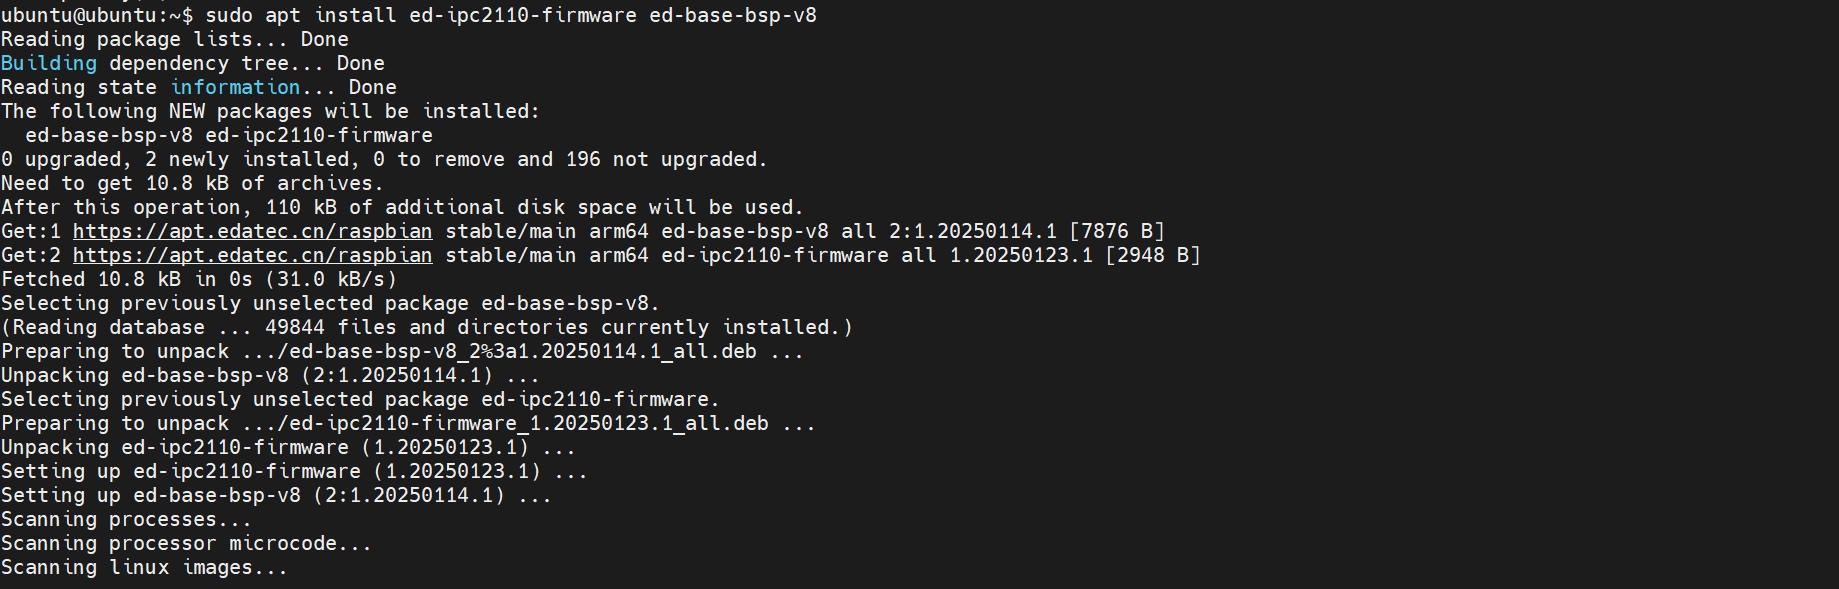
| ED-IPC2110 | sudo apt install ed-ipc2110-firmware ed-base-bsp-v8 |
| ED-IPC2630 | sudo apt install ed-ipc2630-firmware ed-base-bsp-v8 |
| ED-CM4SEN | sudo apt install ed-cm4sen-rev1p0-bsp ed-base-bsp-v8 |
The following is an example of operation on the ED-IPC2110.
Preparation:
Burning and booting configuration of the Ubuntu image has been completed.
The device is connected to a working network.
Steps:
- After the device boots normally, add the edatec apt source by executing the following commands in sequence in the command pane.
curl -sS https://apt.edatec.cn/pubkey.gpg | sudo apt-key add -
sudo echo "deb https://apt.edatec.cn/raspbian stable main" | sudo tee /etc/apt/sources.list.d/edatec.list

- Execute the following command to install the Firmware package for the ED-IPC2110 device.
sudo apt update
sudo apt install ed-ipc2110-firmware ed-base-bsp-v8
- Execute the following command to disable ubuntu kernel updates.
sudo dpkg -l | grep linux-image | awk '{print $2}' | grep ^linux | while read line; do sudo apt-mark hold $line; done

- After the installation is complete, execute the following command to check if the Firmware package is installed successfully.
dpkg -l | grep ed-
The result in the following figure shows ed-cm4sen-rev1p0-bsp indicating that the Firmware package has been successfully installed.

TIP:
If the wrong Firmware package is installed, it can be removed by executing sudo apt-get --purge remove package, where package is the name of the package.
- Execute
sudo rebootto reboot the device.
sudo reboot