Booting From SSD
1 Overview
This section describes the background and scope of application for configuring devices for SSD booting on the ED-IPC2100 Series, ED-IPC2600 Series, ED-IPC3020, ED-HMI2120, and ED-HMI3020.
1.1 Background
Traditionally, the Raspberry Pi has used SD cards as boot and storage media. While SD cards have the advantage of being easily accessible and inexpensive, they typically do not perform as well as Solid State Drives (SSDs in terms of read/write speed and durability. With the price of SSDs dropping and the performance of USB interfaces improving, using SSDs to boot and run the Raspberry Pi is a preferred option that can improve performance and reliability.
Currently our devices are mainly booted via eMMc or SD card. For products that have reserved SSD interface, we support to configure the device to boot from SSD by modifying the boot method of the device.
1.2 Scope
This application applies to ED-IPC2100 series, ED-IPC2600 series, ED-IPC3020, ED-HMI2120, and ED-HMI3020.
2 Application Guidelines
This section describes the procedure to configure booting from SSD on ED-IPC2100 series, ED-IPC2600 series, ED-HMI2120, ED-IPC3020, and ED-HMI3020.
2.2 SSD Flash
Introduces the specifics of flashing an SSD on a device via the Raspberry Pi Image tool.
Prerequisite:
- The device has booted the system normally via the SD card and the SSD has been installed to the device.
- The image file to be flashed has been acquired.
- A Windows PC has been prepared.
WARNING
For SSD installation operation, please refer to the user's manual of the corresponding device!
Operational Steps:
Take Windows system as an example to illustrate the operation steps.
- Decompress the downloaded image (.zip file) to obtain the .img file, and store it in a specified directory on the local Windows PC, e.g., Desktop. 2.
- Use the SCP command on the Windows PC to copy the image file (.img) to the device.
a Press Windows+R at the same time to open the Run pane, type cmd, and press Enter to open the command pane. b Execute the following command to copy the image file (.img) to the pi directory of the device.
scp "Desktop\2024-04-02-ed-HMI3020-101C_raspios-bookworm-arm64.img" pi@192.168.168.229:~

Desktop\2024-04-02-ed-HMI3020-101C_raspios-bookworm-arm64.img: indicates the path where the file is stored in the Windows computer.pi: indicates the directory of the device (i.e., the path where the image file is stored after it is copied)192.168.168.229: the IP address of the device.
- View the image file in the pi directory of the device after the copy is complete.
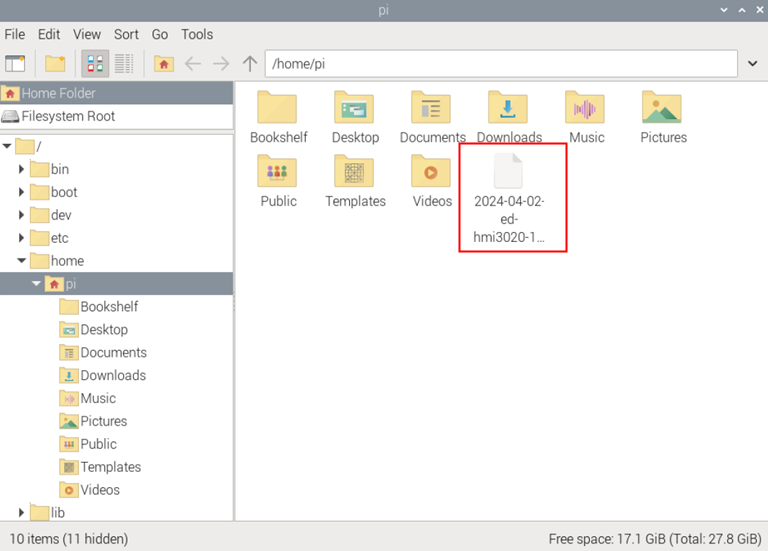
- Click the
icon in the left corner of the desktop, and select "Accessories→Imager in the menu and select “Accessories→Imager" to open the Raspberry Pi Imager.

- Accessing the Raspberry Pi Imager Interface。
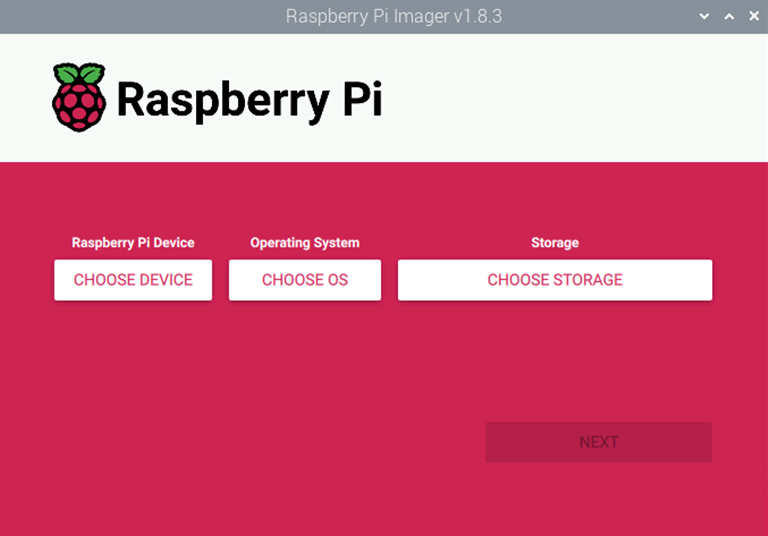
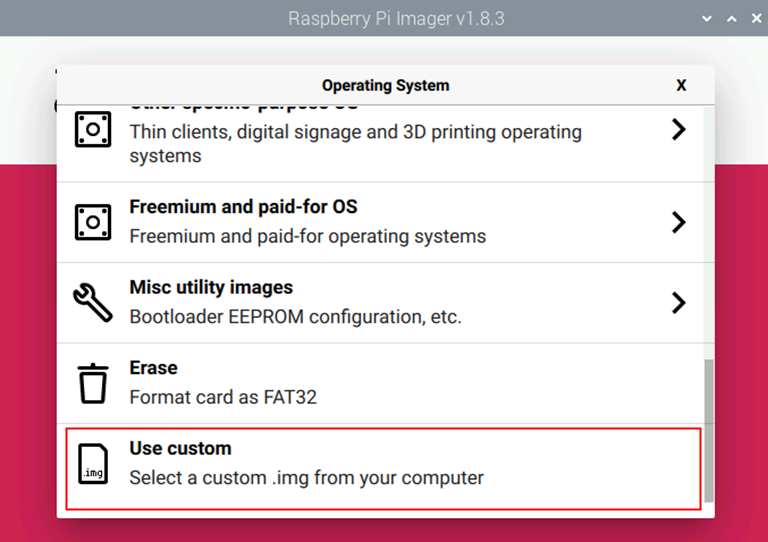
- Click “CHOOSE OS", in the pop-up “Operating System" interface, select “Use custom"."
- In the “Select image” interface, select the image to be flashed.
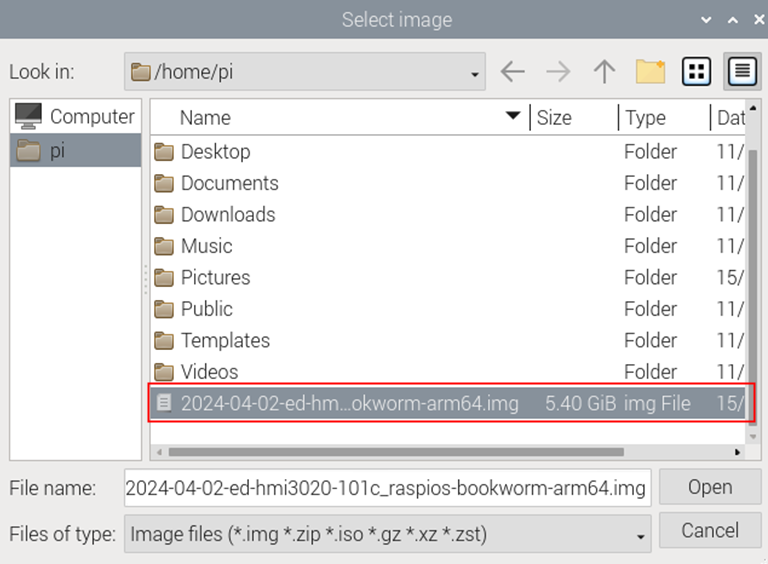
Click “Open” to return to the Raspberry Pi Imager main interface. 9.
Click “CHOOSE STORAGE” and select the SSD in the pop-up “Storage” screen.
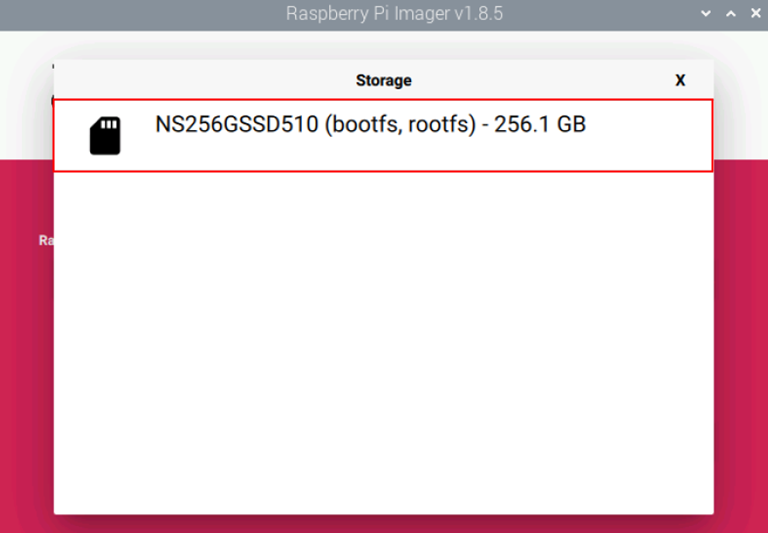
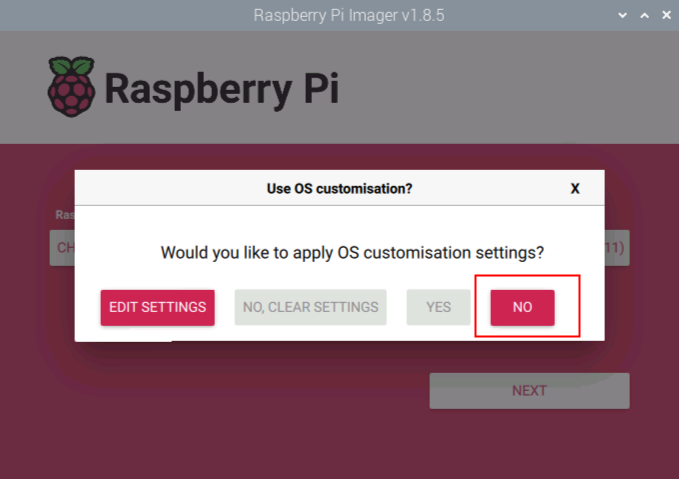
- Click “NEXT” in the main interface of Raspberry Pi Imager, and select “NO” in the “Use OS customization?” pop-up.
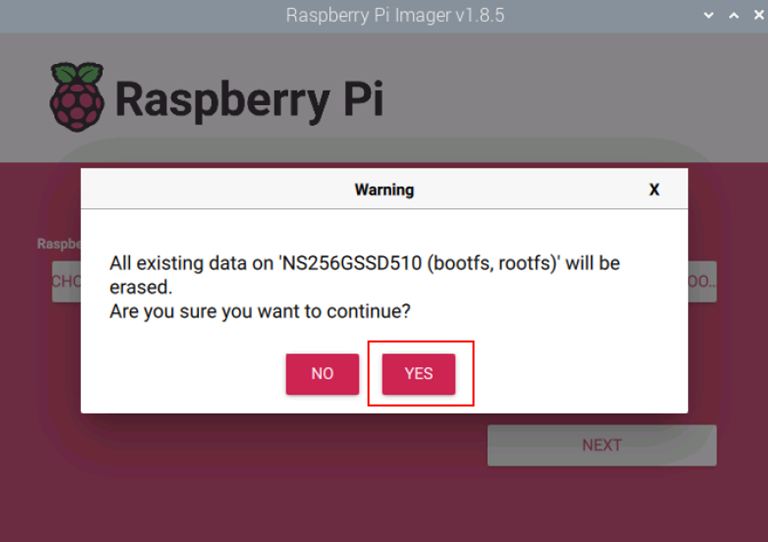
- Select “YES” in the “Warning” pop-up.
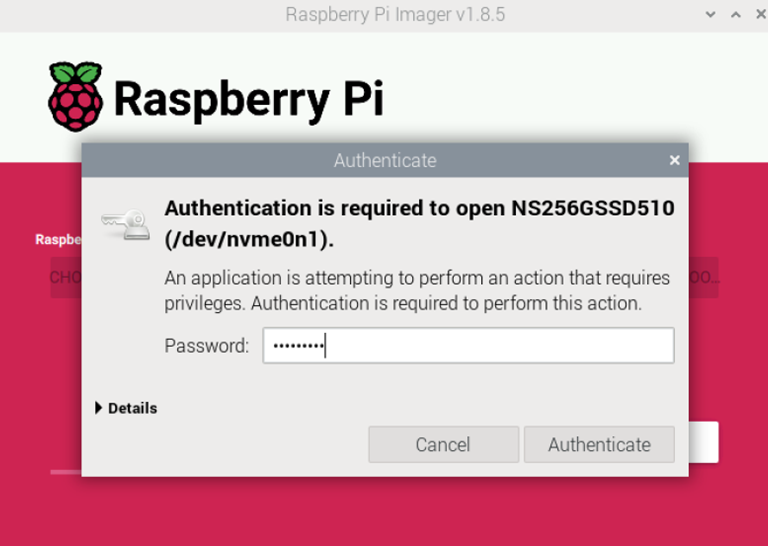
- Enter the login password (raspberry) in the “Authenticate” pop-up and click “Authenticate”.
- Start flashing the image.
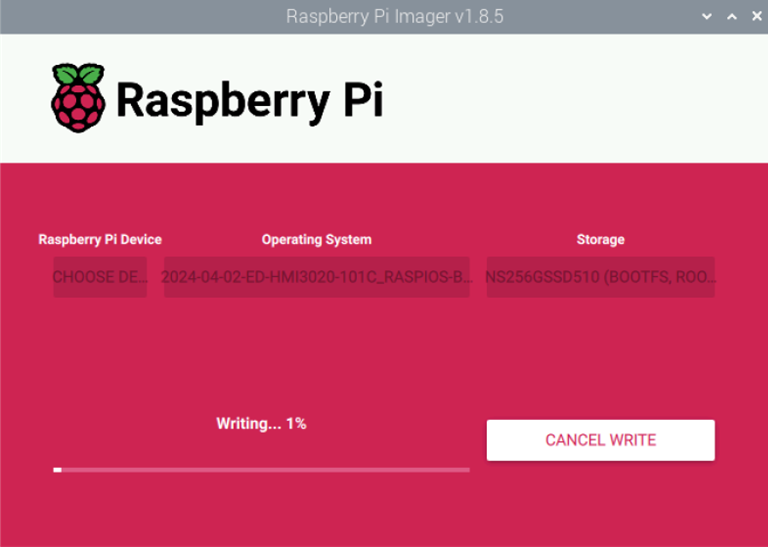
- After the flash is complete, the file is verified.
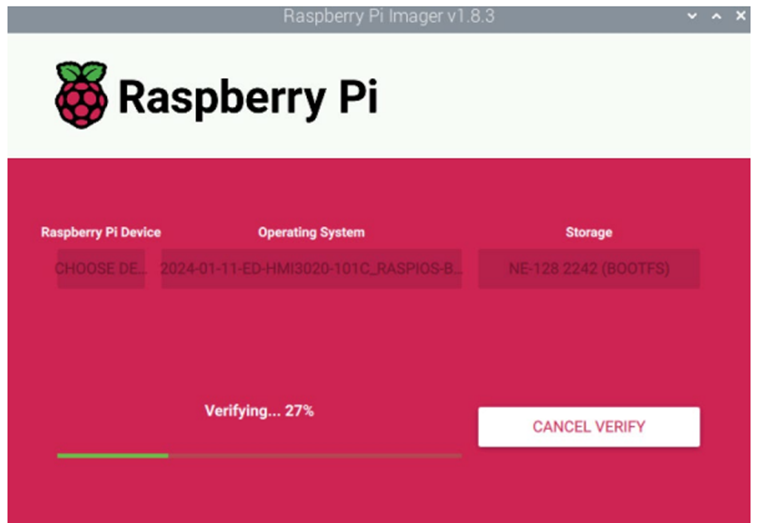
- When the authentication is complete, re-enter the login password (raspberry) in the “Authenticate” pop-up, and then click “Authenticate”. 16.
- In the “Write Successful” pop-up screen, click “CONTINUE” to return to the Raspberry Pi Imager main screen.
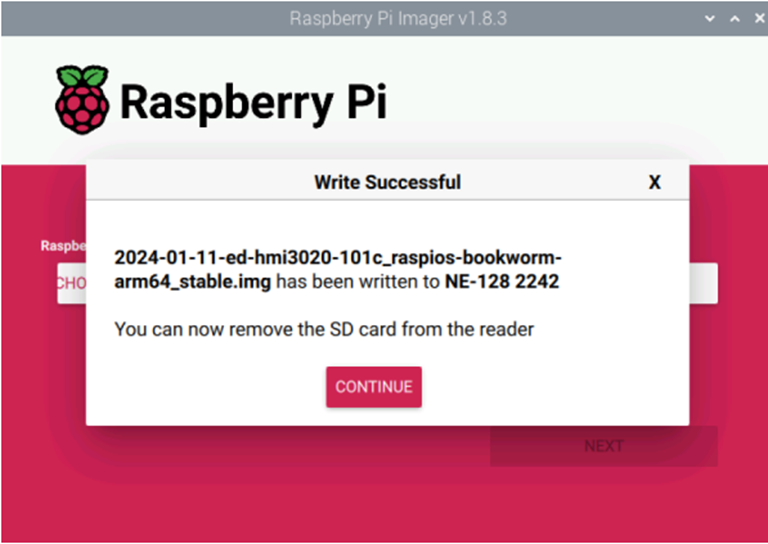
- Close the Raspberry Pi Imager.
2.3 Configuring the boot sequence
There are different ways to configure the startup sequence corresponding to different models, which are explained below according to two categories.
2.3.1 Modifying the boot sequence on ED-HMI3020 and ED-IPC3020
Change the startup order in raspi-config.
Change the startup order in raspi-config.
Prerequisites:
- The device has booted normally from the SD card.
- The SSD flash has been completed.
Operation steps:
- In the command pane, execute the following commands sequentially to upgrade the system.
sudo apt update
sudo apt upgrade
- Execute the following command to open the raspi-config interface.
sudo raspi-config

- In raspi-config interface, press “↓” key to select “Advanced Options”, Enter key to confirm.
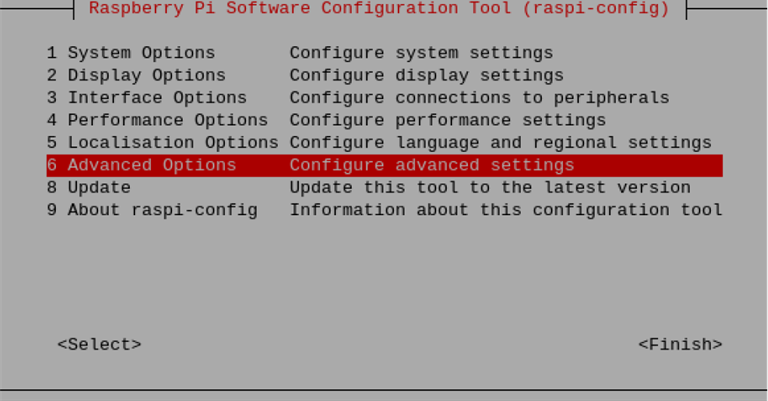
- Select Boot Order and Enter to confirm.
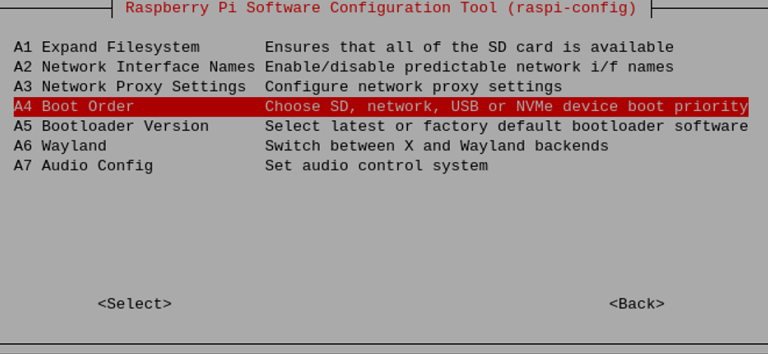
- Select “Nvme/USB Boot” and confirm with Enter.
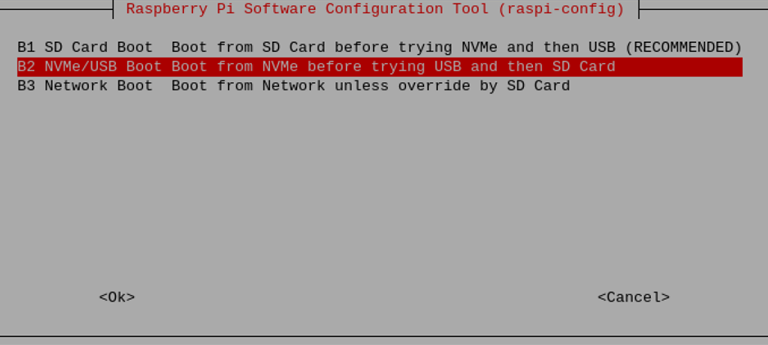
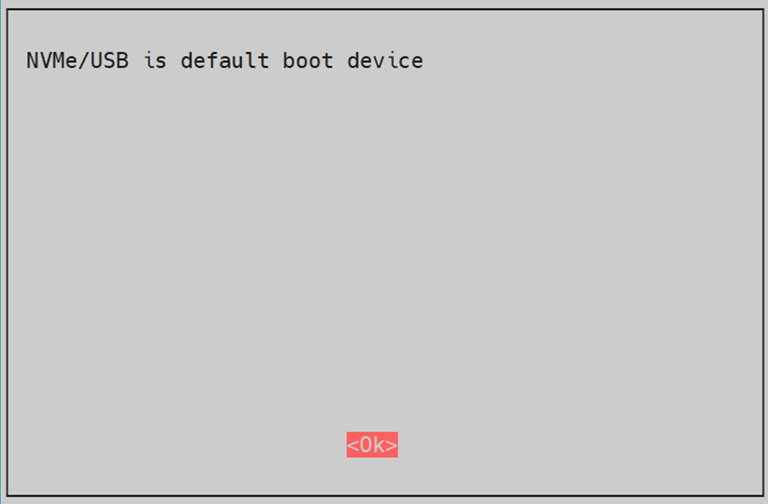
- Booting from SSD has been successfully set, Enter to confirm.
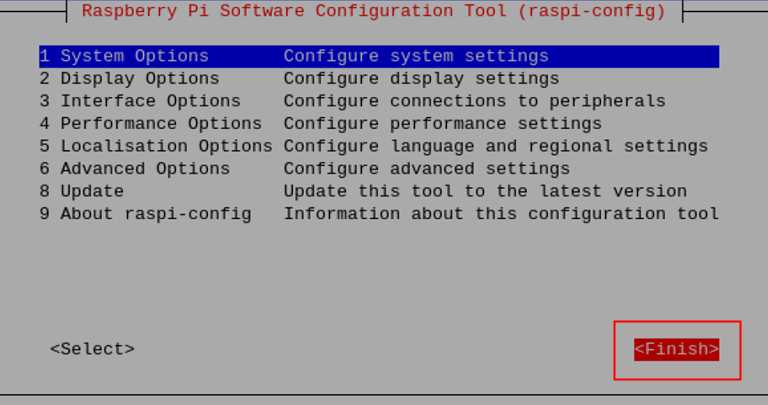
- Press the “→” key to select “Finish” and confirm with the Enter key.
- Select “Yes” and press Enter to confirm and reboot the device.

- Execute the following command to see if the device boots from the SSD.
lsblk
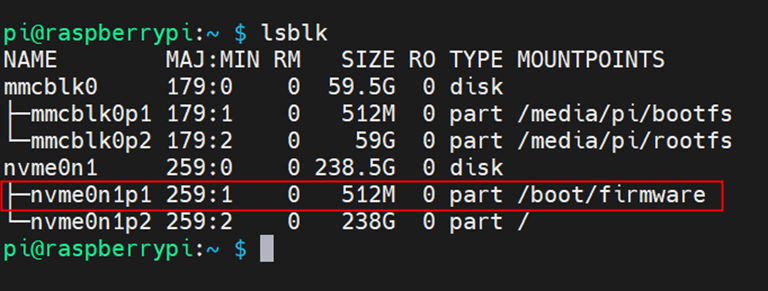
As shown in the above figure, you can see that the boot folder of the system is mounted under the SSD, indicating that the system has booted from the SSD.
2.3.2 Modifying Boot Order on ED-IPC2100 Series, ED-IPC2600 Series and ED-HMI2120
Modify the boot order by modifying the device's configuration file through another Linux PC.
Prerequisites:
- The device has booted normally from the SD card and is connected to the network normally through the Ethernet interface.
- The SSD flash has been completed.
- A USB to Micro USB cable has been obtained.
- A Linux PC has been prepared.
Operating Procedure: 1.
- Install the rpiboot utility via the command line.
a) Execute the following command in the command pane to install git.
sudo apt install git libusb-1.0-0-dev pkg-config build-essential
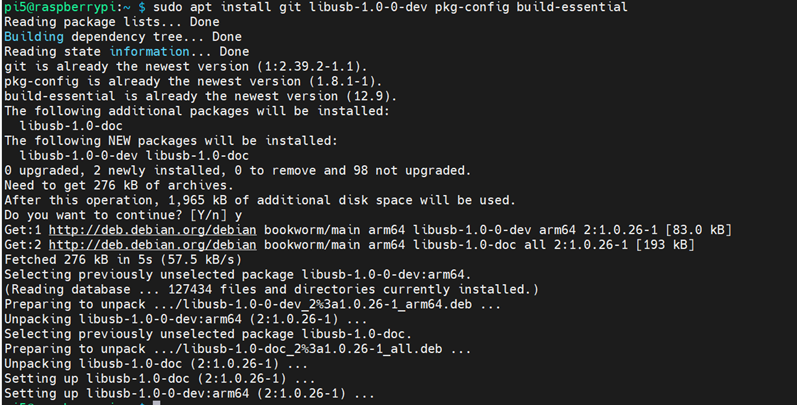
b) Execute the following command to install usbboot.
git clone --depth=1 https://github.com/raspberrypi/usbboot

c) Execute the following commands in sequence to configure the environment.
cd usbboot
make

- Modify the configuration file.
a) Execute the following commands to copy the “customer” folder and modify it.
cp -r recovery customer
cd customer

b) Execute the following command to open the boot.conf file.
nano boot.conf
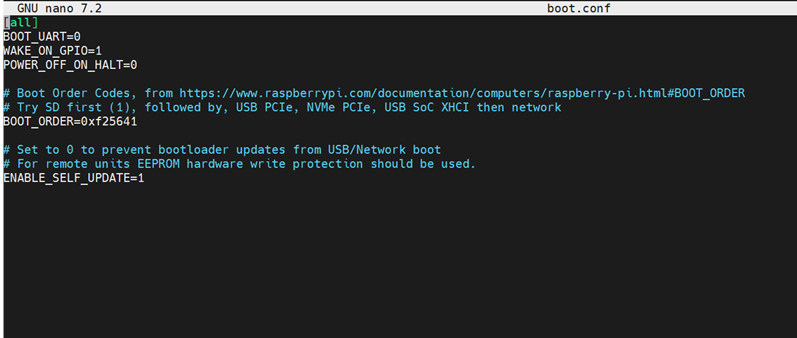
c) Modify the BOOT_ORDER value in the file to 21564.
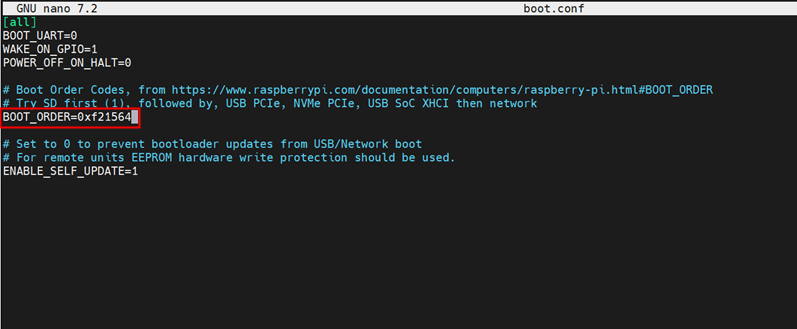
d) Press Ctrl+o and Ctrl+X in turn to save and exit the file editing mode.
- Configuring the Device Boot Sequence
a) To modify the boot sequence of the device through the USB to Micro USB cable to connect to the current use of the PC device, connected to the completion of the device will be powered on to enter the flash mode
b) Execute the following command to update the eeprom.
./update-pieeprom.sh

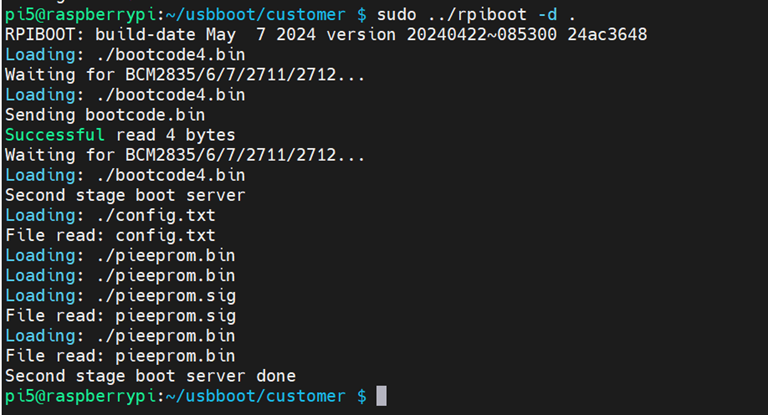
c) Execute the following command to diskify the device and complete the file modification.
sudo ../rpiboot -d .
- Re-power on the device and execute the following command to see the BOOT_ORDER order. BOOT_ORDER=0xf146 means to prioritize booting from SSD.
rpi-eeprom-config

