Configuring Ethernet IP
The device is set to automatically obtain an IP address by default. If you need to reconfigure the IP address, you can do so manually. The steps for manually configuring the IP address differ between the Desktop and Lite operating systems. For detailed instructions, please refer to the sections below.
Raspberry Pi OS(Desktop)
In the Desktop version of the operating system, it is recommended to use graphical tools to configure the IP address.
Preparation:
The device is connected to the network via Ethernet or Wi-Fi.
Steps:
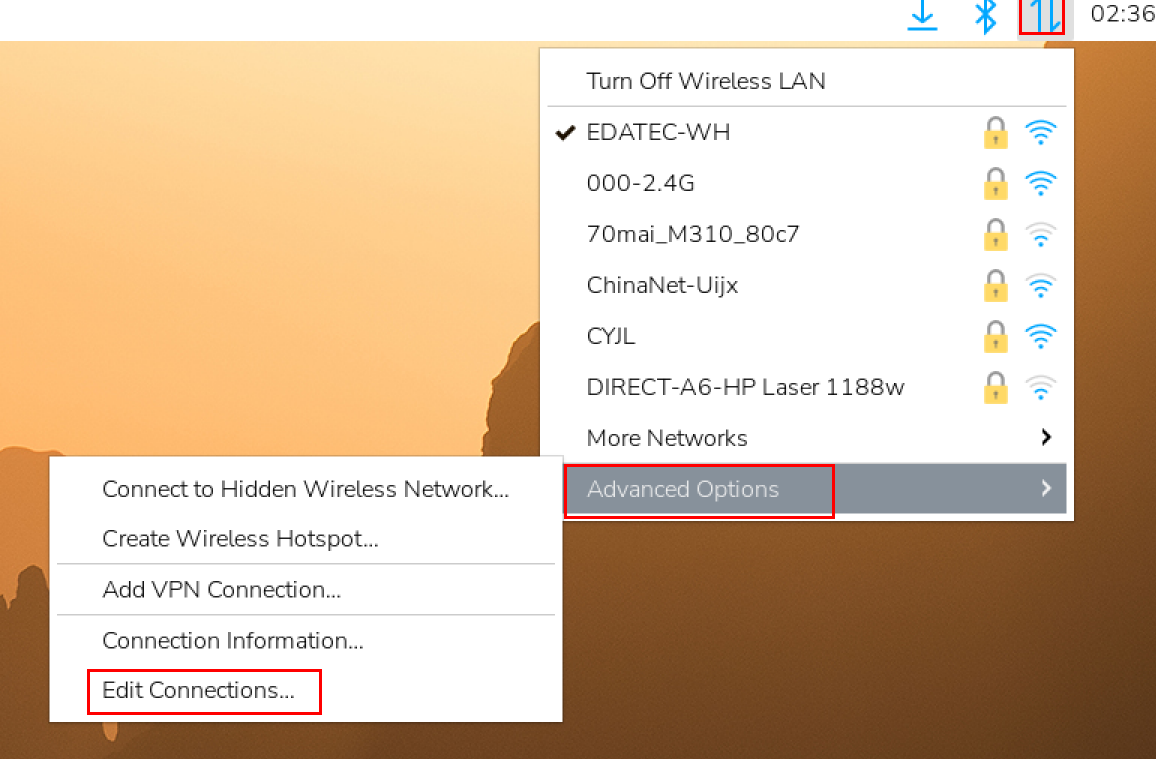
- Left-click the
 icon in the upper right corner of the desktop and select “Advanced Options→Edit Connections” in the pop-up menu.
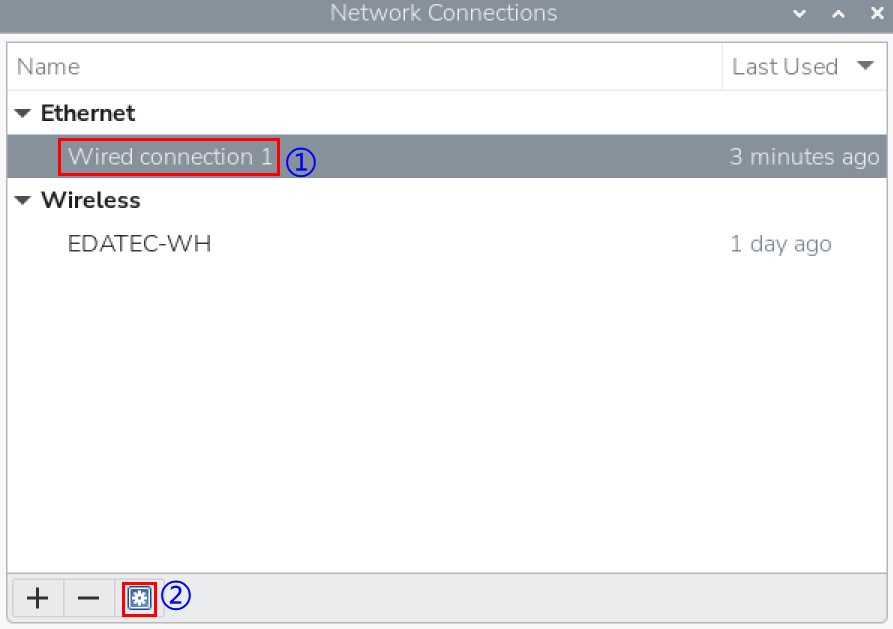
- In the pop-up
Network Connectionspane, select the connection name to be modified, and then click the Settings button below.
- In the pop-up
Editing Wired connectionpane, select the "IPv4 Settings" page, and then set the IP address as required.
- If you want to set the IP as a static IP, set the "Method" as "Manual", add an entry in Addresses and enter the corresponding IP address information.
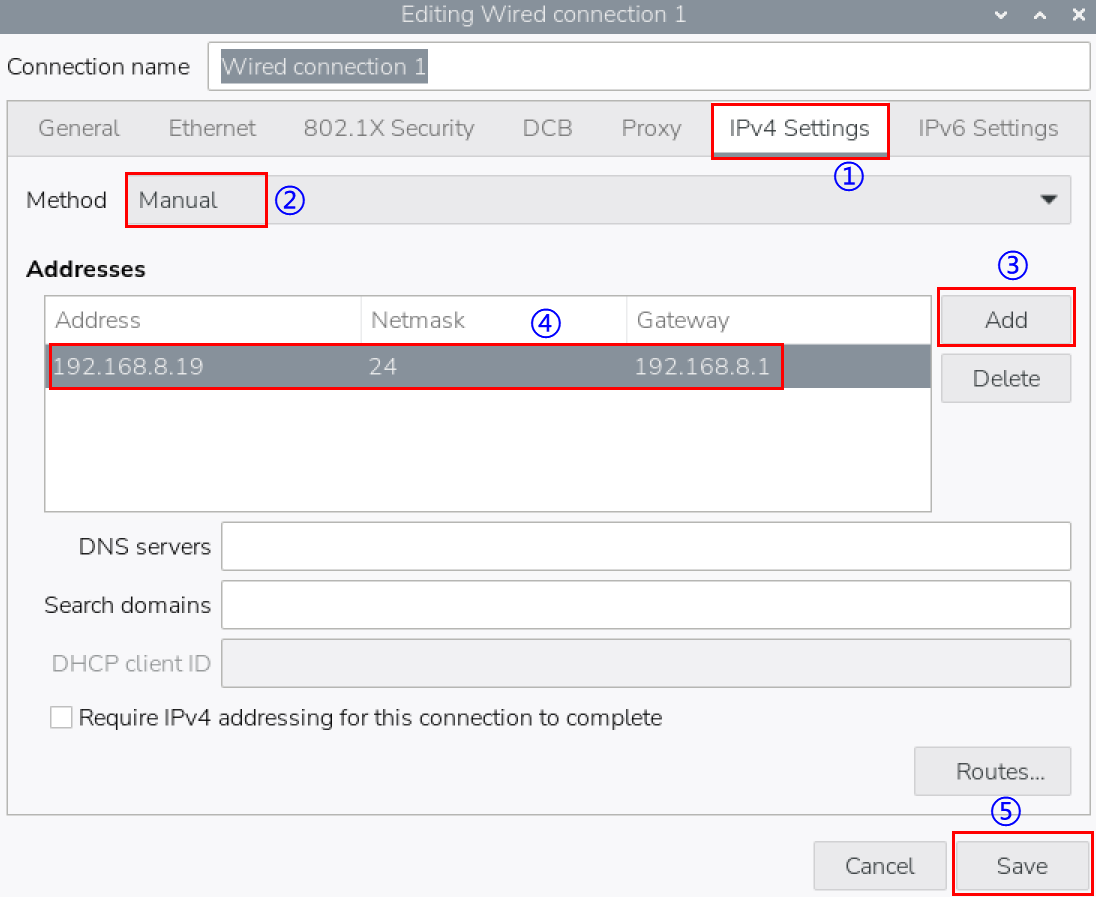
- If you want to set the IP to automatic mode, you only need to set the "Method" as "Automatic(DHCP) ".

- Click "save" to return to
Network Connectionspane and close the page. - Execute the
sudo rebootcommand to restart the device.
Raspberry Pi OS(Lite)
In the Lite version of operating system, it is recommended to use the command to configure IP.
Preparation:
The device is connected to the network via Ethernet or Wi-Fi.
Steps:
Set a static IP address
- Get the assigned IP address, subnet mask and gateway address, for example, the IP address is
192.168.1.101/24and the gateway IP is192.168.1.1. - Obtain the connection name to be modified, for example
e167c45f-efed-3f8d-89a5-f2430f92fae8. In the command pane, run the following command to query the connection name.
nmcli c

- Execute the following command to set the IP address to the obtained IP address.
sudo nmcli connection modify e167c45f-efed-3f8d-89a5-f2430f92fae8 ipv4.addresses 192.168.1.101/24 ipv4.method manual
- Execute the following command to set the gateway IP to the obtained gateway IP.
sudo nmcli connection modify e167c45f-efed-3f8d-89a5-f2430f92fae8 ipv4.gateway 192.168.1.1
Set the IP to automatic mode
- Obtain the connection name to be modified, for example
e167c45f-efed-3f8d-89a5-f2430f92fae8. In the command pane, run the following command to query the connection name.
nmcli c

- Execute the following command to set the way of obtaining IP address to automatic mode.
sudo nmcli connection modify e167c45f-efed-3f8d-89a5-f2430f92fae8 ipv4.method auto