3 Using the device
ED-MONITOR-101C requires a PC host for operation and does not require driver installation. Connect it to the HDMI output of a PC host first, then power on the device to enable normal display. It supports backlight adjustment via dedicated buttons and software.
3.1 Connecting Cables
This section describes how to connect cables.
Preparation:
- A functional power adapter has been acquired.
- A functional PC host has been acquired.
- Functional HDMI and USB cables (Type-A to Type-C USB cable) have been acquired.
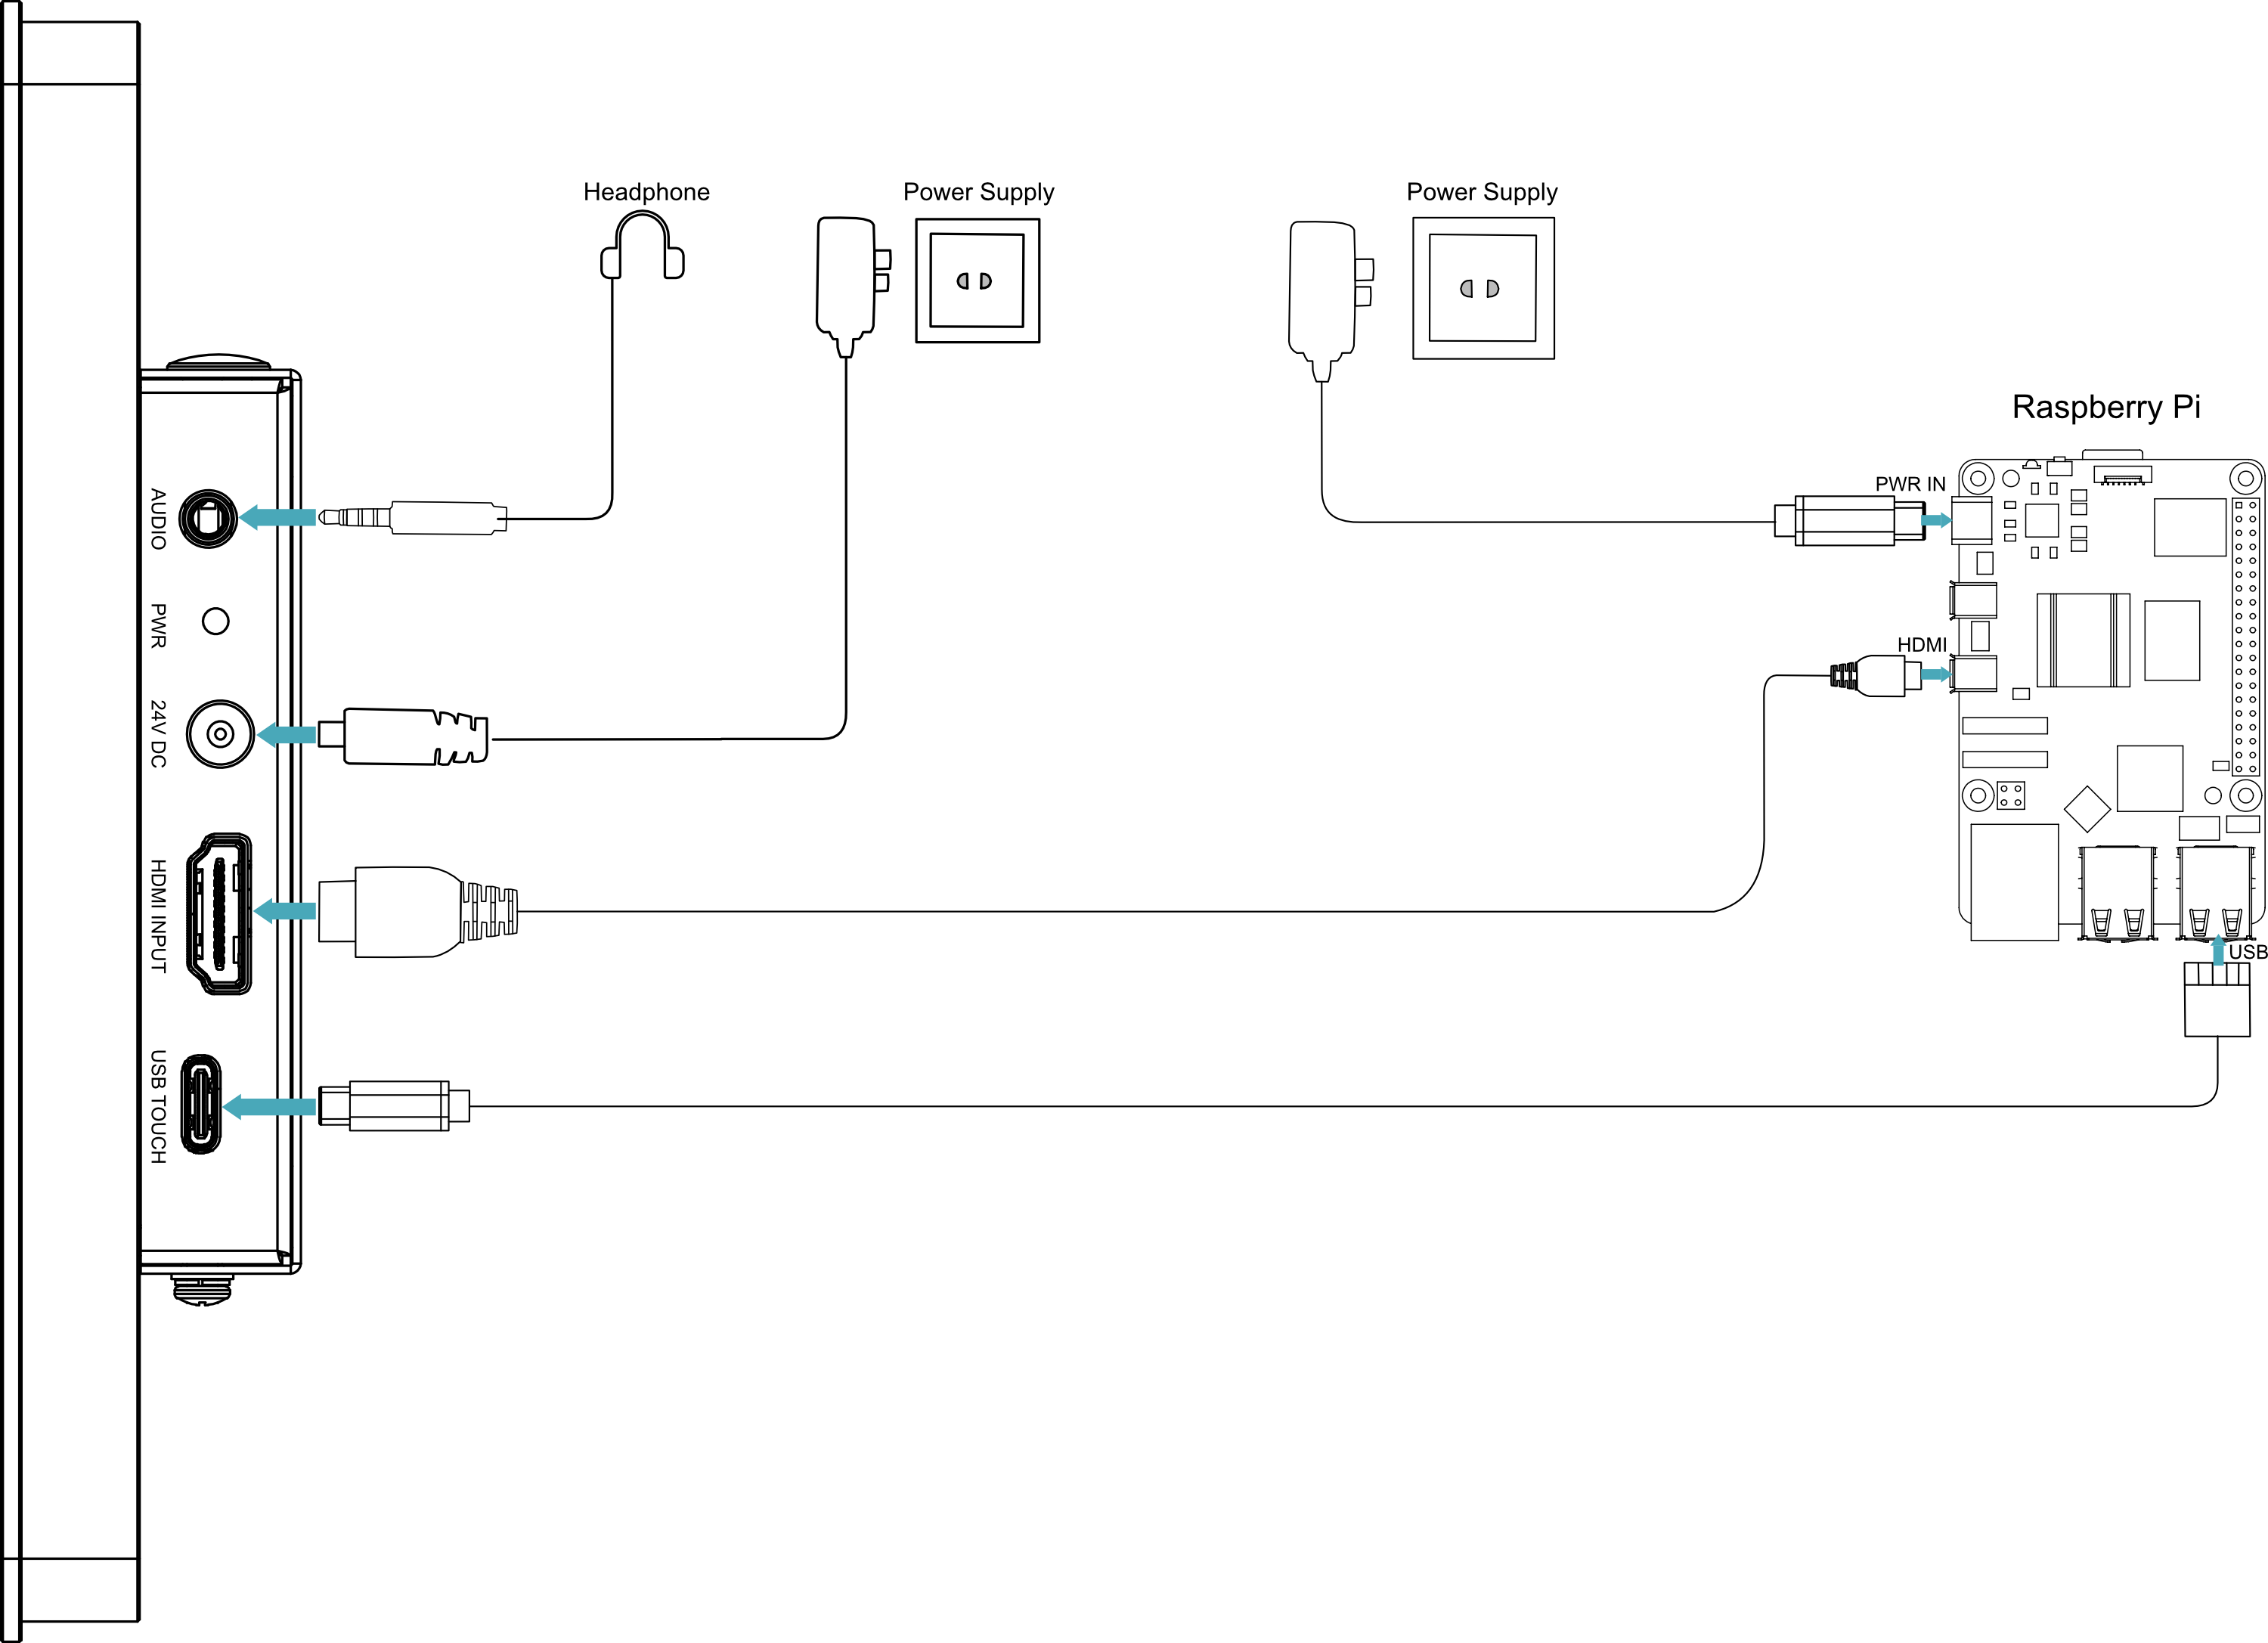
Schematic diagram of connecting cables:
Please refer to 1.6 Interface to obtain the pin definitions and wiring methods of each interface.
TIP
The HDMI INPUT interface of the ED-MONITOR-101C is compatible with various PC hosts. The figure below illustrates cable connection using a Raspberry Pi as an example.
3.2 Booting the device
The ED-MONITOR-101C does not include a physical power switch. After connecting to a power source, the device will automatically power on. Once fully booted, it will display the desktop of the connected PC host.
3.3 Adjusting Backlight Brightness
ED-MONITOR-101C supports brightness adjustment via physical buttons and software.
3.3.1 Button-Based Brightness Adjustment
Once the ED-MONITOR-101C is connected to a PC and displays normally, its backlight brightness can be adjusted using the two dedicated brightness adjustment buttons on the side panel.
| Button | Description |
|---|---|
 | Press the button to increase the backlight brightness of the LCD screen. |
 | Press the button to decrease the backlight brightness of the LCD screen. |
3.3.2 Software-Based Brightness Adjustment
After connecting the ED-MONITOR-101C to a PC host and ensuring normal display operation, the screen backlight can be adjusted via software. Note that the operation methods differ between the Desktop and Lite versions of the operating system.
3.3.2.1 Raspberry Pi OS (Desktop)
Adjusting backlight brightness via UI on Raspberry Pi OS (Desktop).
Preparation:
- ED-MONITOR-101C is properly connected to the Raspberry Pi host with normal display output.
- The Raspberry Pi host has stable network connectivity.
Steps:
- Add EDATEC apt repository by executing the following commands sequentially in the terminal.
curl -sS https://apt.edatec.cn/pubkey.gpg | sudo apt-key add -
echo "deb https://apt.edatec.cn/raspbian stable main" | sudo tee /etc/apt/sources.list.d/edatec.list
sudo apt update
- Install the software toolkit.
sudo apt install -y ed-ddcci-tool
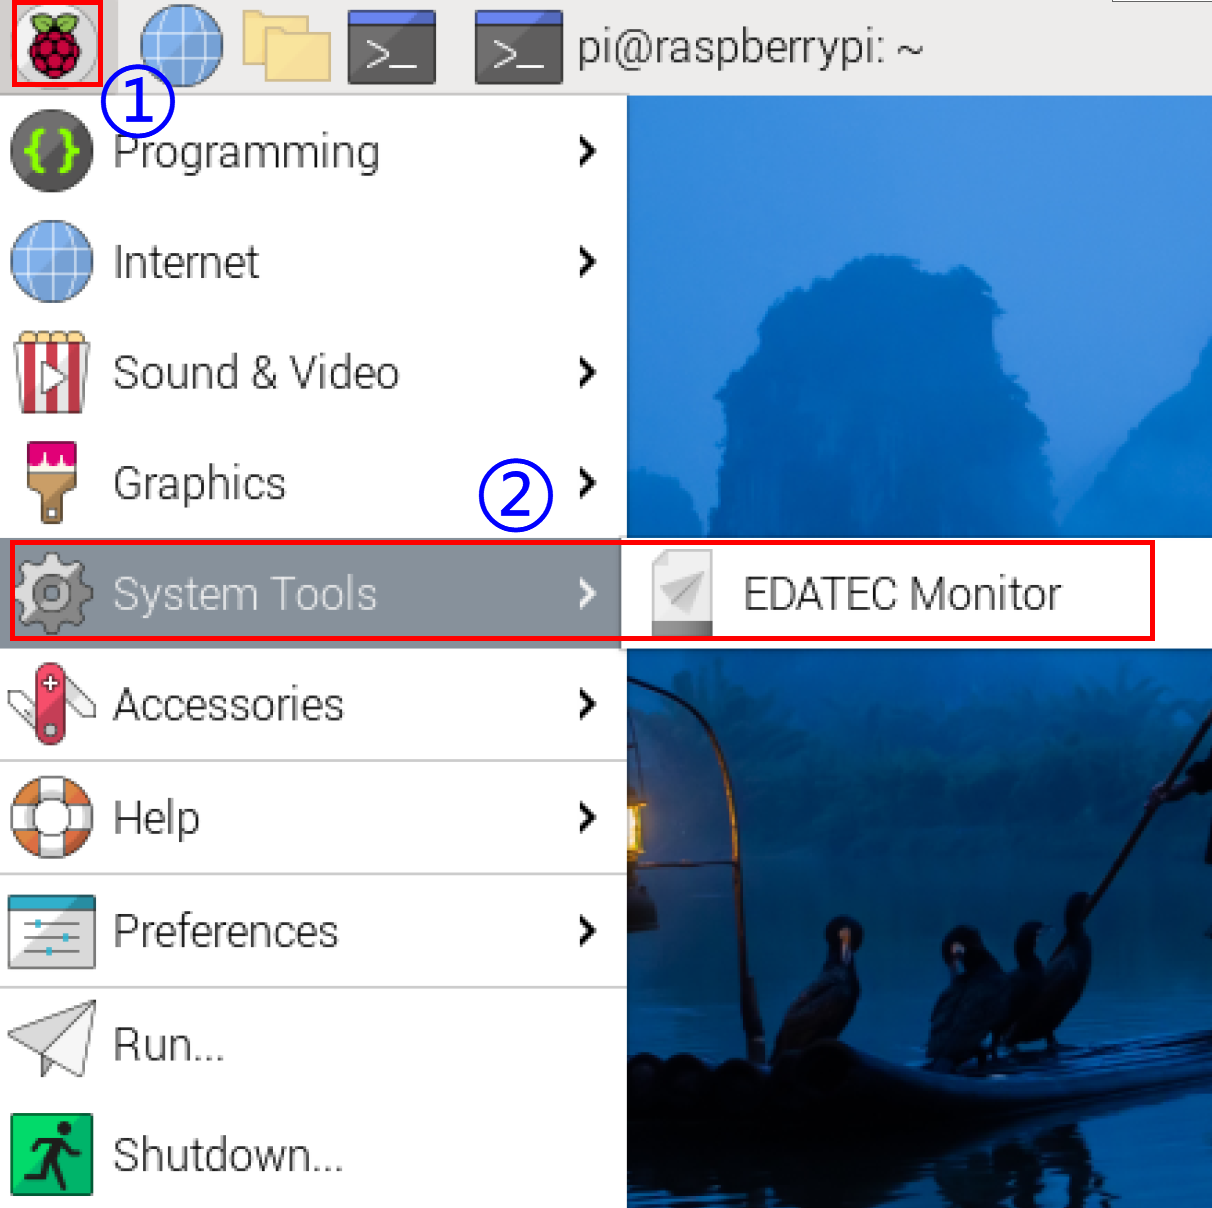
- Click the
 icon in the top-left desktop corner. Then select to "System Tools" → "EDATEC Monitor".
- Adjust brightness using the slider in the "EDATEC Backlight" panel.

TIP
Support executing the sudo ed-ddc-ui command in the terminal window to open the "EDATEC Backlight" panel.
3.3.2.2 Raspberry Pi OS (Lite)
Adjusting backlight brightness via CLI on Raspberry Pi OS (Lite).
Preparation:
- ED-MONITOR-101C is properly connected to the Raspberry Pi host with normal display output.
- The Raspberry Pi host has stable network connectivity.
Steps:
- Add EDATEC apt repository by executing the following commands sequentially in the terminal.
curl -sS https://apt.edatec.cn/pubkey.gpg | sudo apt-key add -
echo "deb https://apt.edatec.cn/raspbian stable main" | sudo tee /etc/apt/sources.list.d/edatec.list
sudo apt update
- Install the software toolkit:
sudo apt install -y ed-ddcci-tool
- Query current brightness level:
sudo ed-ddc-server brightness read
- Set brightness level:
sudo ed-ddc-server brightness write -v X
X represents brightness level (0 = minimum, 100 = maximum).