4 Booting the Device
This chapter introduces how to connect cables and boot the device.
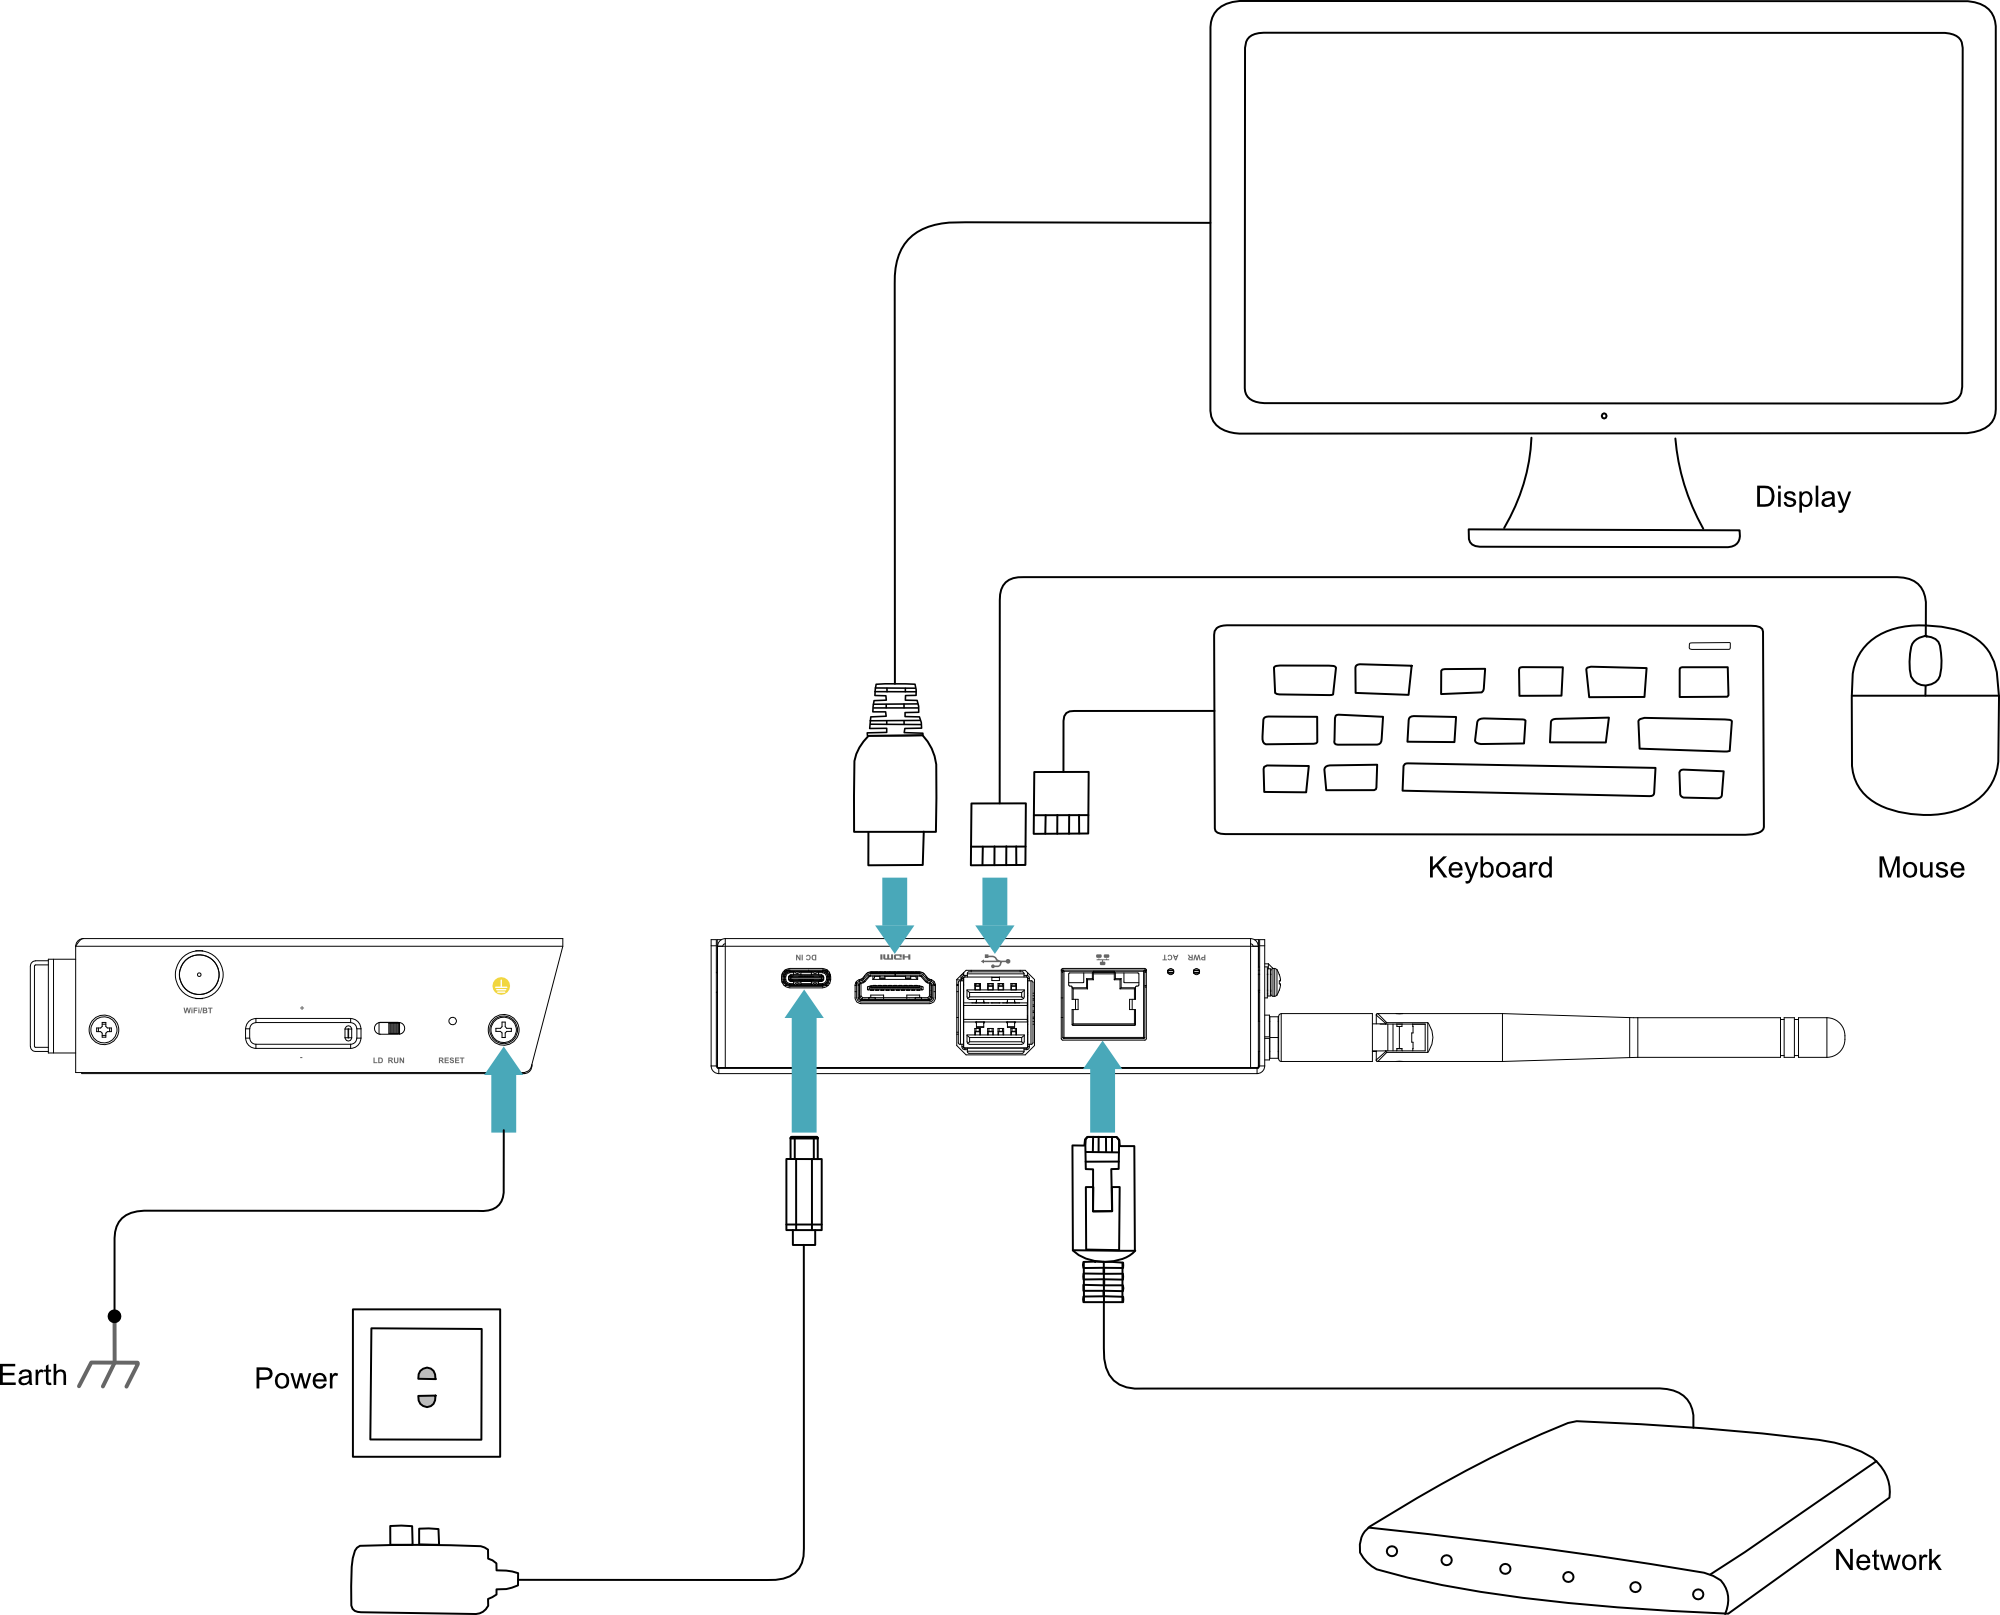
4.1 Connecting Cables
This section describes how to connect cables.
Preparation:
- Accessories such as display, mouse, keyboard and power adapter that can be used normally have been ready.
- A network that can be used normally.
- Get the HDMI cable and network cable that can be used normally.
Schematic diagram of connecting cables:
Please refer to 1.6 Interface for the pin definition of each interface and the specific method of wiring.
4.2 Booting The System For The First Time
The ED-IPC1000 device are not equipped with a power switch. The system will begin to start once power is connected.
- The red PWR indicator is on, indicating that the device has been powered normally.
- The green ACT indicator is blinking, indicating that the system is started normally, and then the logo of Raspberry Pi will appear in the upper left corner of the screen.
TIP
Default username is pi, Default password is raspberry.
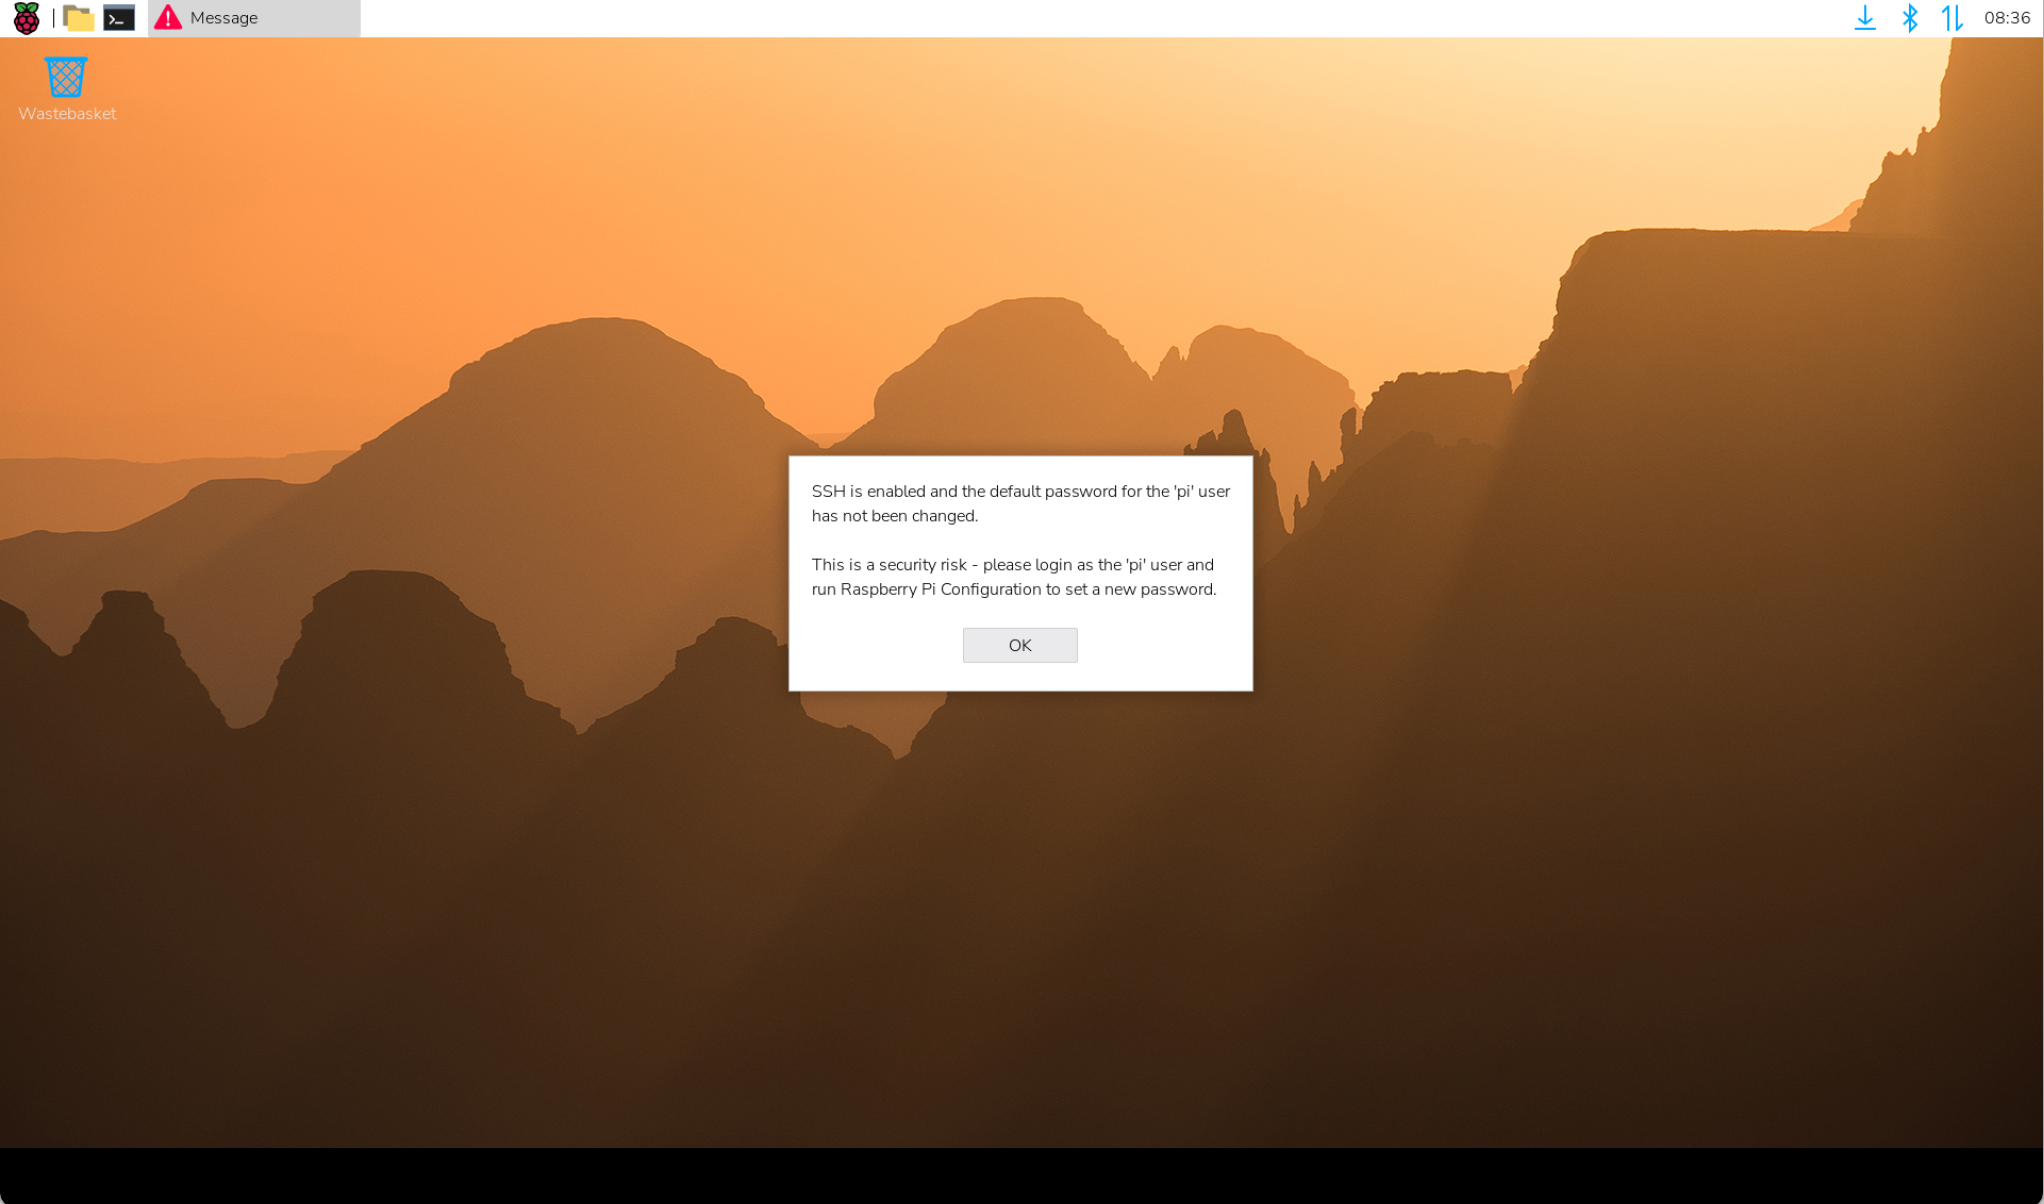
4.2.1 Raspberry Pi OS (Desktop)
If the device is pre-installed with the Desktop edition of the system at the factory, it will directly enter the desktop interface after startup, as shown in the figure below.
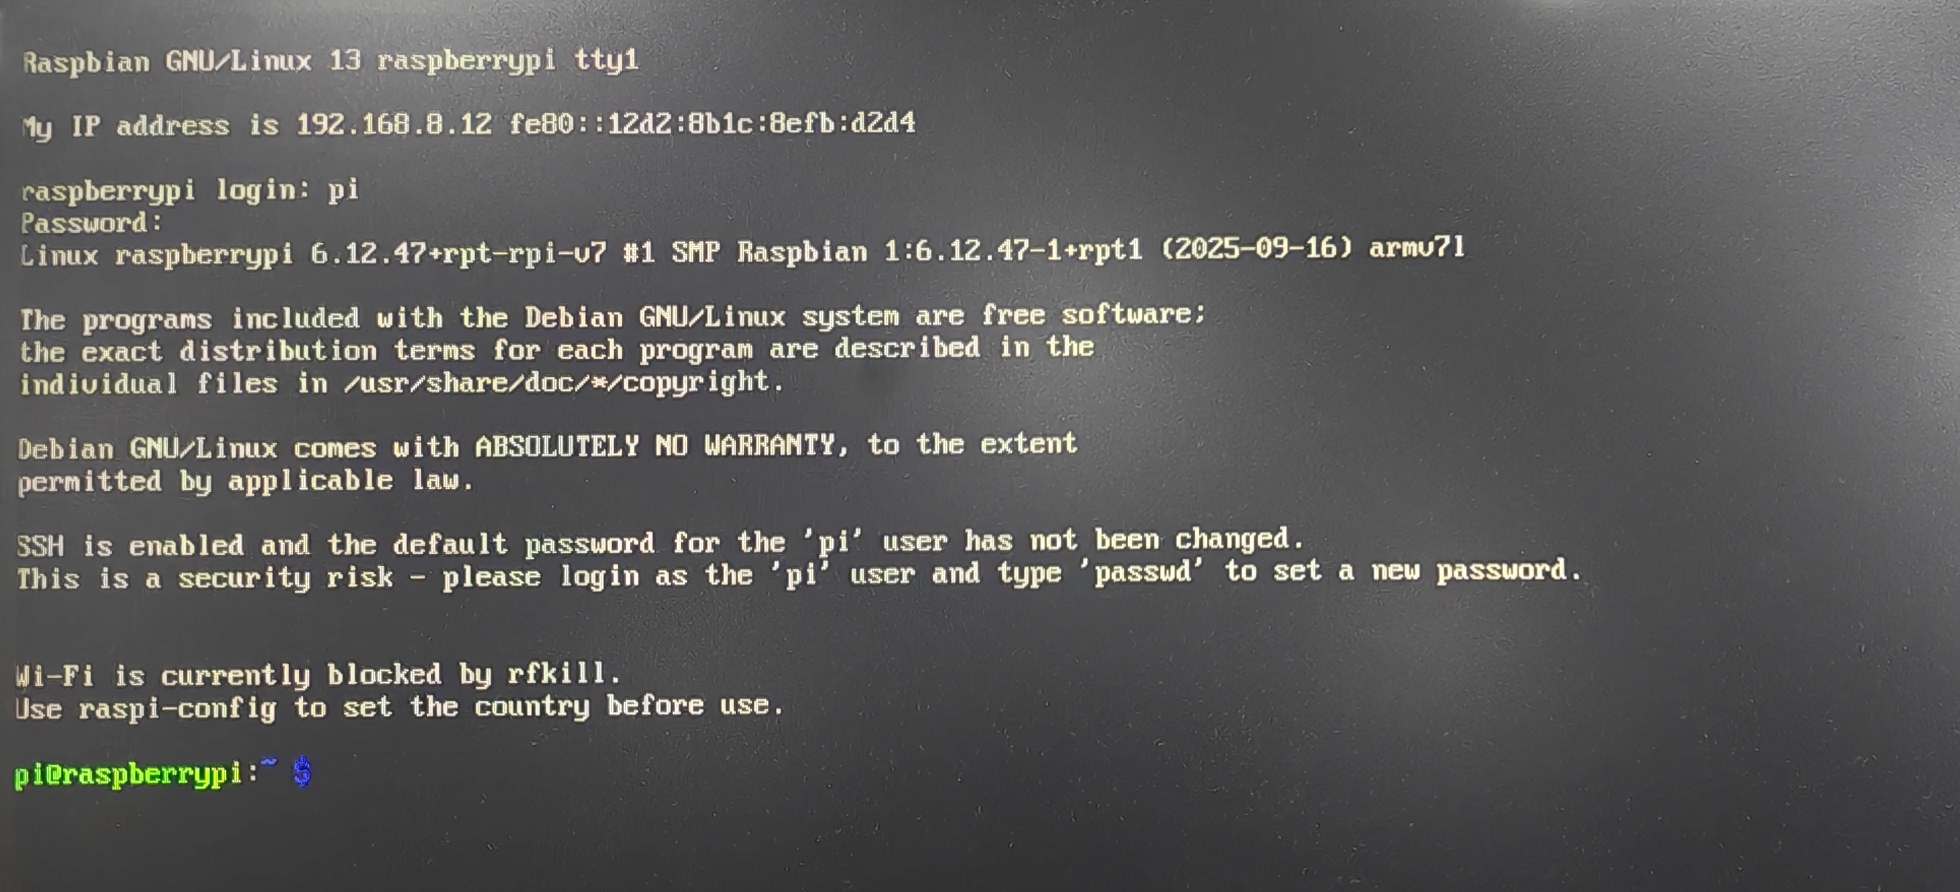
4.2.2 Raspberry Pi OS (Lite)
If the device is pre-installed with the Lite edition of the system at the factory, it will automatically log in using the default username pi. After startup, with the default password being raspberry. The figure below indicates that the system has started successfully.