2 Quick Start
This chapter describes the startup and some of the power-up settings for the ED-GWL2110 series.
2.1 Equipment List
- 1 x ED-GWL2110 Unit
- 1 x Wi-Fi/BT External Antenna (optional)
- 1 x LoRa External Antenna
- 1 x 4G External Antenna (optional)
- 1 x Network Cable
2.2 Hardware Connection
- Install the external antennas for Wi-Fi, LoRa, or 4G separately.
- Connect the Ethernet cable:
- One end connects to the device's Ethernet port.
- The other end connects to a PoE-enabled router or switch with internet access.
2.3 First Startup
ED-GWL2110 has no power switch. After connecting to PoE power supply, the system will start.
TIP
- Default username is
pi, Default password israspberry. - The default operating system has SSH enabled.
2.3.1 Raspberry Pi OS (Desktop)
If the Desktop version of the system is installed when the product leaves the factory, after the device is started, it will directly enter the desktop, as shown in the following figure.

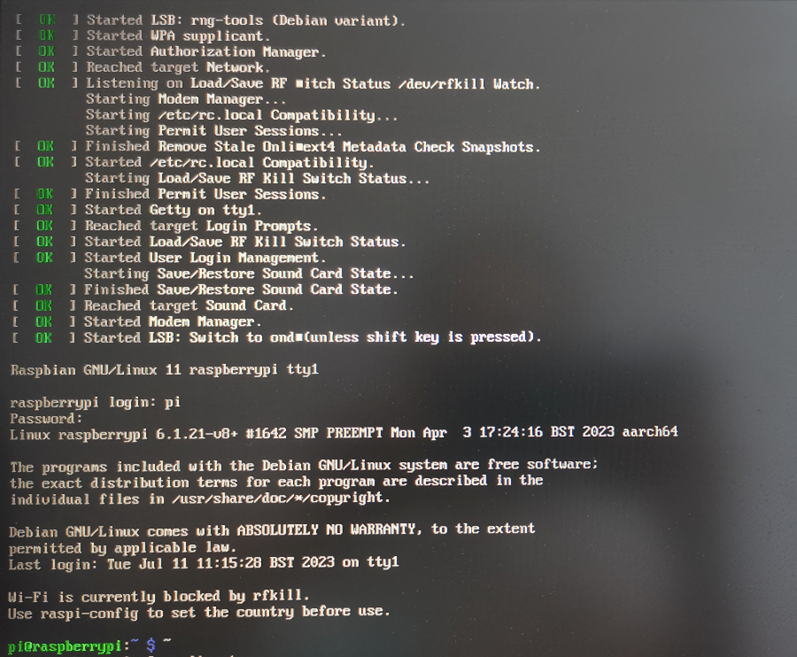
2.3.2 Raspberry Pi OS (Lite)
If the Lite version of the system is installed at the factory, the default username pi will be used to automatically log in after the device is started, and the default password is raspberry. The following figure shows that the system has been started normally.
2.4 Finding Device IP
2.4.1 Login Router to Query IP
When the device starts normally but the display is not connected, you can log in to the router to check the current device IP.
Preparation:
- The device has been connected to the network through the router.
- The IP and network password of the router in the network have been obtained, and the IP address is 192.168.X.X.
Steps:
- Open a browser, Enter the router IP of the network where the device is located in the address bar: 192.168.x.x, and press Enter to enter the router login interface.
- According to the interface prompts, enter the network password and enter the router management interface.
- Find the IP address of device in the terminal device of the management interface.
2.4.2 Scan For Using NMAP Tool
When the device starts normally but the display is not connected, you can use nmap tool to scan the IP under the current network to obtain the IP information of the device. Nmap supports Linux, macOS, Windows and other platforms.
Preparation:
- The device has been connected to the network through the router.
- The IP segment and mask of the router in the network have been obtained, for example, 192.168.X.X/24, where 24 is the subnet mask.
Steps:
For example, using nmap to scan the network segments from 192.168.3.0 to 255, you can use the following steps:
- Open the nmap tool and scan the hosts in the 192.168.X.X/24 network segment.
WARNING
The nmap tool operates differently in different operating systems, so please follow the actual interface or command prompts.
- According to the scanned results, get the device IP.
2.5 Connect To The Device Via SSH
After the device starts normally, you can choose to connect to the device remotely through SSH to configure or debug it. The tools for remote login are selected by users themselves, and the following is an example of logging in through MobaXterm.
Preparation:
- The MobaXterm tool has been installed on the PC.
- The device has been connected to the network through the router.
- IP address of the device has been get.
Steps:
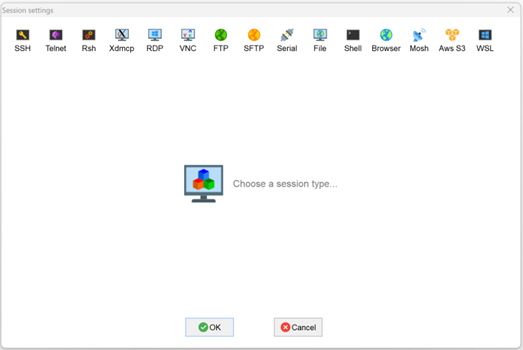
- Open MobaXterm, click
 , and open the window for creating connection, as shown in the figure below.
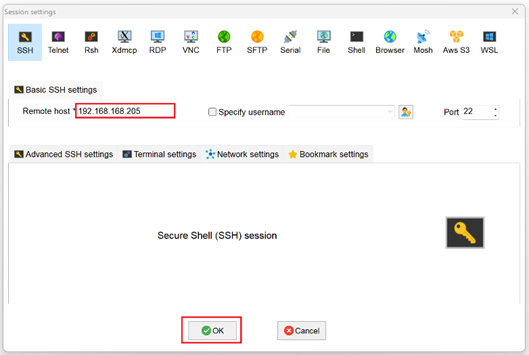
- Click
 in the upper left corner to open the SSH connection interface.
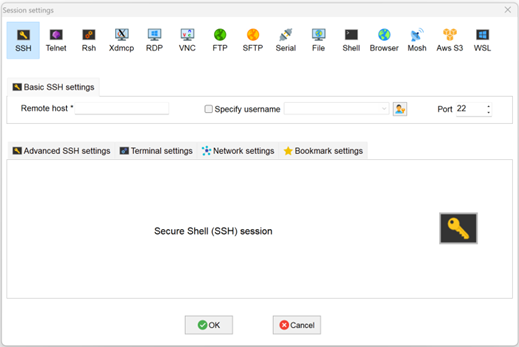
- After entering the IP address of the obtained device, click "OK".
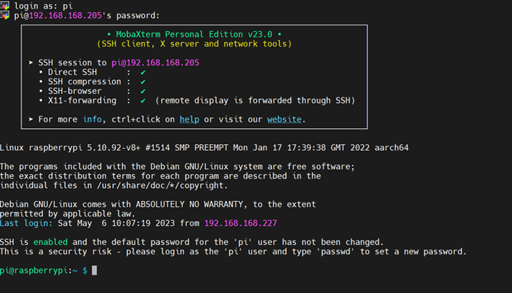
- Click "Accept" in the pop-up prompt box to enter the system login interface.
- Enter the username and password according to the prompt, and enter the system after logging in.
TIP
Default username is pi, Default password is raspberry.