4 Configuring System
4.1 Obtaining Device Files
The device files for EDATEC EtherCAT coupler and EtherCAT I/O modules are integrated. Both the EtherCAT coupler and EtherCAT I/O modules use the same device file, which can be downloaded at: ED-EIOBRG-EC Device File.
- In an actual network configuration where both the EtherCAT coupler and EtherCAT I/O modules are used, you only need to install the device file once when connecting the EtherCAT coupler.
- If the EtherCAT I/O modules are used independently in the network, the device file must be installed separately.
4.2 Configuration Example
An example of building an EtherCAT coupler configuration environment with CODESYS Soft PLC as the master.
Preparation:
- A PC with CODESYS V3.5.19.0 or later installed.
- A number of network cables have been acquired.
- The available EtherCAT couplers (ED-EIOBRG-EC) have been acquired.
- The device description file (e.g. “ED-EIOBRG-EC-xxxxxx.xml”) for the EtherCAT coupler ED-EIOBRG-EC has been obtained.
- The connection of the EtherCAT analog module to the EtherCAT coupler has been completed.
Steps:
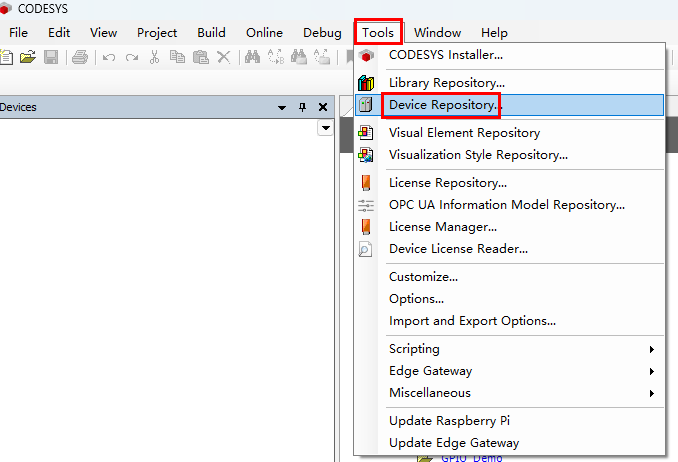
- Double-click the CODESYS icon on the PC desktop to open the CODESYS software. Select “Tools” → “Device Repository” in the menu bar.
- In the "Device Repository" pane, click "Install", select the device file and click Open to install it.
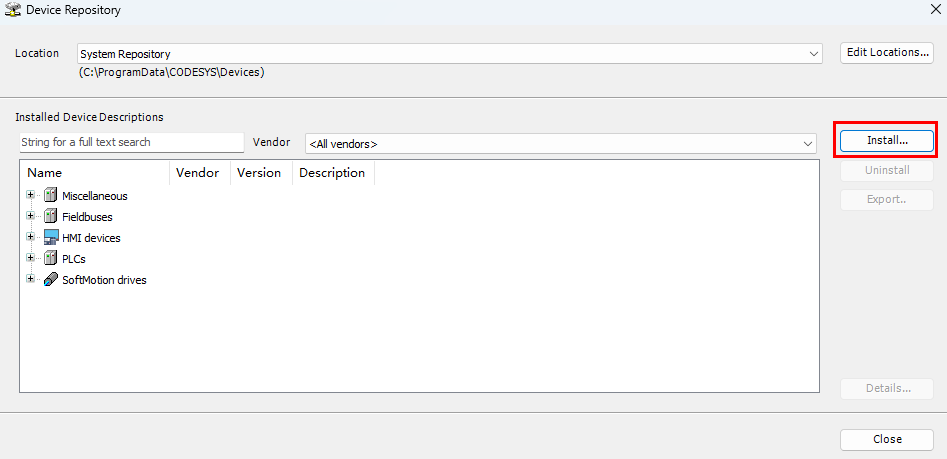
After successful installation, click "Close".
In the menu bar, select "File"-> "New Project", open the “New Project” pane, create a standard project.

In the pop-up pane, select “CODESYS Control V3 × 64” as a device and set the programming language to “Structured Text(ST)”.
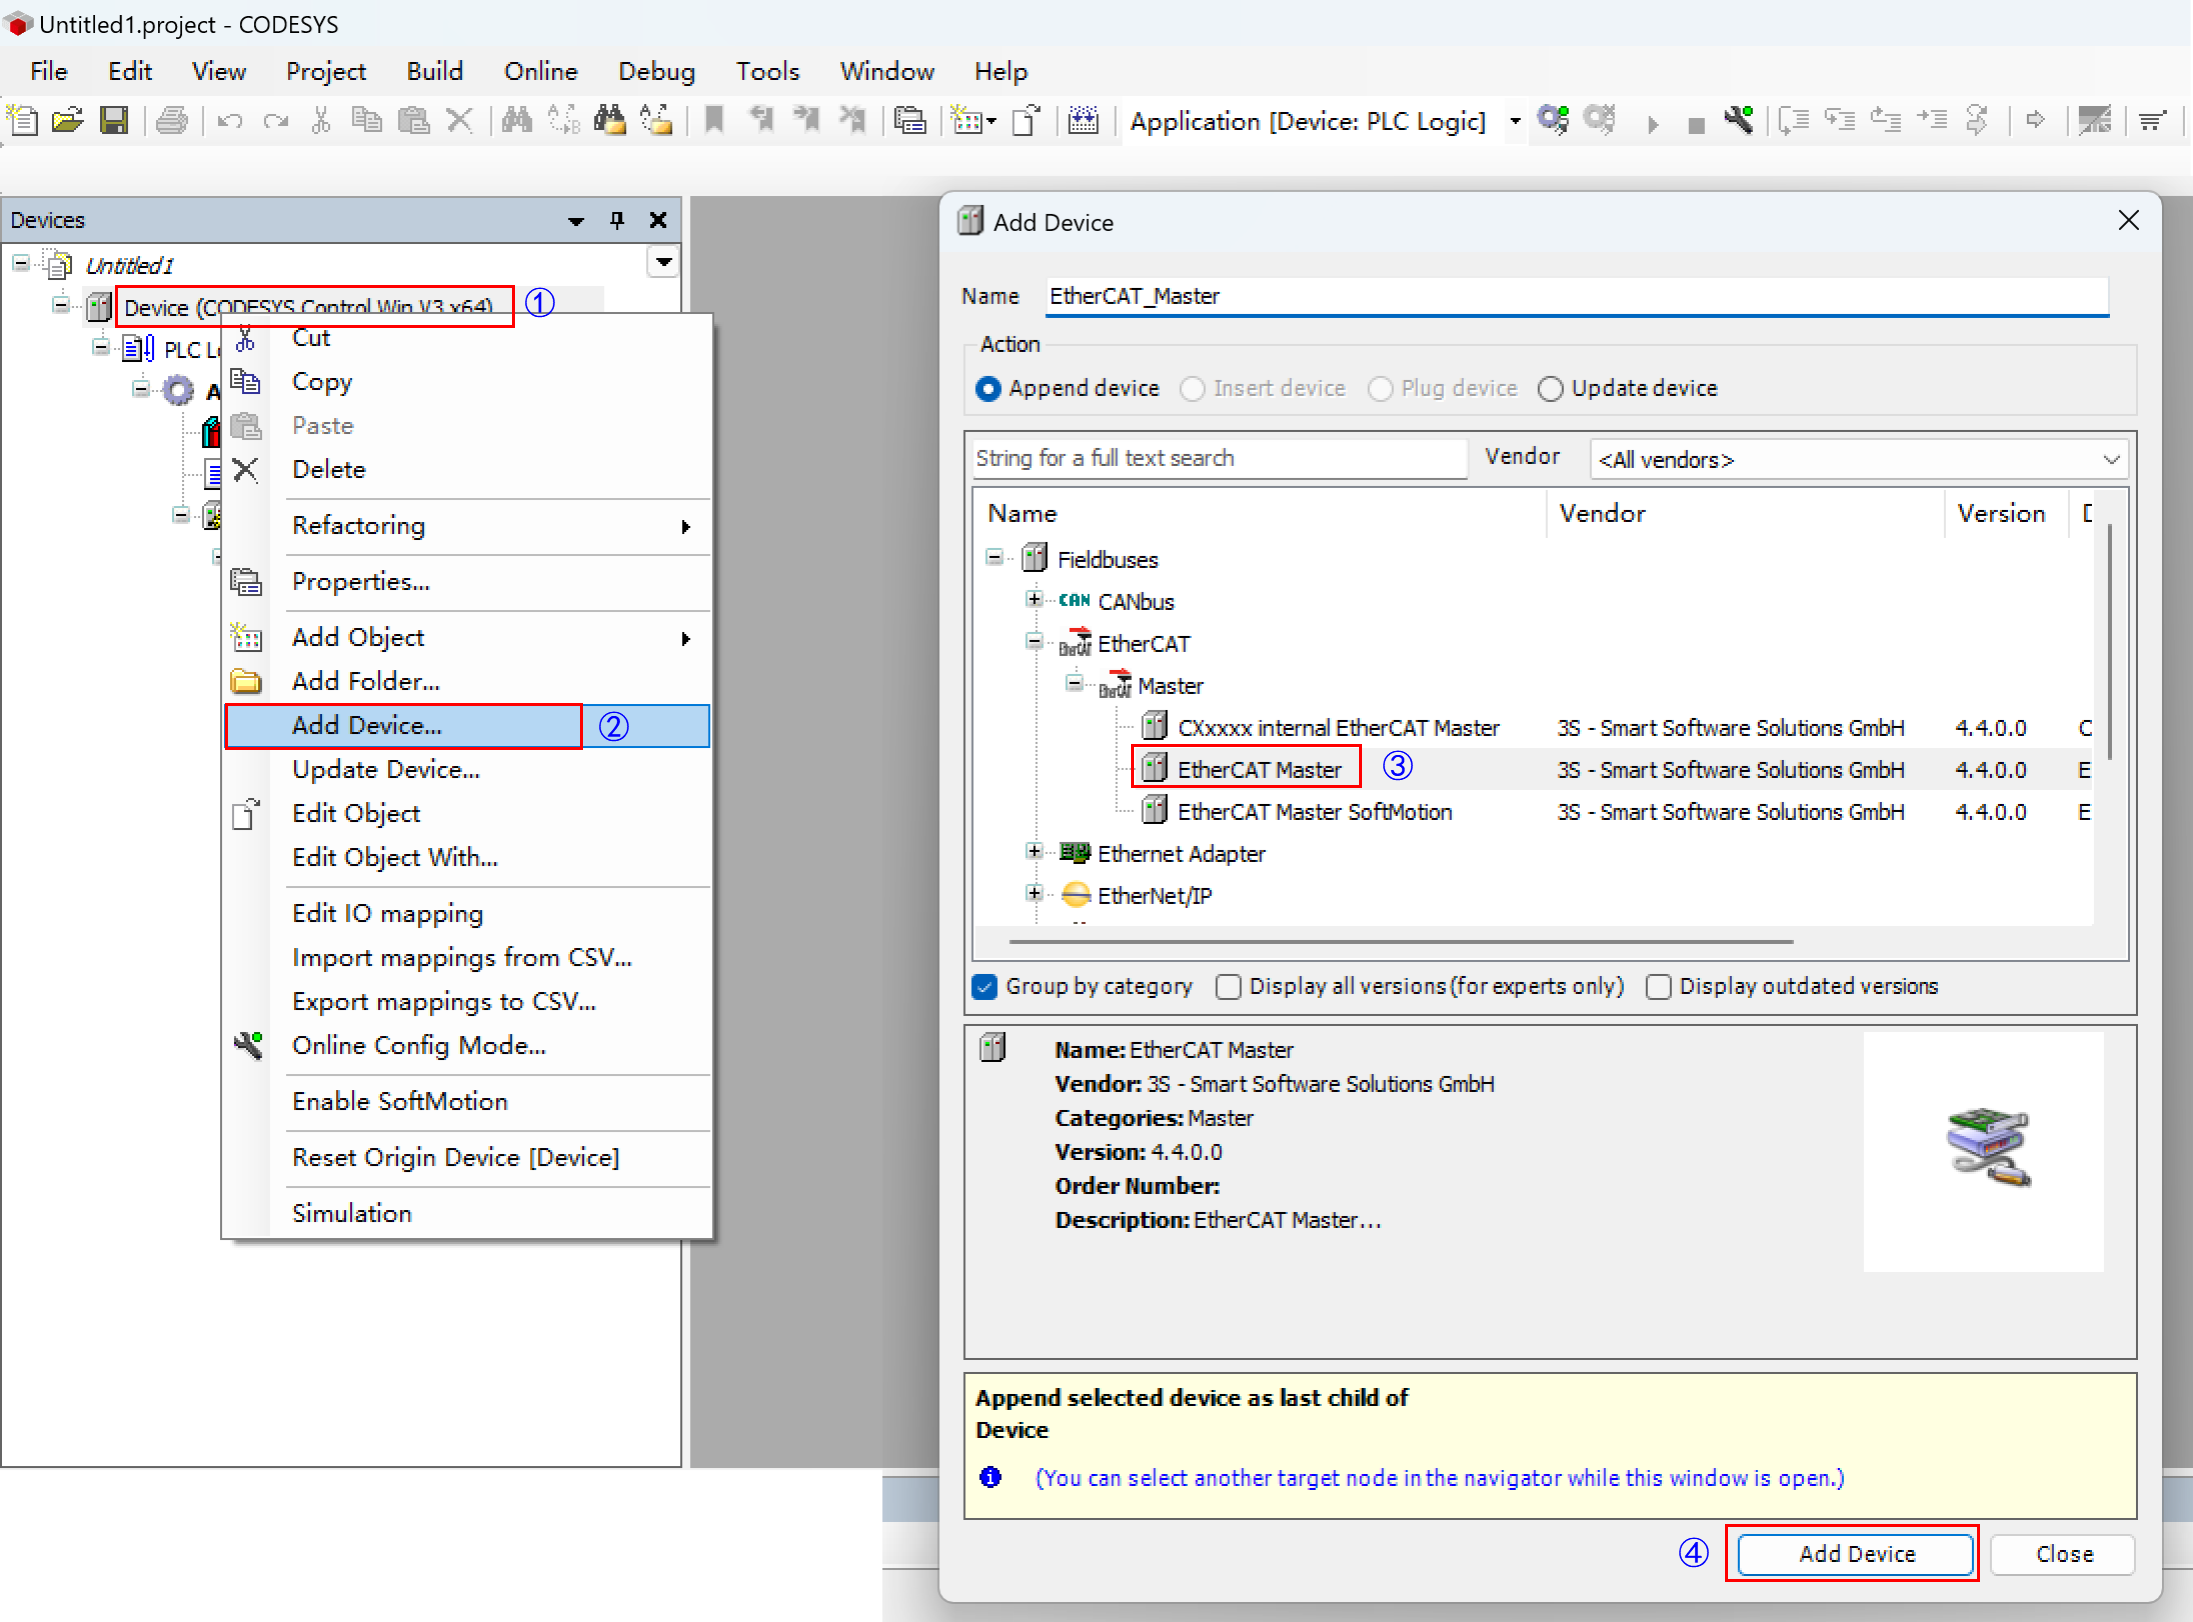
Right-click and select “Device (CODESYS Control V3 × 64)”, then select “Add Device” in the menu to add the master EtherCAT Master.
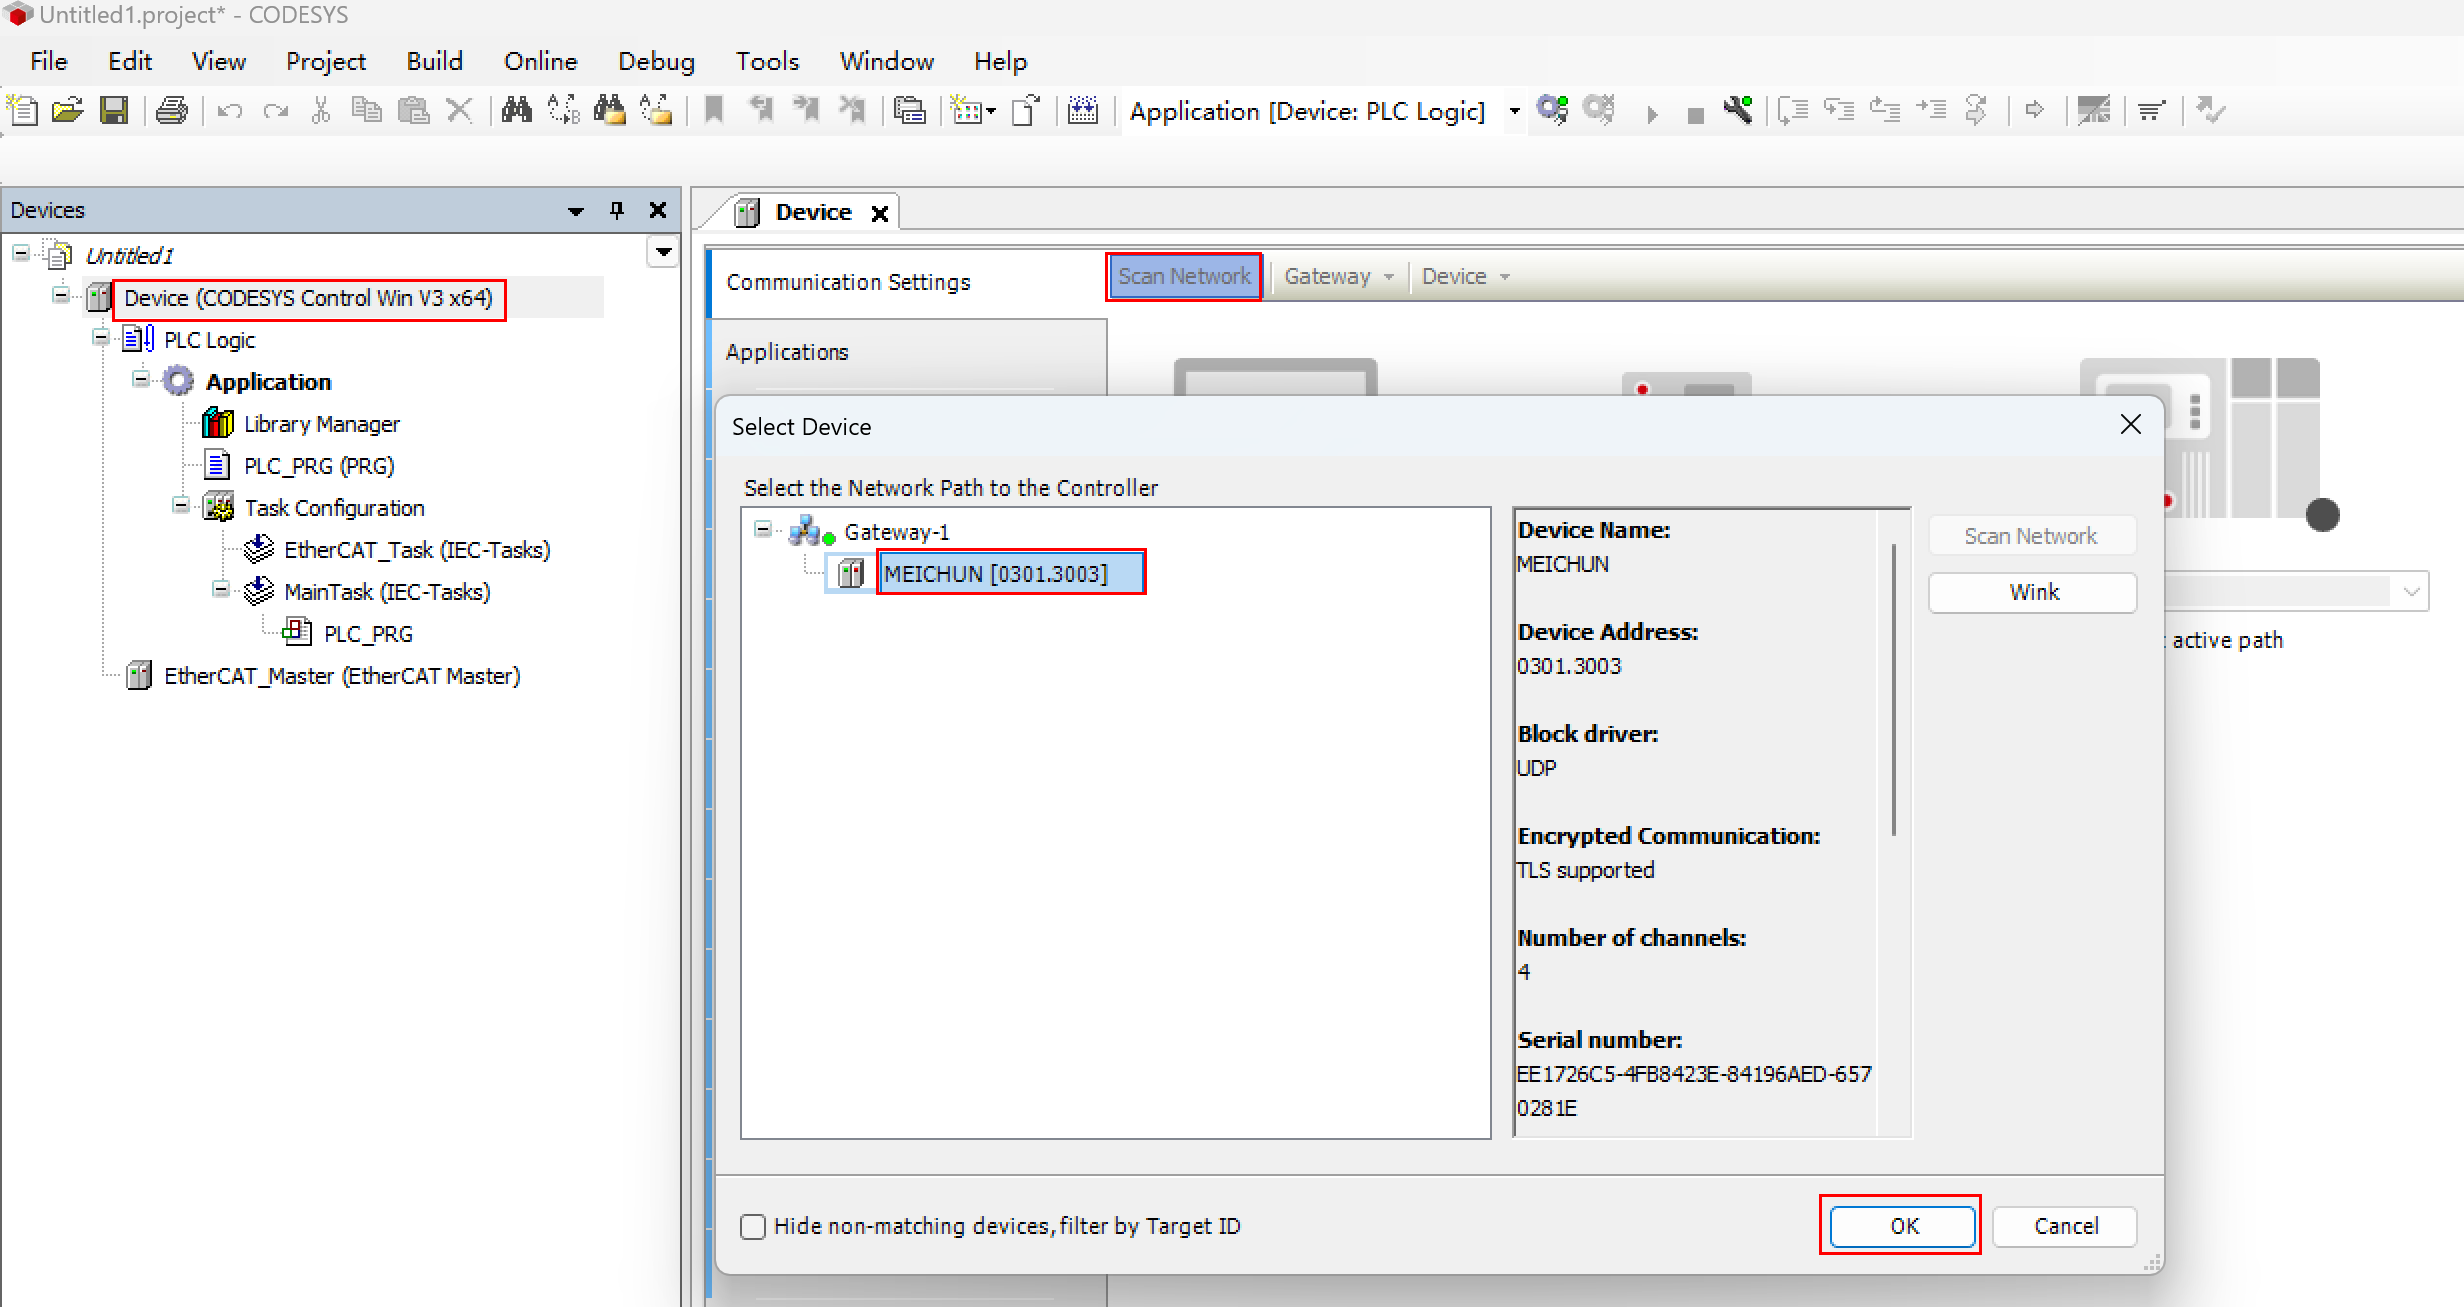
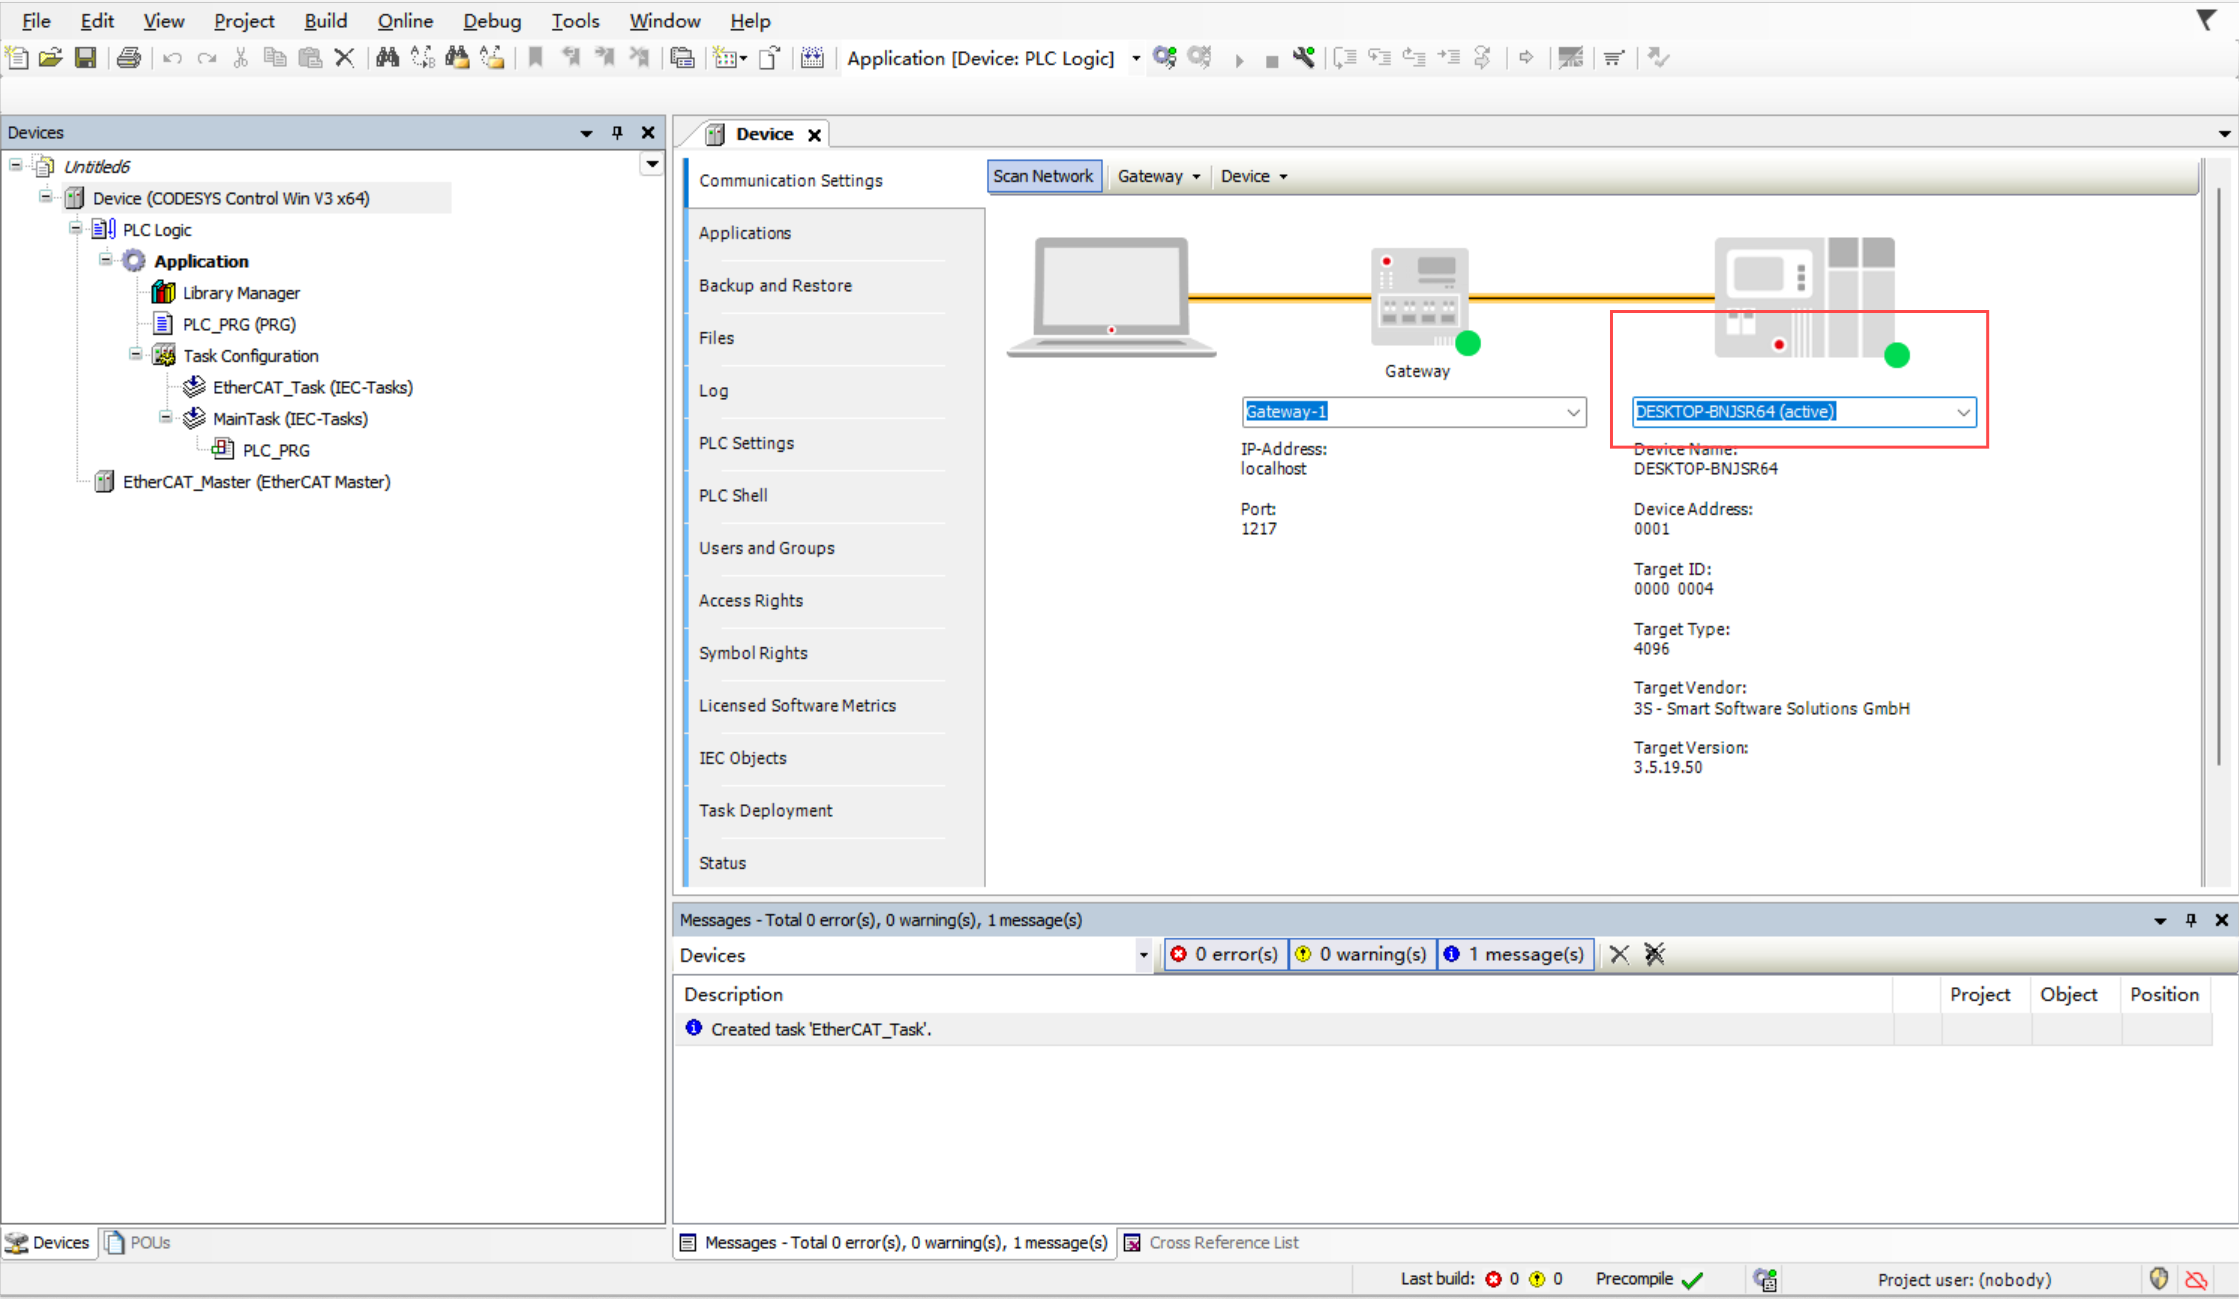
- Open the soft PLC that comes with CODESYS, then left-click and double-click on Device and select “Scan Network” to connect to the soft PLC.
TIP
After installing the CODESYS software, the CODESYS soft PLC will be automatically installed on the PC (can be viewed in the bottom right corner of the PC's application icon) as shown below.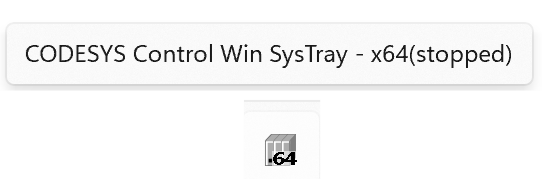
TIP
If the device user login pop-up appears, you will need to log in with your username and password or follow the prompts to register.
- Connection to the soft PLC was successful.
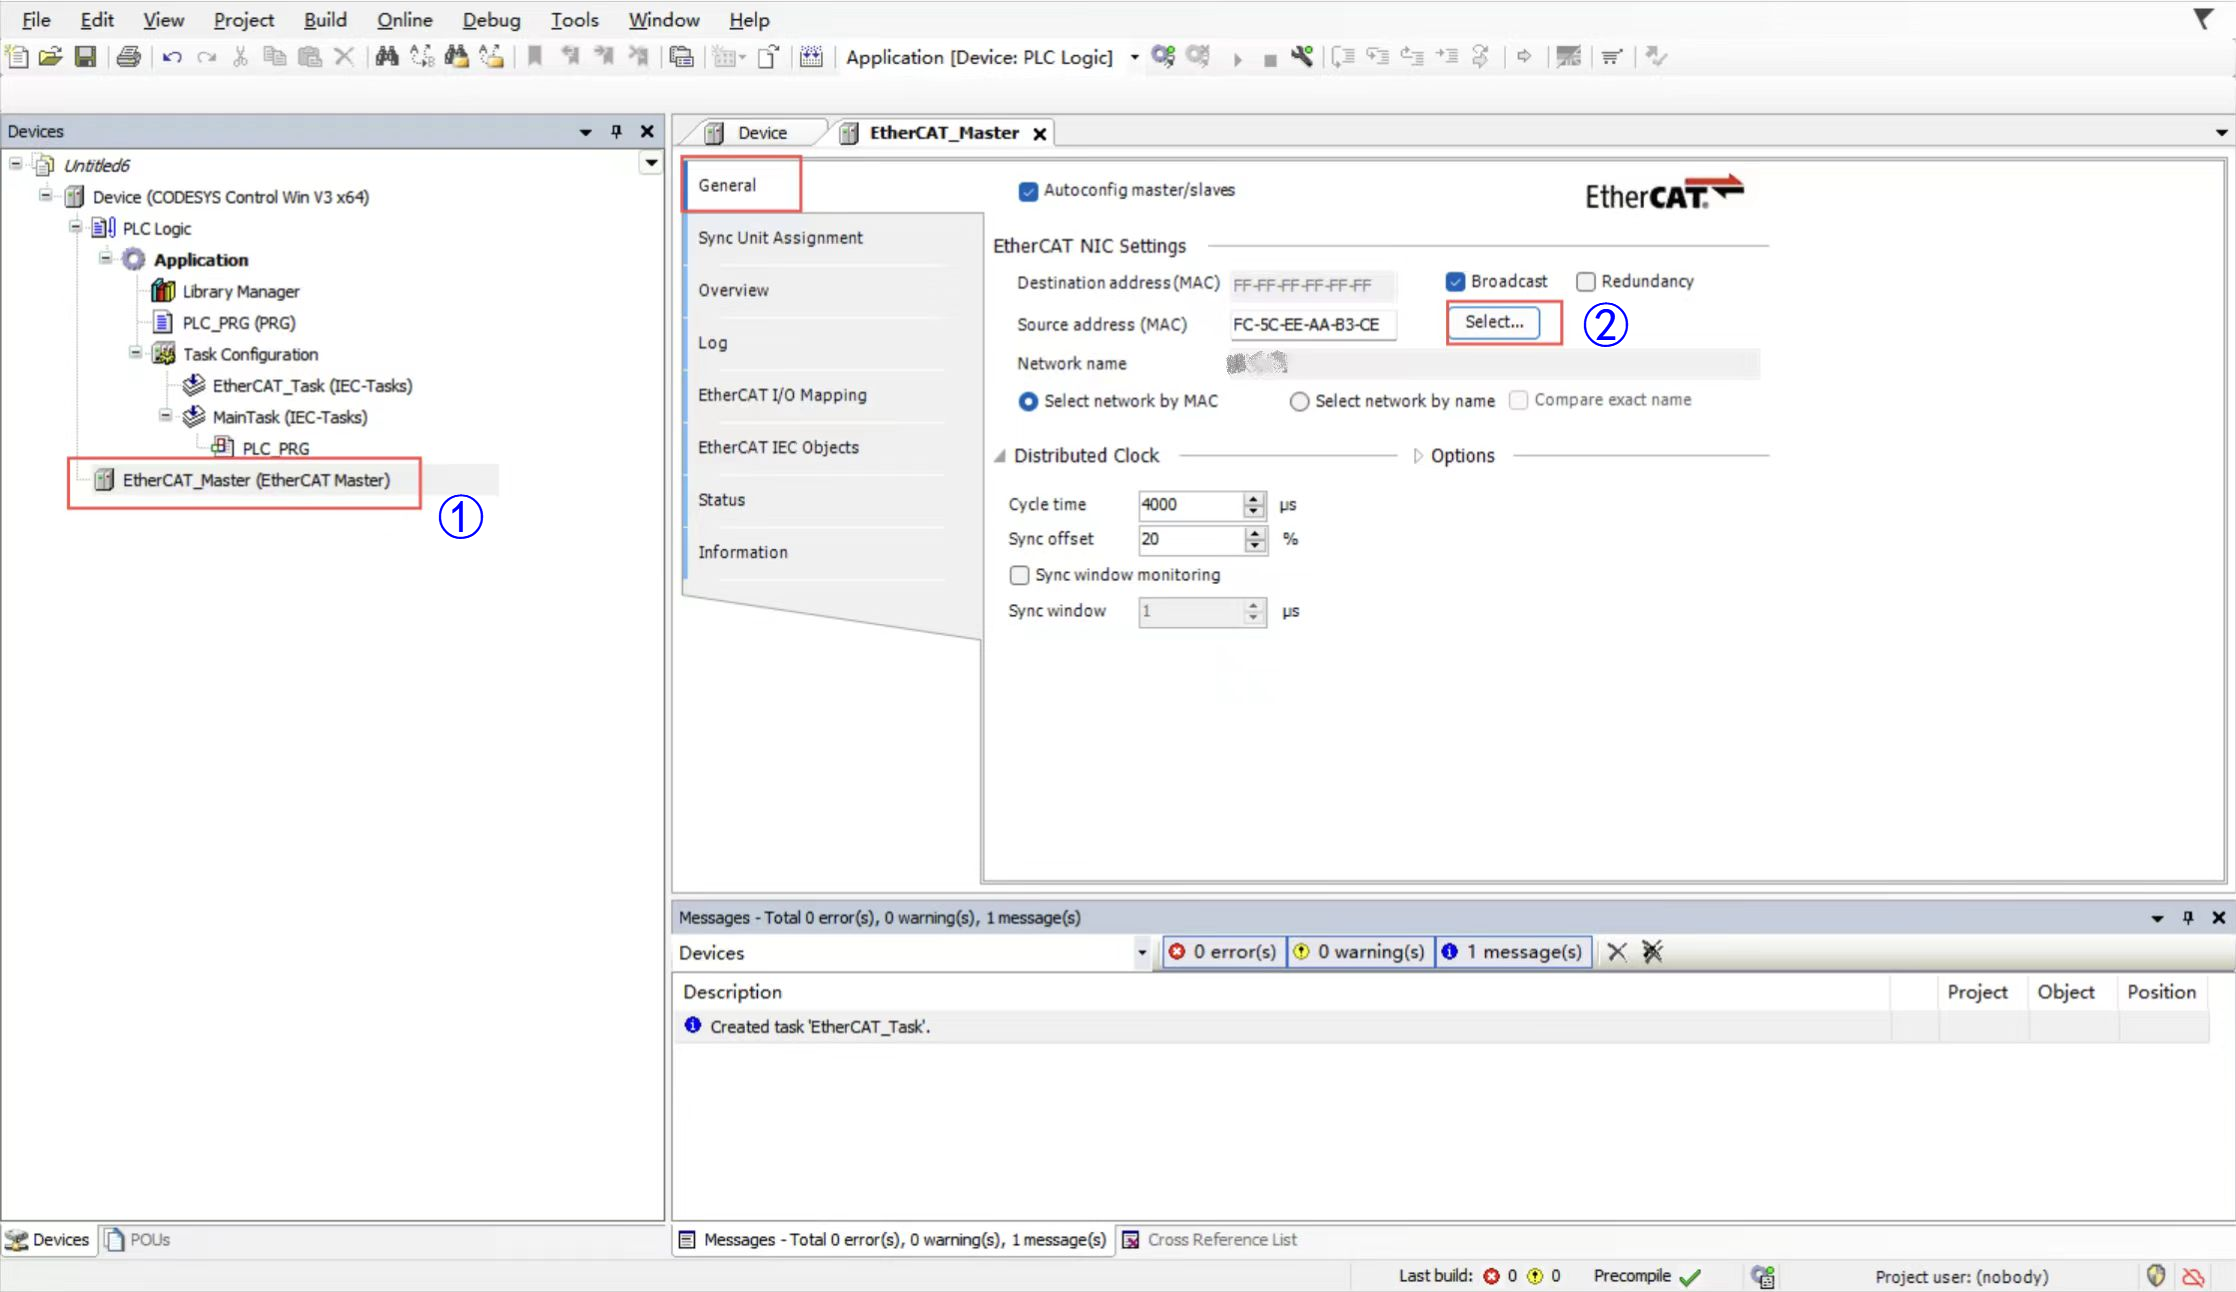
- Left-click and double-click on the EtherCAT master device to set the source address (the exact name can be seen in the pc network manager).
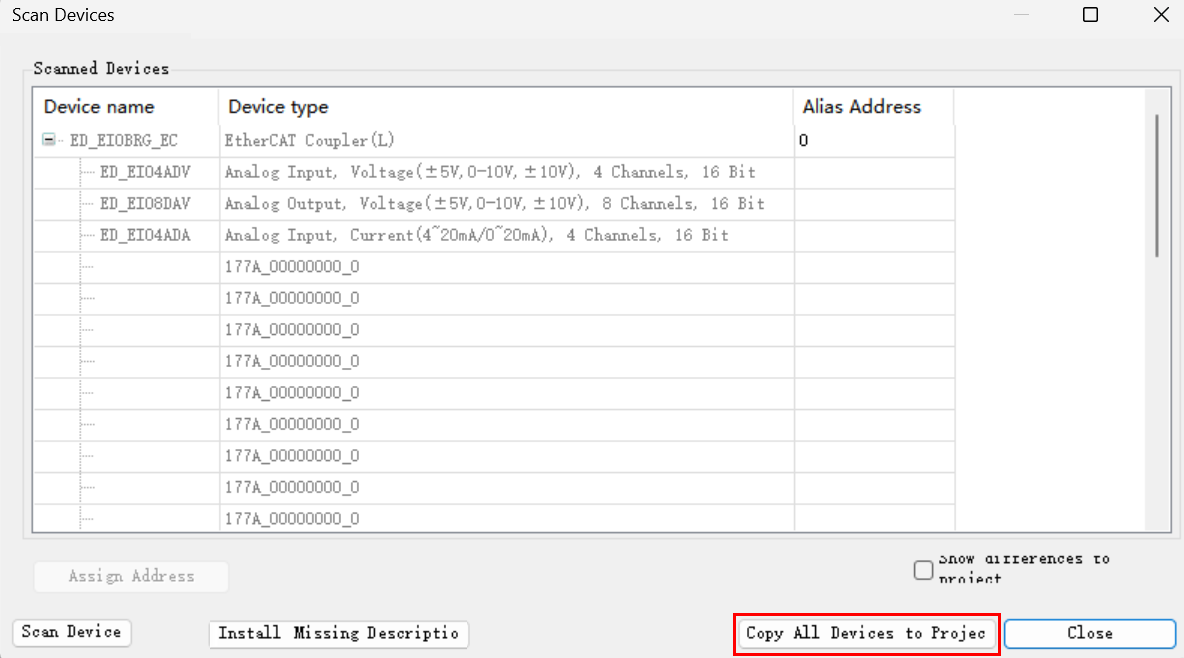
- Click on the EtherCAT master device, select “Scan for Devices” in the menu, and copy all devices to the project after scanning is completed.
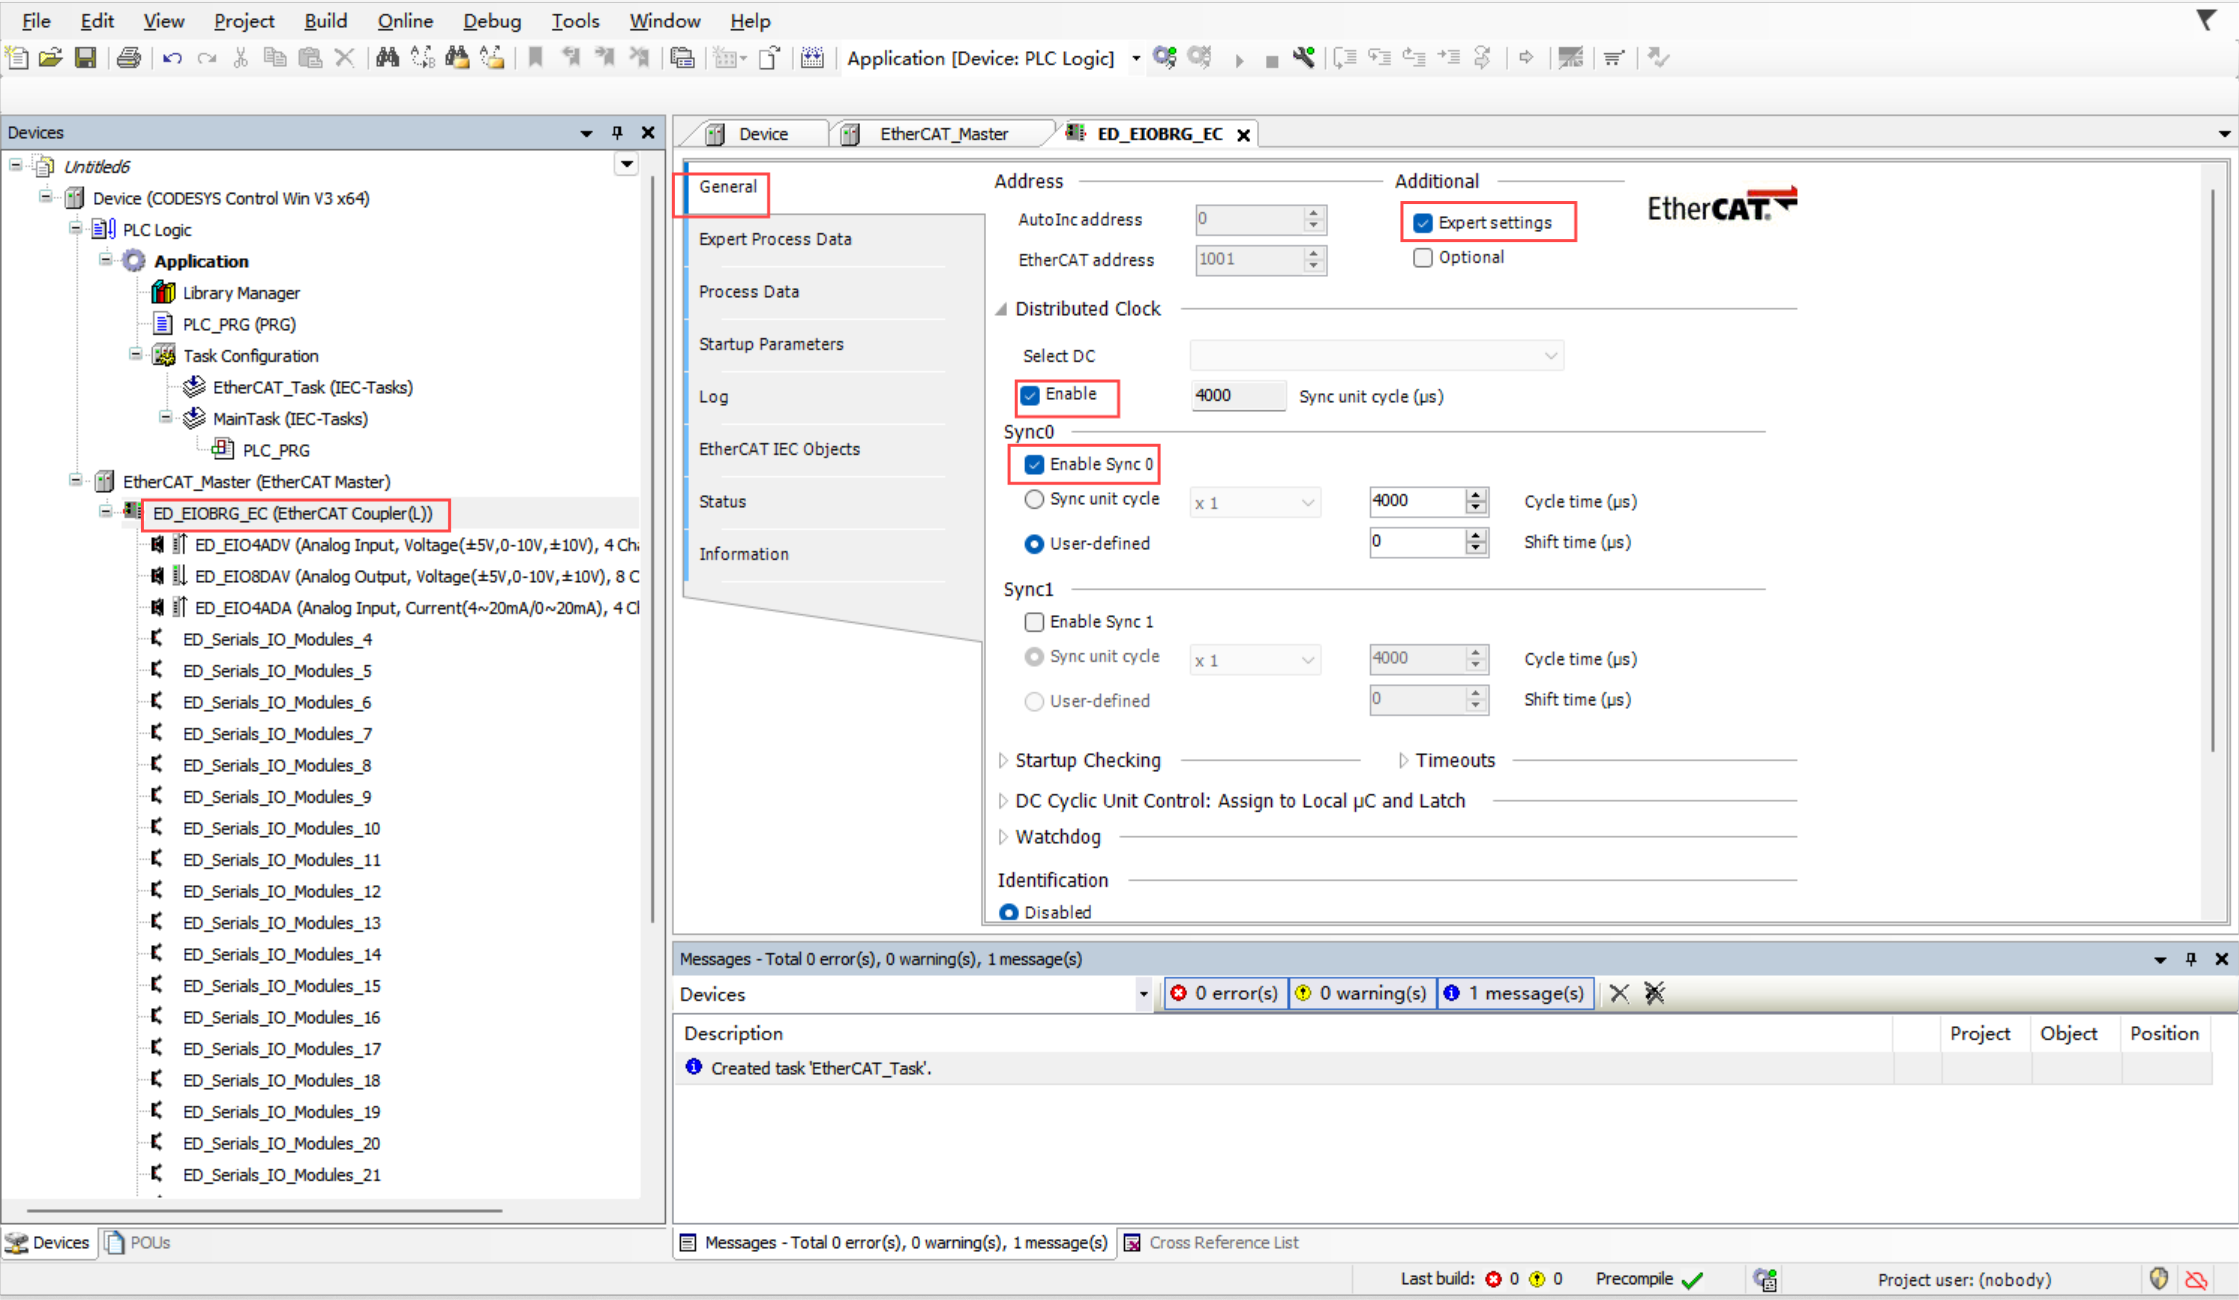
- To set up the slave, double-click on the slave, enable "Expert settings", and enable " Select DC" and "Sync0".
- (Optional) To configure the analogue input module with 0~20mA or 4~20mA, double click on the module, and then double click on ‘Index: Subindex’ in the right interface.
TIP
I/O voltage modules are configured in the same way as current modules.
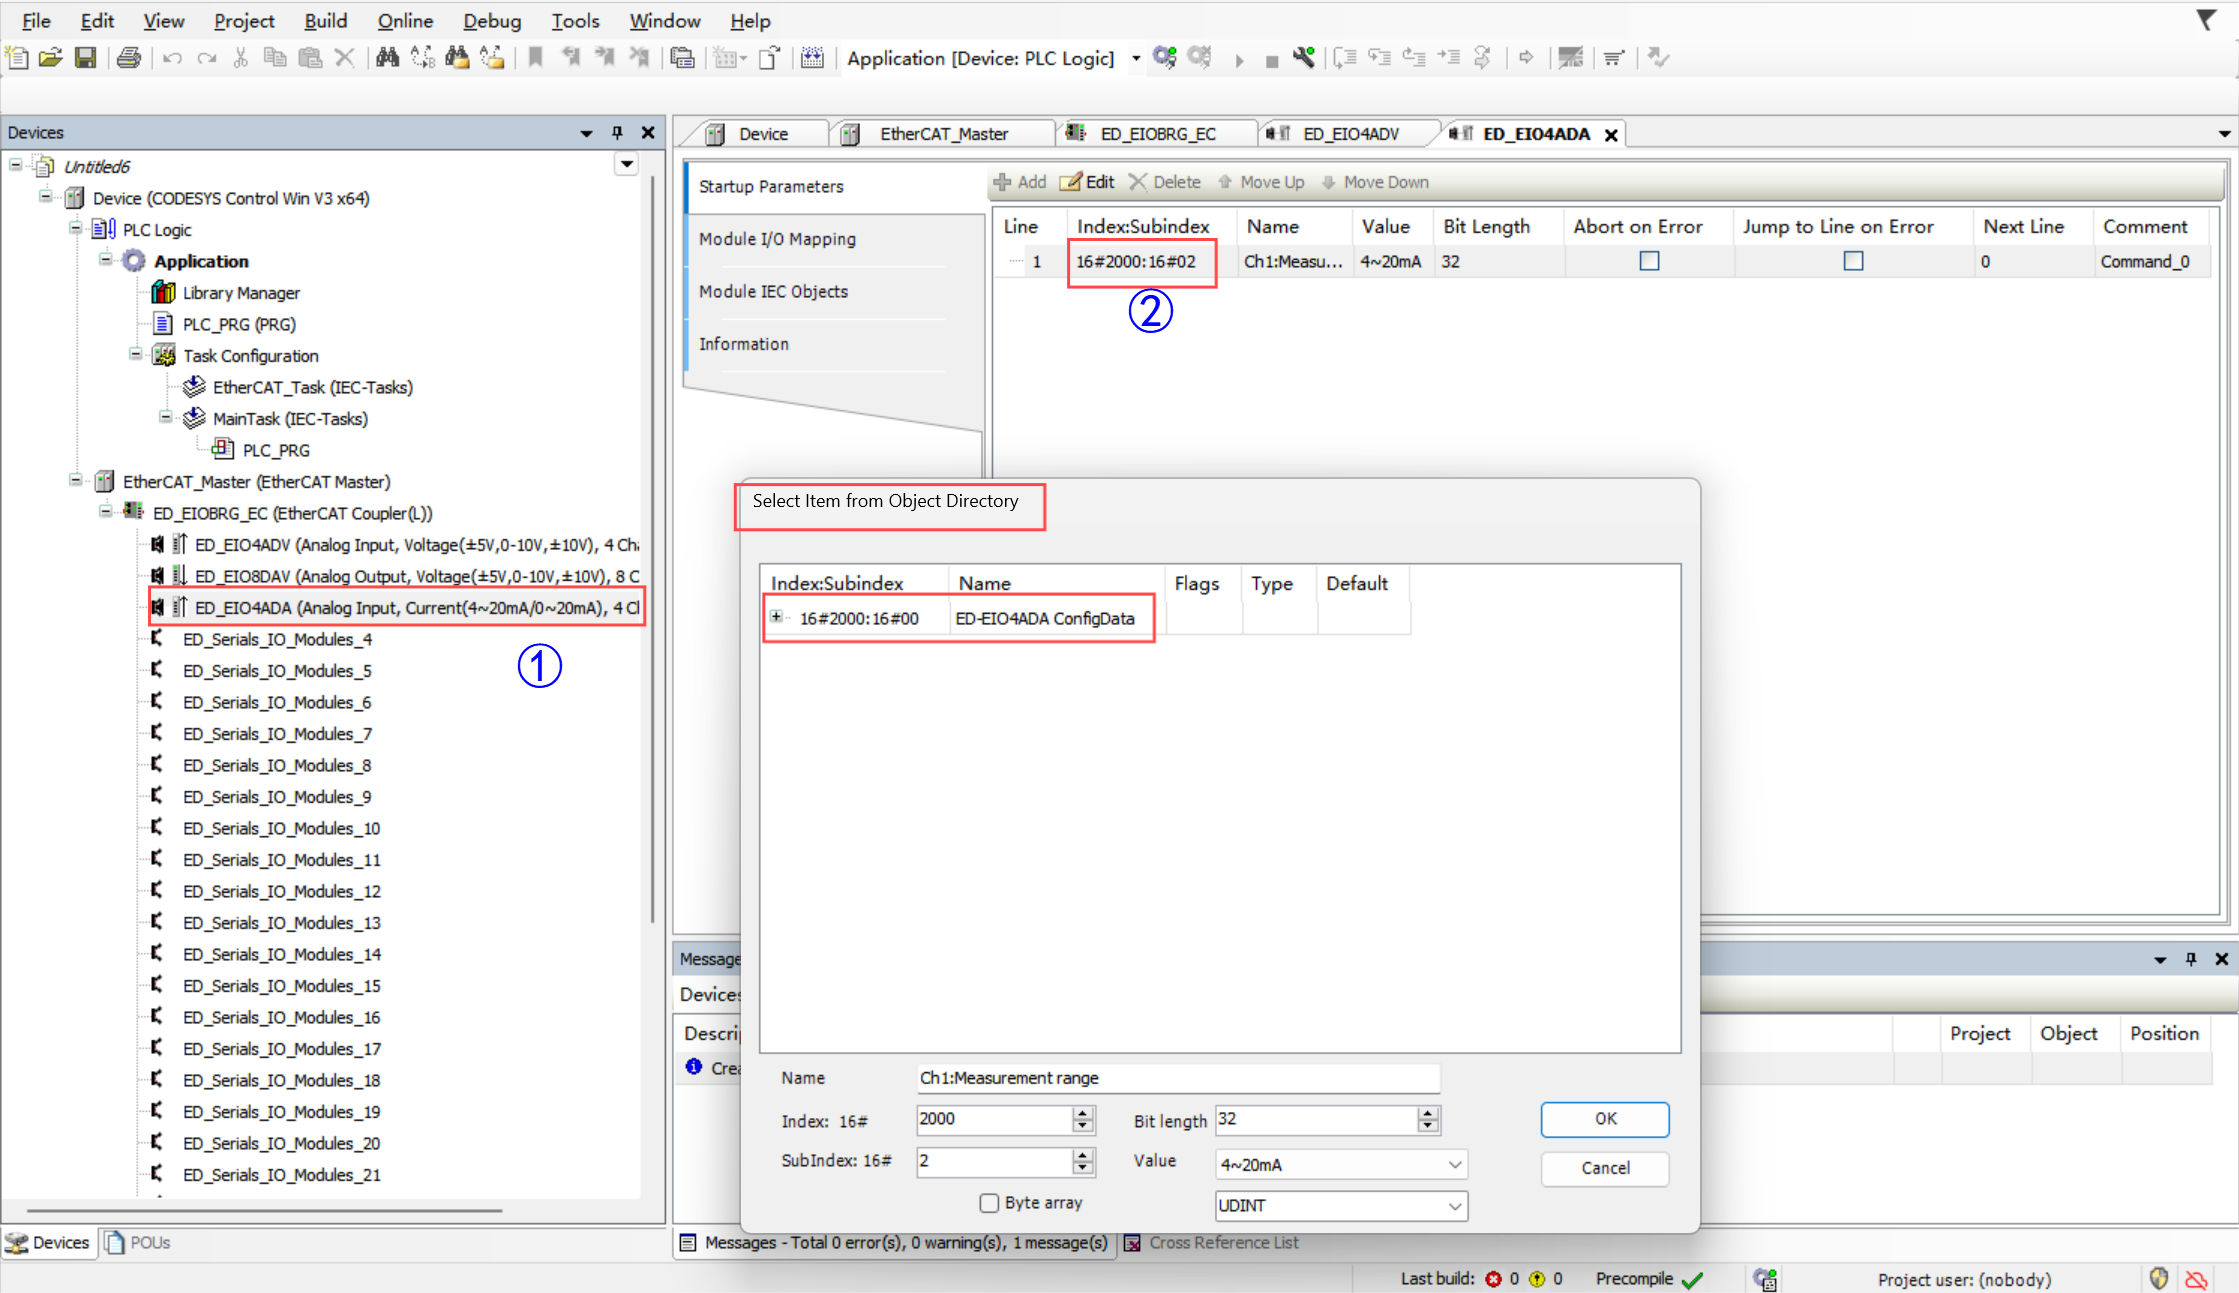
- Select the channel, set the specific current value in “Value” and click “OK”..

- Click Login and Startup to see that the configuration is complete in the startup parameters of the master.
