4 Installing OS (optional)
The device is shipped with an operating system by default. If the OS is corrupted during use or the user needs to replace the OS, it is necessary to re-download the appropriate system image and install it. Our company supports to install the OS by installing the standard Raspberry Pi OS first, and then install the Firmware package.
The following section describes the specific operations of image download, eMMC flashing and installation of Firmware packages.
4.1 Downloading OS File
It is recommended to download the official system image of Raspberry Pi OS (Desktop) 64-bit. The download path is provided in the table below:
| OS | Download Path |
|---|---|
| Raspberry Pi OS(Desktop) 64-bit-bookworm (Debian 12) | https://downloads.raspberrypi.com/raspios_arm64/images/raspios_arm64-2024-11-19/2024-11-19-raspios-bookworm-arm64.img.xz |
TIP
Our engineers are currently adapting and developing firmware packages for Raspberry Pi OS-trixie (Debian 13), so it is temporarily not supported. We recommend using the Raspberry Pi OS 64-bit-bookworm (Debian 12) version of the operating system.
4.2 Flashing to eMMC
It is recommended to use the Raspberry Pi official tools. The download paths are as follows:
- Raspberry Pi Imager : https://downloads.raspberrypi.org/imager/imager_latest.exe
- SD Card Formatter : https://www.sdcardformatter.com/download/
- Rpiboot : https://github.com/raspberrypi/usbboot/raw/master/win32/rpiboot_setup.exe
Preparation:
- The download and installation of the official tools to the computer has been completed.
- A USB-C to USB-A flashing cable has been prepared.
- An 8-Pin M12 male to RJ45 network cable has been prepared.
- A 12-pin M12 female to bare wire power IO cable has been prepared.
- The OS file to be flashsed has been obtained.
Steps:
The steps are described using Windows system as an example.
- Connect the power cord and USB flashing cable (USB-C to USB-A).
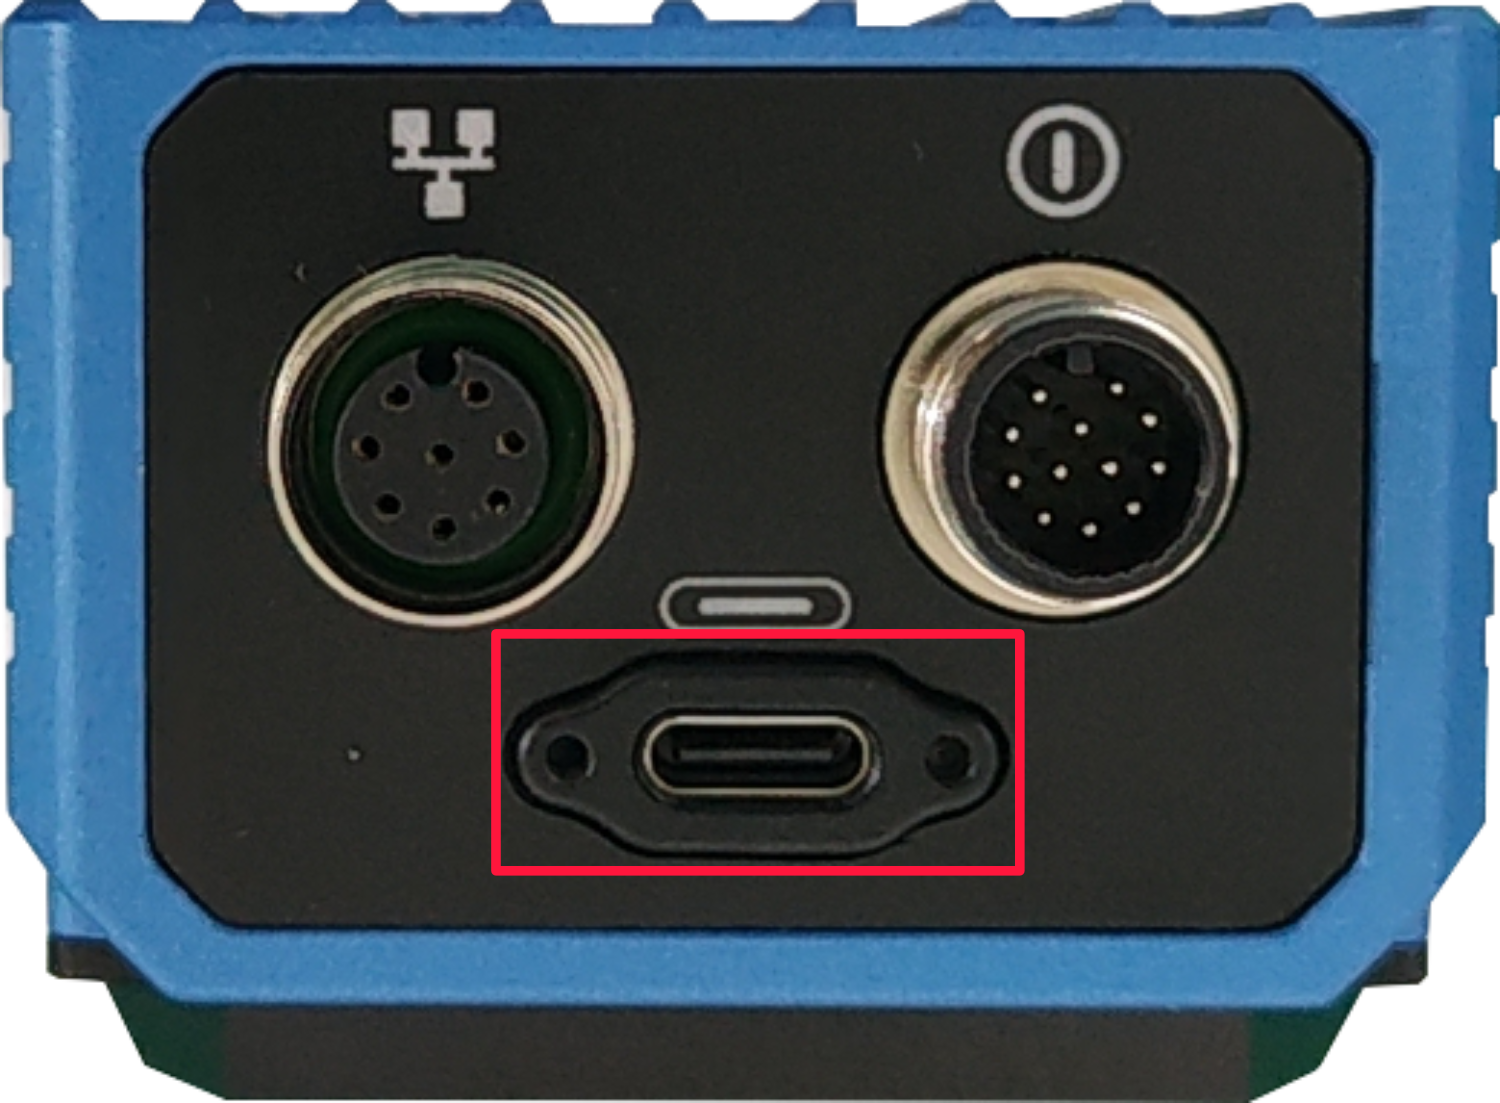
- Connect the flashing cable: one end is connected to the USB type-C port on the device side (the interface in the red box in the figure below), and the other end is connected to the USB port on the PC.
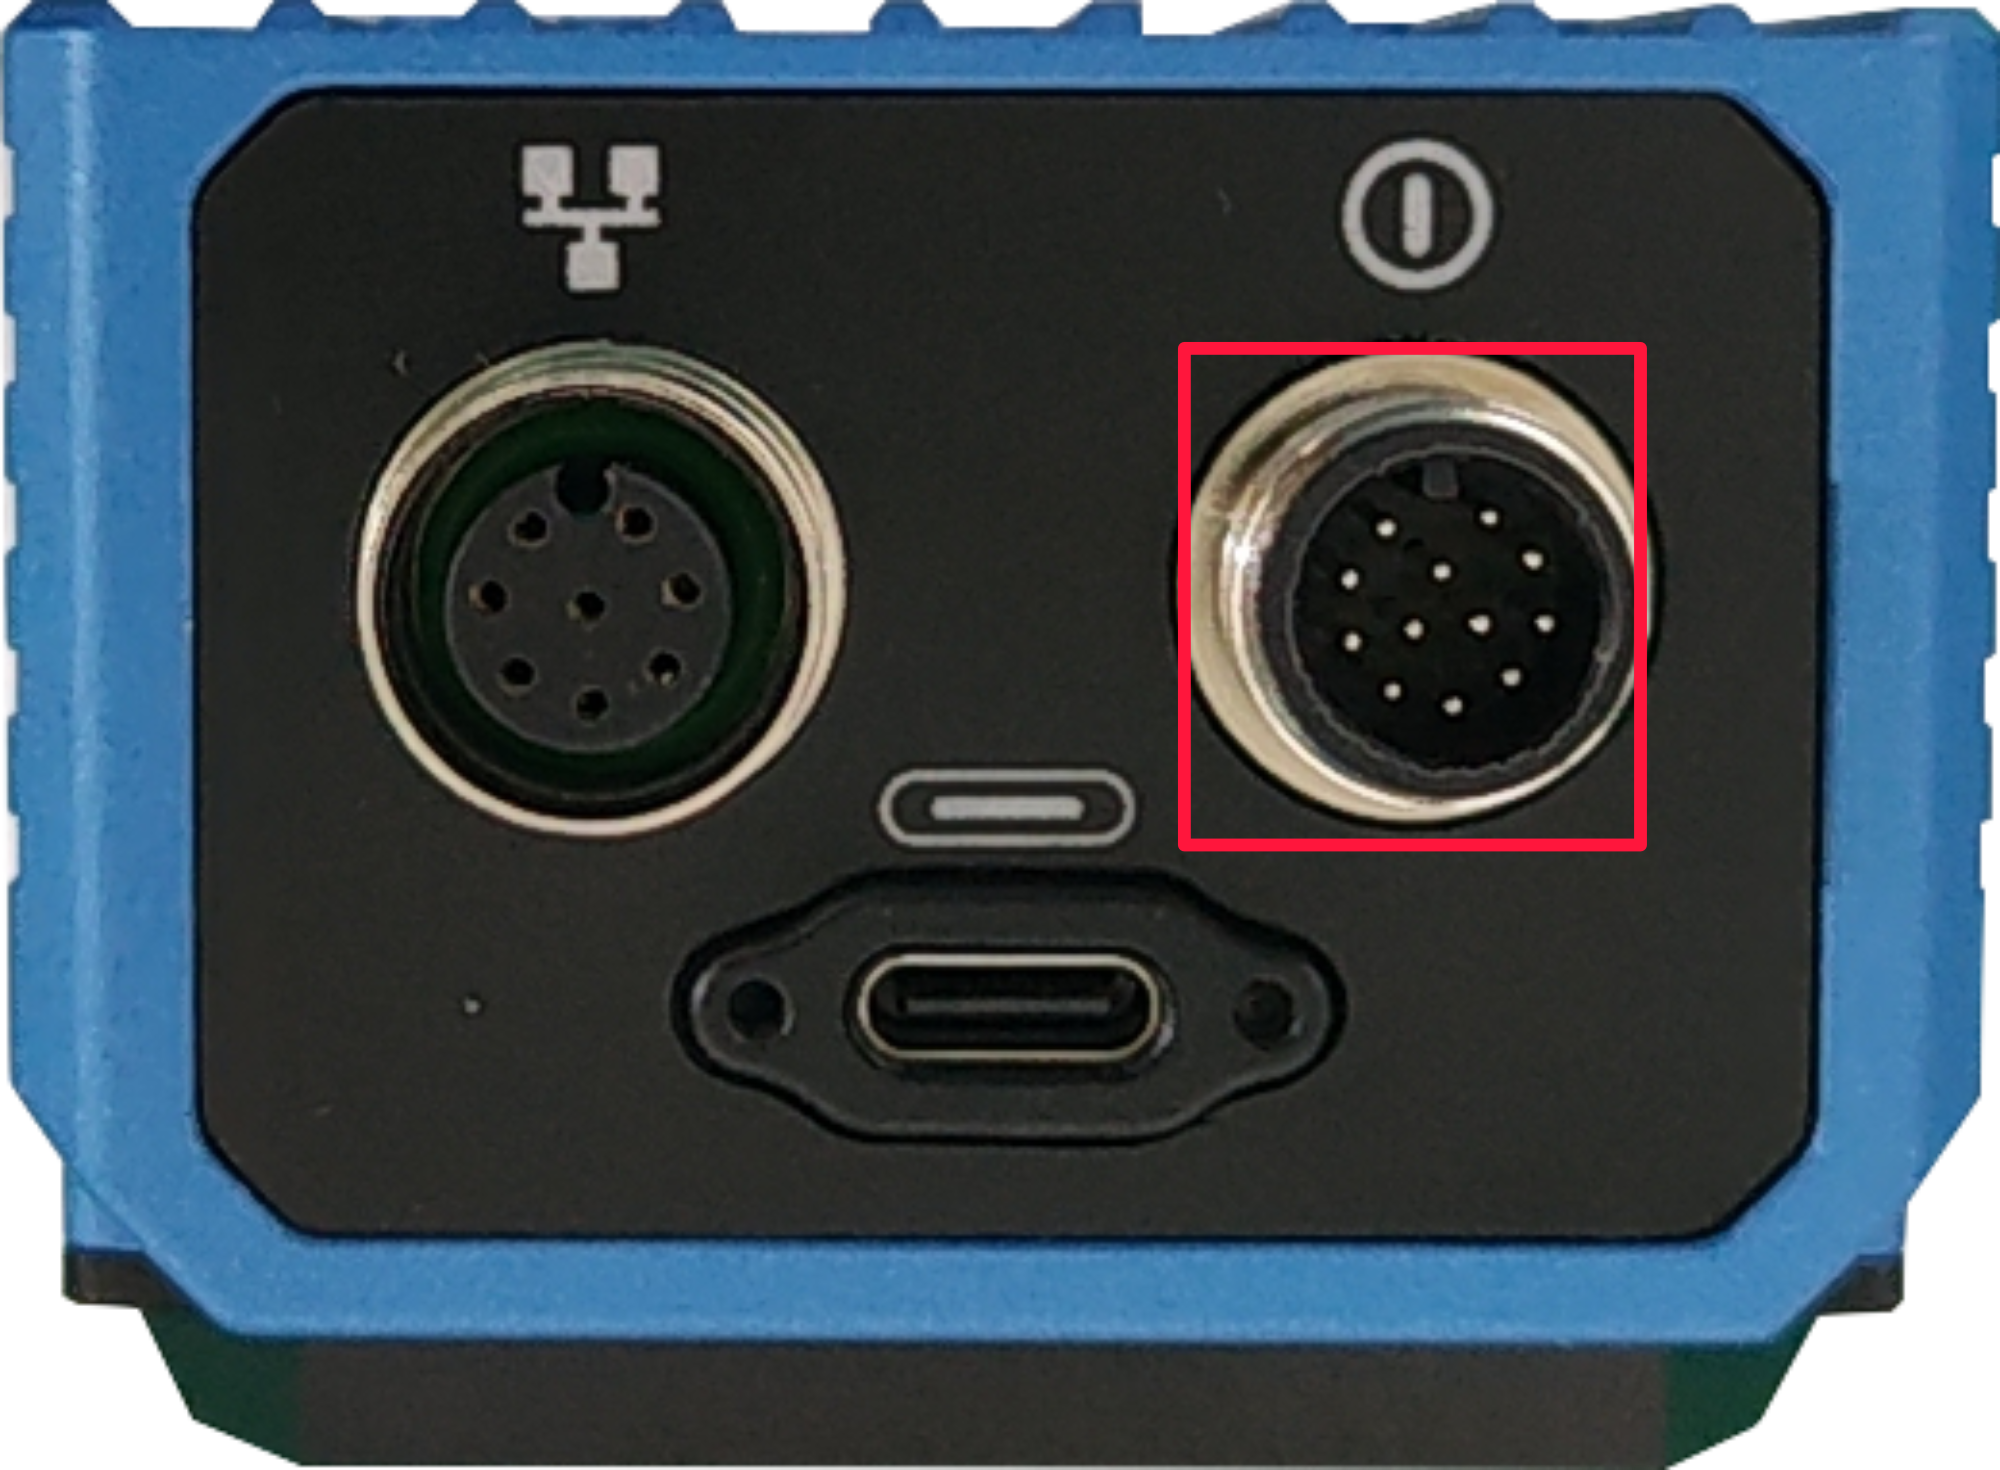
- Connect the power cable: one end is connected to the M12 12-Pin power interface on the device side (the interface in the red box in the figure below), and the other end is connected to the external power supply.
Disconnect the device power supply, then press and hold the TRIG button, and power on the device again. The device will automatically enter the flashing mode.
Open the installed
rpiboottool to automatically convert the drive to a letter.
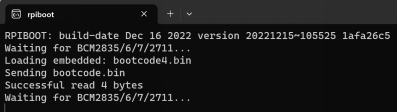
After the completion of the drive letter, the drive letter will pop up in the lower right corner of the computer.
Open
SD Card Formatter, select the formatted drive letter, and click "Format" at the lower right to format.
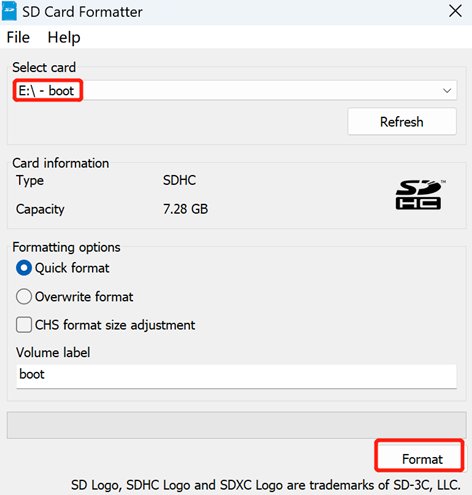
In the pop-up prompt box, select "Yes".
When the formatting is complete, click "OK" in the prompt box.
Close
SD Card Formatter.Open
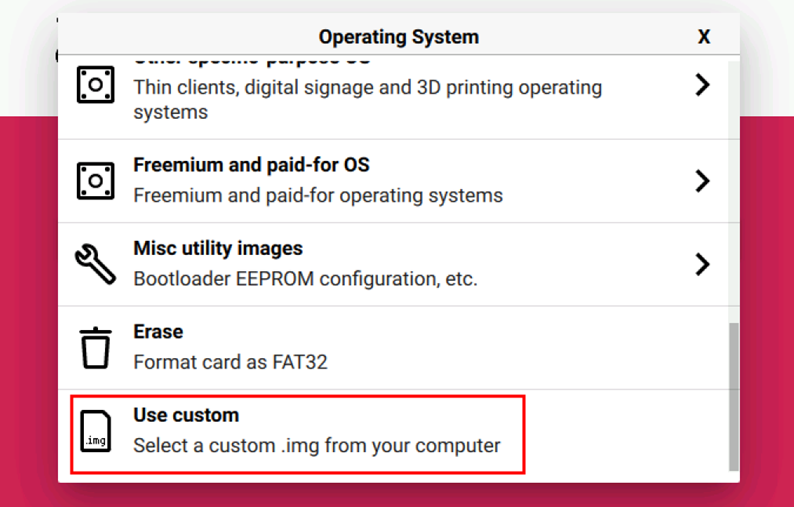
Raspberry Pi Imager, select "CHOOSE OS" and select "Use custom " in the pop-up pane.
According to the prompt, select the OS file under the user-defined path and return to the main page.
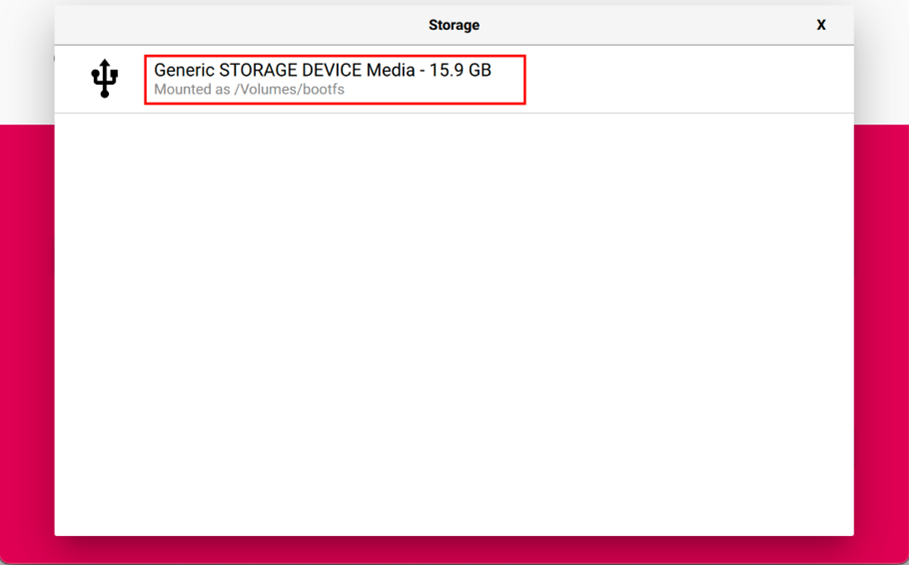
Click "CHOOSE STORAGE", select the default device in the "Storage" interface, and return to the main page.
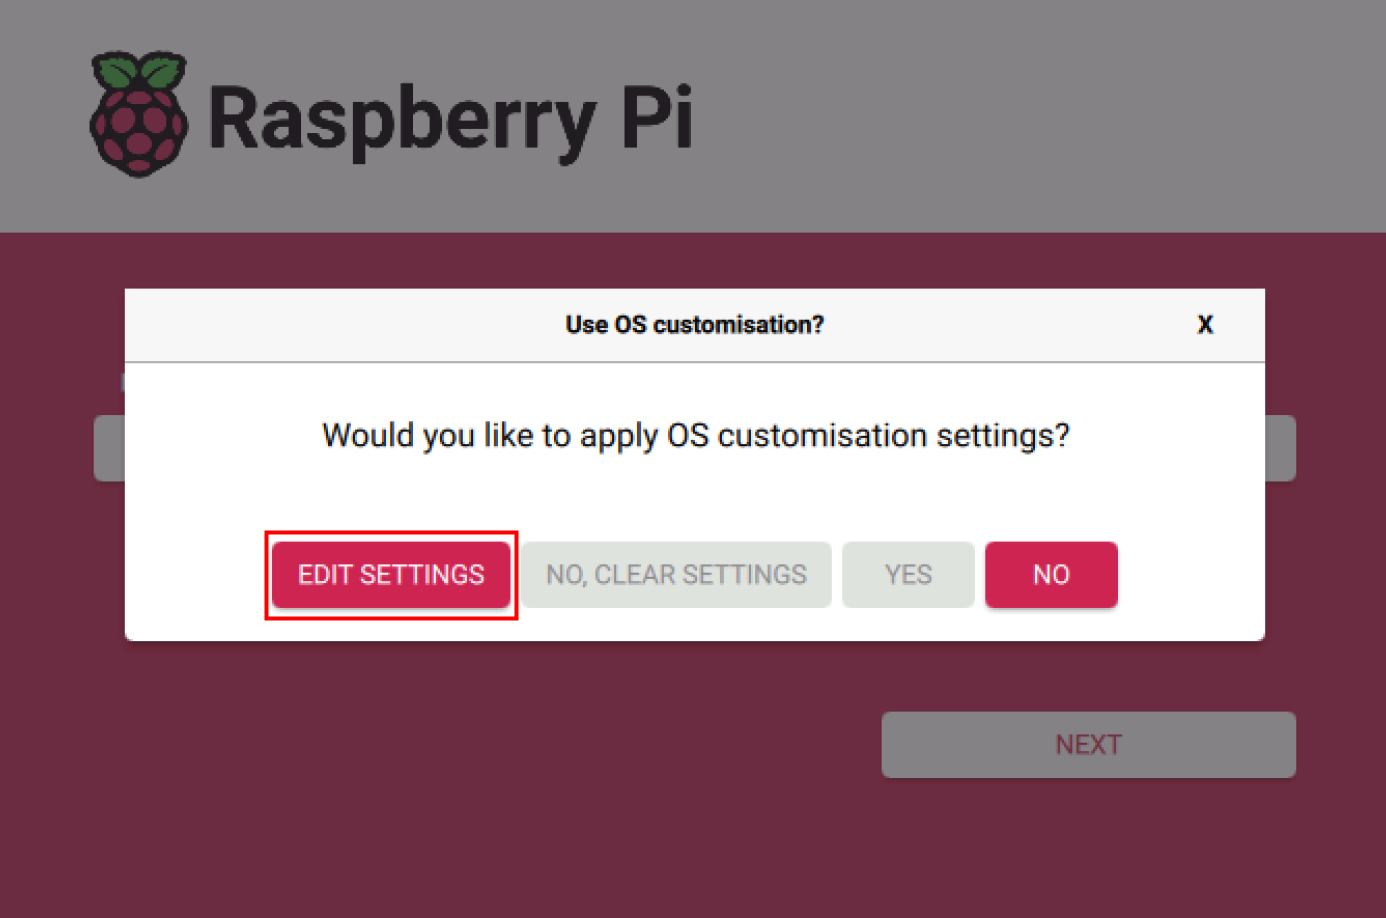
- Click "NEXT", and in the "Use OS customisation?" prompt, select "EDIT SETTINGS".
- On the "OS customisation" interface, under the "General" tab, customize the Hostname and Username & Password.
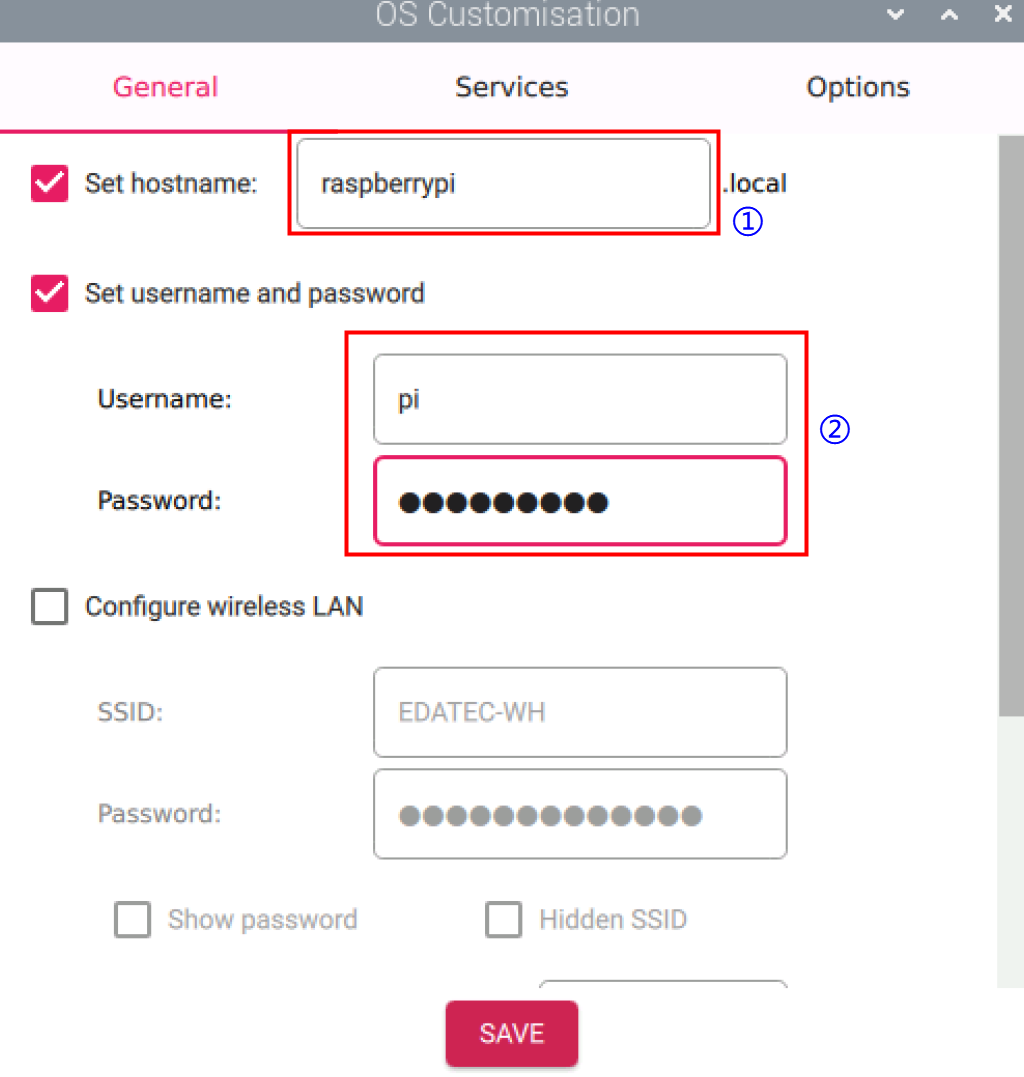
- Hostname: Customize a name for easy identification when locating the device's IP address in the router later.
- Username & Password: Customize credentials to enable automatic login after the device boots.
- Under the "Services" tab in the "OS customisation" interface, enable SSH, then click "SAVE".

- Enable SSH allows remote login to the device.
- In the "OS customisation?" prompt, select "YES".
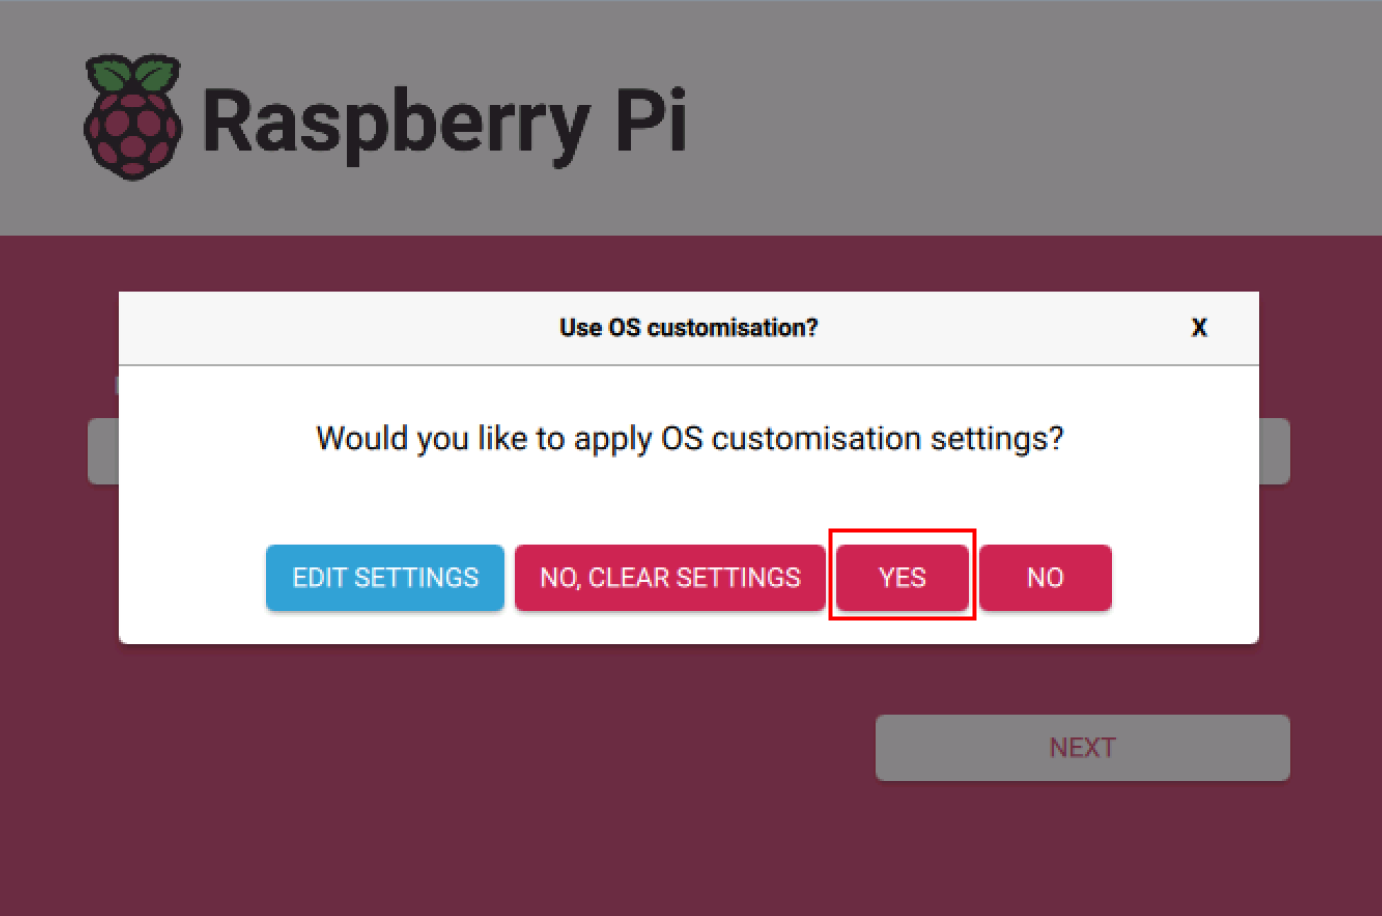
- Select “YES” in the pop-up “Warning” pane to start writing the image.

- After the OS writing is completed, the file will be verified.
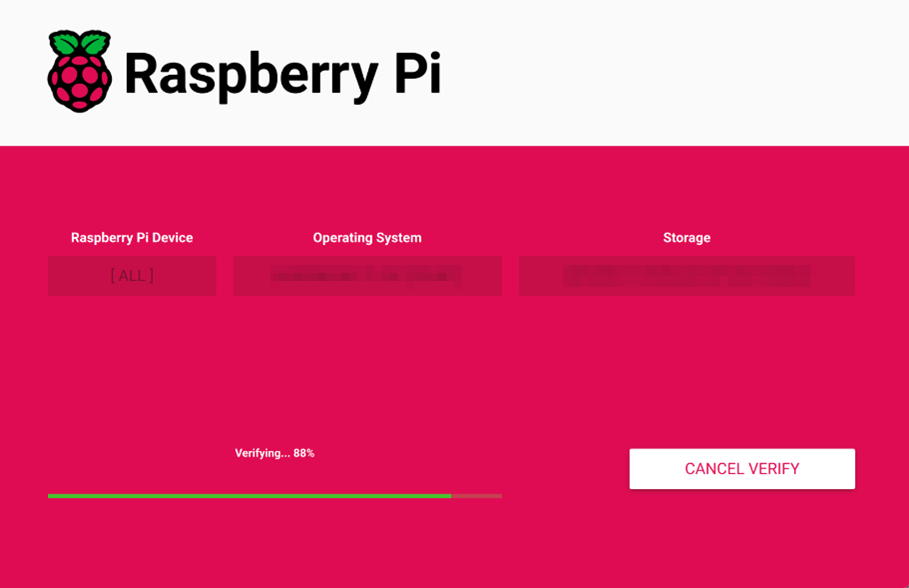
After the verification is completed, click “CONTINUE” in the pop-up “Write Successful” box.
Close
Raspberry Pi Imager, remove USB cable and power on the device again.
4.3 Connecting to Device and Installing Firmware Package
Since the ED-AIC2000 device does not have an HDMI interface, you need to obtain the device's IP address before installing the Firmware package, and then connect to the device via SSH.
4.3.1 Finding Device IP
After the device has booted up successfully, it is recommended to check the device IP address by logging into your router.
Preparation:
- The device is connected to a network via a router.
- You have the IP address (e.g., 192.168.X.X) and the administrator password for the router in your network.
Steps:
- Open a browser, type the IP address of your router (e.g., 192.168.X.X) into the address bar, and press
Enterto access the router login interface. - Enter the router's administrator password as prompted to log into the router's management interface.
- Locate the device's IP address in the list of client devices within the management interface, typically identifiable by its hostname.
4.3.2 Connecting To The Device Via SSH
After the device boots up successfully, you can choose to remotely connect to it via SSH for configuration or debugging. You may select your preferred remote login tool. The following instructions use MobaXterm as an example.
Preparation:
MobaXtermis installed on your PC.- The device is connected to the network via a router.
- The device's IP address has been obtained.
Steps:
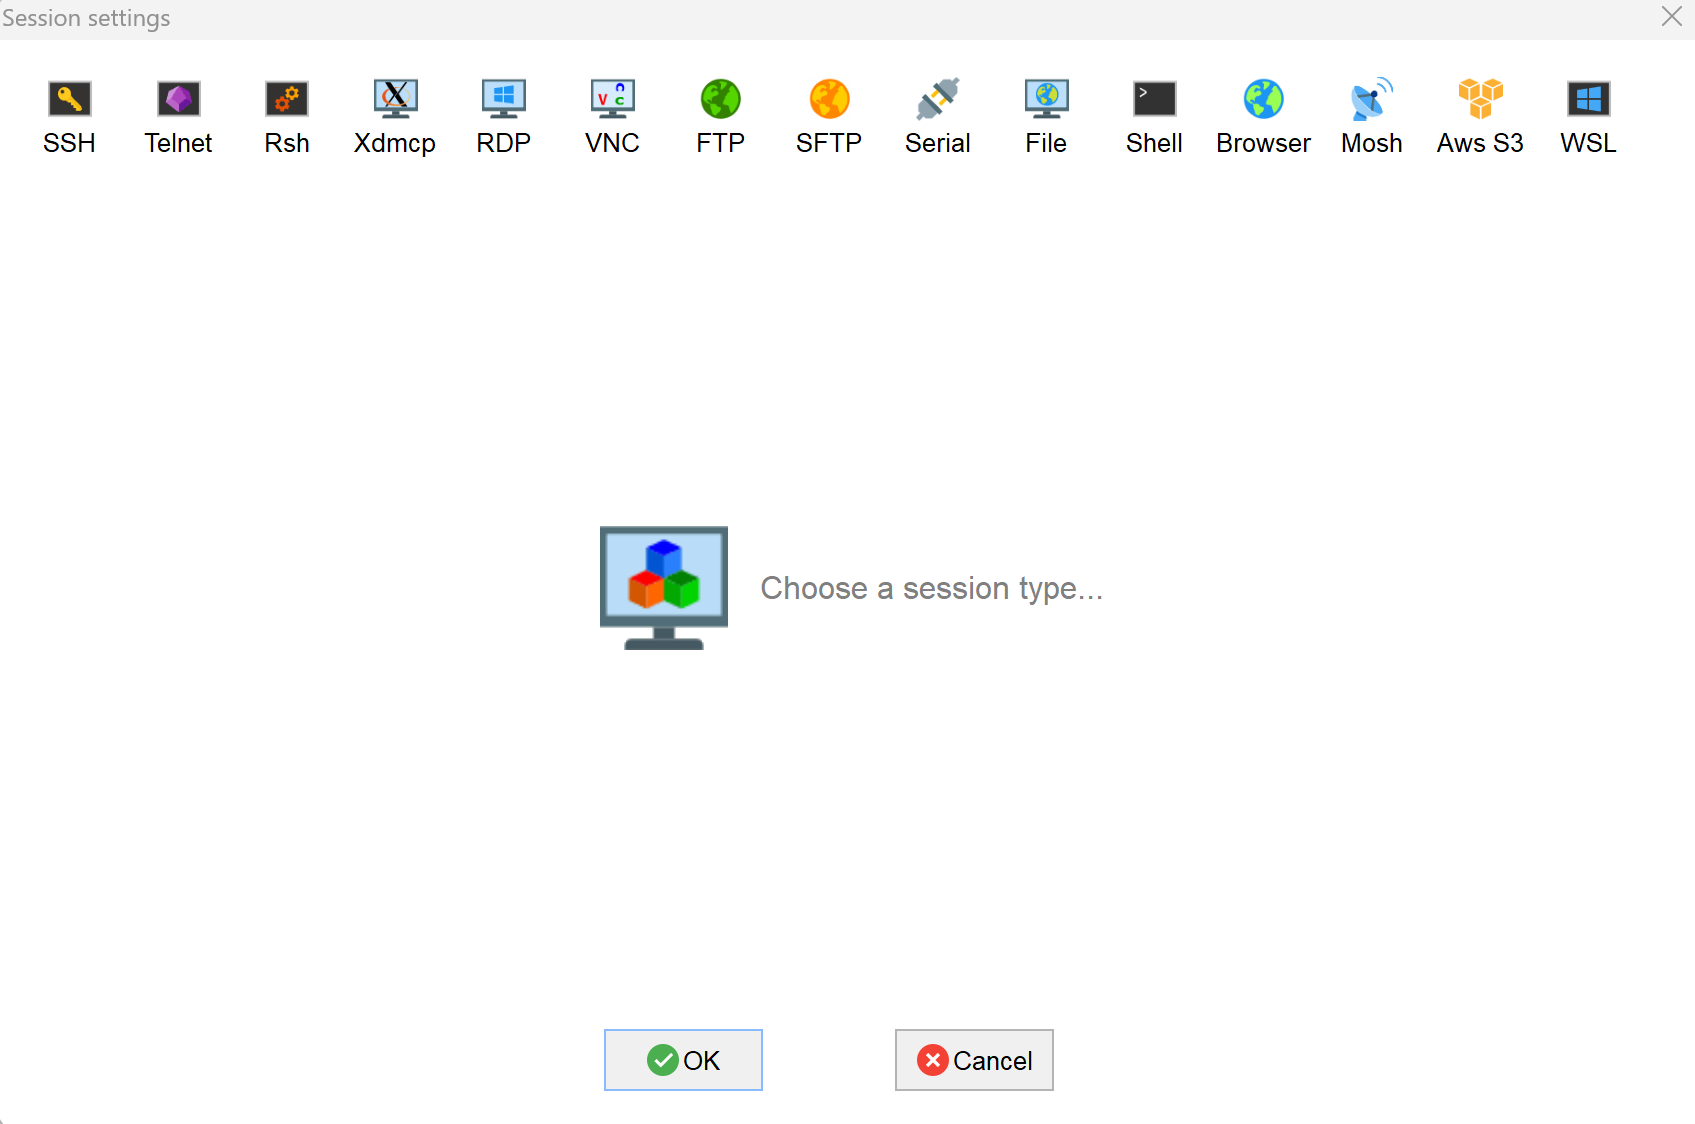
- Open
MobaXterm, click the icon to open the session creation window, as shown below.
- Click the
 icon in the upper left corner to open the SSH session interface.
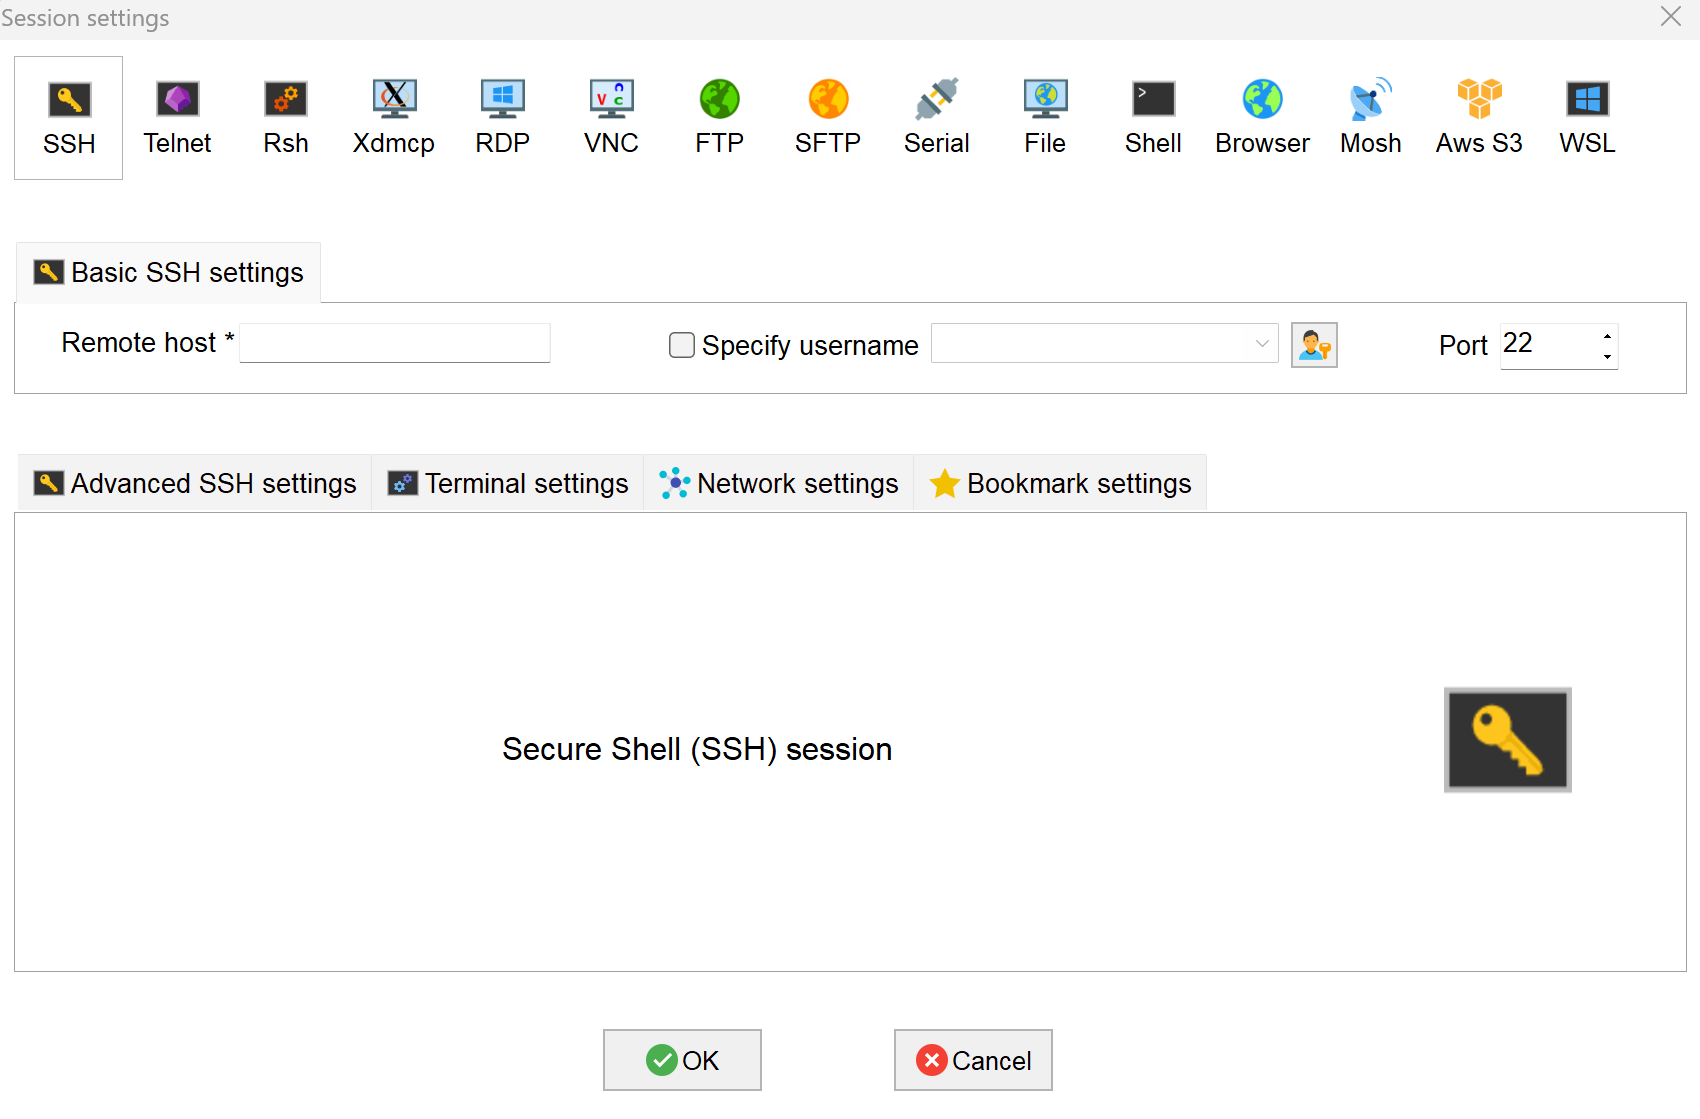
- Enter the obtained IP address of the device, then click "OK".
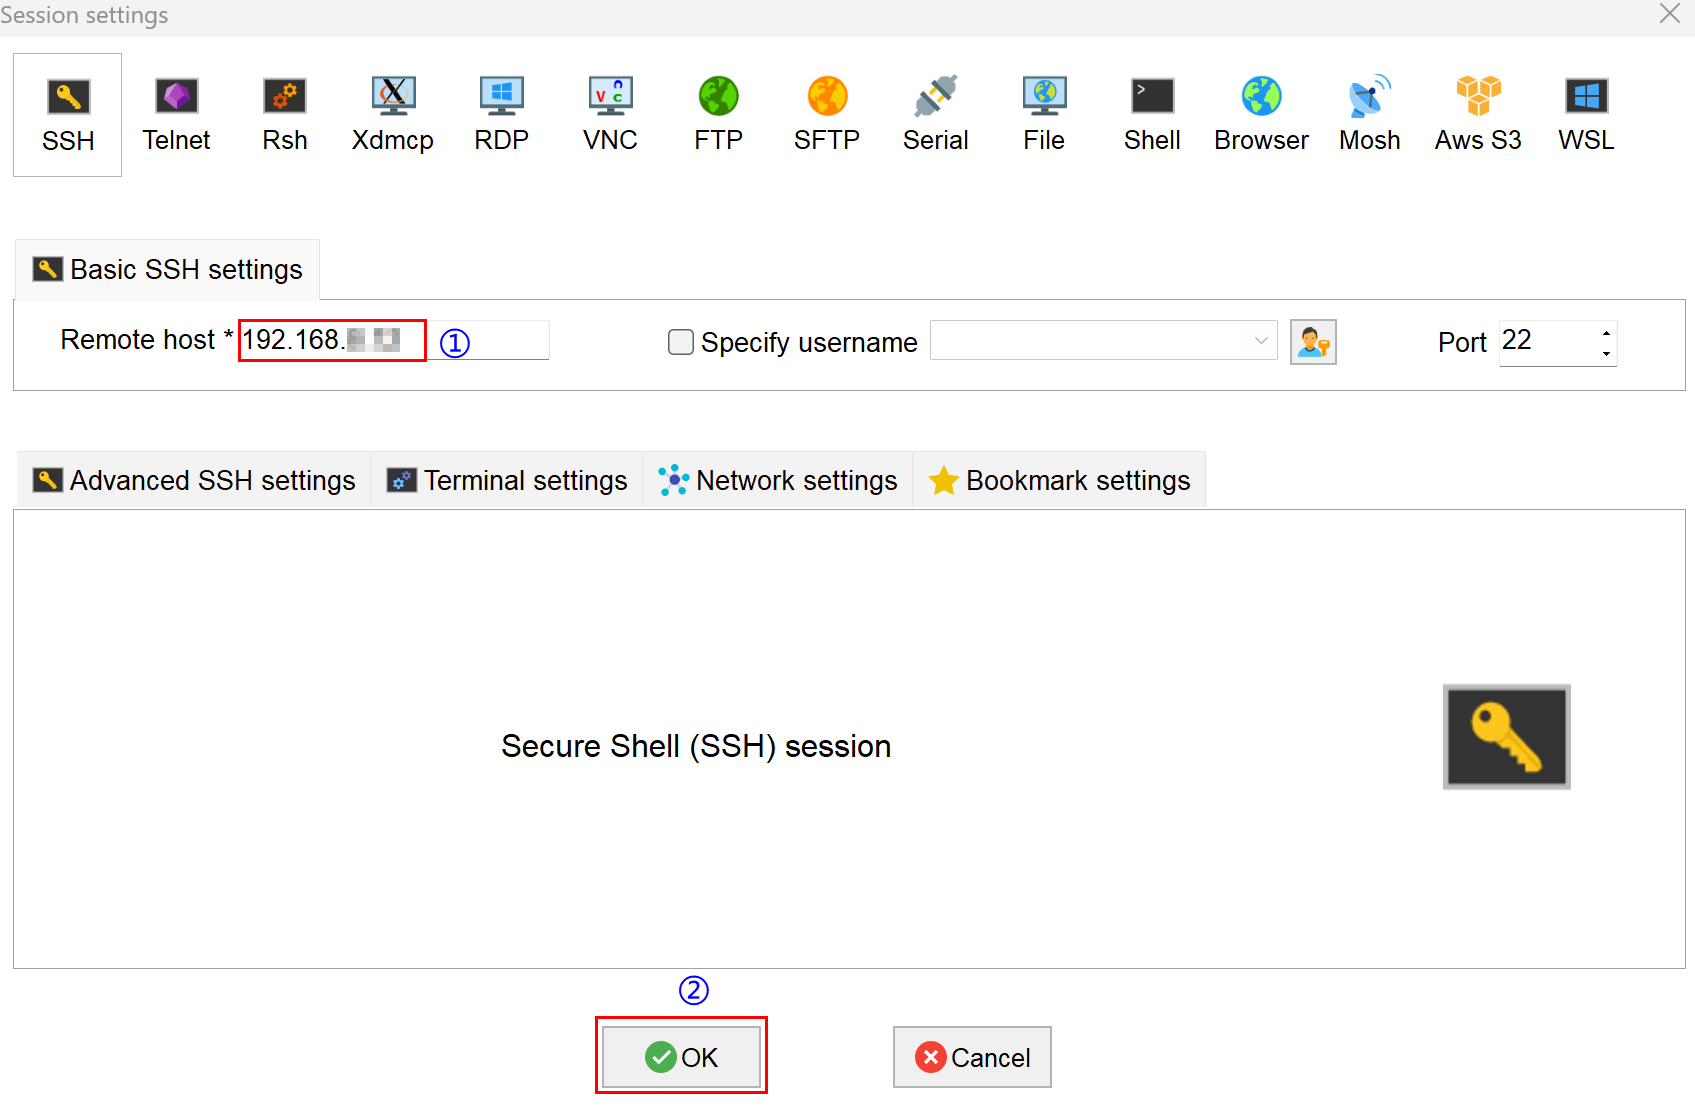
- Click "Accept" in the pop-up prompt box to enter the system login interface.
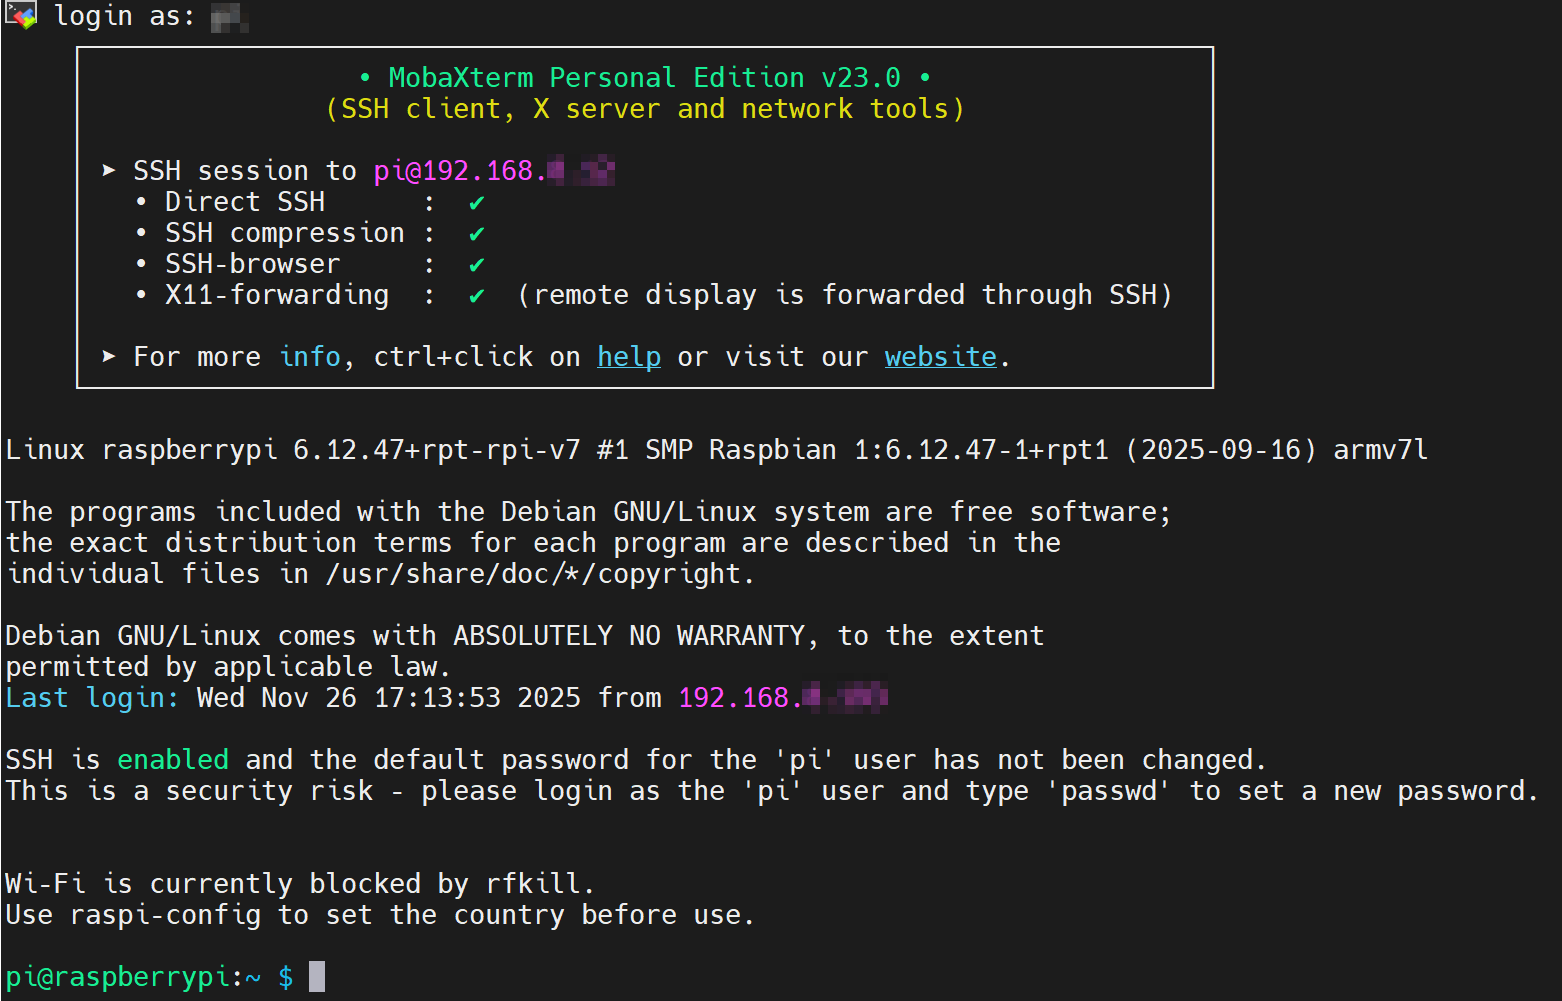
- Enter the username and password as prompted to complete the login and access the system.
TIP
The username and password are those set in the Raspberry Pi Imager before flashing to eMMC.
4.3.3 Installing Firmware Package
After installing the standard Raspberry Pi OS onto the ED-AIC2000 series, it is necessary to configure the system by adding the edatec apt repository and installing the firmware package to ensure normal system functionality. The following instructions use the Debian 12 (bookworm) desktop edition as an example for installation.
TIP
Our engineers are currently adapting and developing firmware packages for Raspberry Pi OS-trixie (Debian 13), so it is temporarily not supported. We recommend using the Raspberry Pi OS 64-bit-bookworm (Debian 12) version of the operating system.
Preparation:
- The flashing to eMMC of the Raspberry Pi standard OS (bookworm) has been completed.
- The device has booted normally and the relevant boot configuration has been completed.
Steps:
- After the device boots up normally, execute the following commands in the command pane to add the edatec apt repository.
curl -sS https://apt.edatec.cn/pubkey.gpg | sudo apt-key add -
echo "deb https://apt.edatec.cn/raspbian stable main" | sudo tee /etc/apt/sources.list.d/edatec.list
sudo apt update
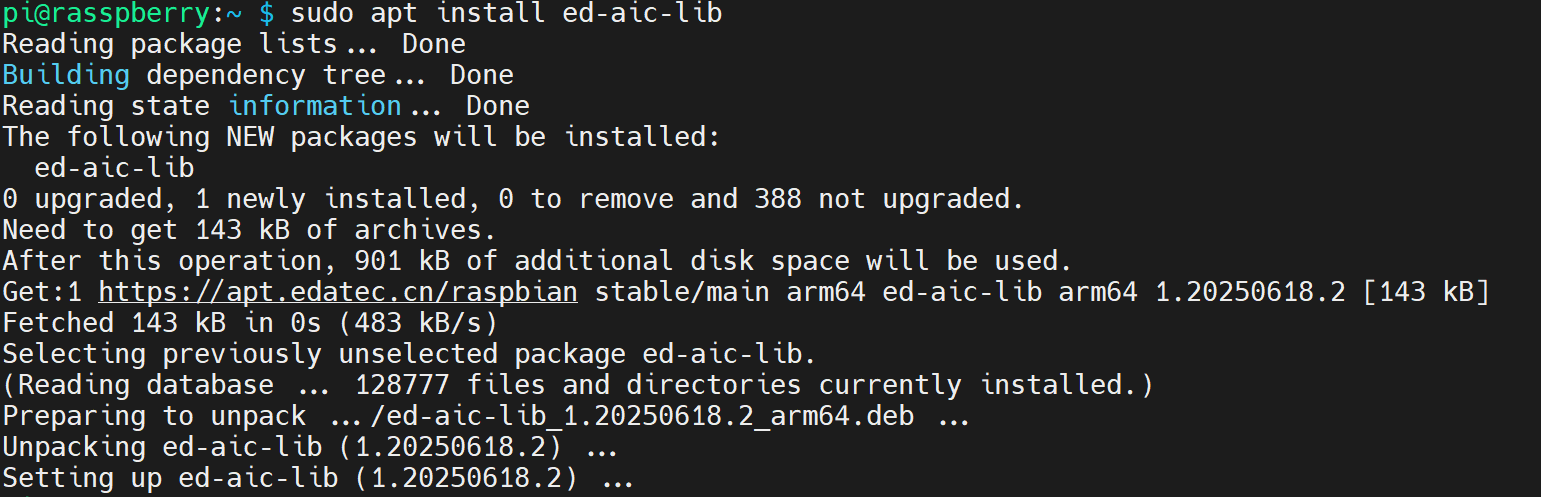
- Execute the following command to install the Firmware package.
sudo apt install ed-aic-lib
- Execute the following command to restart the device.
sudo reboot
- Execute the following command to check whether the Firmware package has been installed successfully.
dpkg -l | grep ed-
The result shown in the figure below indicates that the Firmware package has been installed successfully.

TIP
If an incorrect firmware package is installed, you can remove it by executing sudo apt-get --purge remove package, where "package" is the name of the package.