ED-VESA-B
VESA Adjustable Wall-mounted Bracket
Specifications
| Mechanical Characteristics | |
|---|---|
| Material | Aluminum alloy and cold-rolled steel |
| Color | Black |
| Weight | About 326g |
| Max Load Capacity | 10kg |
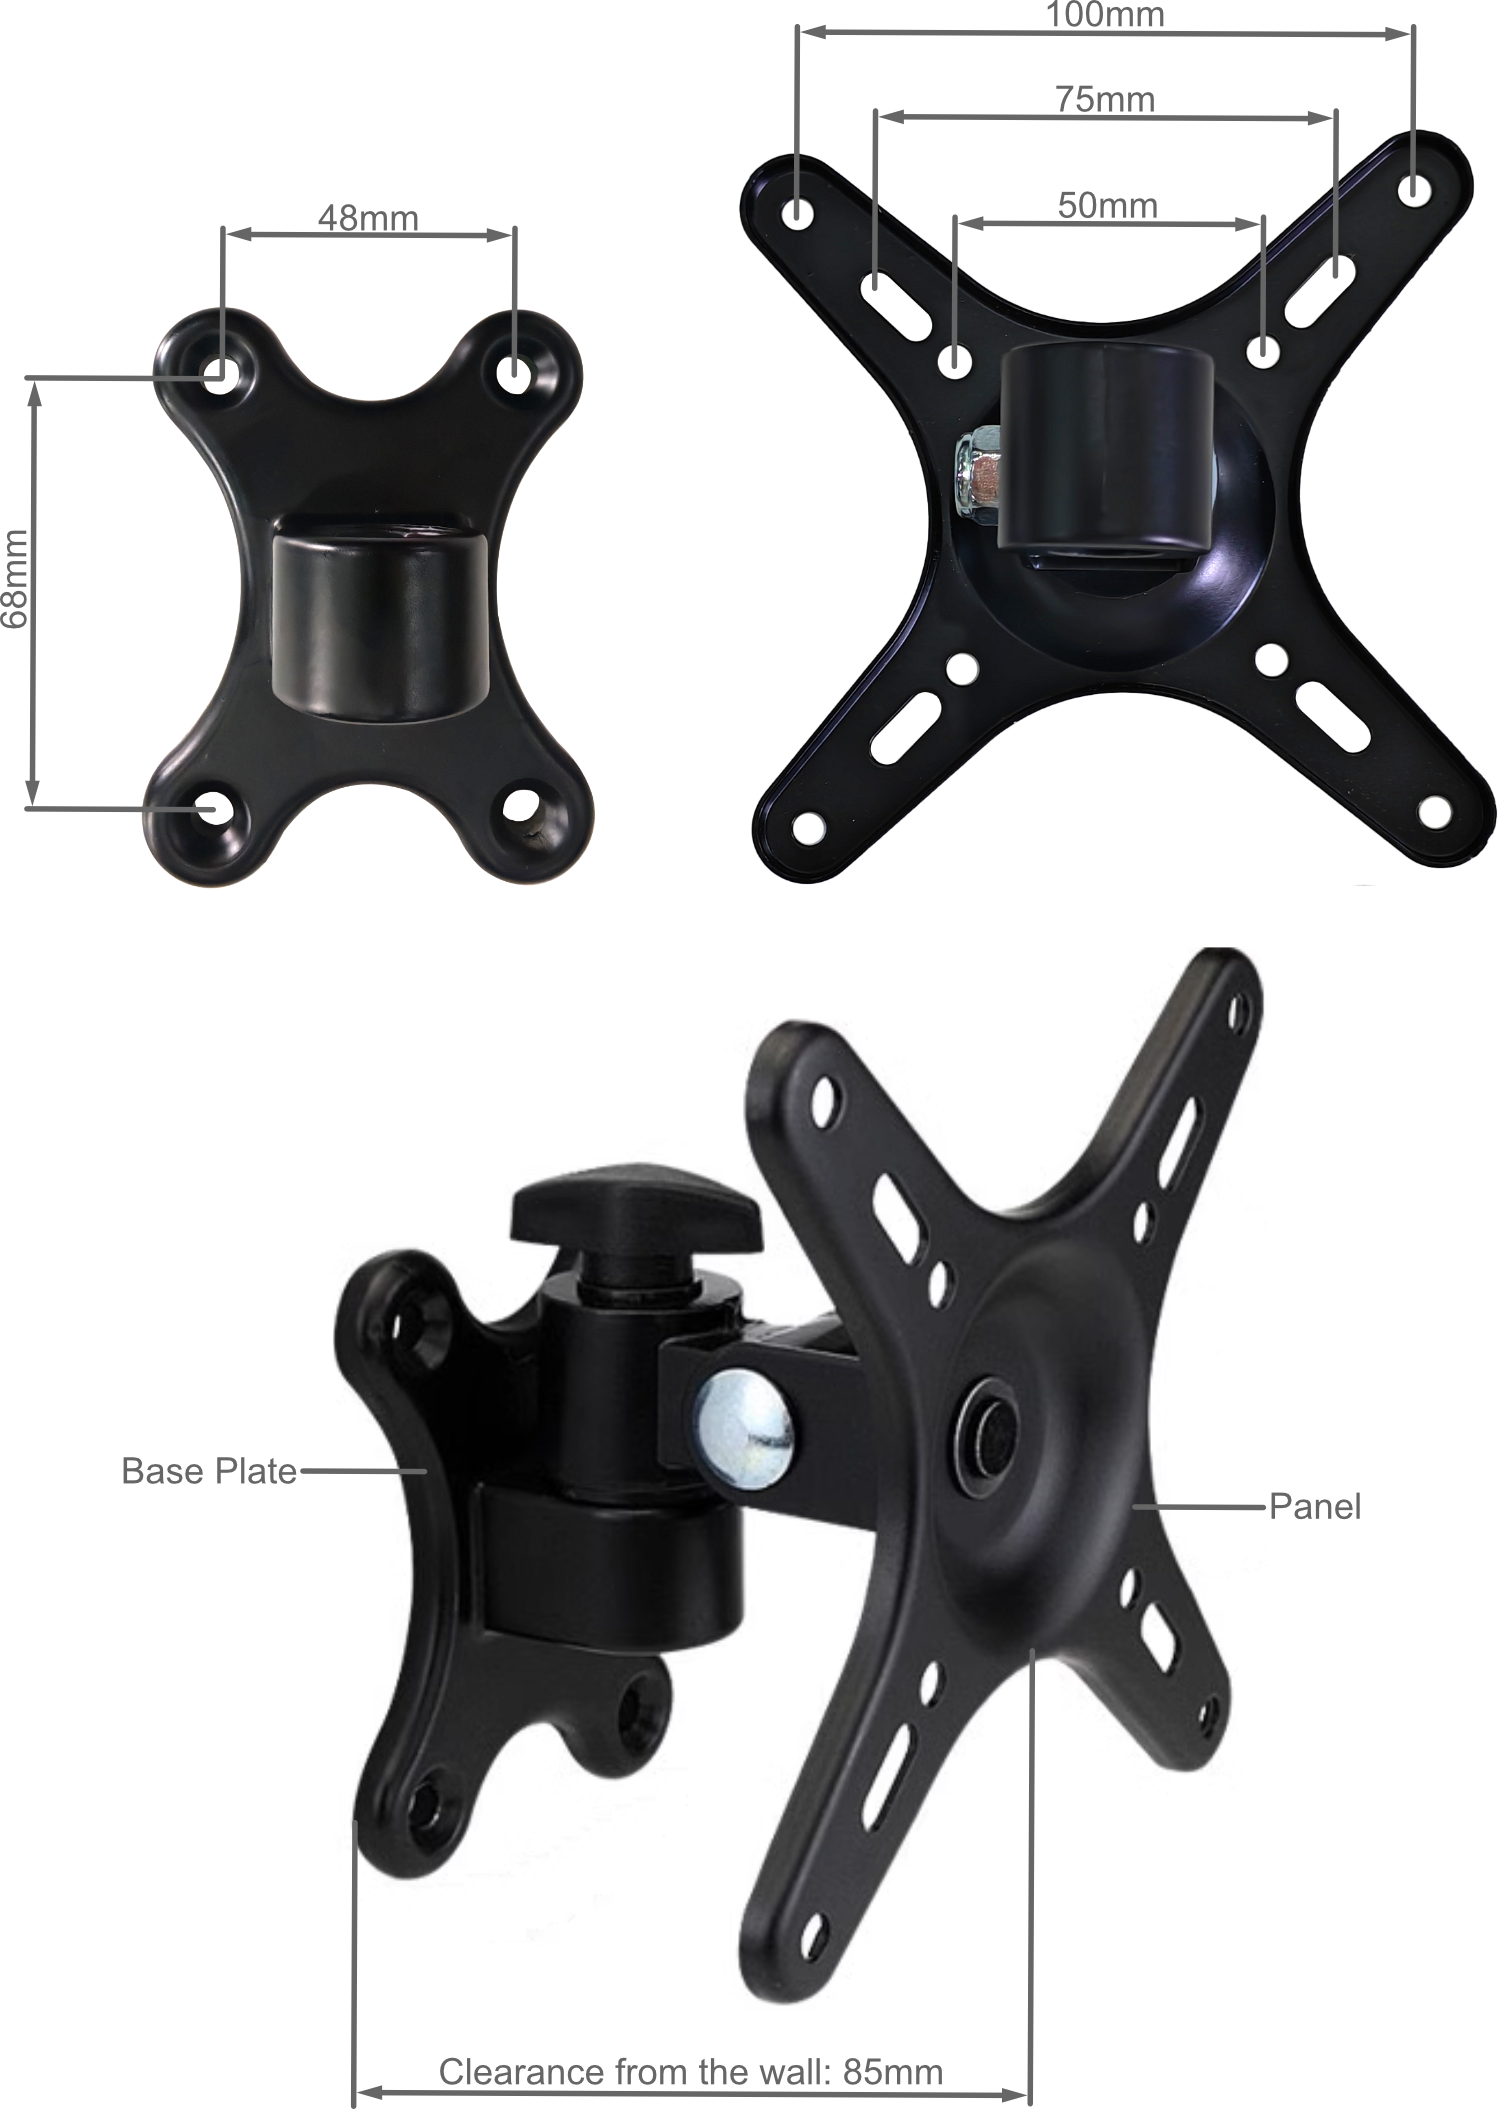
| VESA Hole Pattern | 50mm/75mm/100mm |
| Clearance From The Wall | 85mm |
| Installation | Wall-mounted |
Dimensions
Ordering Code
| Model | Description |
|---|---|
| ED-VESA-B | VESA Adjustable Wall-mounted Bracket for ED-MONITOR |
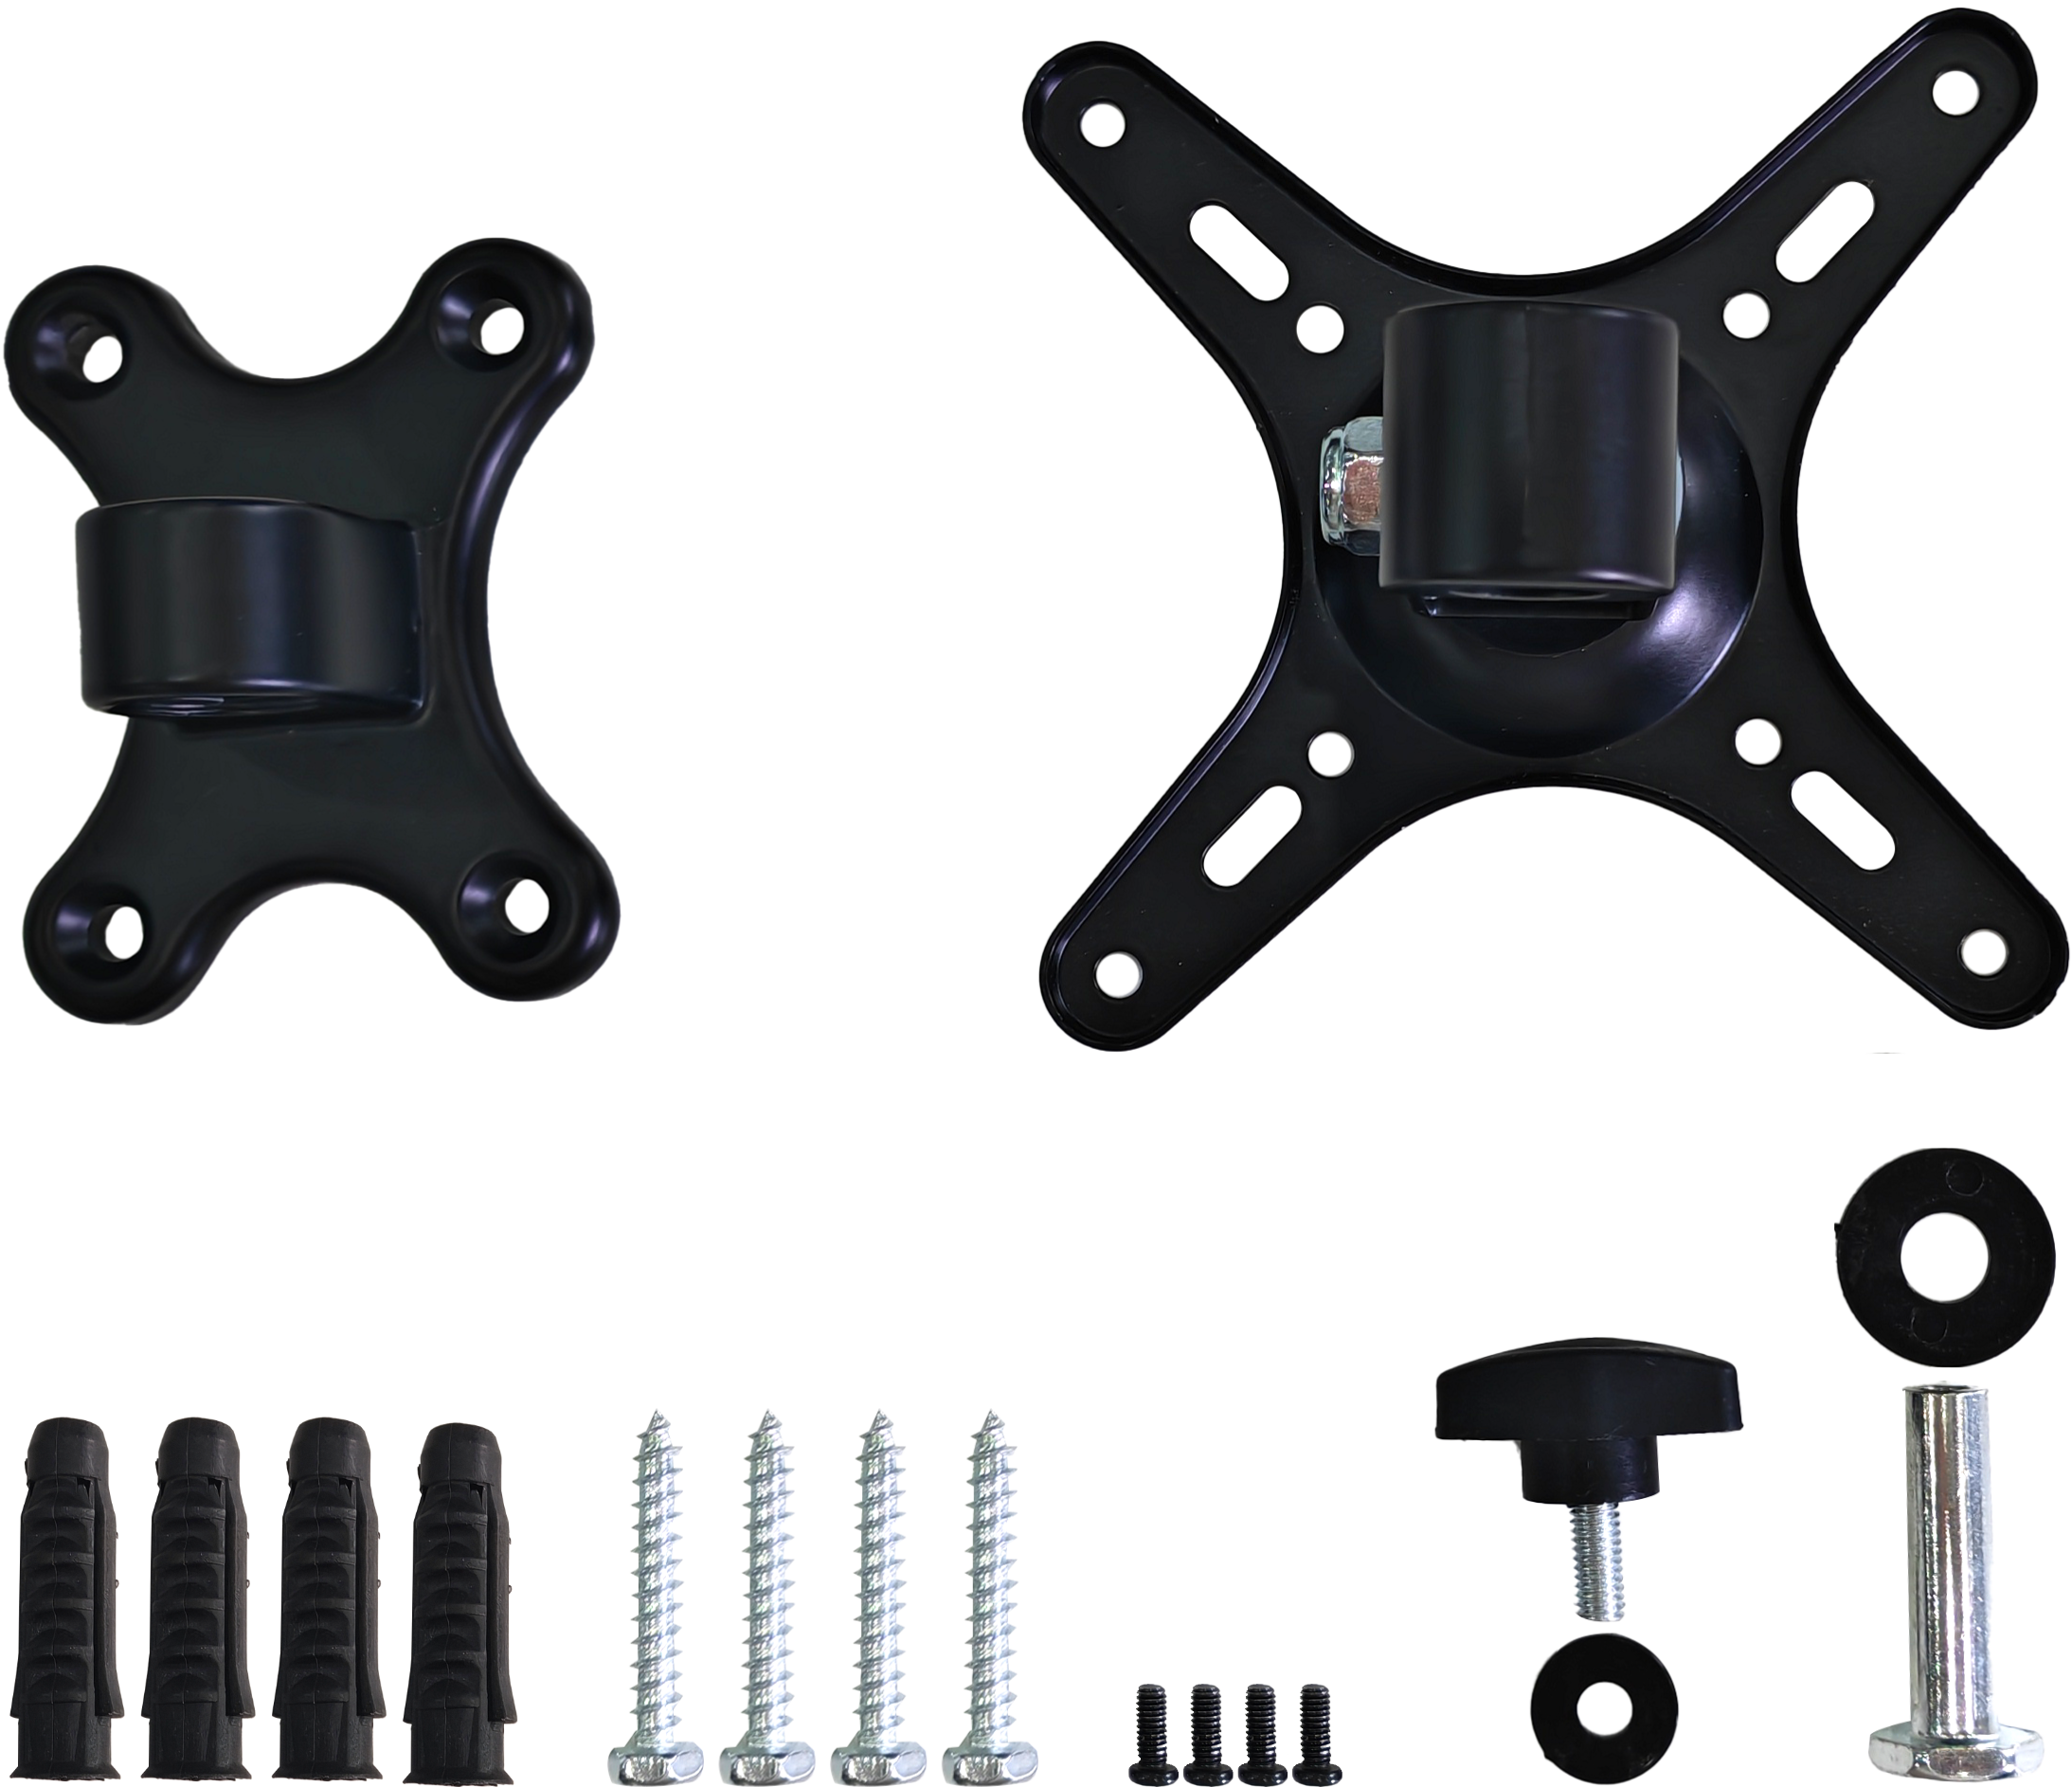
Packing List
- 1 x ED-VESA-B (including 4 x M6*40 screws, 4 x M6*40 plastic expansion tubes, 4 x M4*5 screws, 1 x rivet, 2 x washers and 1 x handle screw)
Installation
Parts List:
| NO. | Name | Quantity (PCS) |
|---|---|---|
| ① | ED-VESA-B | 1 |
| ② | ED-MONITOR (Not provided) | 1 |
Preparation:
You have acquired the tools, including an electric drill, a pencil, a hammer, a screwdriver, and other equipment.
Steps:
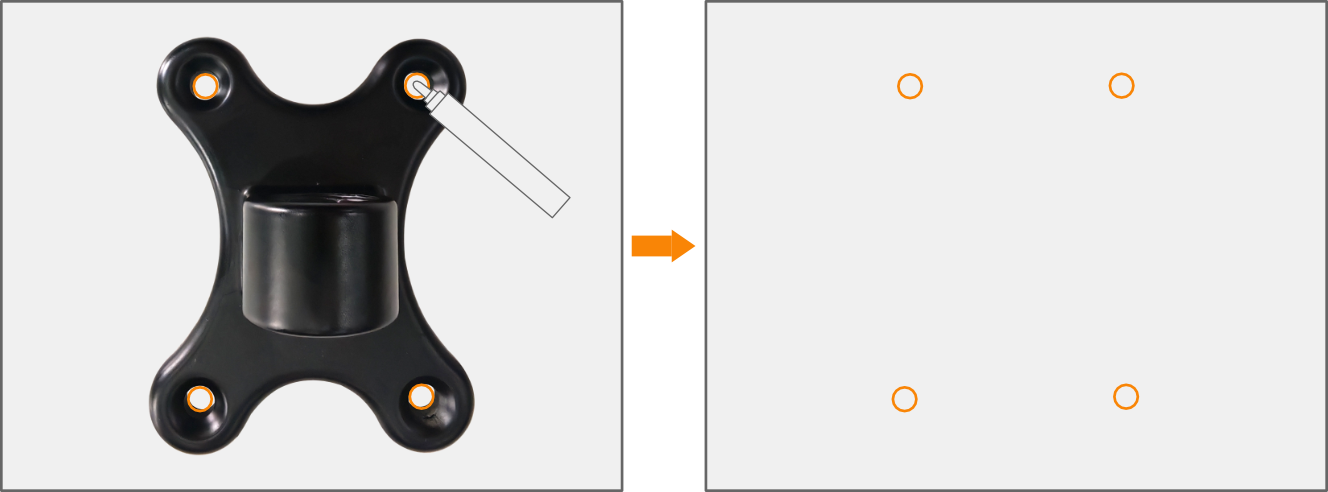
- Mark the drilling positions:
- Use a pencil to mark the positions of the 4 mounting holes on the wall, based on the screw hole spacing of the bracket Base Plate.
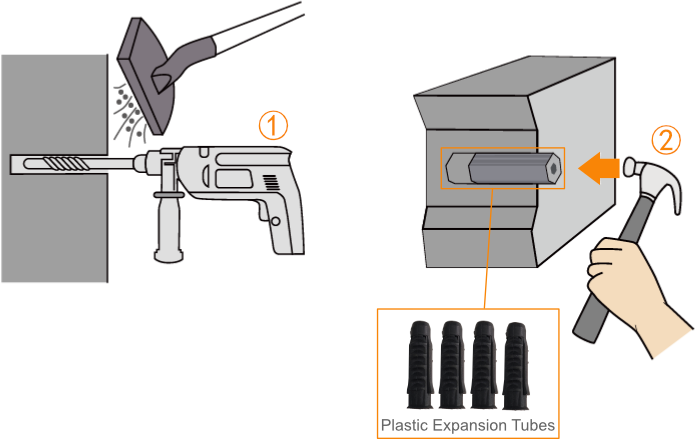
- Drill and install Plastic Expansion Tubes:
① Drill 4 holes at the marked positions using an electric drill.
② Use a hammer to insert the 4 Plastic Expansion Tubes into the holes.
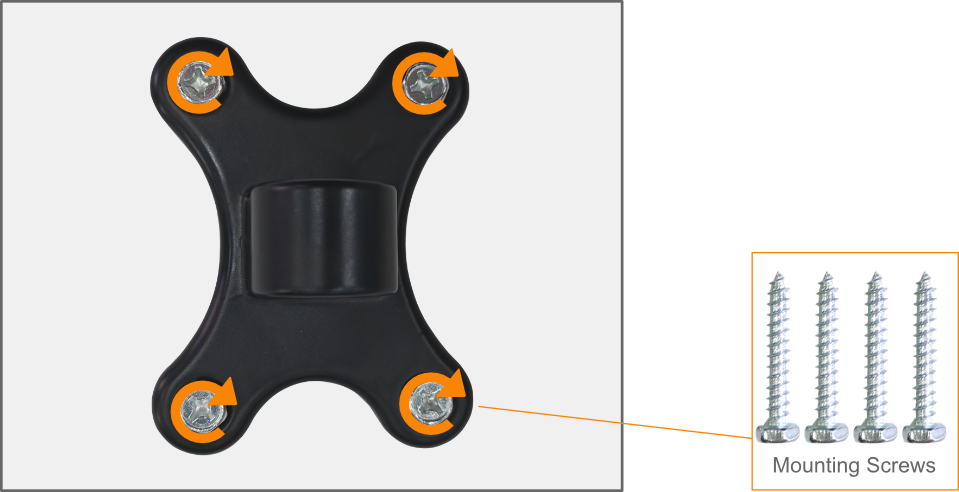
- Secure the Base Plate to the wall:
① Align the 4 screw holes on the bracket Base Plate with the installed Plastic Expansion Tubes.
② Insert the 4 mounting screws (M6*40) through the holes and tighten them clockwise with a screwdriver to fix the Base Plate firmly to the wall.
- Attach the bracket Panel to the ED-MONITOR:
① Align the 4 screw holes on the bracket Panel with the 4 VESA mounting holes on the back of the ED-MONITOR.
② Insert 4 mounting screws (M4*5) and tighten them clockwise with a screwdriver to secure the Panel to the back of ED-MONITOR.

TIP
The VESA hole spacing for the ED-MONITOR is 75mm.
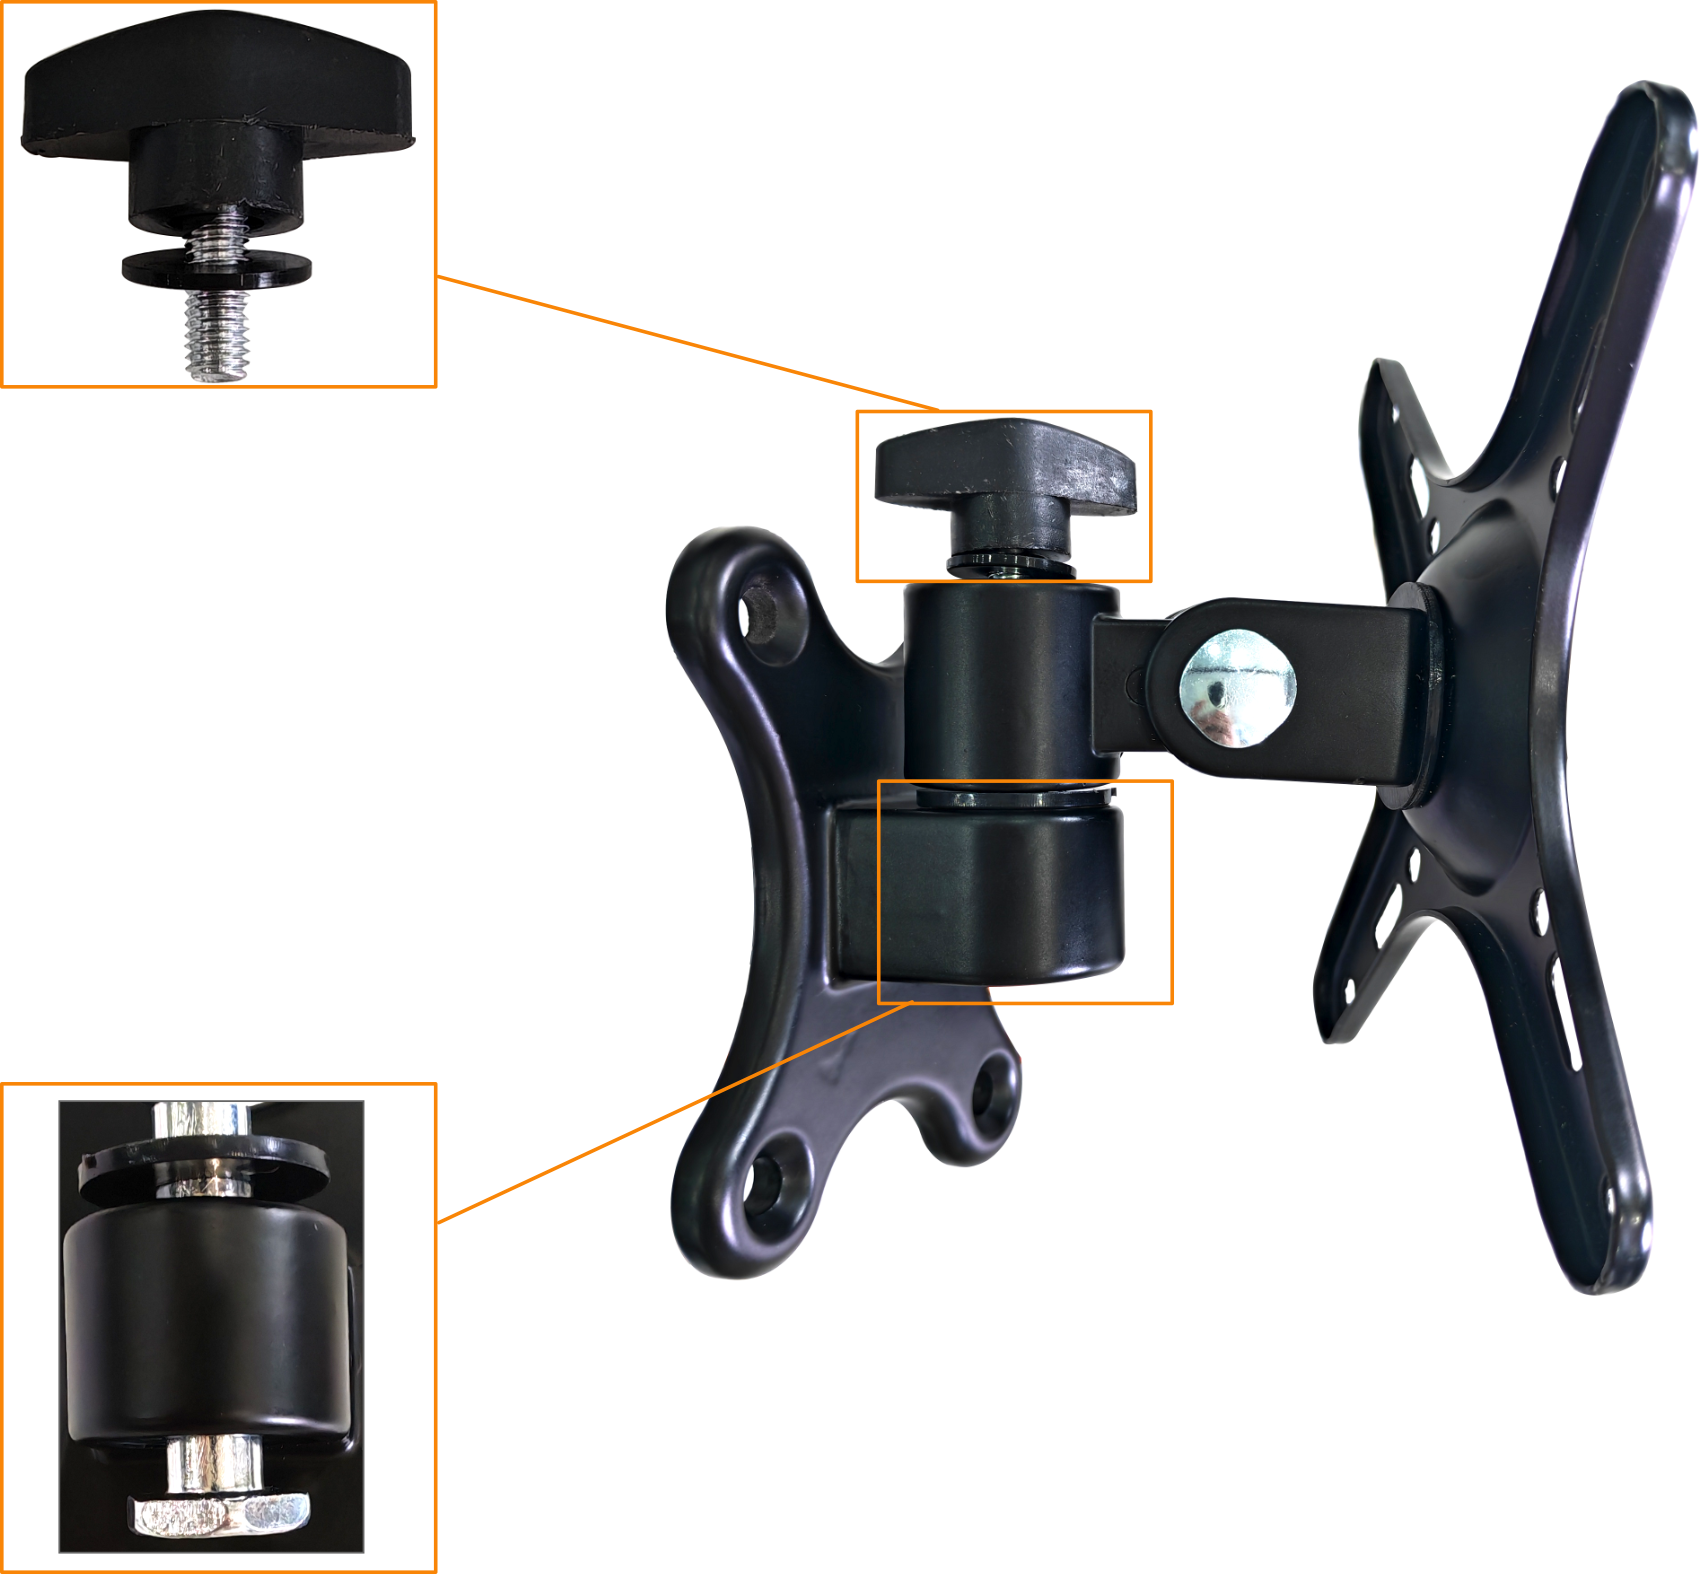
- Fix the bracket Panel to the Base Plate:
① Refer to the diagram below for the correct orientation.
② Use 1 x rivet, 2 x washers and 1 x handle screw to attach the ED-MONITOR-mounted bracket Panel to the Base Plate installed on the wall.
- Adjust the viewing angle:
- Rotate the bracket Panel (with the ED-MONITOR attached) left or right to achieve the desired angle.